
When I shoot landscape panoramas, in addition to tripod use and careful alignment, I always follow one basic technique – set my camera in manual exposure mode. To determine the optimum exposure for a panorama, I set my aperture (typically between 11 and 16 for landscapes), and meter different parts of the scene. I select the brightest portion of the scene and over-expose the meter to a point that no highlights are blown out. Then I set the camera to manual exposure, dial in the appropriate shutter speed, and I’m ready to capture all the frames of the panorama, knowing that they will blend together nicely in post production.
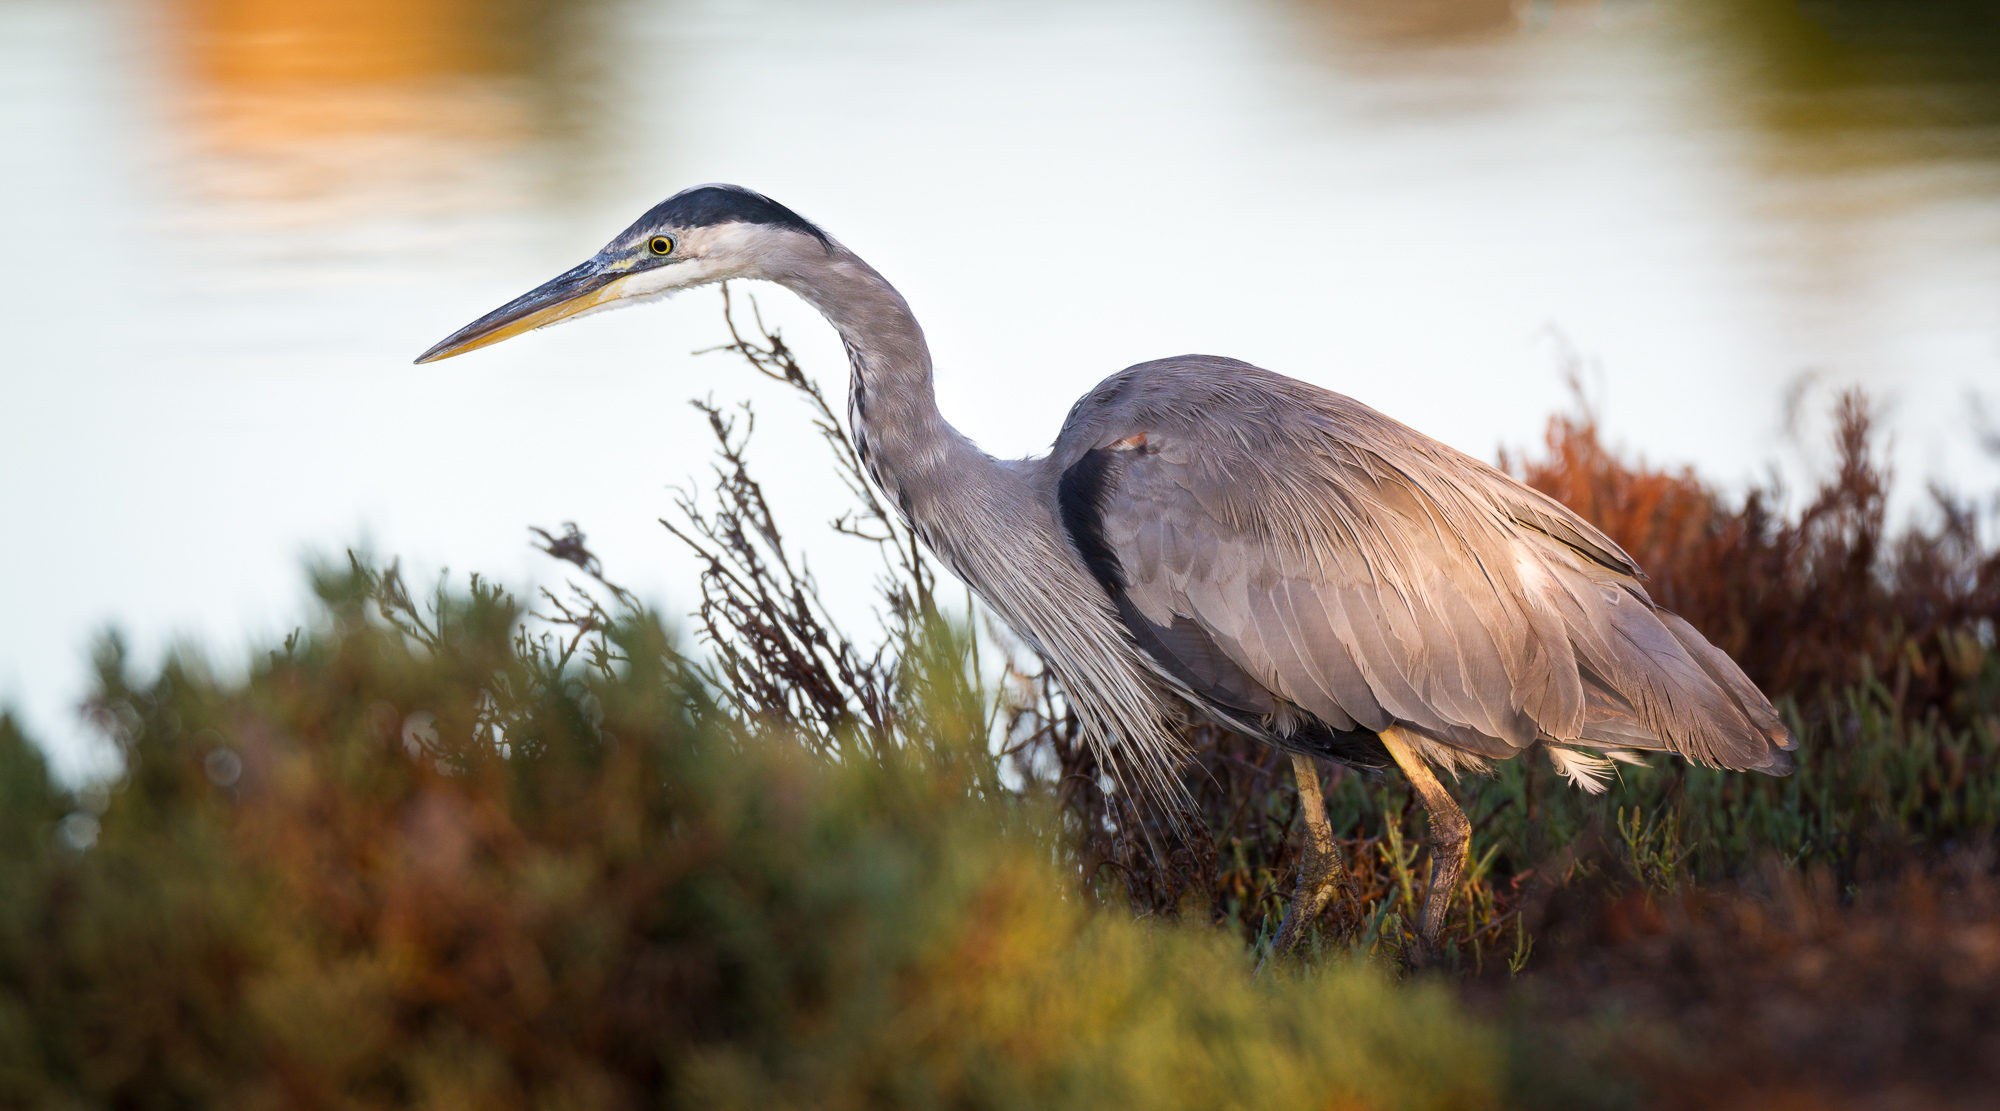
However, when I am photographing birds or wildlife panoramas, I am often forced to use quick and dirty techniques. These panorama situations usually arise when I am close enough to an animal that their face can fill an entire frame, but I still want to capture their entire body. Instead of backing away, I usually resort to taking multiple overlapping images, knowing I can stitch them together later. This often happens with large water birds such as this great blue heron, that are docile enough to allow me to get close.
Because I know that the animal can move at any time, I need to be quick with my overlapping photos, taking them in rapid succession. This means I don’t have time to carefully meter the scene and dial in the optimum exposure. Usually I will leave my camera in aperture priority (for overlapping photos to stitch together, aperture MUST be the same throughout all images) and let the camera decide the exposure. Usually no photo is more than 1 stop from any other photo.
Now that I’ve taken my photos and have imported them into Lightroom, I need a quick way to align the same exposure across all photos. Enter the “hidden” Match Total Exposures feature.
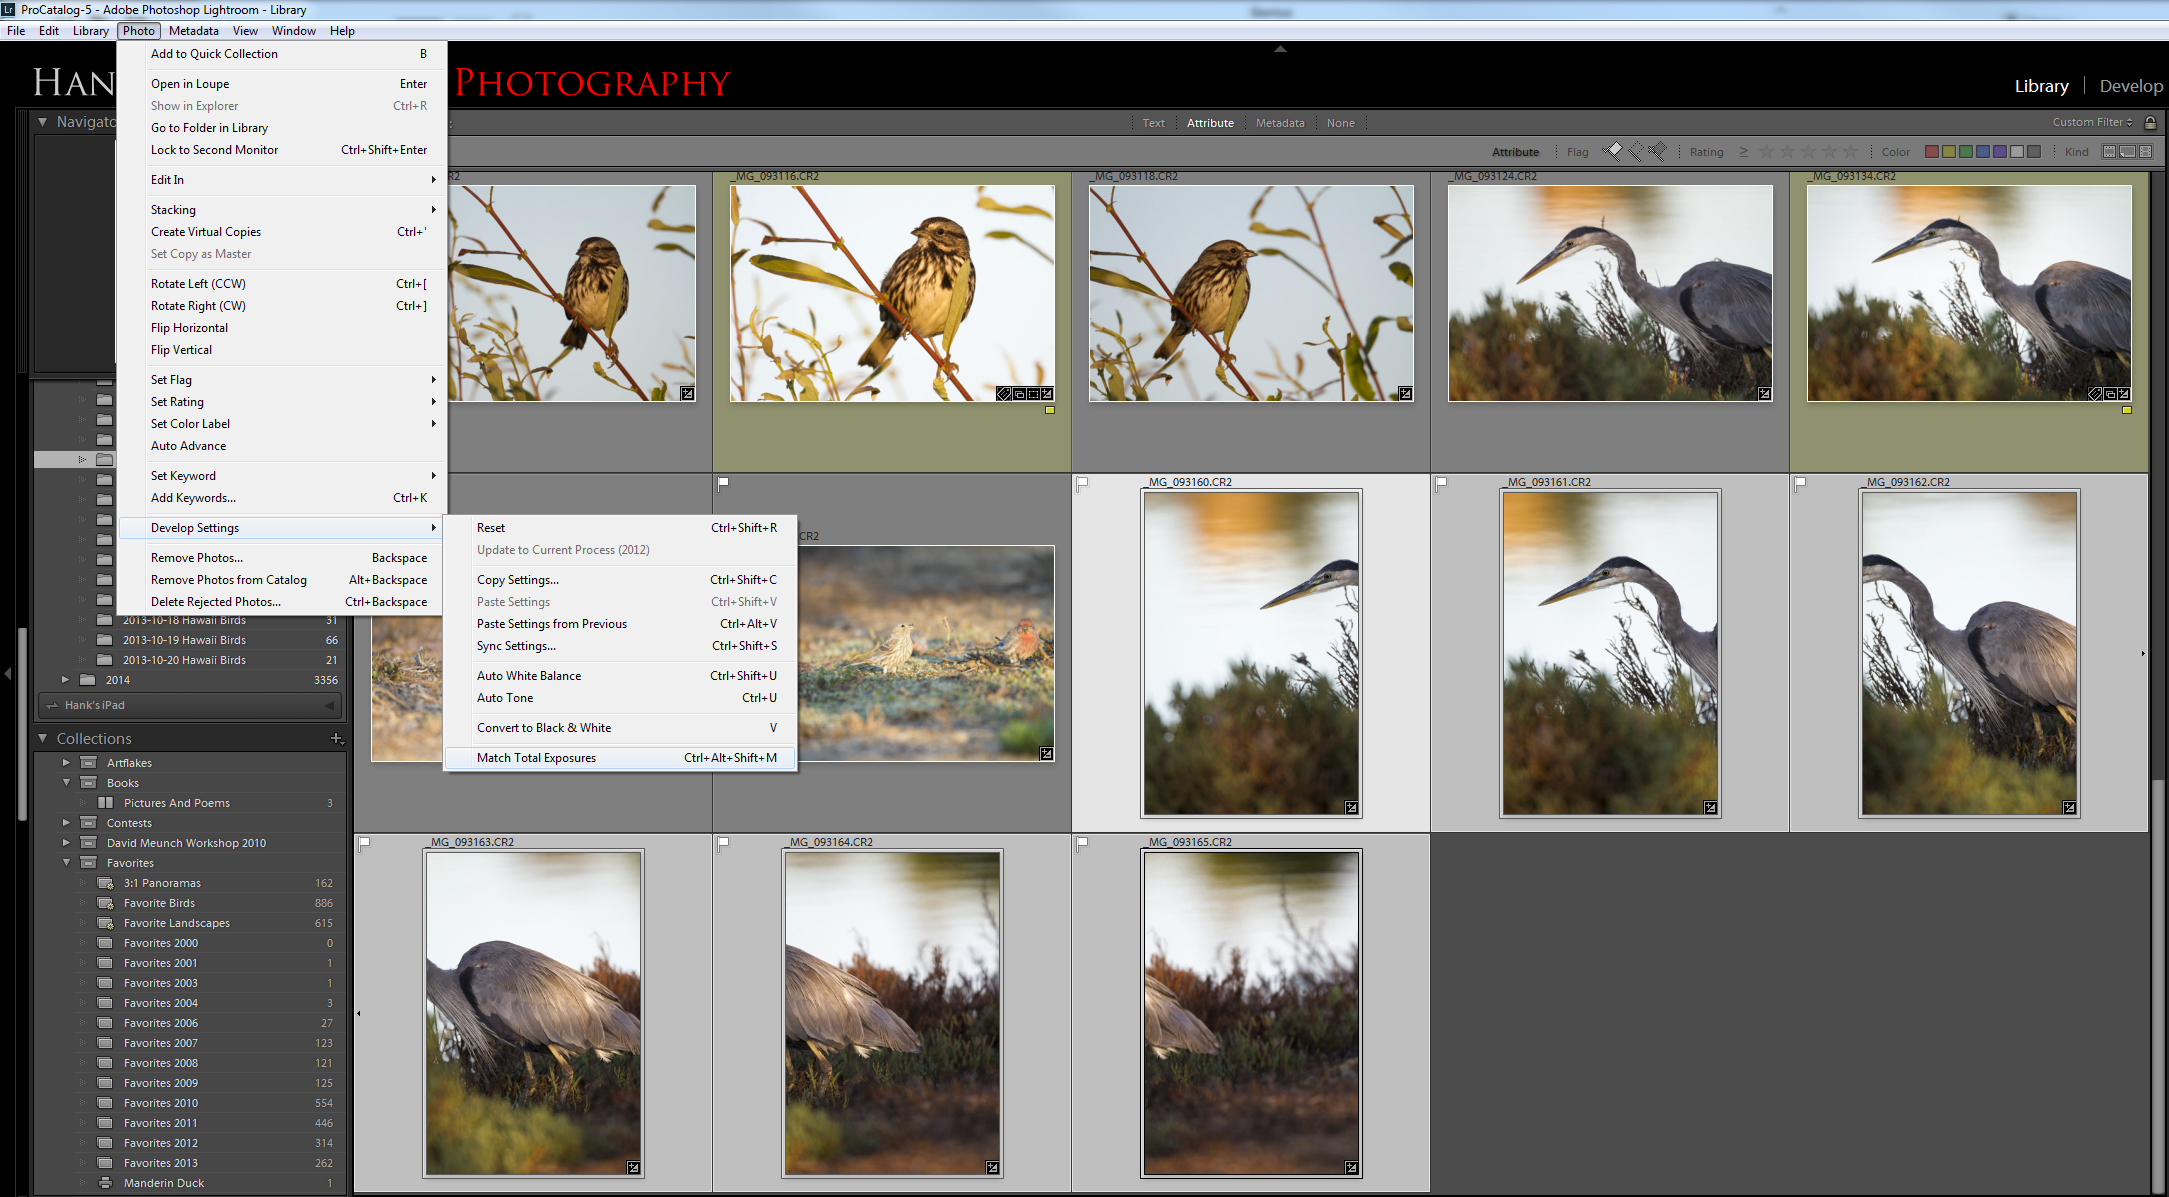
I pick one of the photos with which to optimize the exposure. Once I’ve adjusted the exposure slider to my liking, I select all the photos in the series and click the menu Photo->Develop Settings->Match Total Exposures. All of the other photos in the series will move their exposure sliders up or down so that the adjusted exposure is matched to the original. For example, let’s say we have three photos all shot at f/5.6, with the following shutter speeds: 1/500, 1/250, and 1/1000 (the exposures will typically be much closer, but I’m using easy math for illustrative purposes). If the first photo (1/500 seconds) is selected as the original to match, then the exposure slider for the second photo will move up one stop and the exposure slider for the third will move down by one stop. This is a quick and easy way to make sure the exposures for all photos in the series are similar so that they blend properly.
Once I’ve adjusted all the exposures, I keep them all selected and click Photo->Edit In->Merge to Panorama in Photoshop. This will result in a perfectly blended panorama.