When arriving at a new location to photograph, it is easy to get over-excited, and like a moth to a flame, focus all attention directly on the obvious composition. This is easy to do when shooting a grand vista, and more than once I’ve gotten so caught up in this one shot, that only later do I realize that I’ve missed many other great photos that could have been captured there.
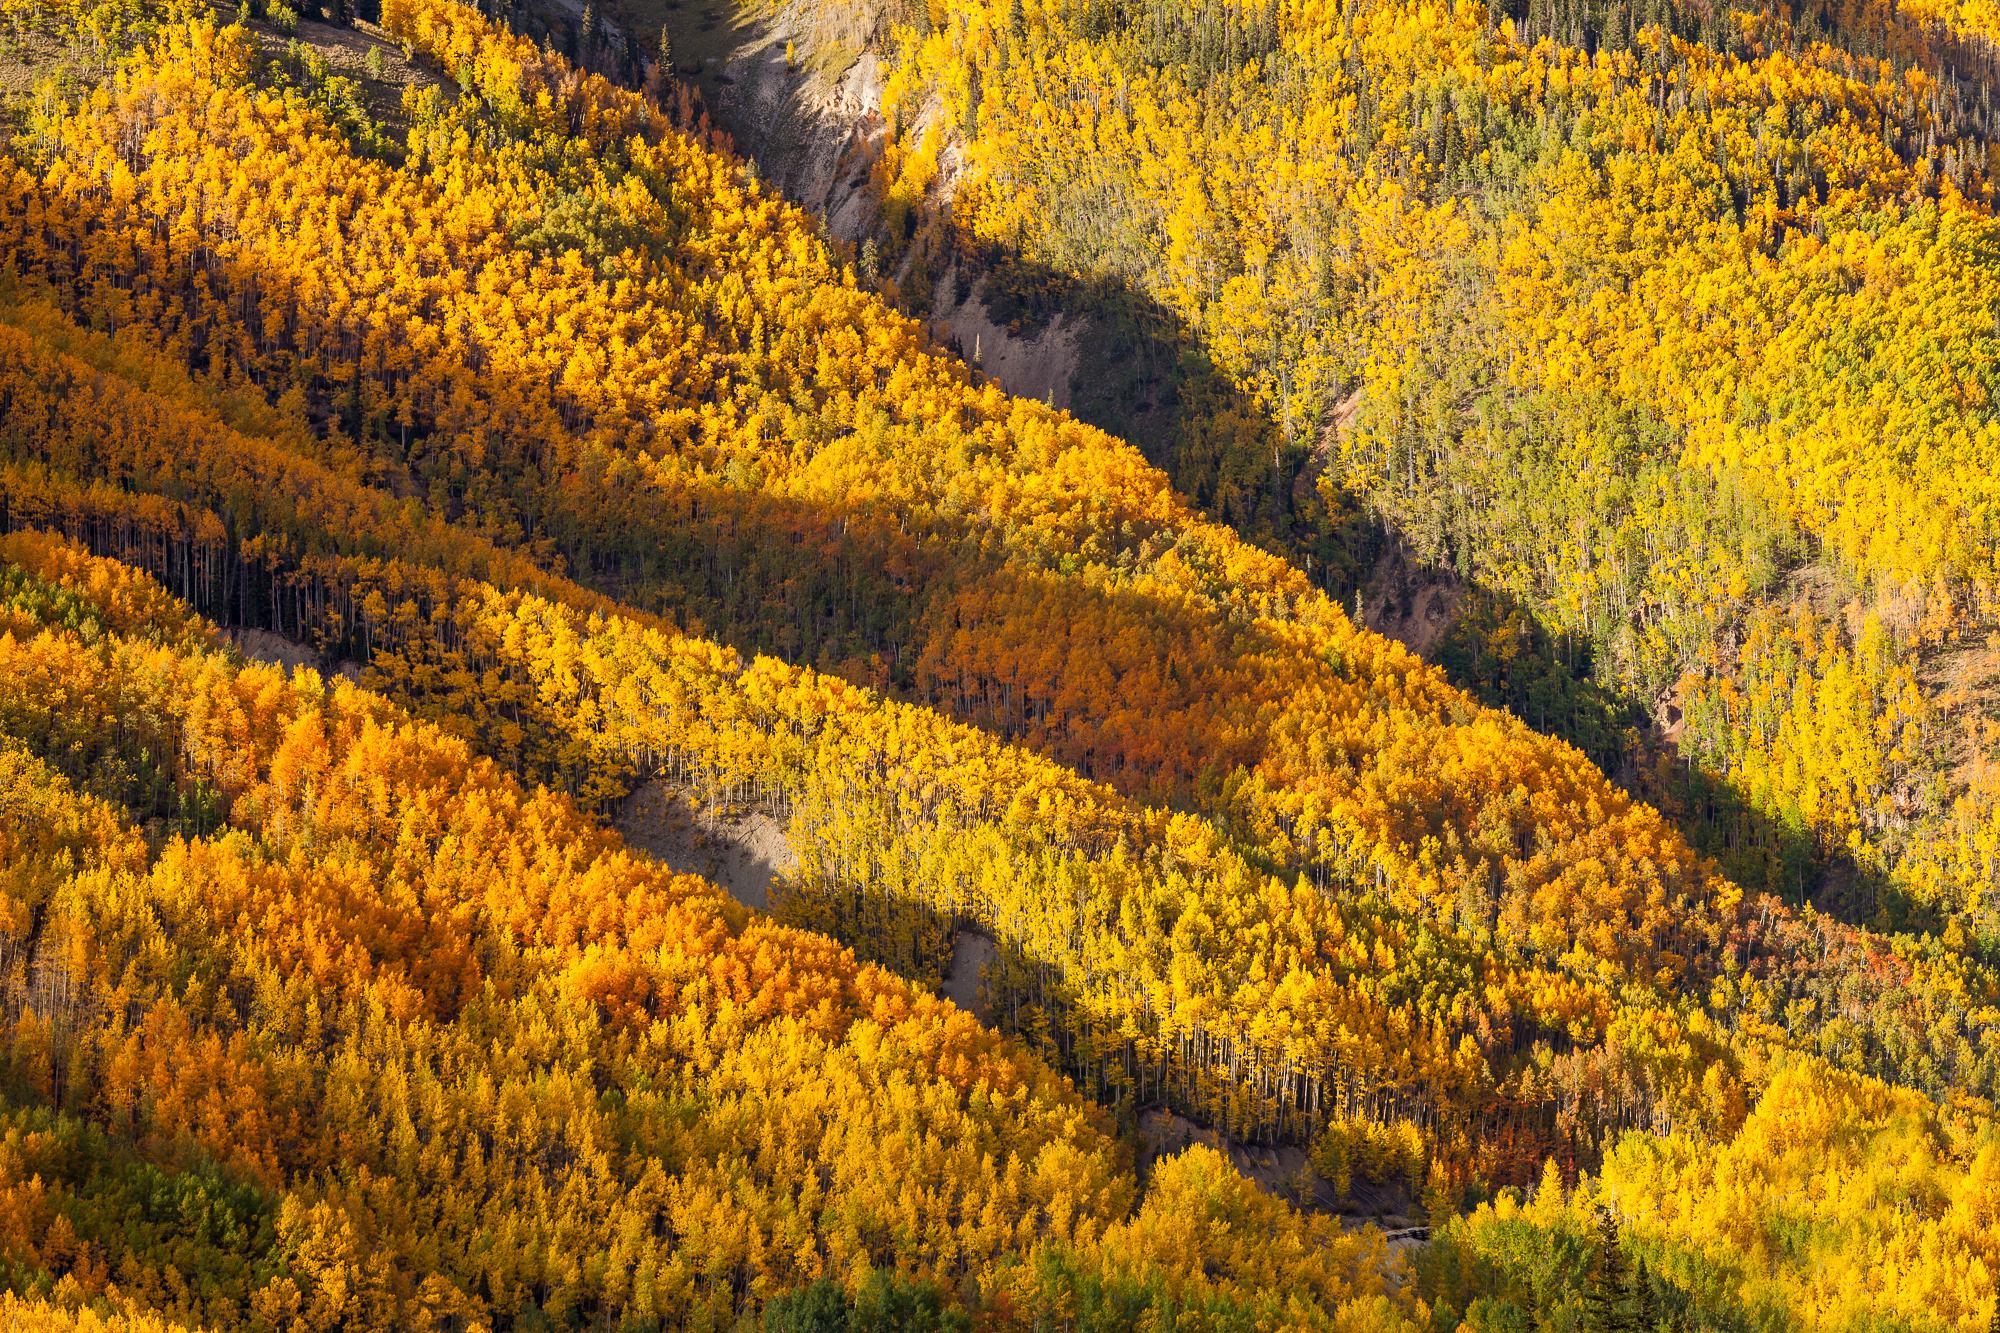
On a recent trip to Colorado, I kept this top of mind as I shot a valley filled with beautiful aspen. I made sure to look for many different photos to be made within the scene. This is a good example of thinking of different ways to capture a scene, because I didn’t even move the tripod – here are six different shots taken from the same spot.
Light beams cut through afternoon storm clouds over Abrams Mountain, Ouray, Colorado
I started with the “obvious” grand vista shot. Situated on a bluff overlooking this valley, I shot down the valley at the mountain capping it off. Of course, waiting for just the right moment is also important, and here I captured a ray of light that broke through the clouds for a moment, illuminating the peak.
Abrams mountain rises above lower slopes filled with bright fall colors, Ouray Colorado
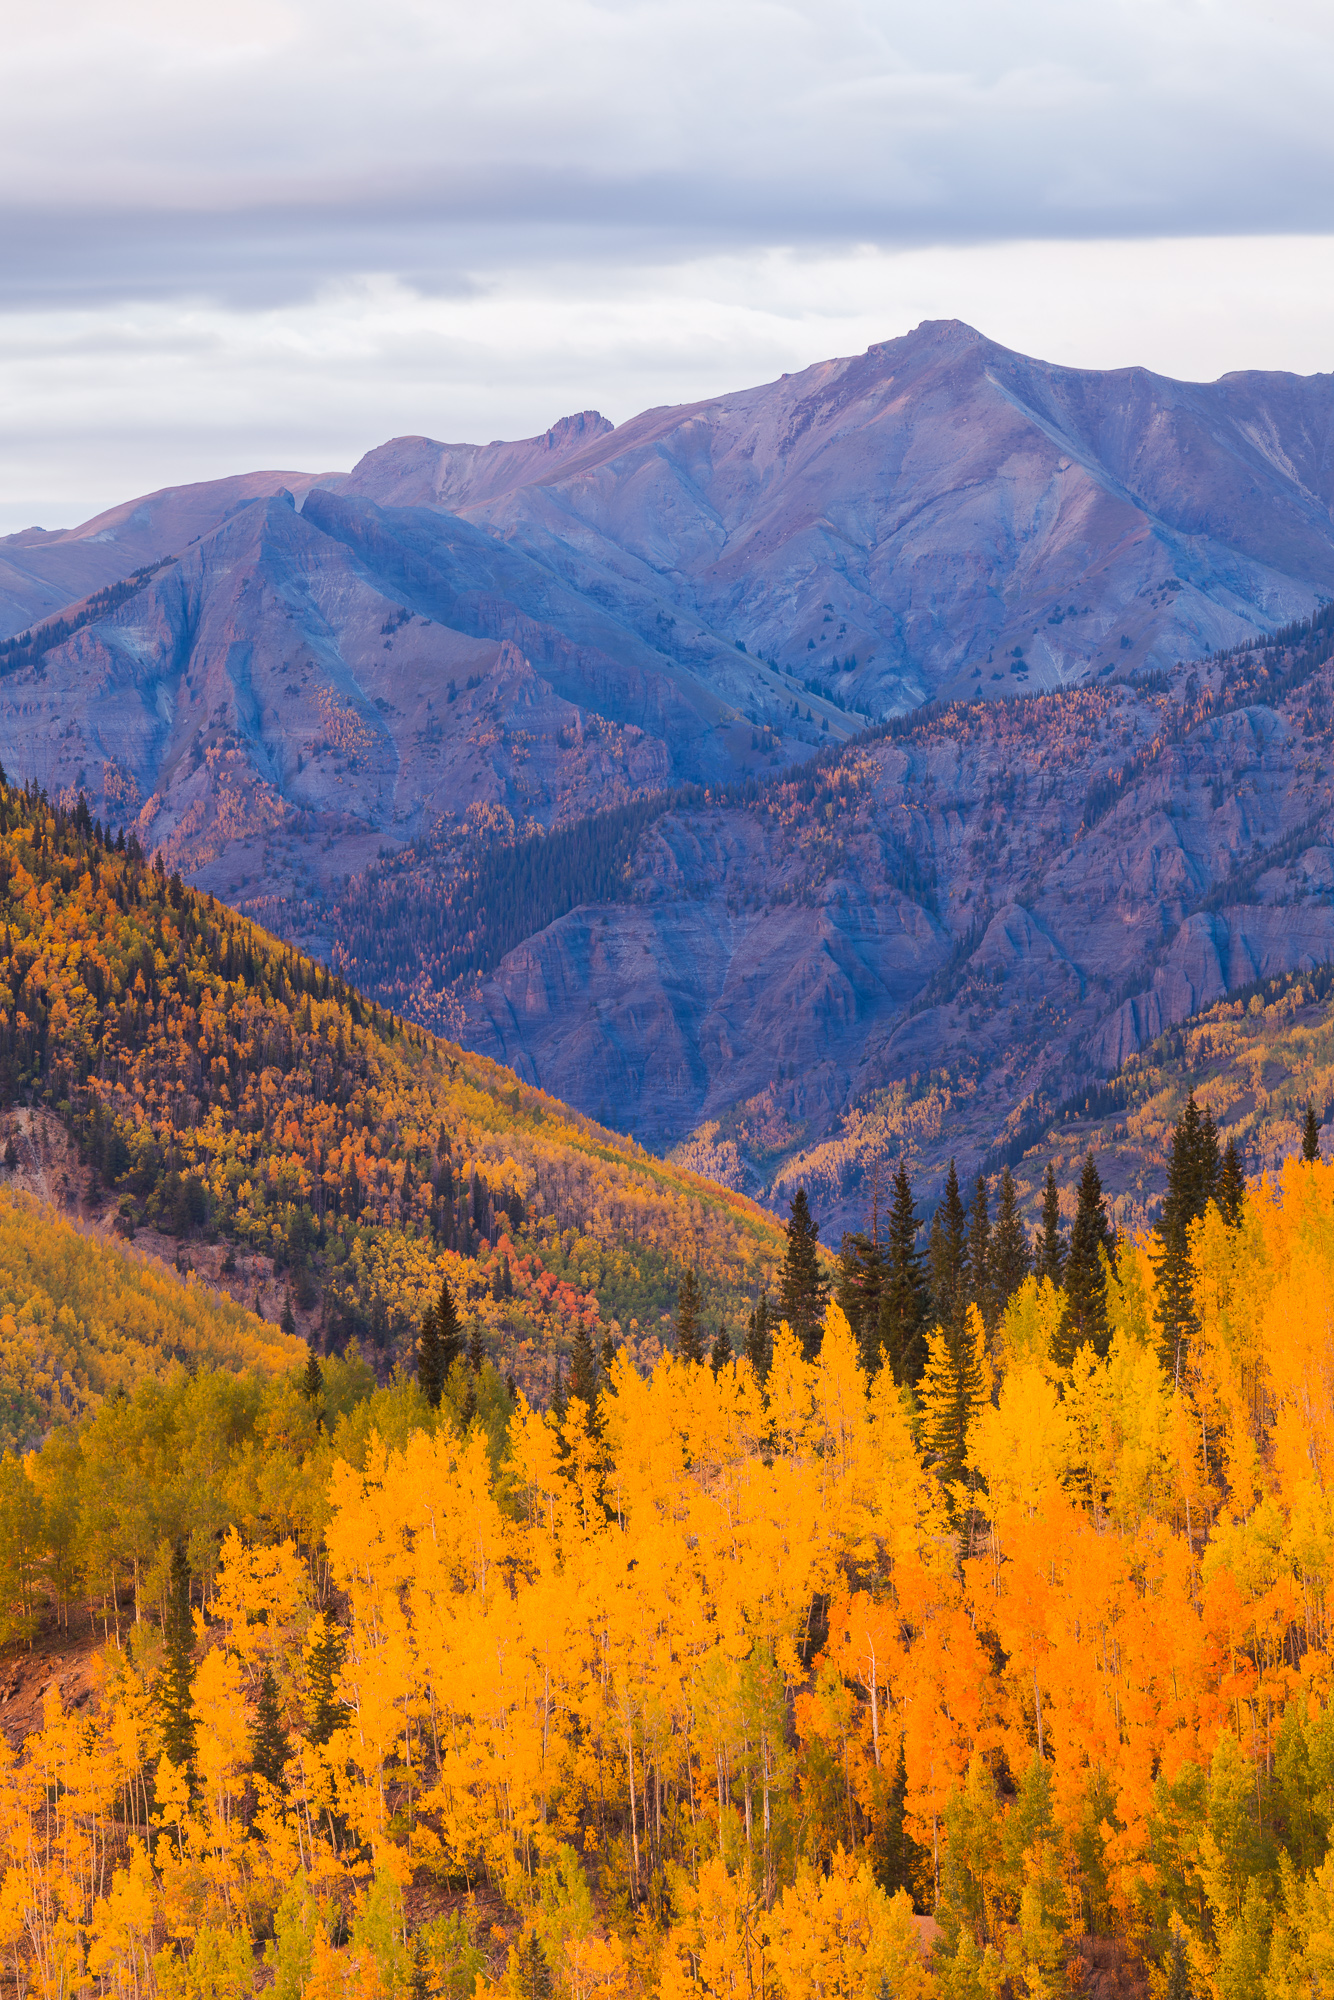
My next shot was essentially the same shot, but in a vertical orientation. When the landscape allows for it, I always try to capture both vertical and horizontal shots, offering variety for my stock collection.
Fall colors explode on the slopes of Hayden Mountain, Ouray, Colorado
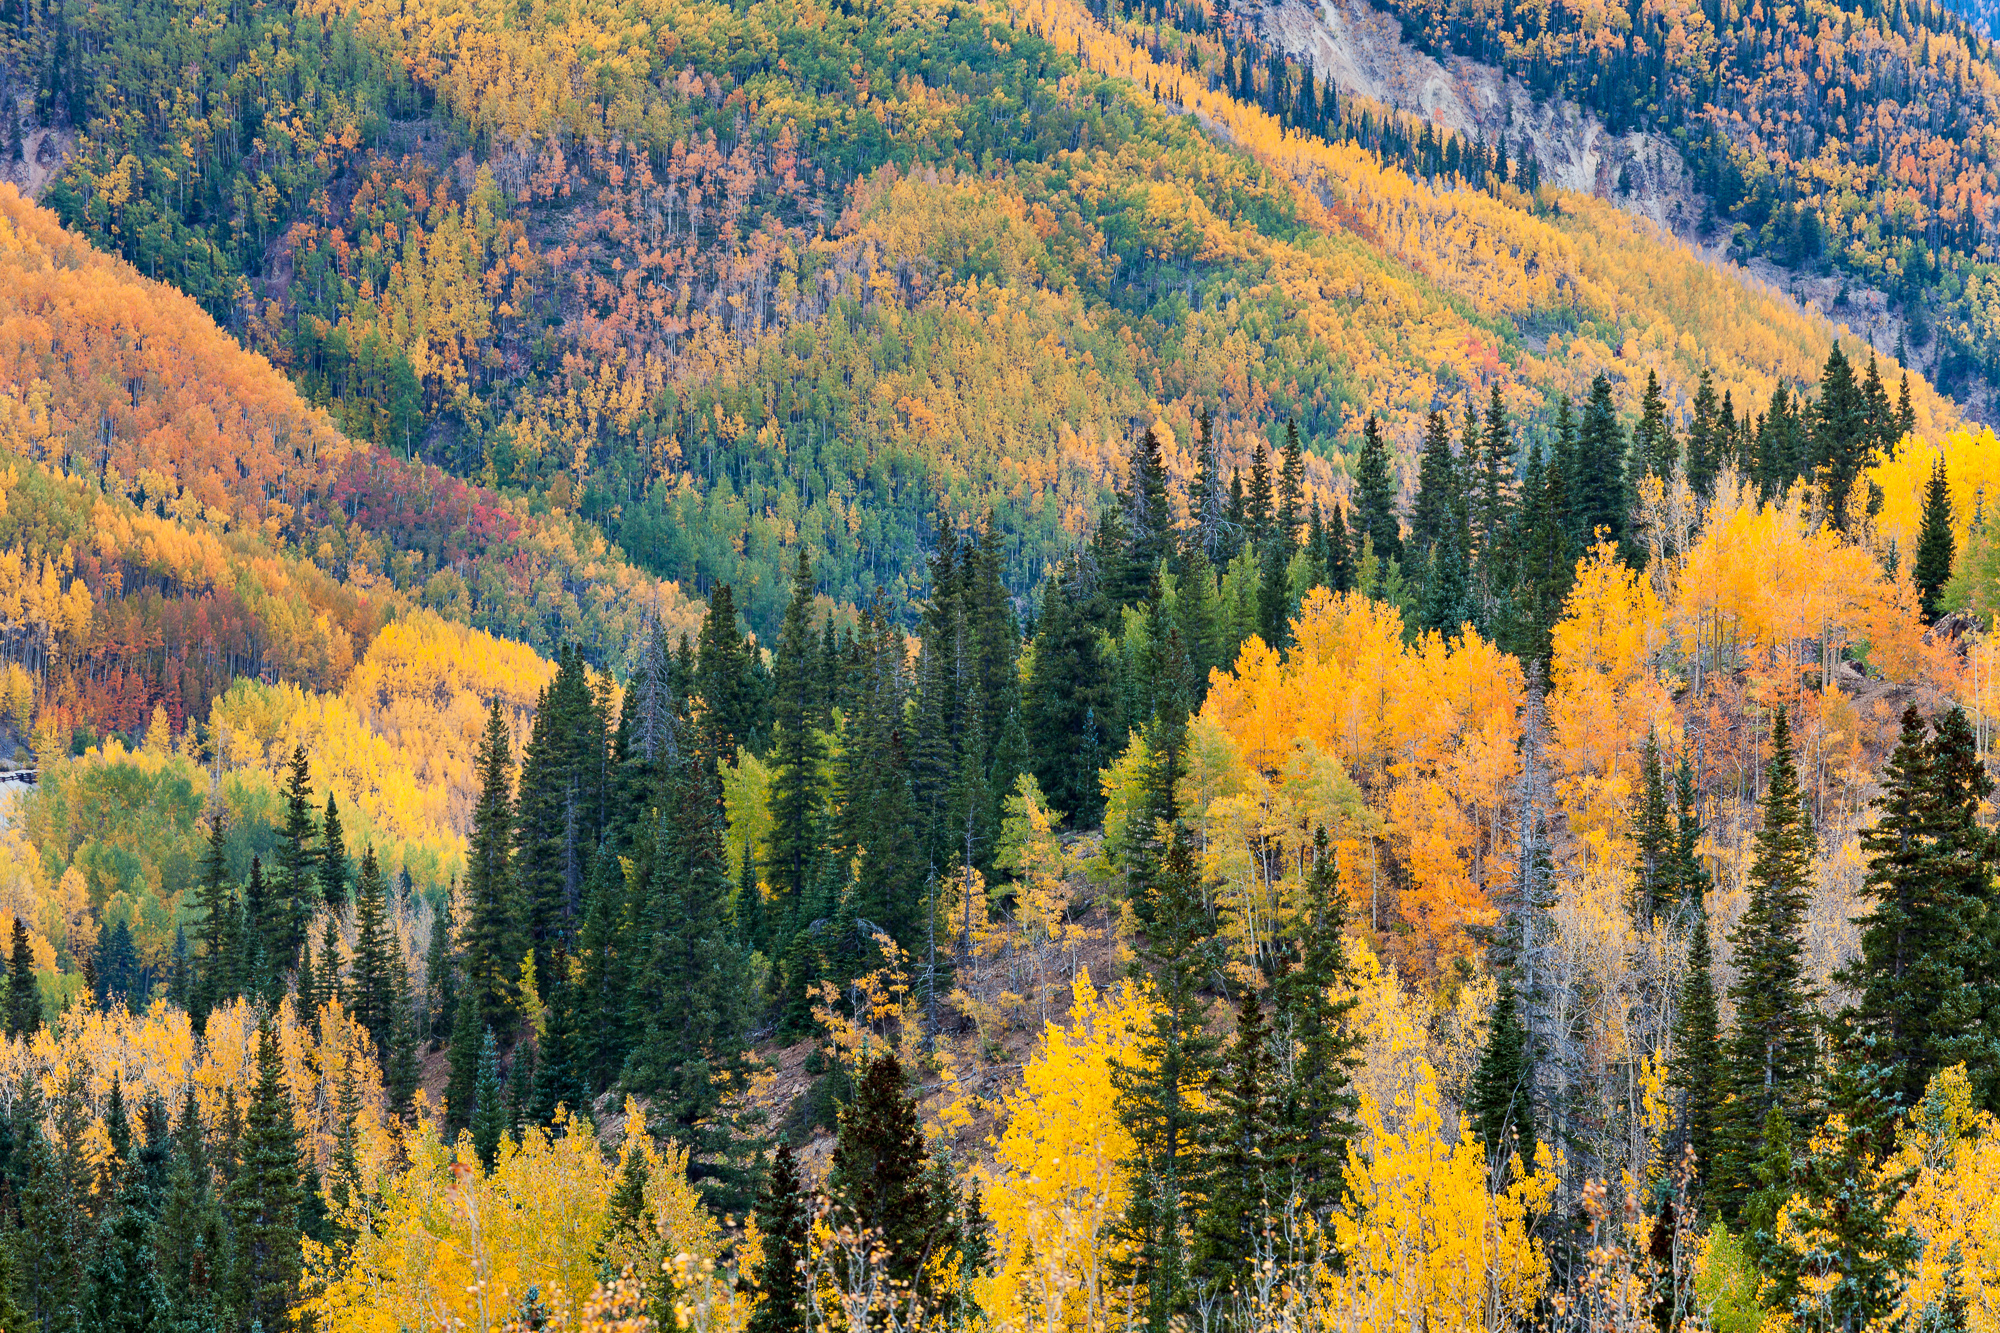
Turning to my left, I shot another vertical, this time of Hayden Mountain. The groves of aspen climbing up its lower slopes were ablaze in fall color glory.
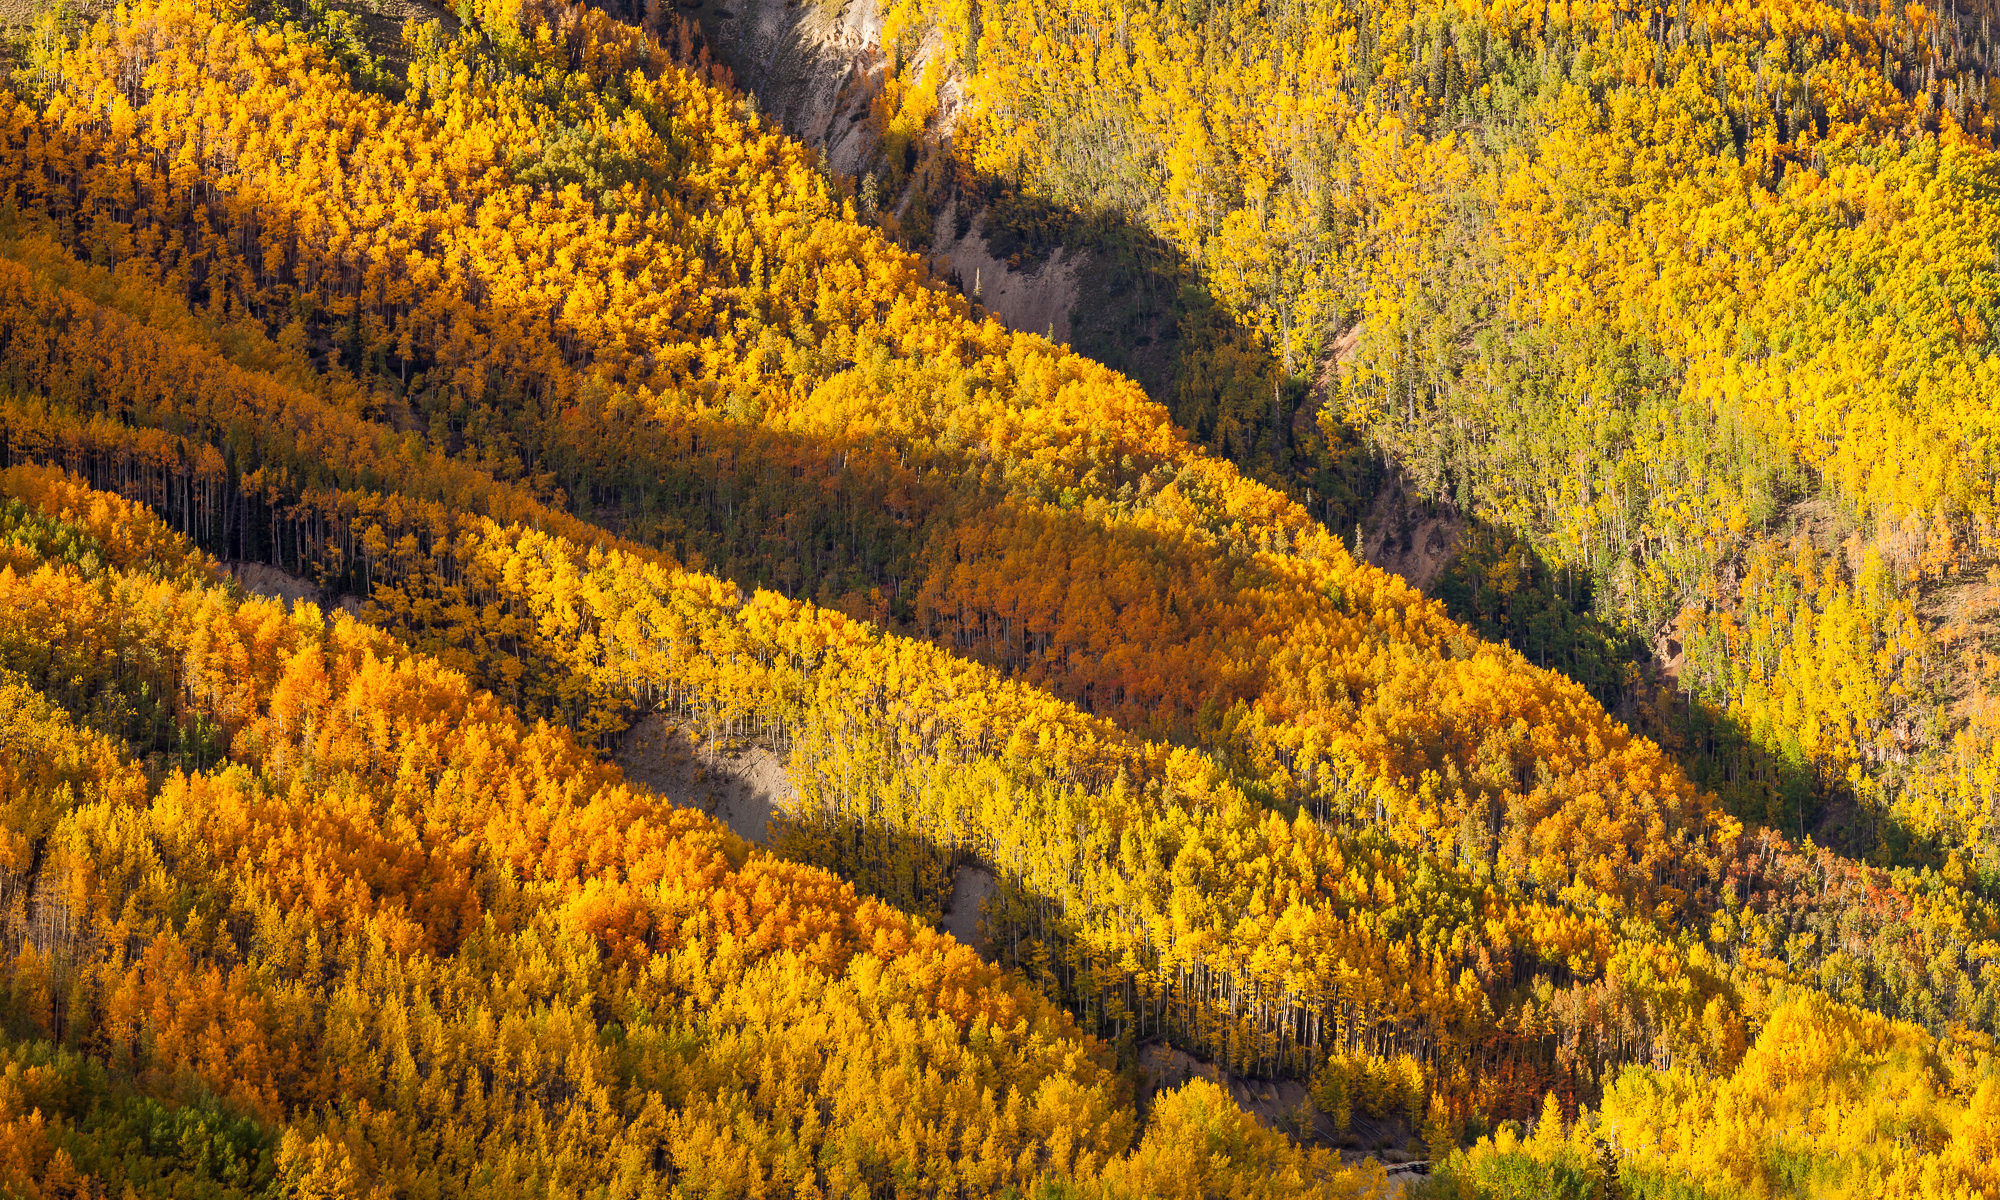
Mountain slopes exhibit a kaleidoscope of color in the fall, Ouray, Colorado
Telephoto lenses are great for carving out smaller sections of a landscape. If the landscape holds enough detail interest, there are likely many different photographs to make from a single scene. Here the collection of colors was changing from spot to spot, providing strong abstract photos, each unique from one another.
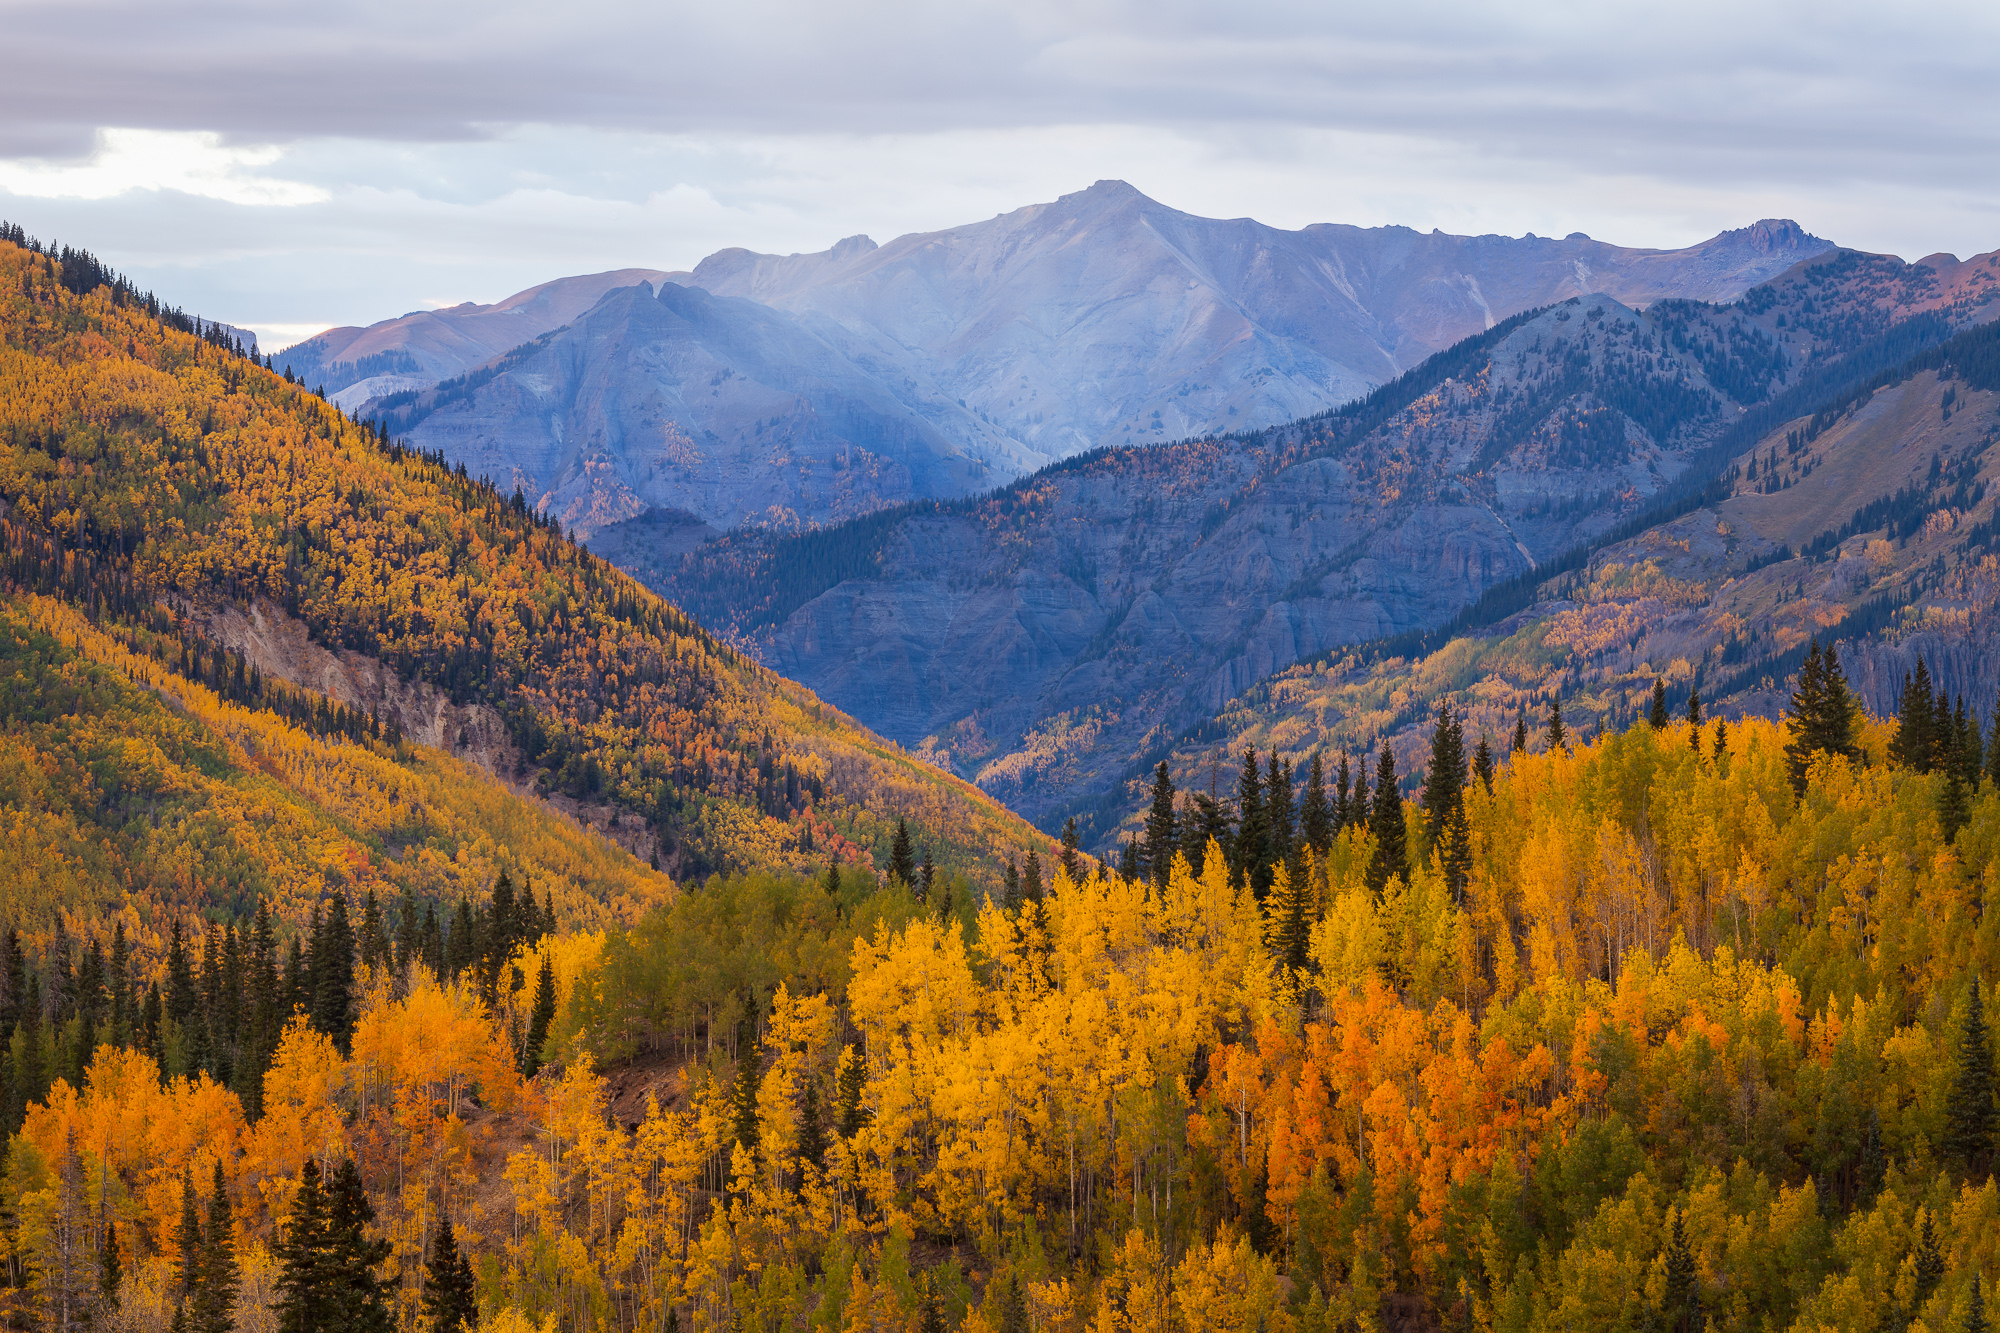
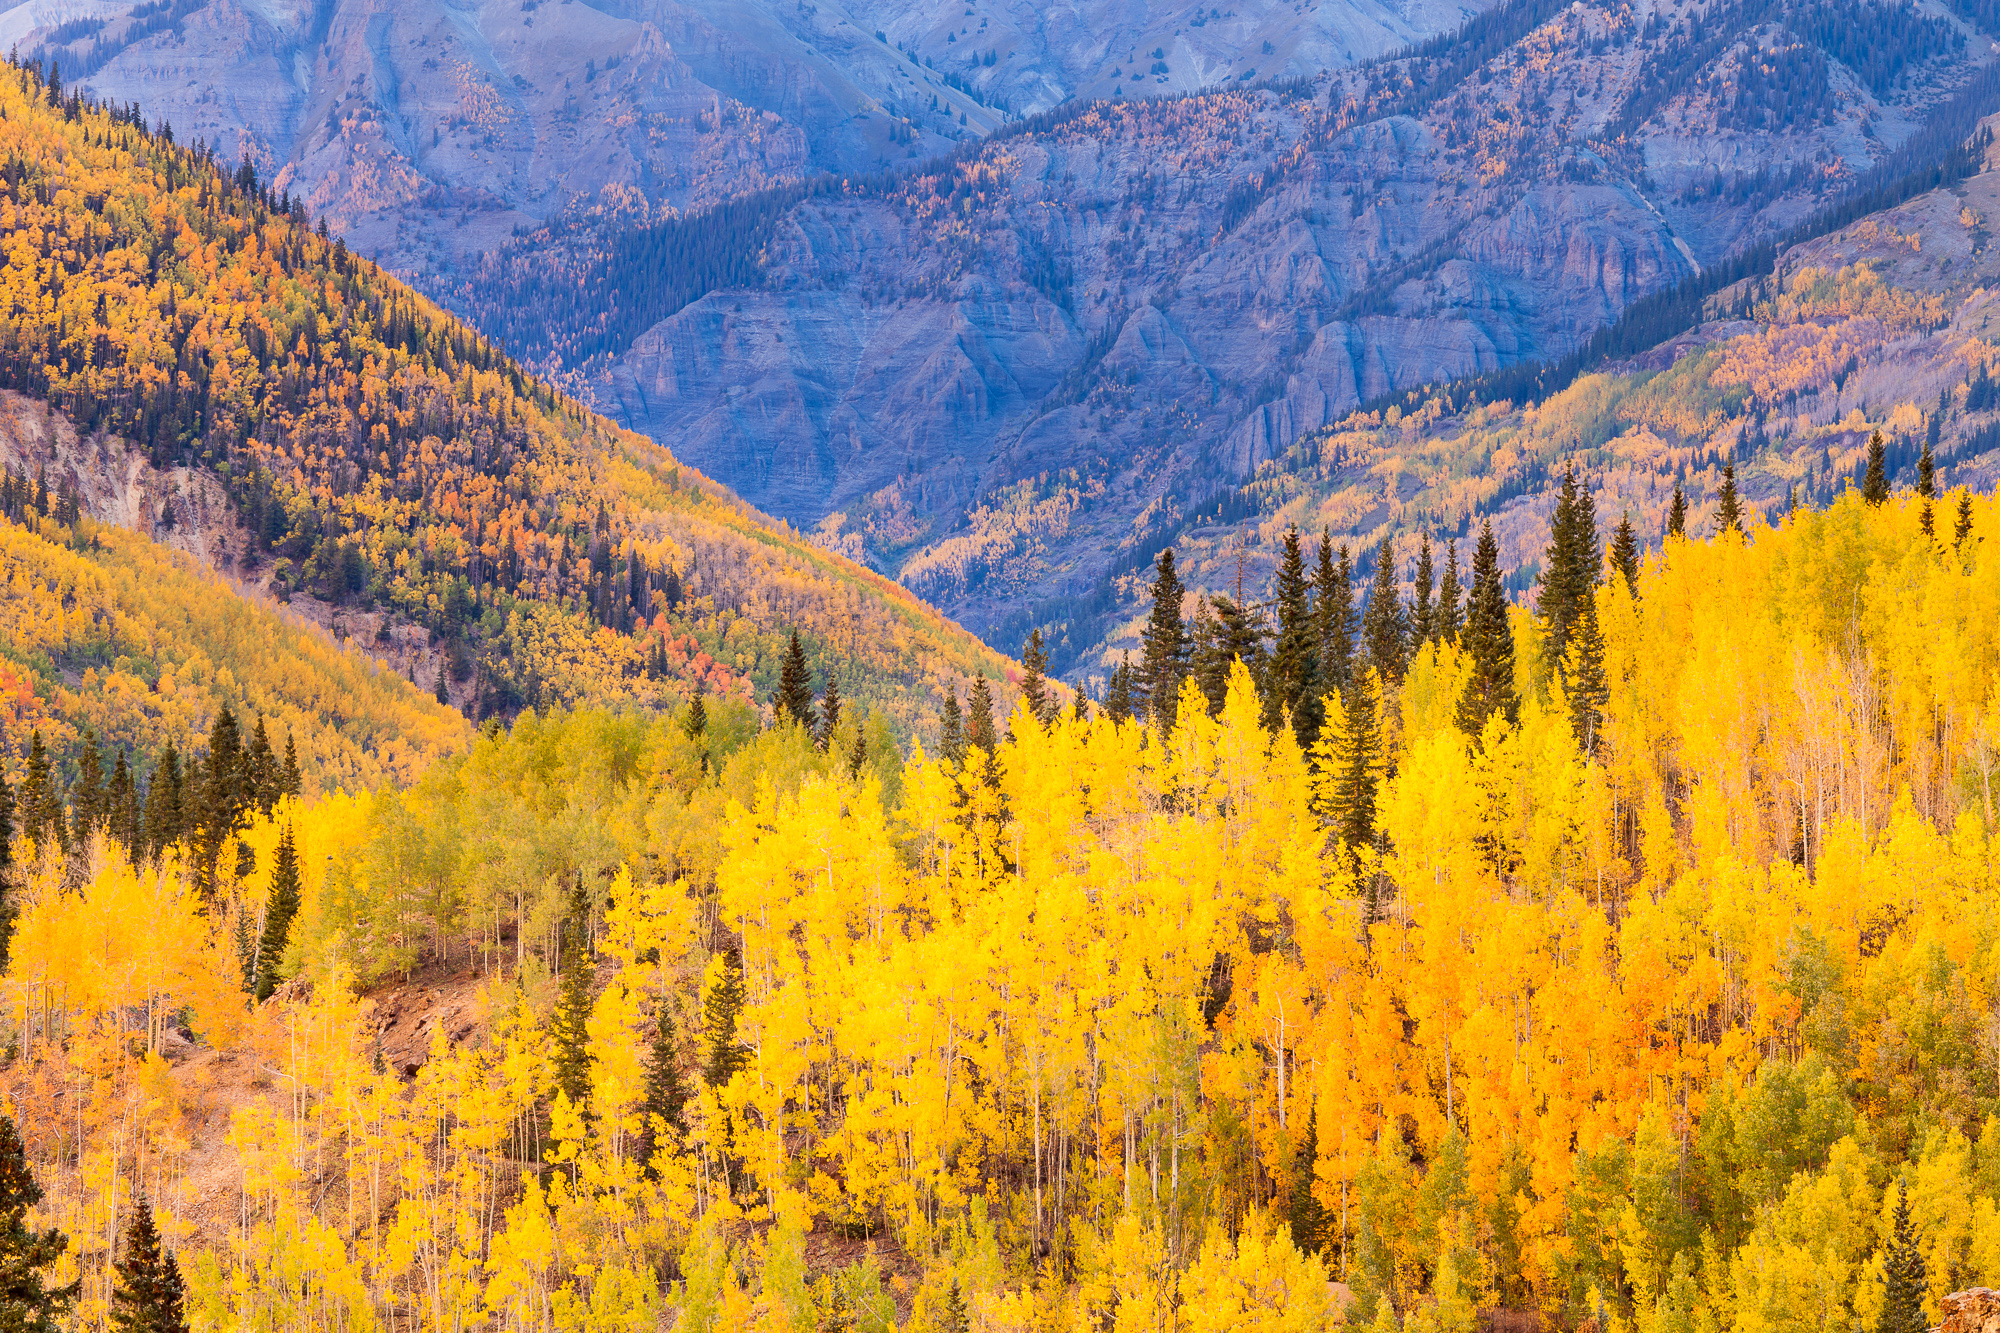
Abrams Mountain caps the end of a valley filled will fall color, Ouray Colorado
Finally, I made a shot similar to my first, but this time leaving out the sky and mountain top. Using the telephoto I created a photo that was more about the variety of color (the warm colors of the forest contrasting with the cool blues of the base of the mountain) than it was about a mountain scenic.
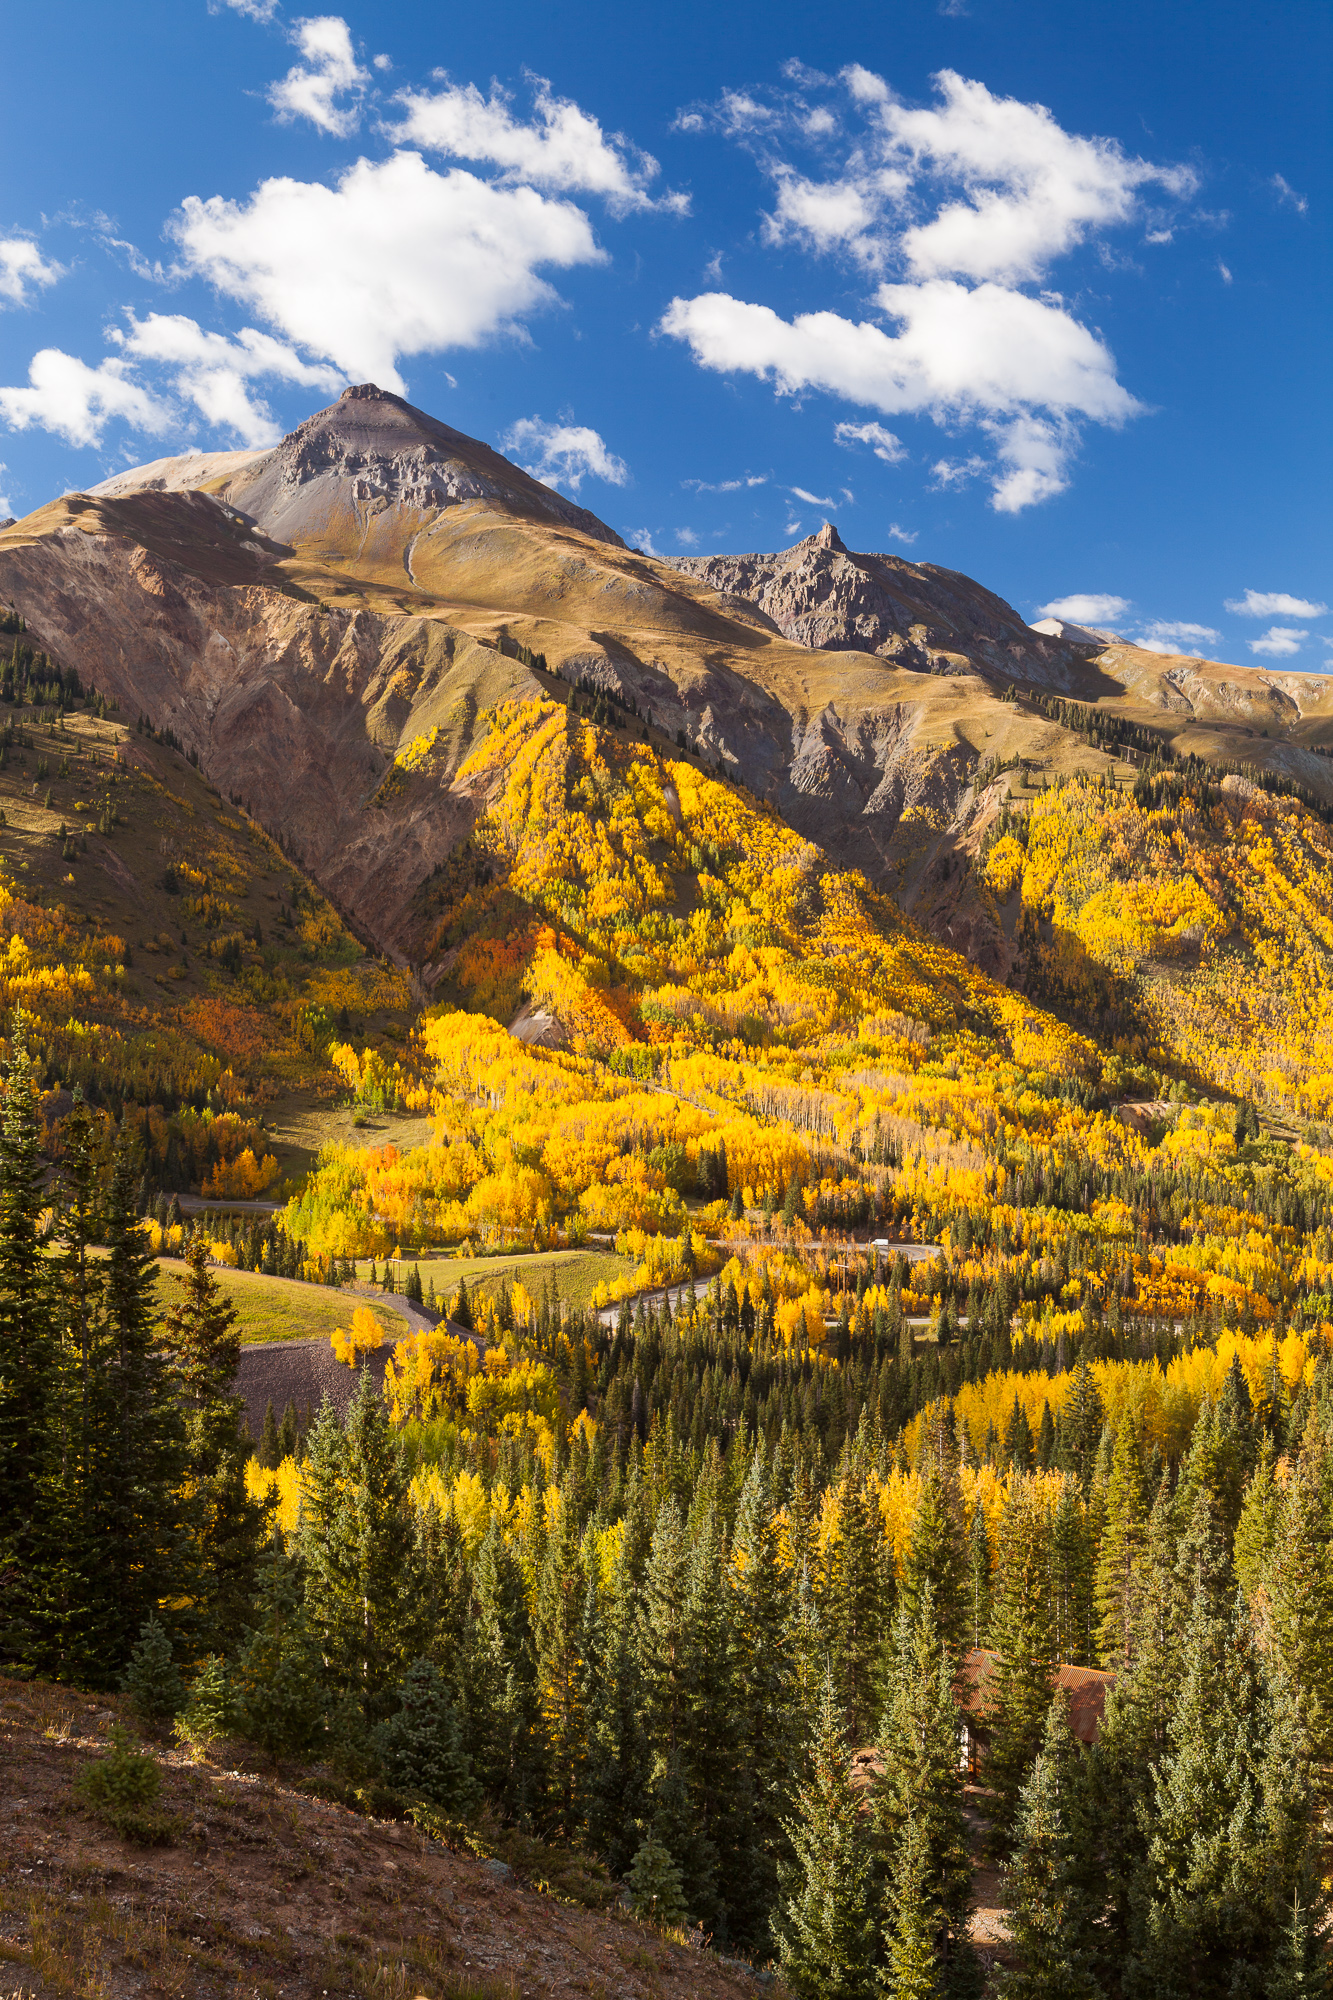
I tried a variety of other shots from this spot (panoramas, cloudscapes, etc), some more successful than others. But by the time I left, I felt I covered the area pretty thoroughly photographically.
I first heard about Adobe’s astonishing anti-shake feature In October 2011 when they demoed it at their user conference. The tool works on photos that were focused correctly but had a slow enough shutter speed to introduce camera shake (usually from hand-holding the camera), resulting in a blurry photo. To put it simply, the tool will analyze these photos, attempt to derive the directional path that the camera was moving along at the time the photo was taken, and correct that blur path. If it worked, this would be the holy grail of photo correction, finally disproving photography teacher’s mantra – “You can’t fix a blurry photo.”
At the time it was touted as a feature “in development,” which in software speak means it is something we’re tinkering with, but might actually never be released. Therefore, I was very surprised when it was announced as a headline feature of Photoshop CC. Now that this was out, I was excited to put it to the test with some real world examples from my catalog. Would this be a handy tool in the digital photographer’s toolbox, or just useless demo ware – a good idea with poor execution?
To start with, I needed to find a couple of test photos. I did a metadata search in Lightroom through my entire archive for photos taken with my Canon 800mm lens at a shutter speed of less than 1/200 of a second. Even when mounted on a tripod with the image stabilizer turned on, such a slow shutter speed usually introduces camera shake. This results in blur, even when the subject is correctly focused. Most photos taken at this speed with that lens are mistakes, usually due to a rapid change in light or background. And almost all of them become throwaways, never seeing the light of day on my web site.
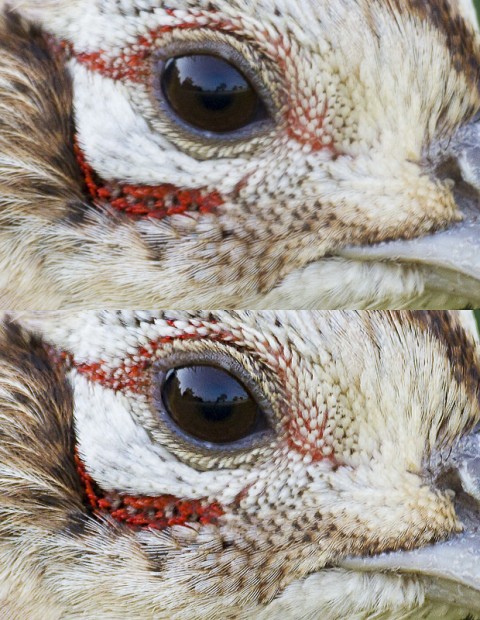
I quickly found two candidate photos, one of a female ring-necked pheasant at 1/180 seconds which was almost sharp, and a much blurrier shot of a swimming common gallinule at 1/100 seconds.
I first worked on the pheasant and brought it into Photoshop. I duplicated the background to create a working layer and opened the anti-shake filter. The first thing the tool does is to pick a portion of the photo and analyze the edges to make a judgement about the motion of the camera at the time of capture. It automatically selected a portion of the face, probably because it has the sharpest edges in the photo. I slightly adjusted the detection square so that it just included the most important parts of the bird’s face. This is the area I wanted maximum sharpness. Other than that, I left all settings default. I had no experience with custom settings here, and in those cases, it is usually best to leave things alone to see how the tool performs.
There is a large preview in the tool, but I found it didn’t really help me determine if the shake was corrected or not. I hit OK to see the following results:
In this photo, the blur introduced by camera shake has been corrected using Photoshop’s new anti-shake tool.
As I said, the original was almost sharp but not quite. But I was blown away with how sharp the corrected photo was! This definitely turned a throwaway into a keeper. (Thanks Adobe!) Here is a closer crop comparison to help see the improvement in sharpness.
The top image is the shot out of camera, suffering from slight camera shake. The bottom photo has been corrected using Photoshop’s new anti-shake tool.
Very satisfied with the results of the ring-necked pheasant, it was time to really put the anti-shake tool to the test. I opened the common gallinule photo and followed the same steps above. This photo is much blurrier than the ring-necked pheasant, but I was fairly sure the subject was in focus, just blurry due to camera shake. This time I again chose a target rectangle around the bird’s head, as this was the area of critical focus (especially the eye). The results are below:
In this photo, the blur introduced by camera shake has been corrected using Photoshop’s new anti-shake tool.
In this case, the sharpness improved quite a bit, but the results were not as stellar as the first photo. The resulting photo almost looked a little too crunchy, with small halo artifacts here and there. That said, this photo now became usable at smaller sizes. It will find a new life in web use and for smaller prints. Here is a crop to do a detailed comparison.
The top image is the shot out of camera, suffering from slight camera shake. The bottom photo has been corrected using Photoshop’s new anti-shake tool.
So what do these two real world tests tell us about the tool? First and foremost, this is not a panacea for blurry photos. This is no reason to go sell your expensive tripod on eBay. However, it can rescue some photos that are right on the verge of sharpness, but suffer from some amount of camera shake. And for those photos, it really does a fantastic job.
I’ll definitely spend some time scouring some of my older photos that I rejected because of camera shake. I’m very impressed with how well Adobe was able to pull this off – it is definitely a worthwhile and very usable feature.
Meet Gidget, a Cavalier King Charles Spaniel. She loves to fetch the ball, and will do it for hours if you let her. Afterward, she is quick to take long naps and generally look very cute.
I find myself doing more and more pet photography these days. I photographed some friends’ dogs on a recent trip to Las Vegas, where they live. These little ones are Cavalier King Charles Spaniels, and they have the wonderful trait of remaining cute even long after puppihood. They both had a very sweet disposition and were relaxed and easy to work with. I didn’t try to pose them at all or add props – they were cute enough just hanging out and snoozing! Too see all the photos of these two buddies, be sure to check out the gallery here.
Meet Lola, a Cavalier King Charles Spaniel. She has a very sweet disposition and loves to cuddle.
These are very impromptu and informal shots, but even if you are not creating a full studio setup, there are certain things to keep in mind to improve the photos. Most importantly, put the camera at eye level with your subject. This is a good idea for any time of animal photography (and people too!), but with pets, your environment is controlled and you really have no excuse not to. If the dog is lying on the floor, this usually means you are too. But the sore knees is worth it in the end.
Meet Gidget, a Cavalier King Charles Spaniel. She loves to fetch the ball, and will do it for hours if you let her. Afterward, she is quick to take long naps and generally look very cute.
Next, and again this is a general rule for many types of photography, use a tripod whenever possible. As I didn’t have a studio setup for these shots, I was relegated to normal home lighting, which can be quite dark. I stayed away from using a strobe as I didn’t have any diffusers or bouncers with me, and I was too lazy to create a make shift one. This meant that longer shutters and a tripod were a must.
Meet Lola, a Cavalier King Charles Spaniel. She has a very sweet disposition and loves to cuddle.
Finally, if a pet is active or energetic, tire them out before any photography session. For Gidget this meant fifteen minutes of playing fetch with a ball. She was already pretty calm to begin with, but after a fetch session she was very relaxed in front of the lens. A tired pet will allow the photographer much more freedom in posing, props, or just making sure the pet will sit still.
Pet photography can be a lot of fun (in fact, I think I enjoy it more than taking people portraits!) and the results can be treasured keepsakes for loving owners.
One of my favorite times of day to shoot is either just before sunrise or just after sunset. The sky casts the entire scene in deep blues and purple hues, and the light becomes very soft. It is actually a great time to shoot because all harsh contrast is removed, and the photo captures all the details in the shadows.
The photo above was taken about 45 minutes after sunset, just after the typical “magic hour” light had left the sky. For post-sunset photography, it helps to scout your intended shots earlier in the day, as it can quickly get quite dark, and it is harder to compose the photograph. There is only about half an hour with this type of light before it becomes night photography.
Additional benefits include lack of crowds (even most photographers leave after the sunset light goes away), and (usually) any wind will die down, allowing for reflections and keeping grass and plants from moving in those long exposures. Here it is helpful to have an intervalometer to help time really long exposures, as most cameras stop their auto exposure shutter timings at 30 seconds. A stopwatch can also work in a pinch, but that can become more fiddly, especially in the waning light.
Moments before the sun rises, Hot Creek reflects the cool glow of snow covered peaks
This photo was taken at the other end of the day, about a half hour before sunrise. Again, there is little contrast difference between the foreground and the distant mountains due to the soft, even light. I had been to this location before, and had pre-visualized this shot in this kind of light. This helped me greatly in knowing where to go and how I wanted to compose this shot, so that I didn’t have to wander around in the dark (and cold!) of the early morning. I find it also helps with my early morning motivation to know exactly what I want to accomplish. Without a clear plan, it is far too easy to glance out the window and then roll over and go back to sleep!