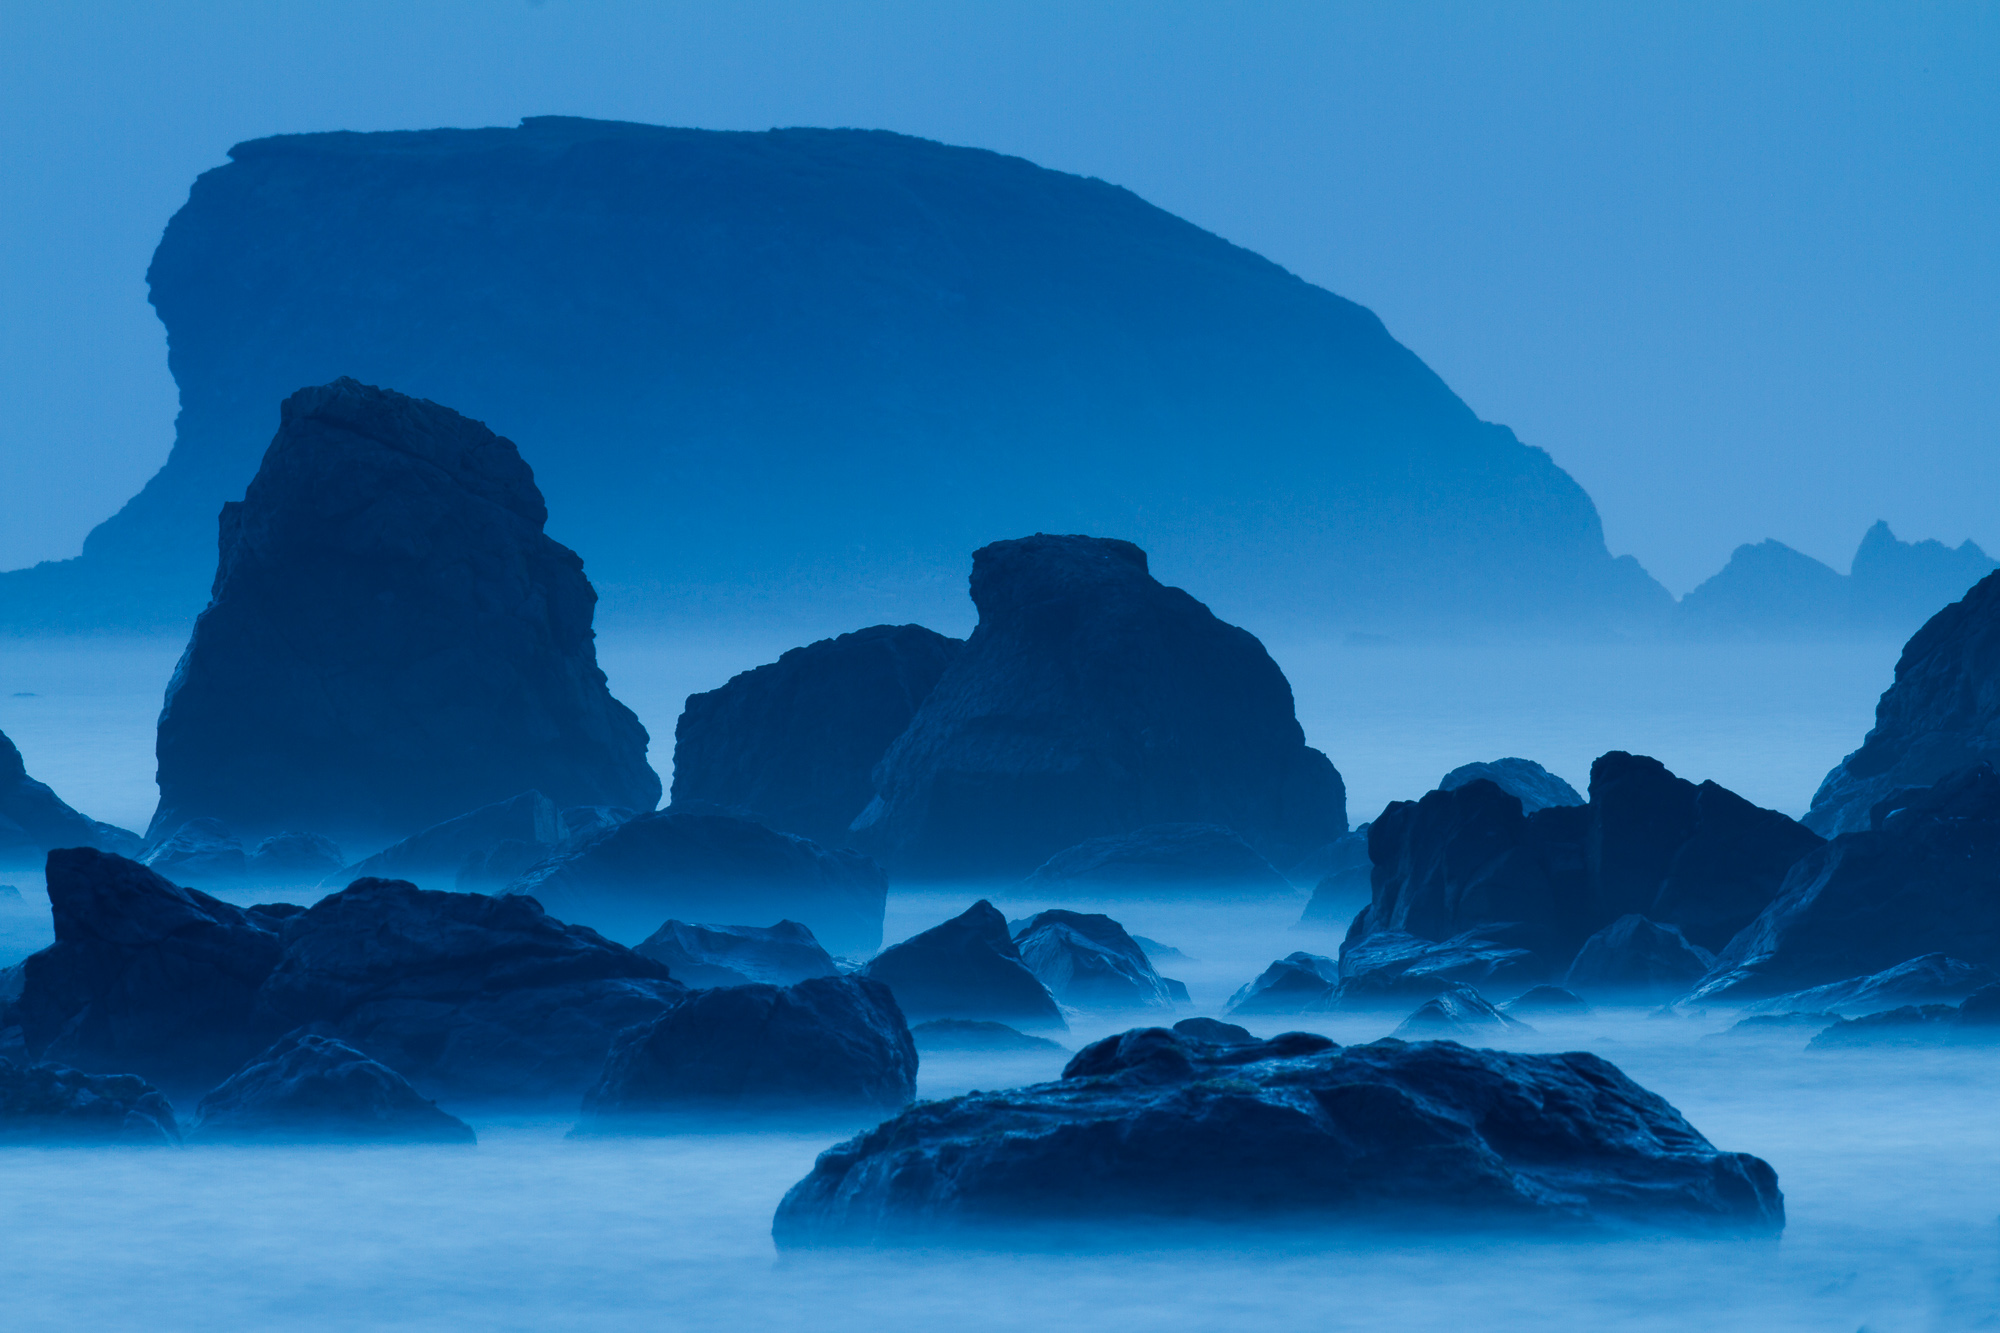
On my recent trip north up the California coast to photograph redwoods and rhododendrons, I also had an opportunity to shoot sea stacks just offshore in Crescent City, CA. After shooting a bit with my 70-200mm, I really wanted to go for a unique perspective of these rocks and stack them on top of one another. So I grabbed my go-to bird lens, the 800mm f/5.6. Using a Canon 7D with a cropped sensor gave me an equivalent focal length of 1280mm.
I waited until the sun set, giving me photos with the cool blue of dusk, and allowing me to slow my shutter speed to turn the crashing waves into a calming mist. This is the effect I was after – hard, sharp rocks shrouded in a blue fog of moving water. However, as soon as my shutter speed got longer than 1/100th of a second and started creeping toward the 1 and 2 second mark, the results on the back of my LCD were horribly blurry.
In normal shooting conditions with this lens, I never like to let the shutter speed drop below 1/250th of a second, and only if I have a stationary subject do I lock down the gimbal head on my tripod and go for something slower. But usually 1/100th of a second is my slowest usable shutter speed. What to do in this situation? Even by bumping the ISO very high I couldn’t achieve a fast enough shutter speed in these darkening conditions, and doing so would also counteract the effect of the moving water.
The solution seemed counter-intuitive at first. I found that by greatly lengthening my exposures, I was able to achieve much sharper results! The initial blurriness I was seeing was caused by the shutter vibration, amplified by the extremely long focal length (and yes, I was using mirror lockup). When I increased the exposure time, the percentage of time that the mirror shake impacted the overall exposure time was reduced, thus creating a sharper image. Using this principal, I found that by exposing for 30 seconds, I was able to achieve the sharpest results.
A couple things to keep in mind. First, this technique will only work if there is no wind. Even a slight breeze will blow a huge lens like that back and forth, ruining any chance of a long exposure. Second, make sure to check sharpness by zooming in to your resulting photo on the camera’s LCD. Never trust sharpness from a photo displayed 3 inches across – everything looks sharp when it is that small!
So next time you’re out with a giant lens trying to do landscape work (really not a very common combo!), remember to experiment with the slower shutter speeds. You might just find some sharpness in there.
Years ago, I wrote about how long lenses give the photographer the ability to completely change the background of the image they’re working on while still behind the camera. With a slight move left, right, up or down, you can change the angle of your shot, and sometimes change the background elements that appear behind your subject. Because long lenses help blur the background into solid colors, this can change the look and mood of your photo without changing the main subject.
I’m always looking for these opportunities while photographing wildlife. Photo editors constantly seek variety, so when I’m on a bird, I try to get as many poses, expressions, and backgrounds as possible. I think of it like an outdoor “studio” session, giving me the ability to come up with scene changes for my subject. (I still haven’t figured out how to do wardrobe changes, but that is a topic for another post!)
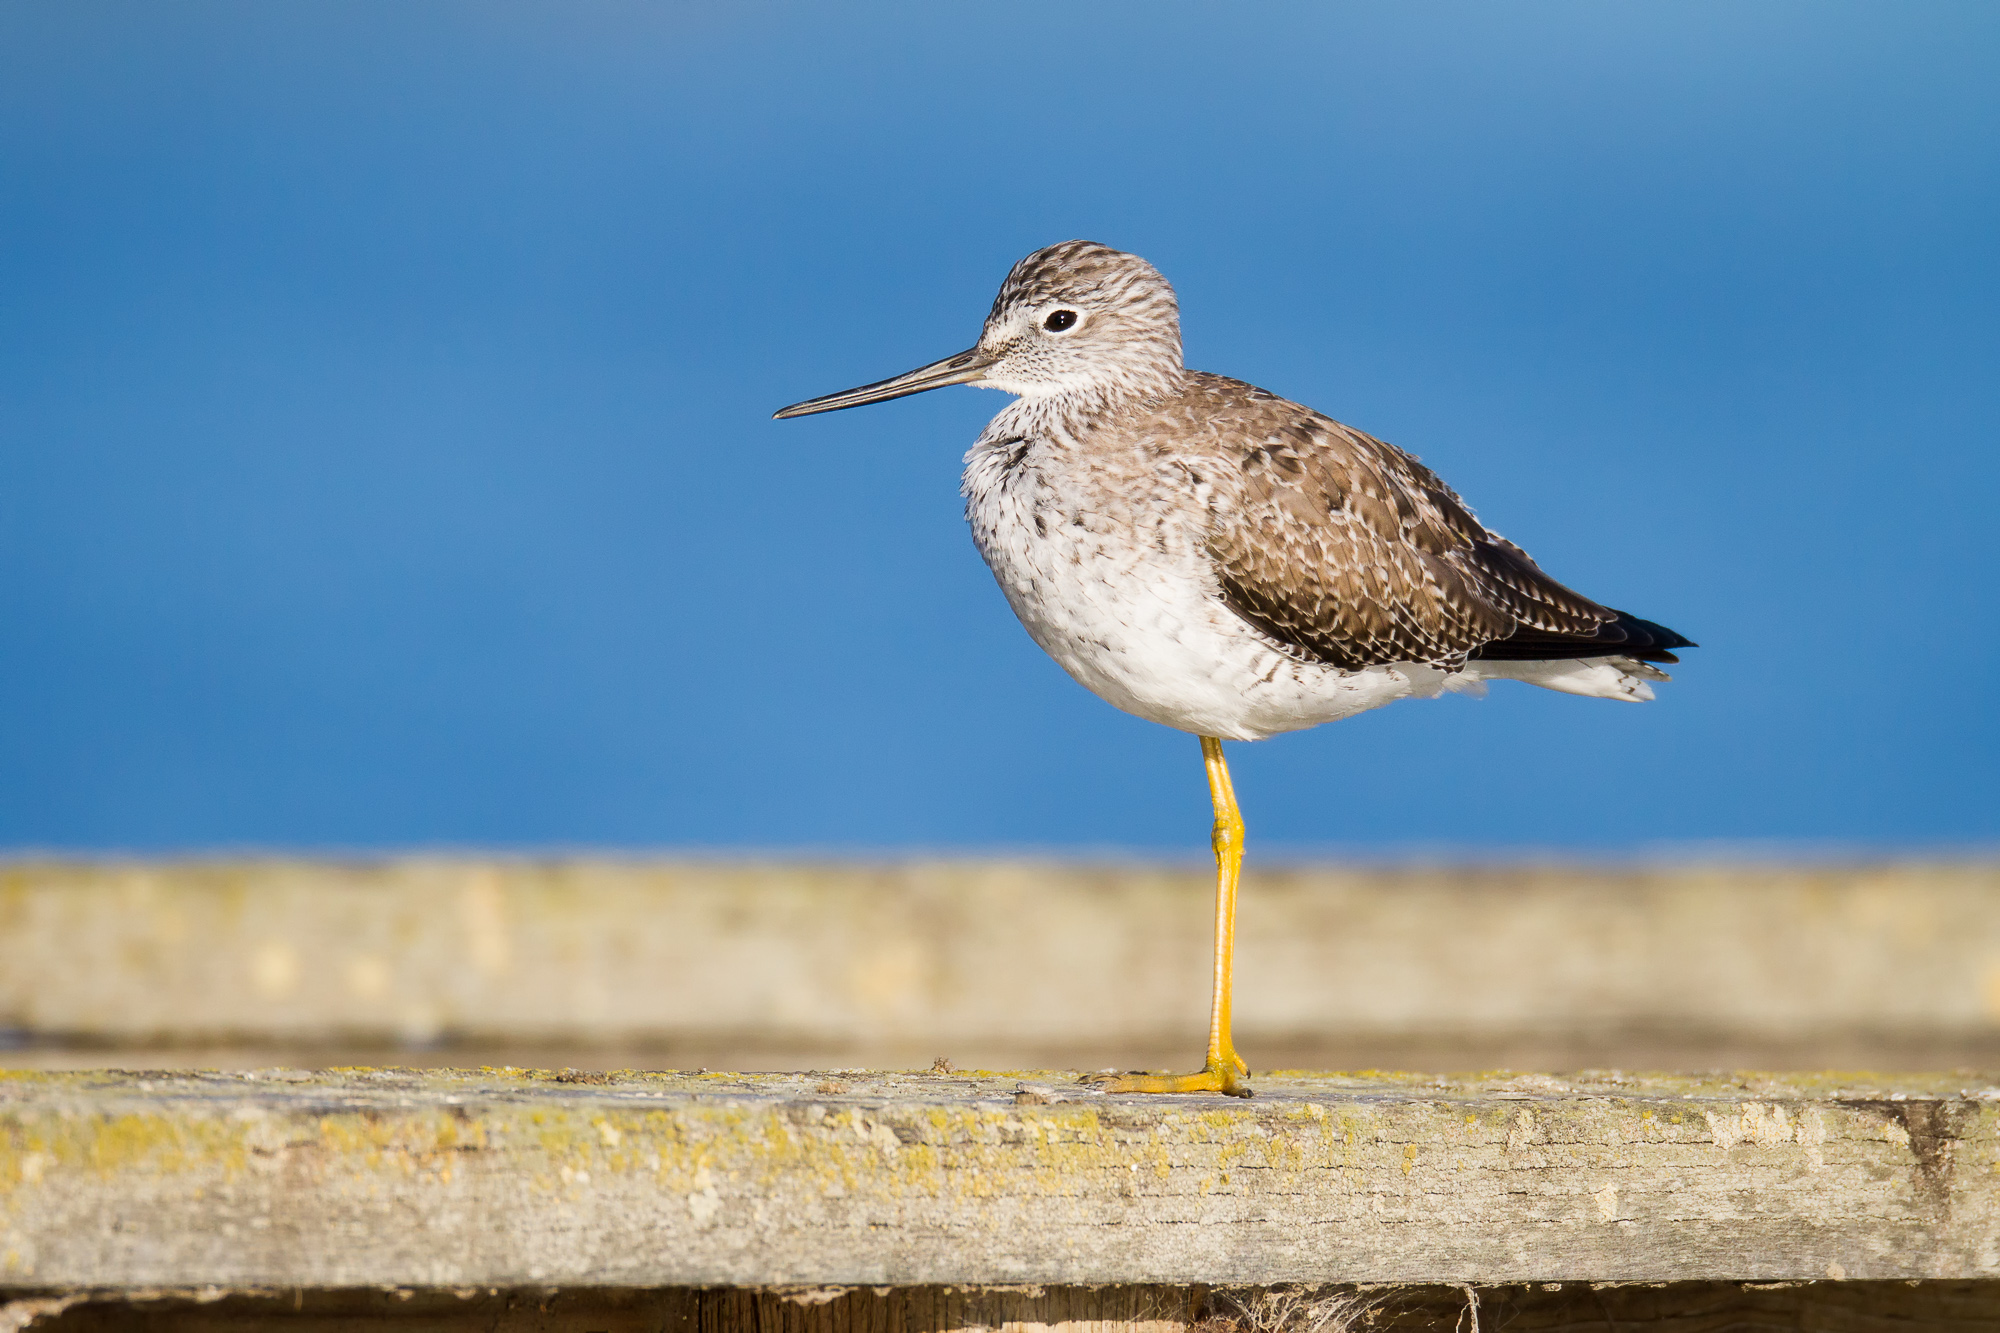
In the photos below, I first photographed the greater yellowlegs with the shoreline of a lake as the background. The background blurred to a nice tan-brown. I then changed my angle by swinging around to the left, and now the lake was behind the bird, coloring the background in a blue wash.
A greater yellowlegs stands on the railing of a dock. The background color comes from a distant shoreline behind the dock.
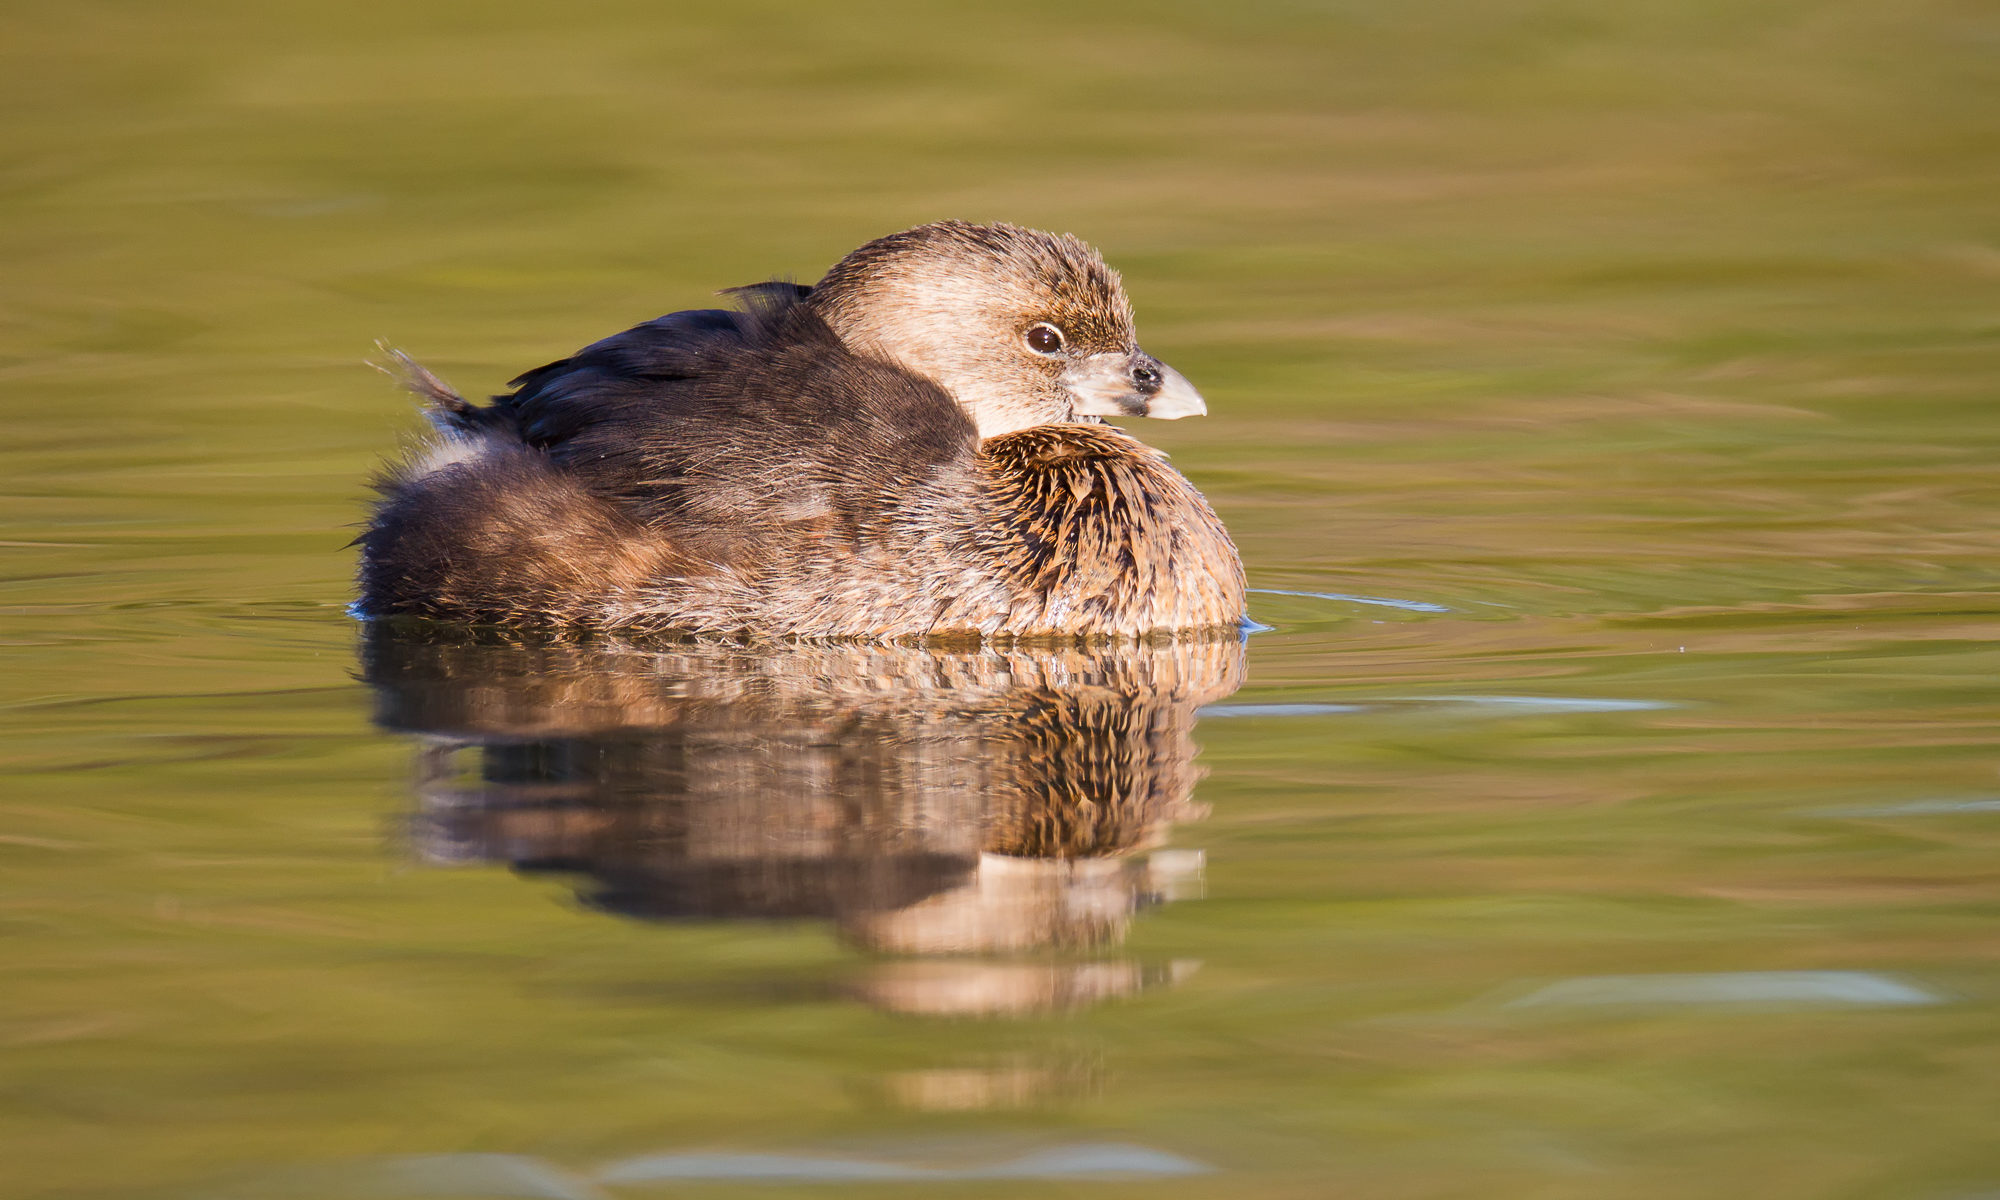
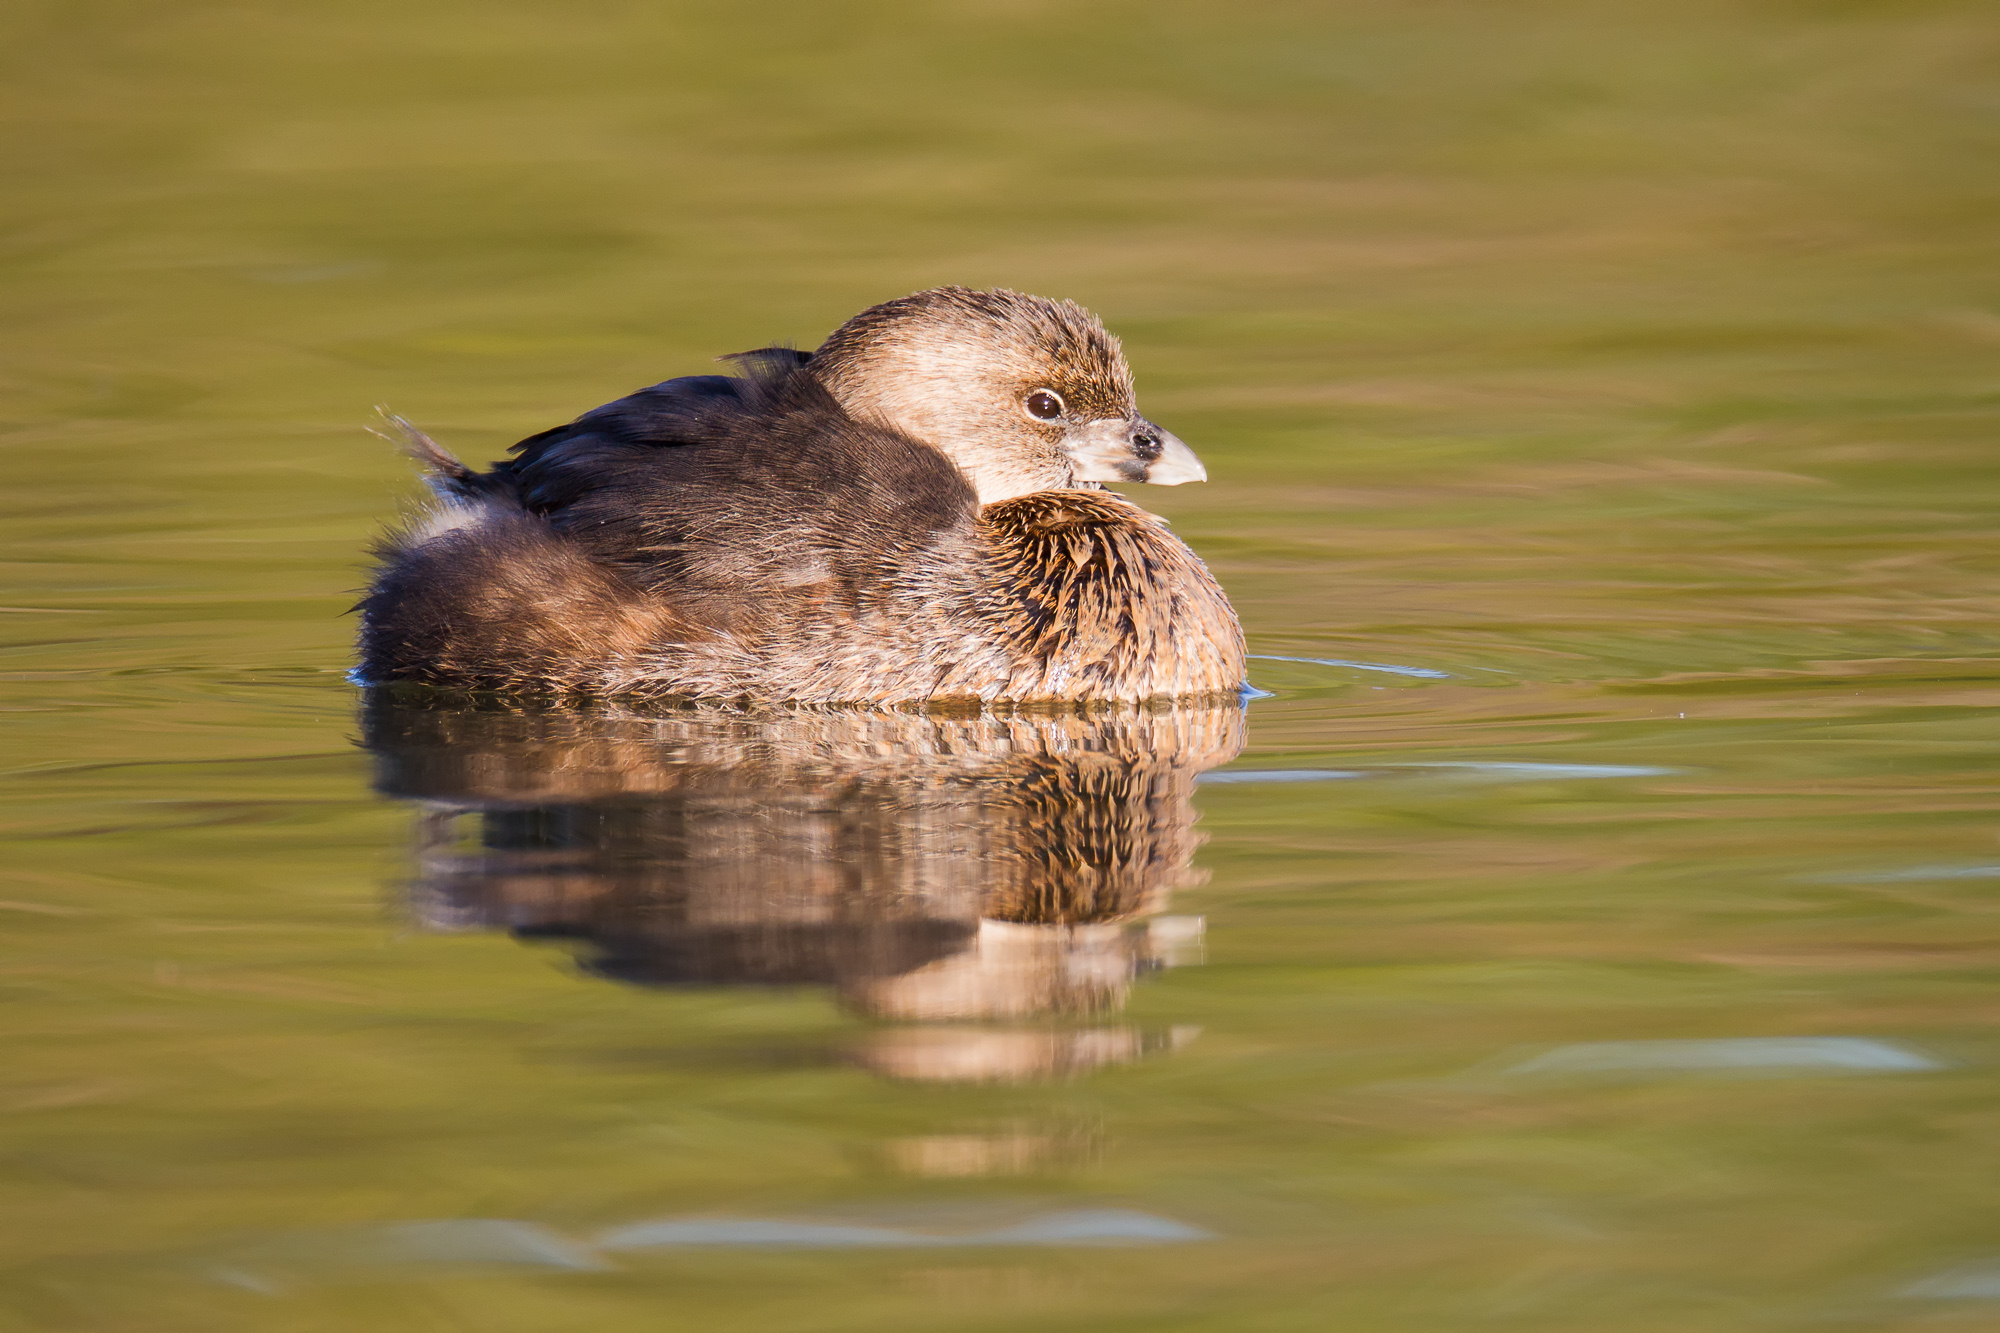
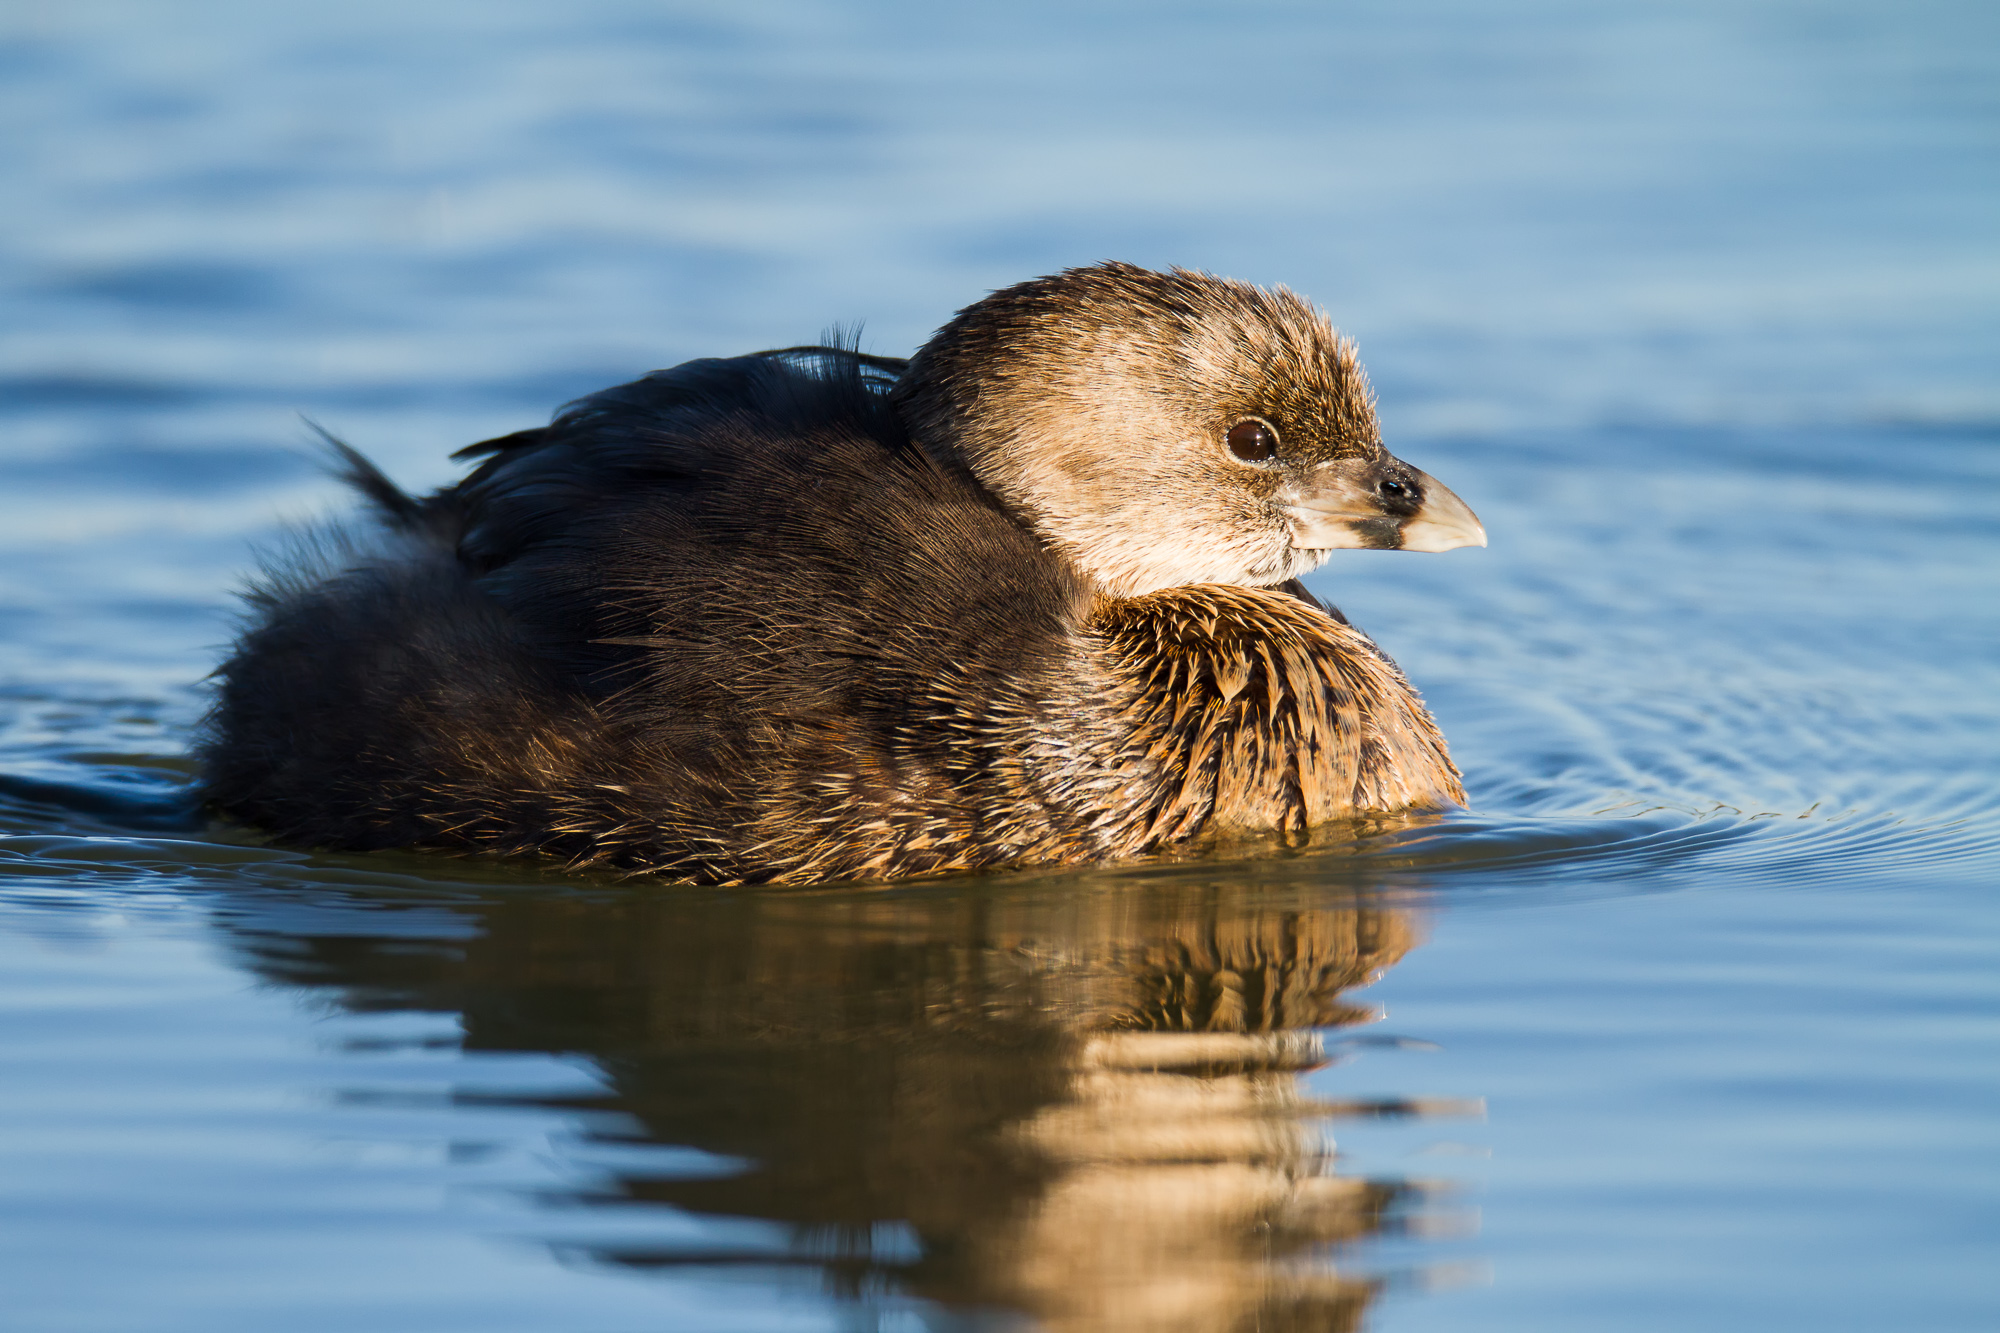
You can achieve similar color changes using reflection (and patience) as well. In the photos below, I didn’t change my position, but just waited for the bird to move instead. When I first photographed this pied-billed grebe, it was fishing and diving close to shore. The colors of the shoreline were reflected in the surface of the water, contributing dominant oranges to the photograph. I knew that this bird was likely to move away from the shore eventually, so I sat a waiting, hoping to capture that color variety. I didn’t have to wait long before this happened, with an added bonus of the grebe moving closer to me, filling my frame. The blue sky reflected off the water, giving the photo an entirely different look.
A pied-billed grebe is reflected in the still water near the shore of a lake. The color reflected in the water comes from the nearby shore.
The next time you’re out photographing with a longer lens (depending on your subject, anything over 100mm can work well), think about trying different backgrounds with your subject. This works great on people pictures as well!
When we pulled up to the stand of aspen that Jack had scouted earlier, I could tell he was hopefully optimistic about the coming sunset. I was participating in a 5 day photo workshop with landscape legend Jack Dykinga, and this was our first field excursion of the workshop. We were in Grand Teton National Park and the weather had been less than optimal, with thick smoke sitting on the floor of the valley, extirpating any hope of a clear view of the mountains. However, earlier in the day, there had been a shift in the wind, and the weather forecast called for a storm moving through in the next couple of days.
“You know, we might just get a killer sunset,” Jack said to the eager group. The location certainly was beautiful. A colorful grove of fall aspen stood before us with the grandeur of the Tetons rising behind. But the clouds were building in the west and there was still a haze in the sky above the mountains. I just didn’t see it. Uninspired, I set about working with tight shots of the trees.
As it got later, I decided to move up the road a bit and get into a position that removed my foreground, composing just the trees and mountain. Just in case we have a sunset, I thought. A few minutes later, Jack appeared to my left and a little ways behind me. Apparently he had found his spot and was getting ready for the sunset he was anticipating. I could tell he was getting more excited as it got later. I still didn’t see anything special in the light, so I asked him what he thought was going to happen.
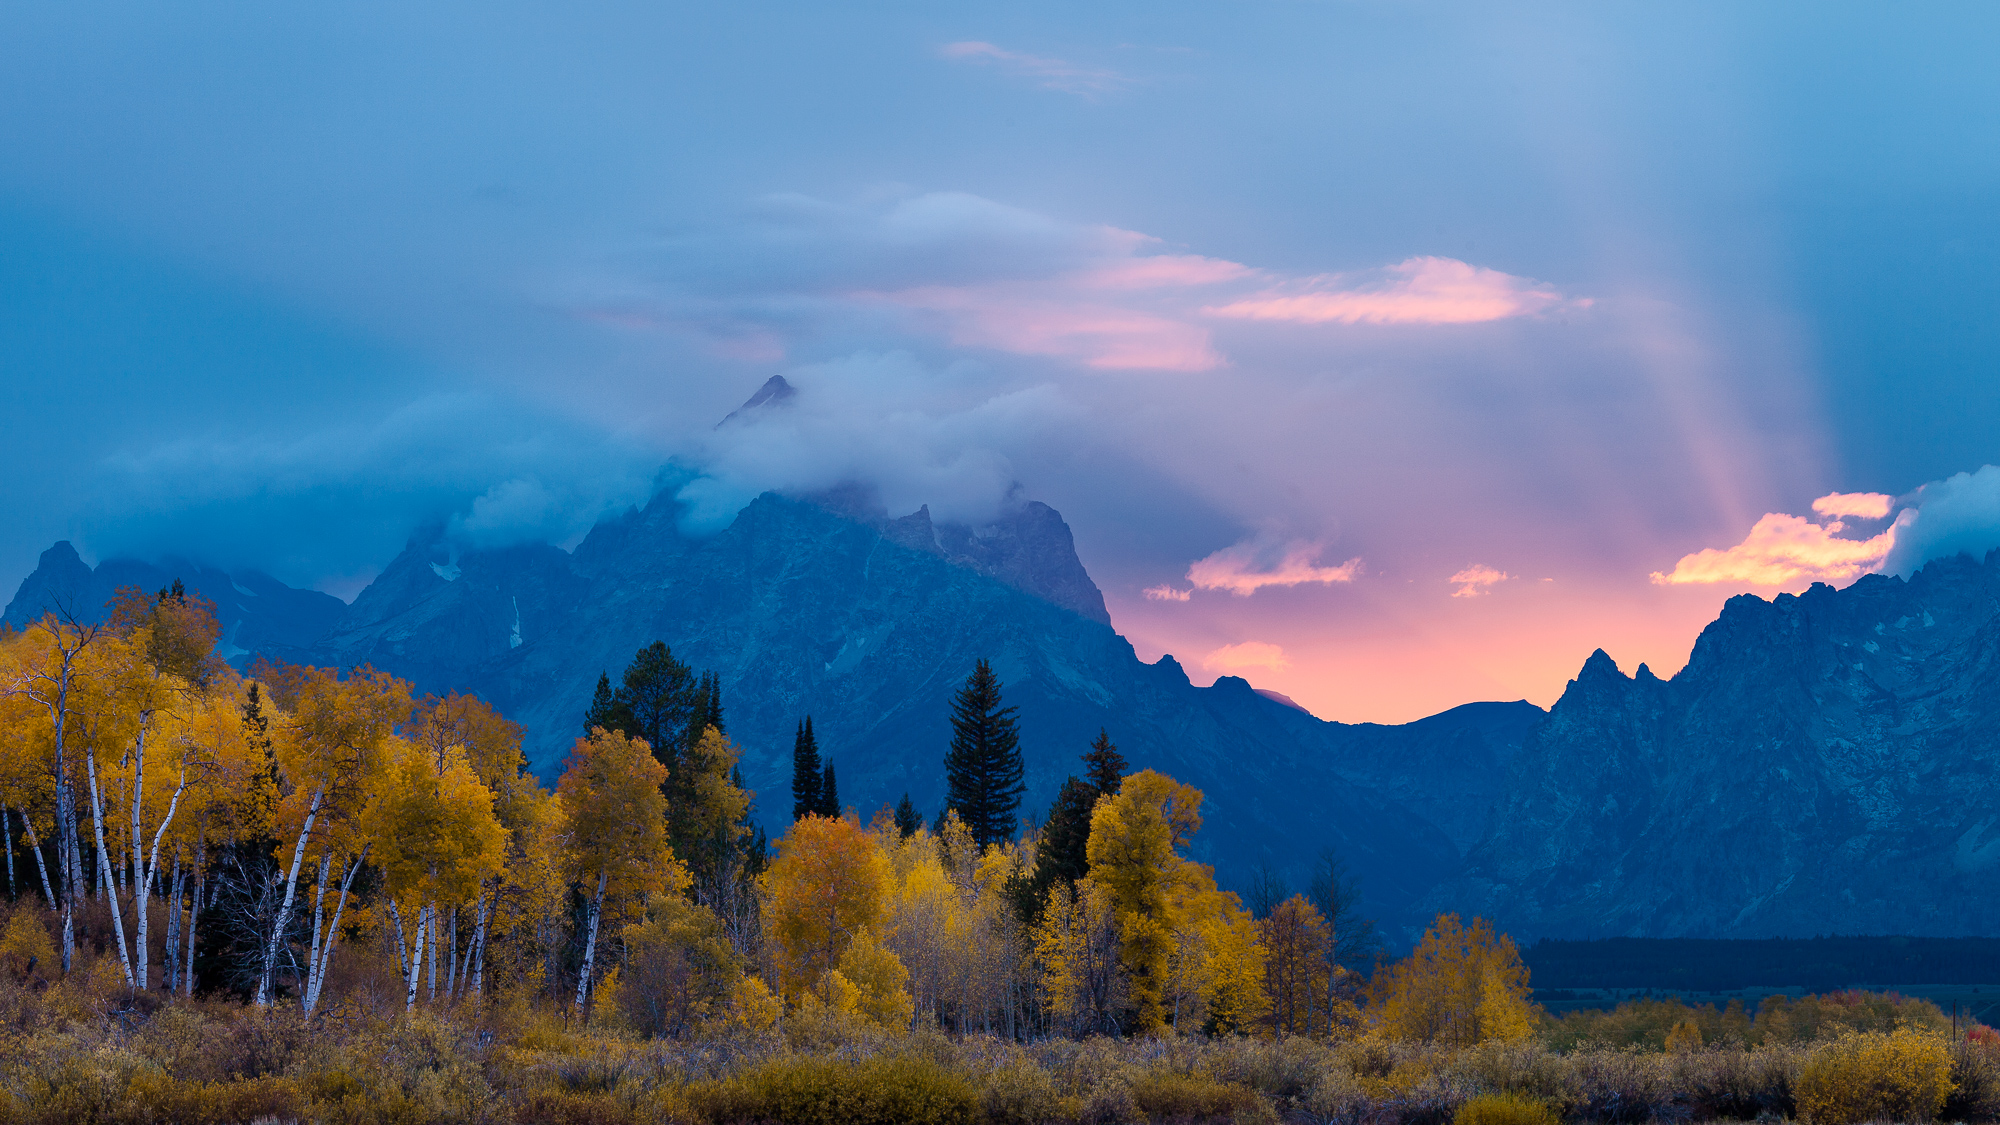
“We have just a trace of smoke in the sky, with clouds building above, that when the sun sets behind that notch,” he pointed to the right of the mountains, “we might just get God beams blasting up from behind.” Not sharing his optimism, I adjusted my composition anyway, including the notch he pointed to. Just in case. Eventually, the sun set behind the notch, just as he predicted, but no great light. “Just wait,” he called out to the group. “And be ready!” Moments later it all came together.
Dramatic light bursts from behind the Tetons at sunset. Thick smoke and haze from nearby forest fires create God beams as the sun drops behind the horizon, Grand Teton National Park
As he captured his images, Jack whooped into the air with joy. And he let out more than one of his trademark “Woof!” shouts. As amazed as I was about Jack’s ability to predict exactly what the light was going to do, I realized that what was happening here was not pure luck or voodoo magic. Certainly this ability to anticipate the light came from his years of experience working with 4×5 cameras. Working with large format film requires a far slower pace than what is possible with the run-and-gun potential of 35mm format. One of the requirements of this slow pace is the ability to anticipate and then patiently wait for the light to happen in front of you. Since he was a successful large format photographer for so many years, logic dictates that he must also be an expert light forecaster. It is a skill I greatly admire and will strive to hone in the future.
A few days later, Jack was giving one of his amazing photographic lectures. When a student asked how he “lucked” across a particular cactus with a perfect bloom, Jack said that this image was taken on something like his tenth trip to this spot in as many days, waiting for the bloom to become optimal. And he had previously visited this site close to a hundred times. In other words, Jack knew these cacti very well. After all, the best photographers are experts on their subjects.
After the workshop, I got a chance to put this lesson to practice. My friend Jerry Dodrill (and the workshop’s co-leader), suggested that although we had been to the same stand of aspen several times already (our group had revisited the first night’s location later in the week), he felt the location still had more to offer. “I’d love to see both the mountains and those trees side lit in the early morning,” he told me. And although this would make three visits in four days to the same spot, we awoke long before dawn and made the journey out to this secluded forest service road. I had my doubts as we watched the clouds in the pre-dawn light, streaking to the east, but I trusted Jerry’s experience, and knew that this was an opportunity to try out Jack’s suggestion that we revisit locations well known to us.
As I set up my composition and waited for the light, I became aware that each time I came here, I did know the area a little better, giving me a better idea of how to approach the subject. In fact, as I lined up my shot that morning, I felt I was in the best spot of all my previous attempts at this shot. Moving left and right, forward and backward, zooming in and out gave me infinite possibilities to compose this type of shot. It helped to understand the some of the subtleties of my subject and have a clear vision in my mind of exactly what I wanted to achieve.
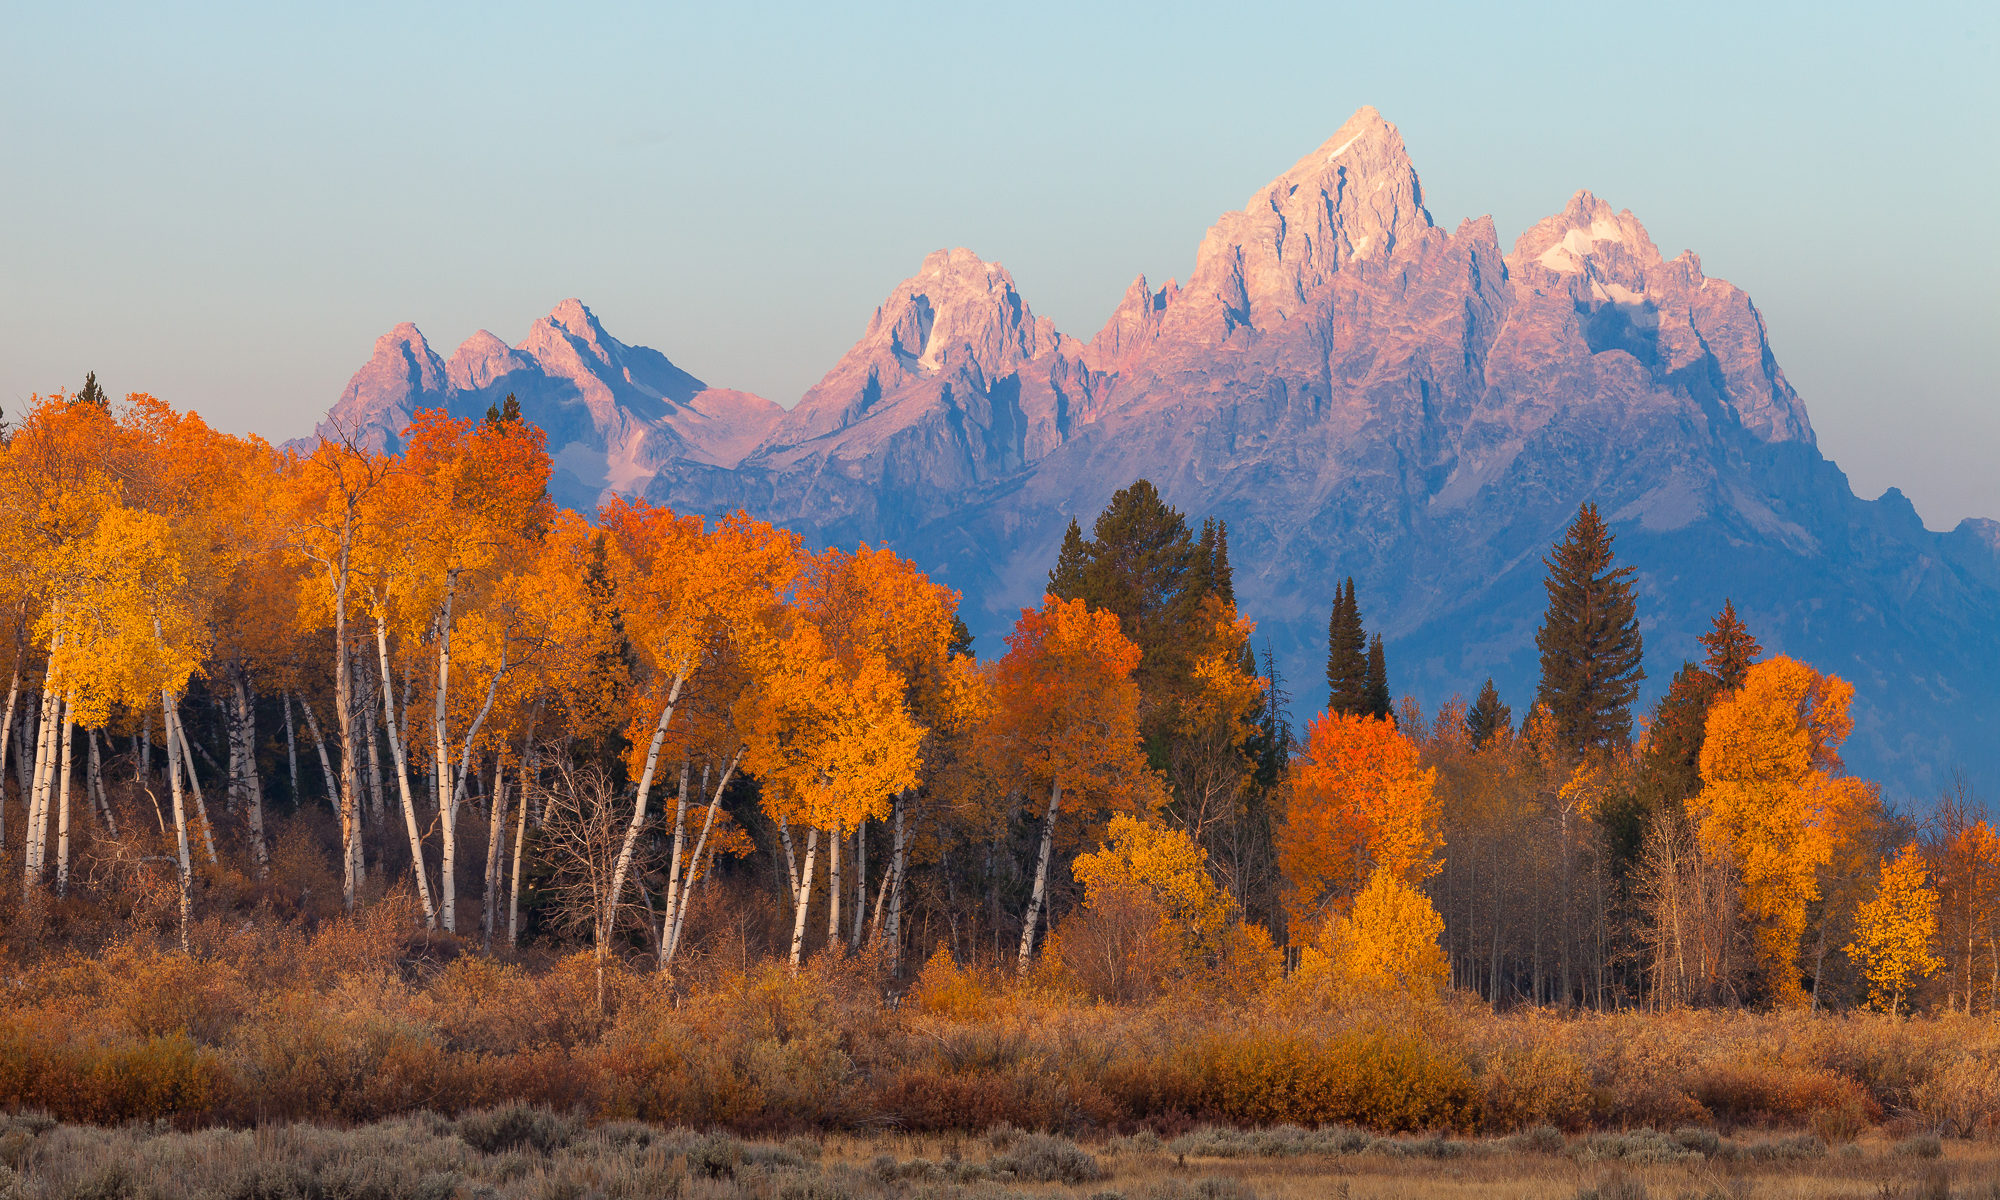
The sun just lights the top of the Tetons as it rises behind a grove of aspen in their fall colors, Grand Teton National Park
As the top of the mountain began its alpenglow transition to day, the scene in front of me was beautiful. But I heard Jack’s voice in my mind – “Wait for it!” All at once the morning sun brushed the aspen with luminous side light. I clicked the shutter, appreciative for these lessons from Jack.
As I said in an earlier post, the trees were the real stars of the show on my recent trip to Grand Teton National Park. Fall colors were bursting from every leaf, and the mixture of coniferous and deciduous gave the changing leaves a nice backdrop from which to pop.
Composing coherent tree photos is not easy. It is the epitome of finding patterns in chaos. In some cases I was able to juxtapose the shapes and colors of tall, white, narrow trunks with the round colorful leaf canopy as seen in the photo below. Given that I wanted to stack the trunks against one another to create a continuous pattern of lines, I shot this one from a distance with a telephoto lens.
A stand of trees in full fall color, Grand Teton National Park
There are other occasions where I want to be closer to the trees, and seek patterns just in the trunks. In the following photo I was inside an aspen forest, and really liked the character of the boulder that these trees were growing around. But the real thrust of this photo is again a linear pattern created by the trunks.
This photo took quite a while to compose, as I wanted to avoid conjoining trunks in order to maintain that clean linear pattern throughout the photo. As you can see in the background, the distant trunks were carefully placed in between the tree in the foreground, so as to avoid any overlapping.
Fall colors dot a grove of aspen, Grand Teton National Park
Weather played a part in my tree photographs, as it did with the grand landscapes as well. After a storm passed through, I had a nice rainbow to play with for over an hour. Moving up and down a riverbed, I found this stand of trees that I could compose the rainbow behind. I was careful to run the rainbow up into the right corner of the photo, to create a strong corner.
A rainbow forms in the midst of a moving storm, Grand Teton National Park
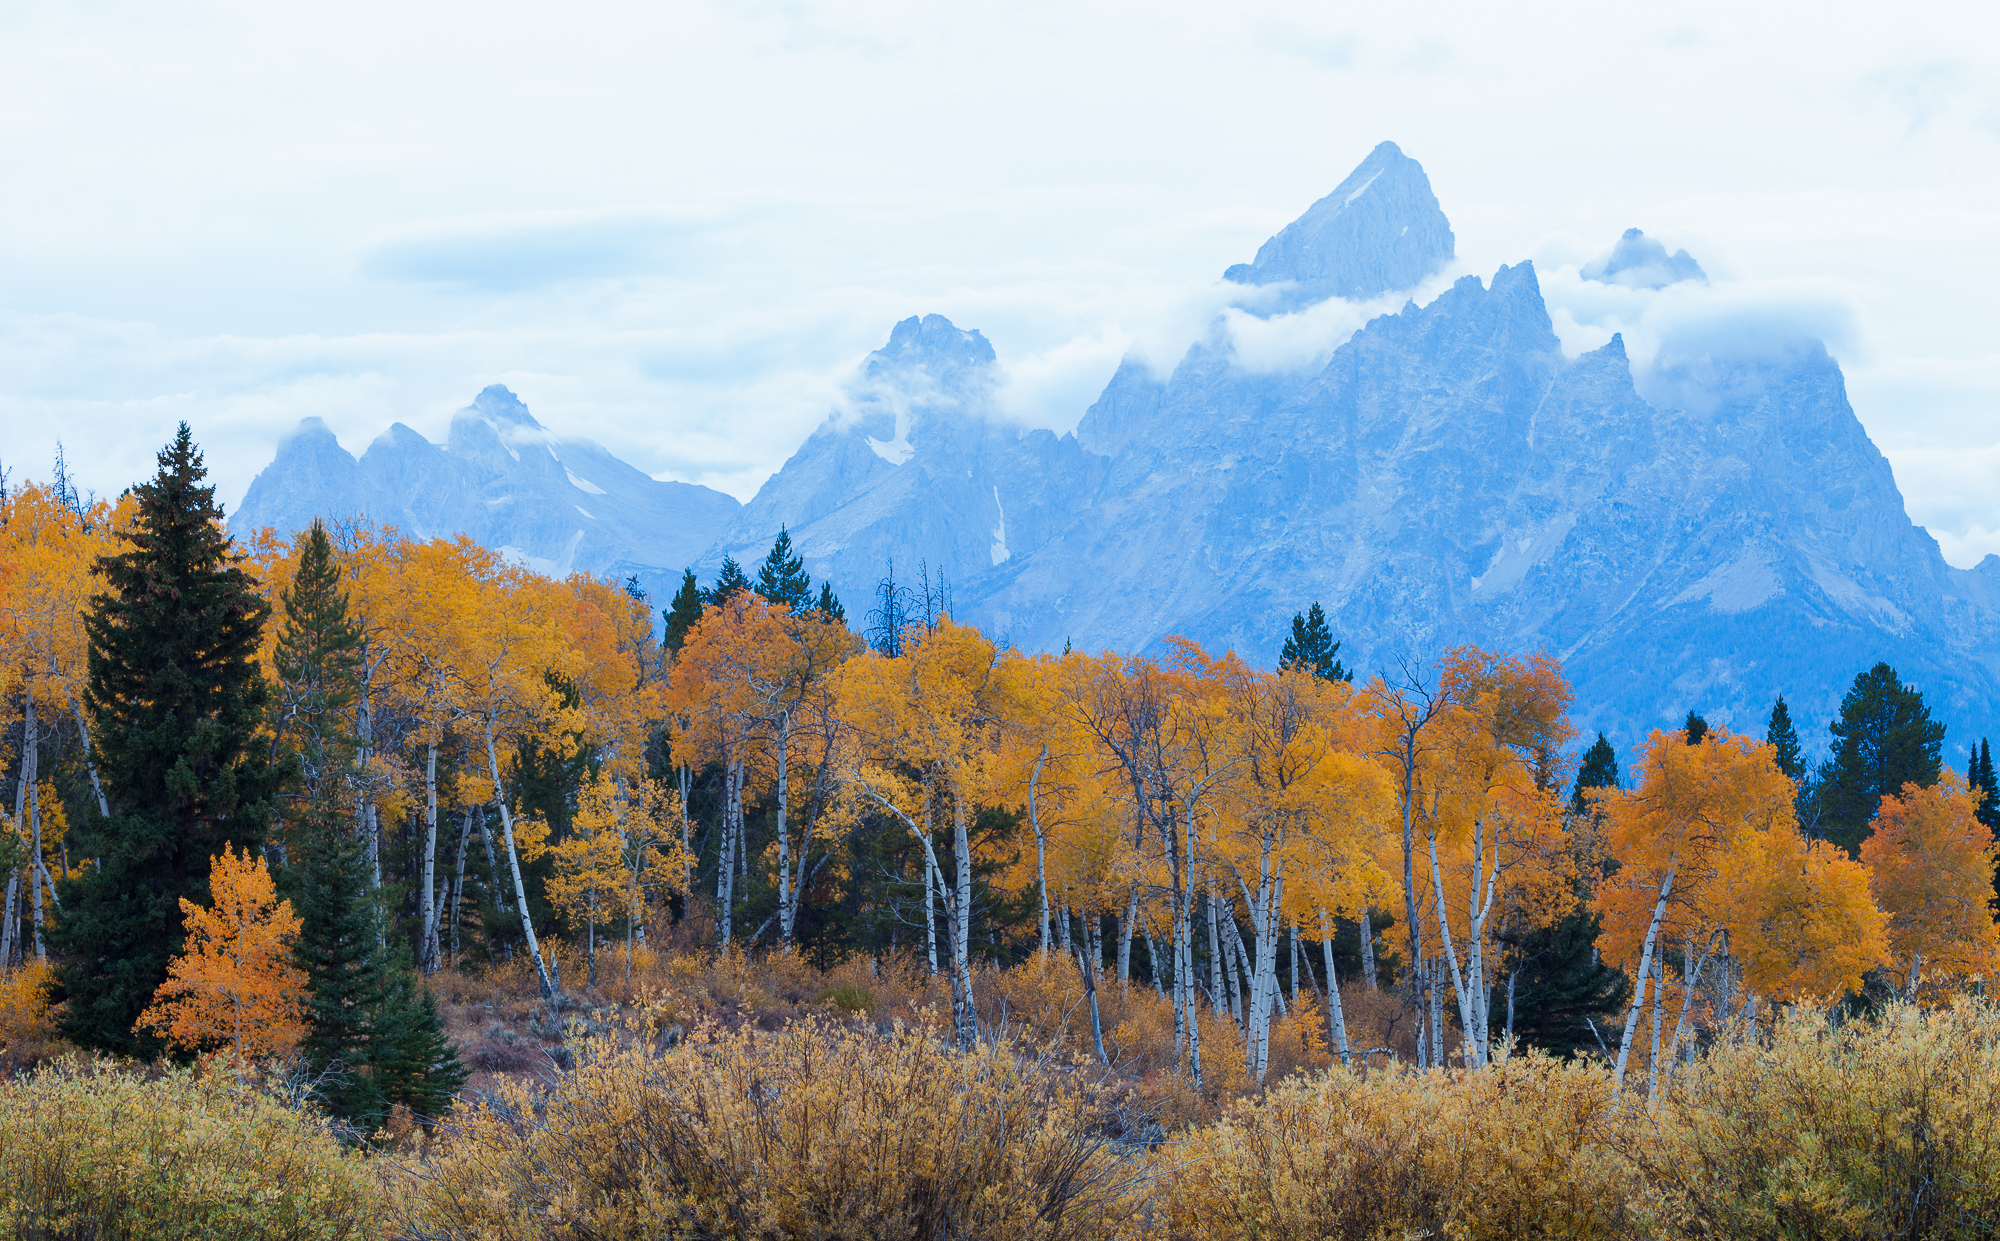
Of course there were those foggy mornings as well. When I took this photo, I was up above the Snake River, and watched for a while as the changing fog moved like a living thing among the trees and distant hills. Landscape features were hidden, revealed, and back again, as if controlled by a grand magician working his craft.
Bright fall colors show through the dense fog that shrouds the landscape, Grand Teton National Park
I’ll leave you with one of my favorites – Aspen Embrace. There were many things I loved about these two photogenic trees. Not only does the aspen look like it is hugging the lone fir, welcoming it into its grove, but texturally, I love the stark, solid fir needles against the ethereal aspen leaves. Here the composition was straight forward – I only cropped it to a more traditional 4×5 aspect ratio as I felt the subjects’ spacing worked better with that framing. (Careful observers will note that this fir tree also makes an appearance in the first photo above.)
A fiery aspen wraps its branches around a lonely fir, Grand Teton National Park
Even though the nearby forest fires cause some smoke issues on the first few days of my trip, the timing of the fall colors couldn’t have been better. I’d love to spend more time in this part of the country next fall – there were definitely a lot of great opportunities there.


")
")
")
")
")
")