Fall Birds Along The San Francisco Bay

A bewick's wren perches on a narrow branch, Redwood Shores, CA.

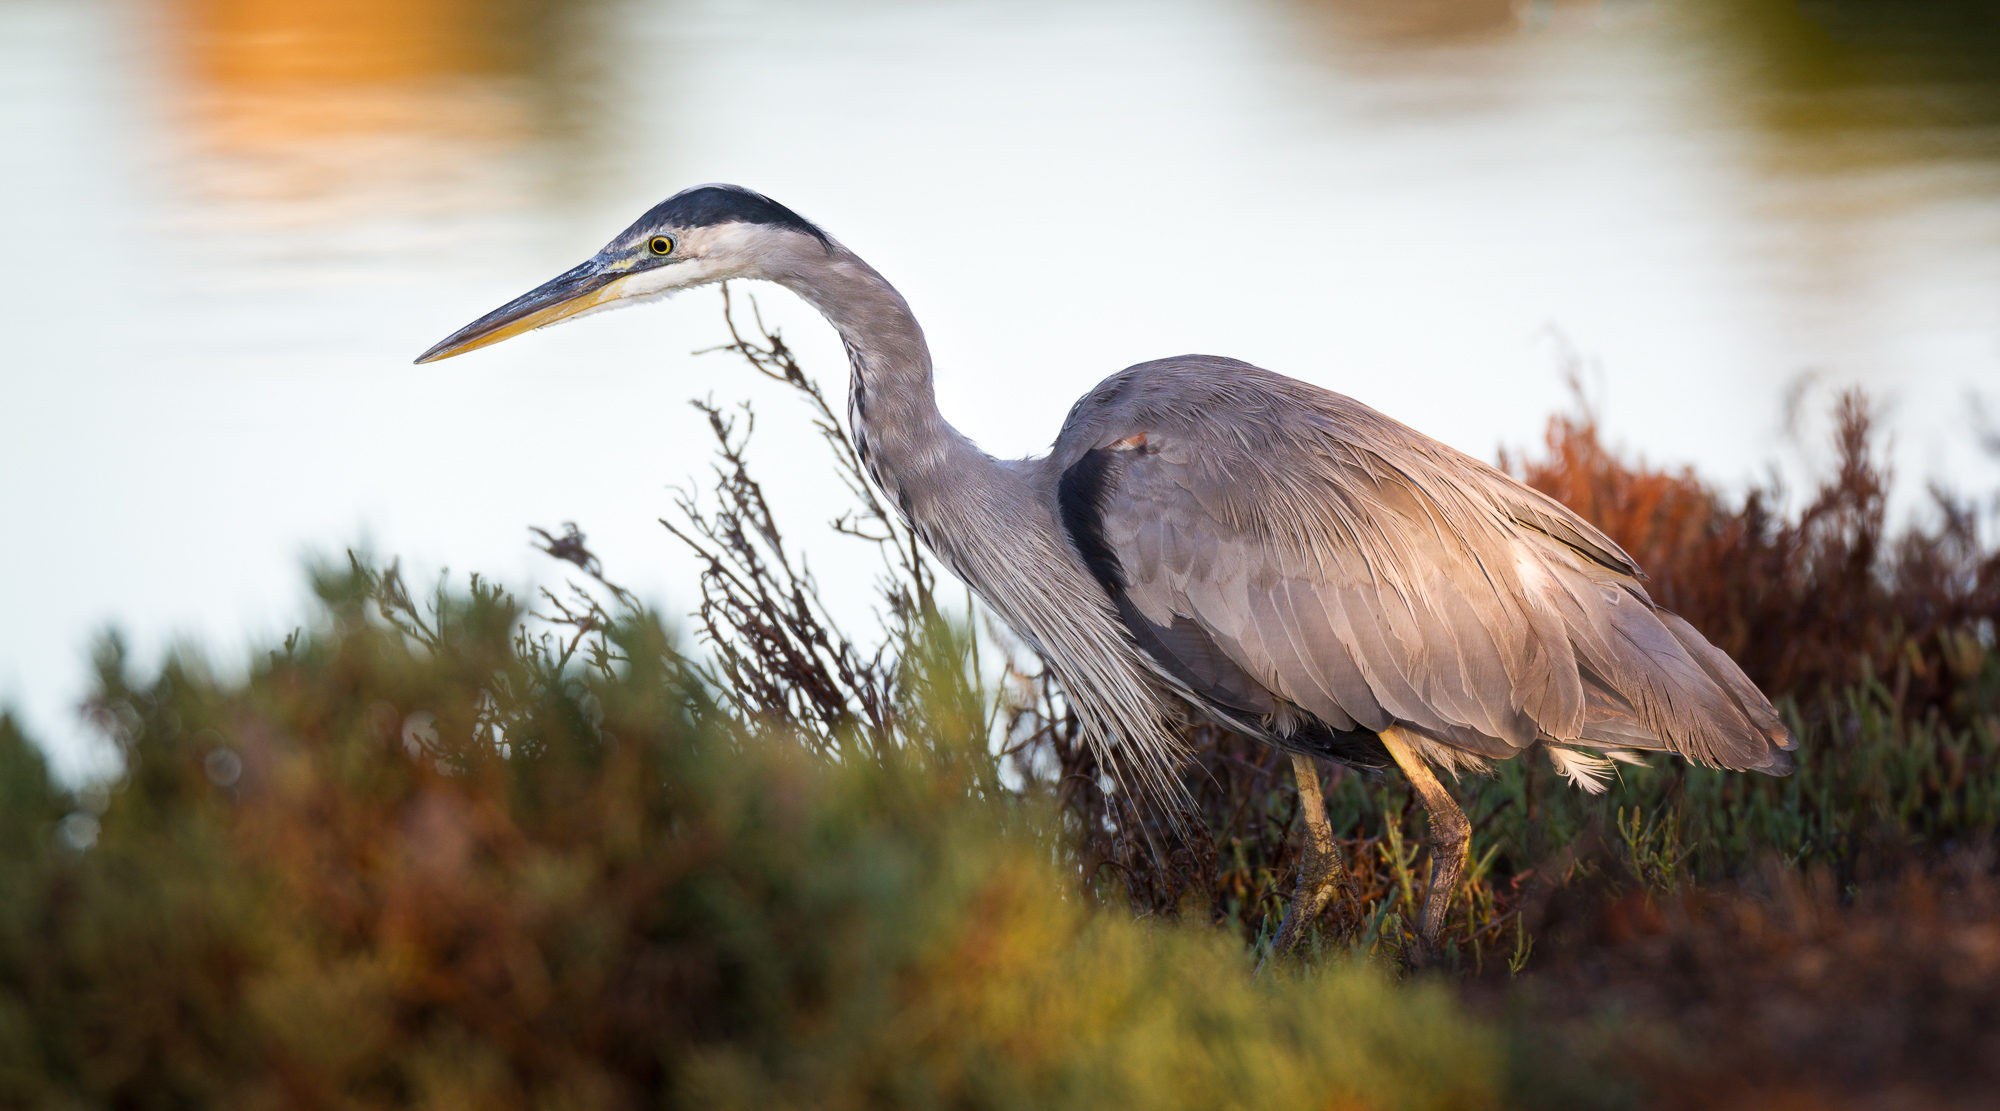
Winter is coming to the SF Bay Area, and so are the wonderful variety of wintering birds. I set out on a recent afternoon to see what the winds have brought in, and to capture some of these winged denizens in beautiful golden light. Looking back through the day’s photos though, I realized that most of what I saw were year-round birds. Oh well, even if I didn’t see a typical winter’s variety, the winter months always tend to be a bit more “birdy” around here.

A european starling perches on the top of an ornamental bush, Redwood Shores, CA.

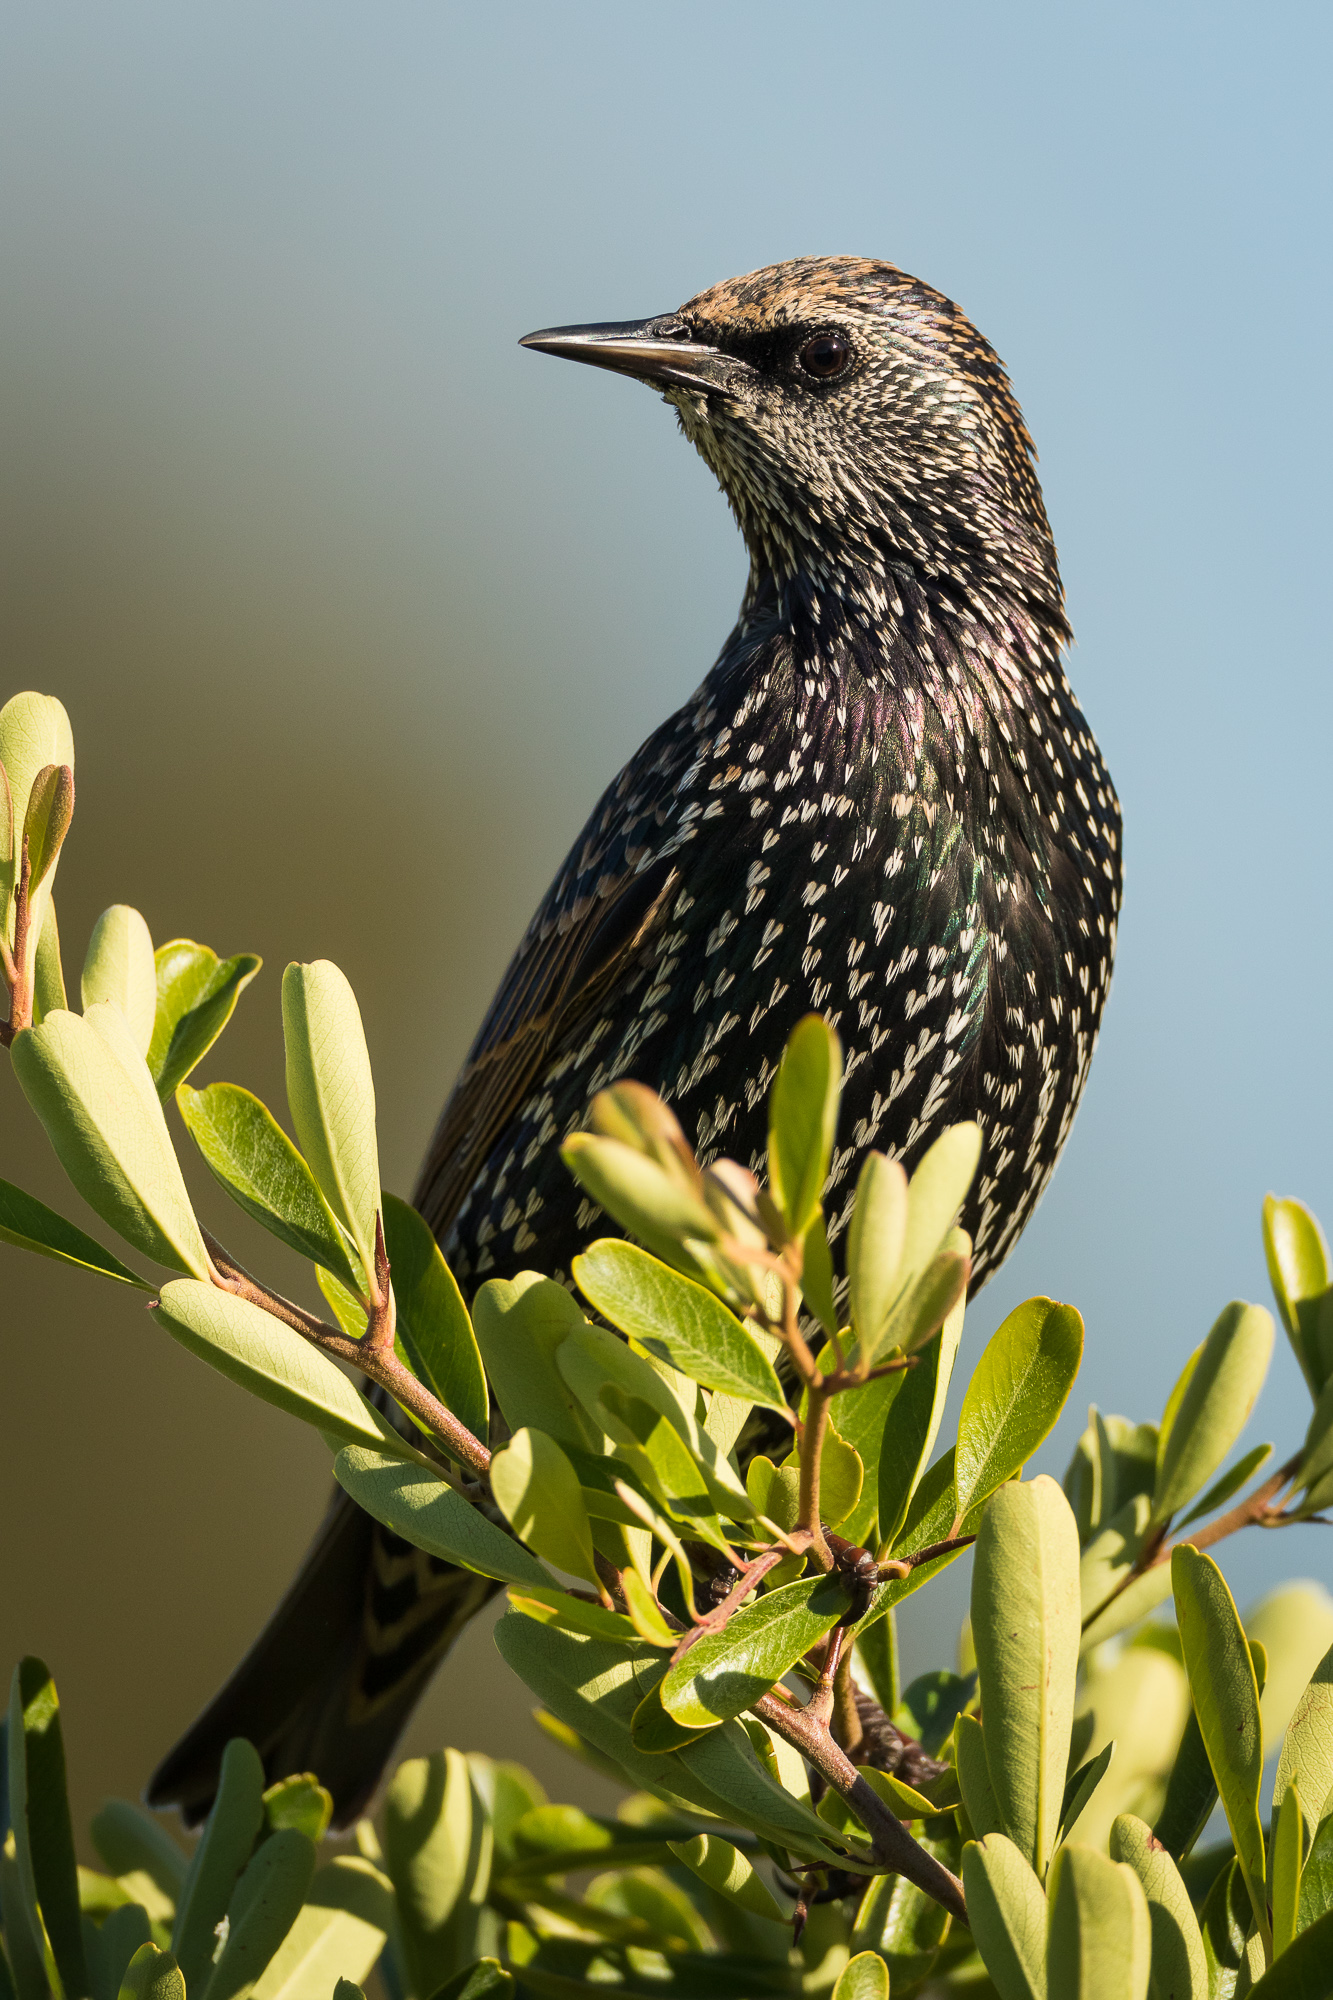
First up on the list was a young European starling. Yes, I know, some consider this more or less a garbage bird, but if you see a good specimen in nice light, it can make a rather pleasent photo.

A double-crested cormorant swims through still water, Redwood Shores, CA.

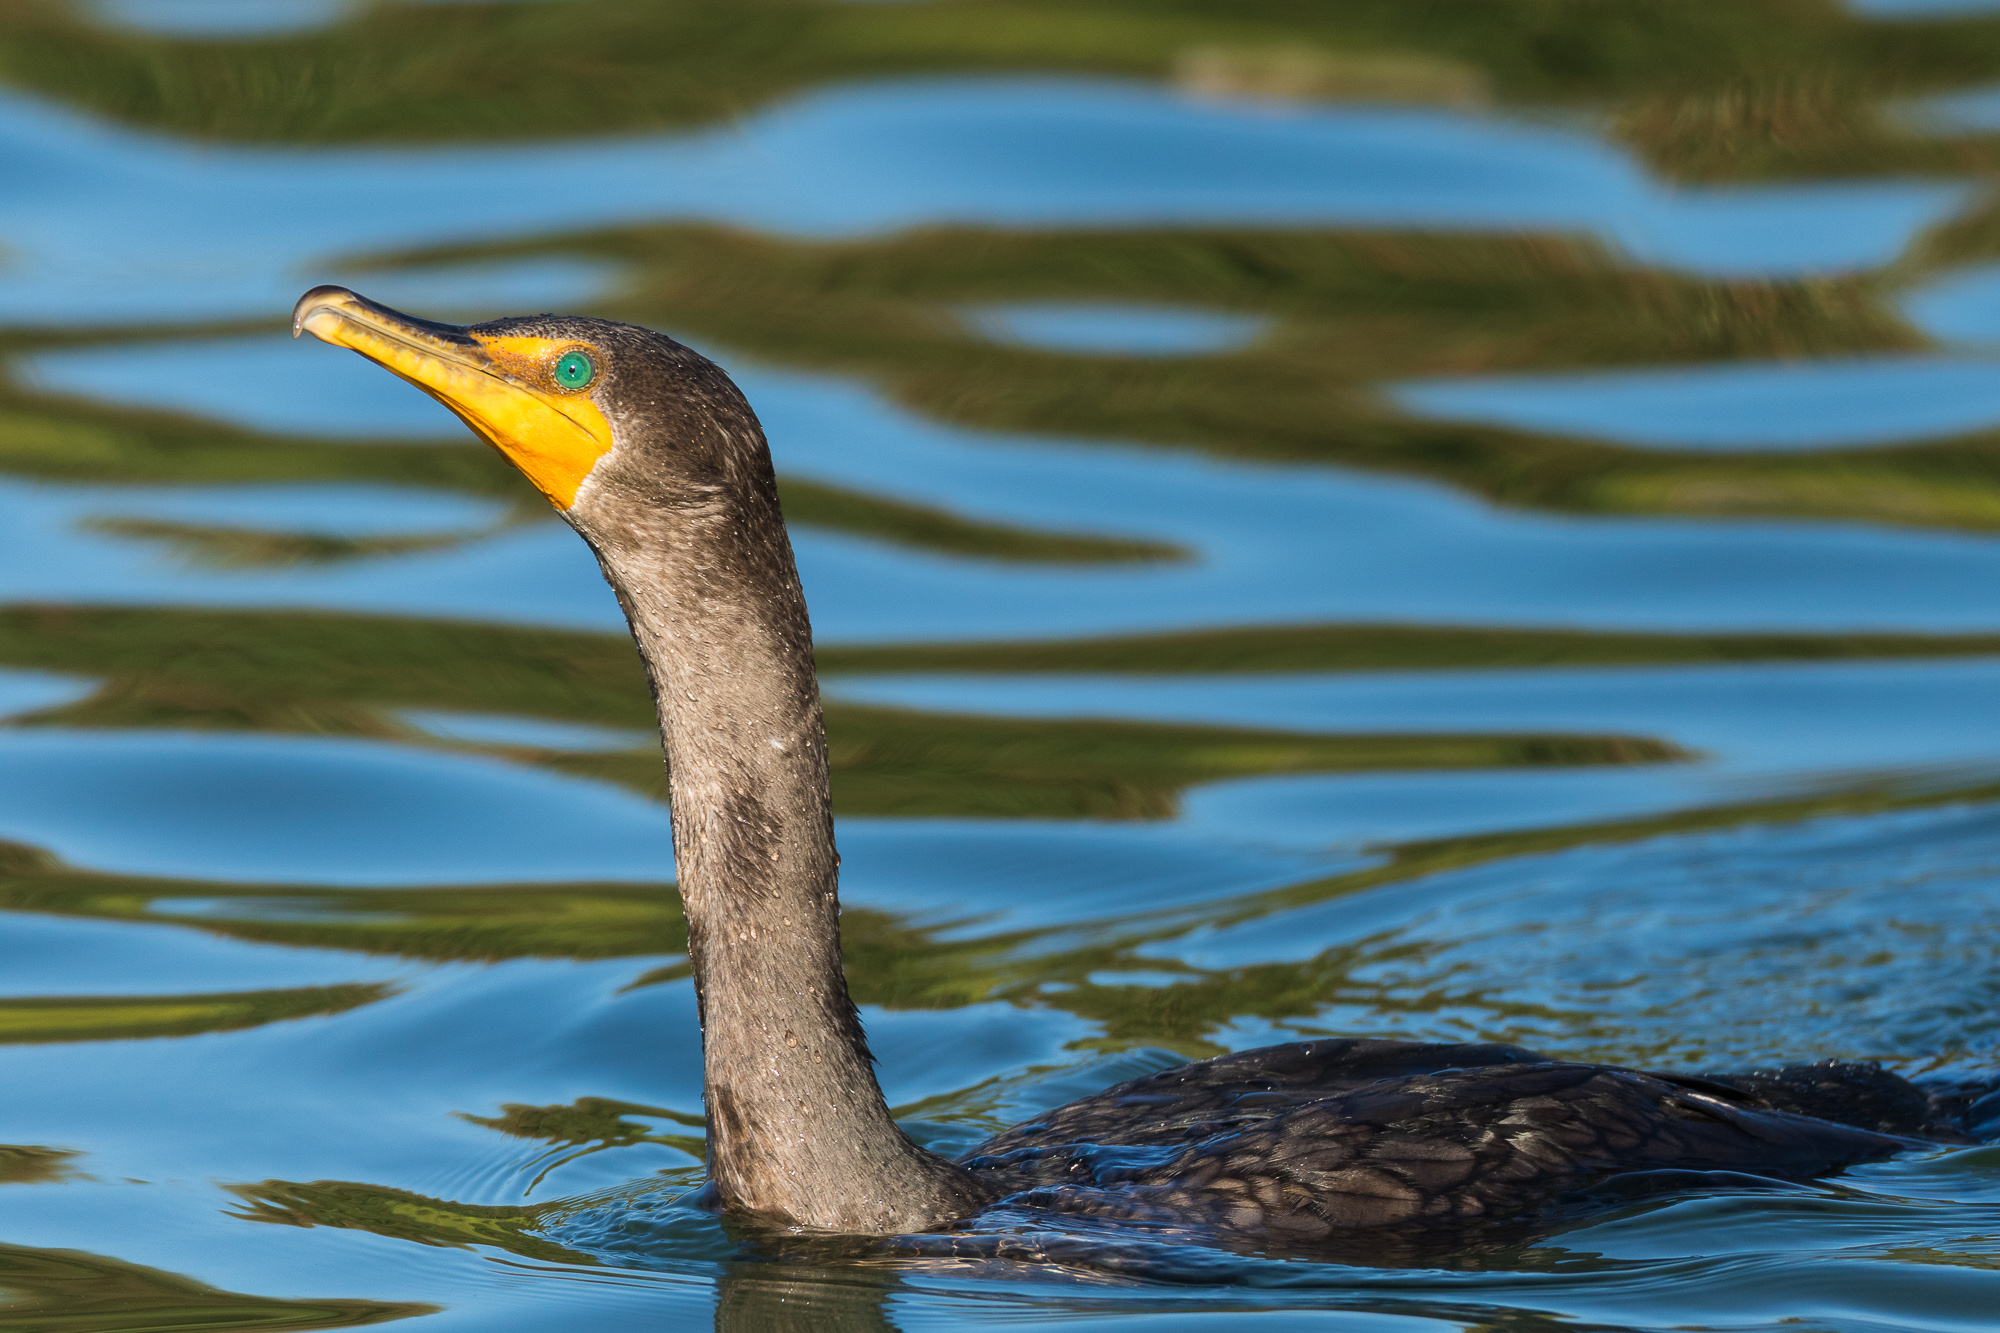
The next bird I spent time with is a very popular one along the bay – the double-crested cormorant. I got some nice close-up shots has this one swam back and forth, diving for food.

A double-crested cormorant flies low over the water, Redwood Shores, CA.

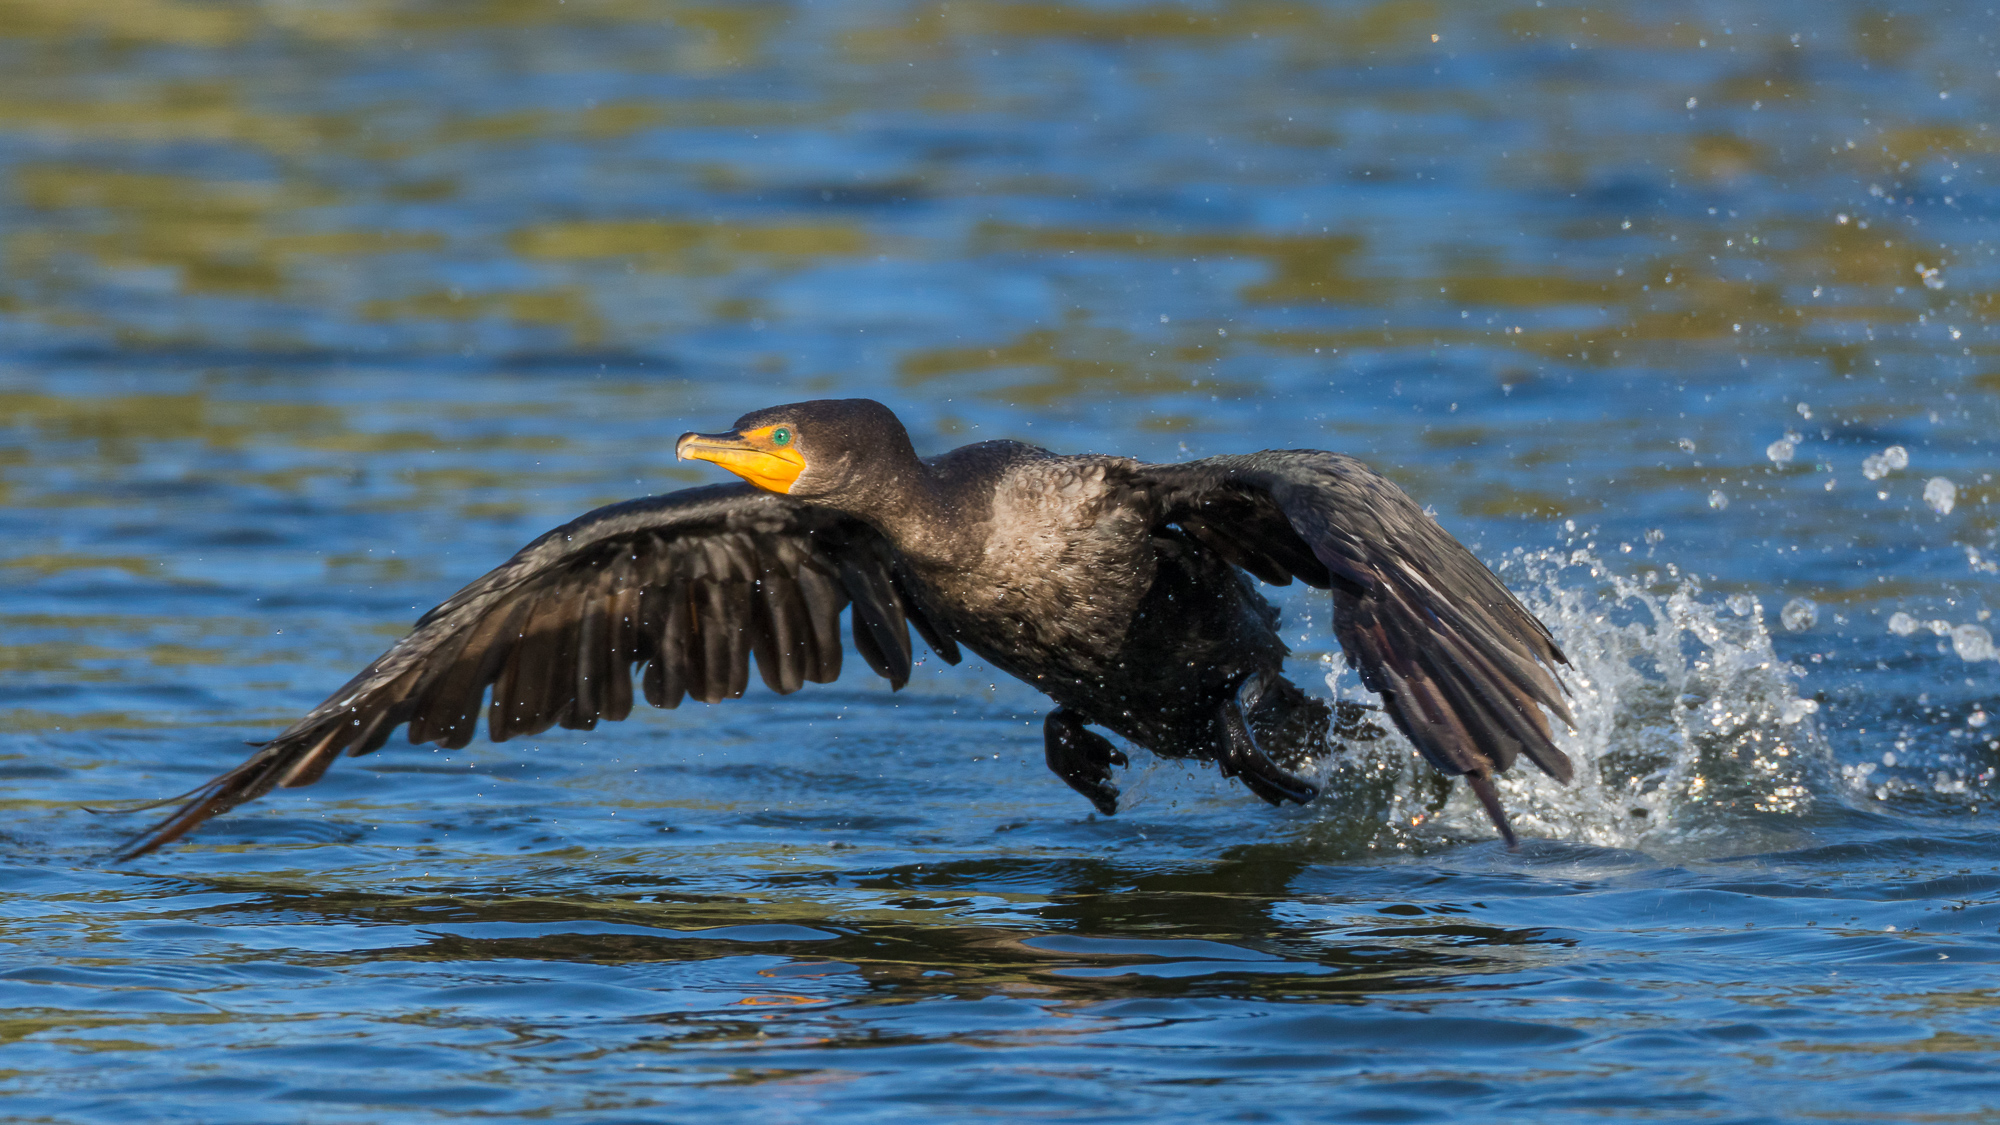
My patience with this commoner was rewarded with some decent take-off and flight shots. Birds in flight are more than a little difficult to shoot with my 800mm beast. So I always give a thank you to those who take off slowly, giving my ample time to track them with autofocus.

A green heron stands in iceplant next to a water channel, Redwood Shores, CA.

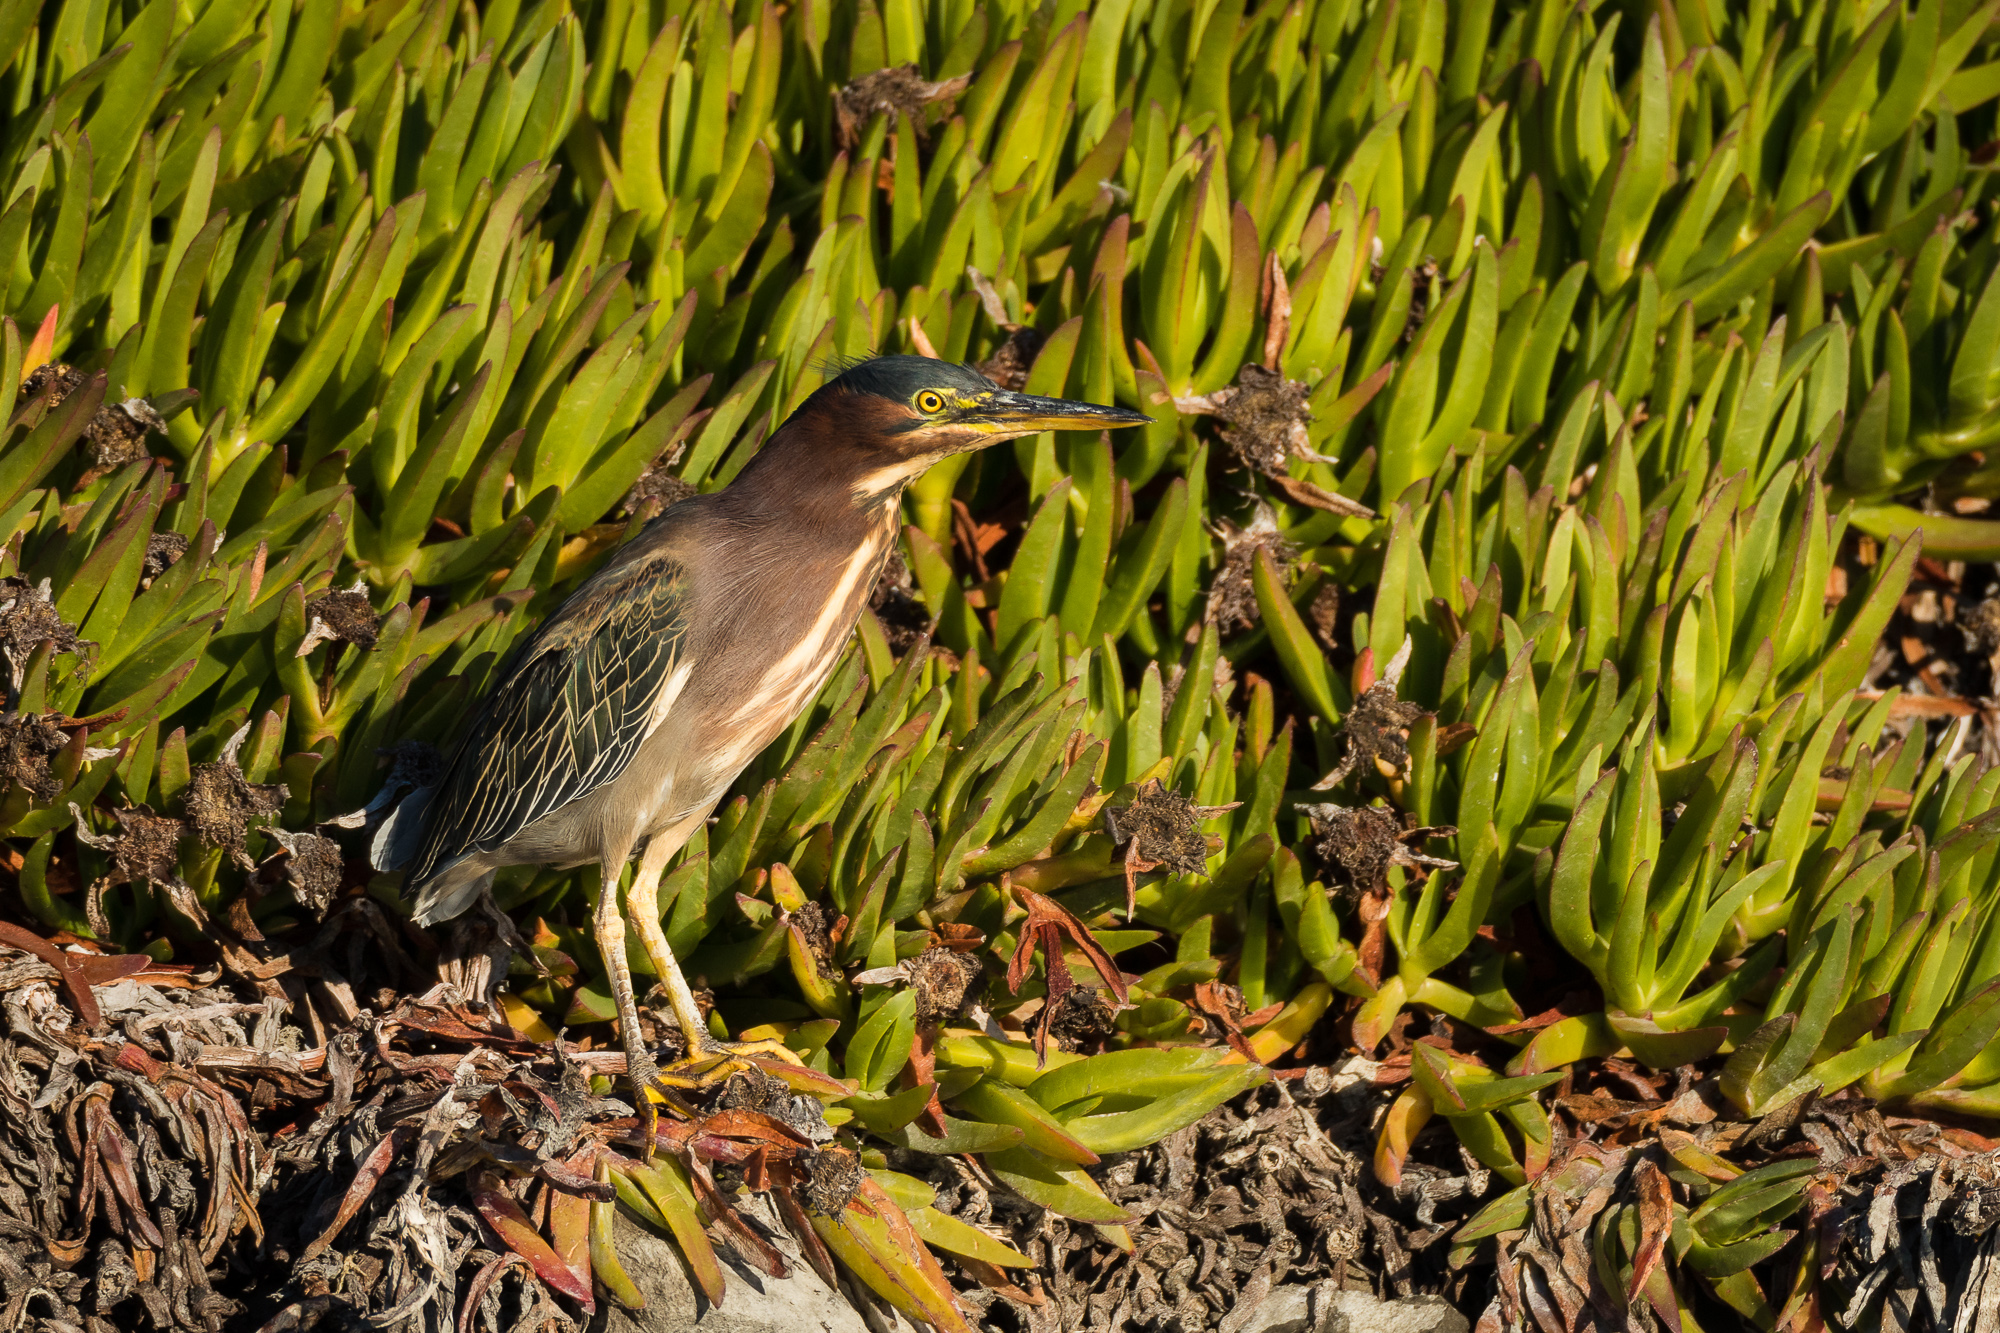
Green herons are pretty common around my house, but are usually seen only by the most avid birders. You wouldn’t think it from the photograph, but these guys can really blend into the rocks and vegetation surrounding the water channels. If they aren’t moving, they are very hard to spot, even when scanning a shoreline with a scope. Therefore, it is always a treat when I do see one and can get close enough for decent photographs.

A sooty fox sparrow perches on a small branch, Redwood Shores, CA.

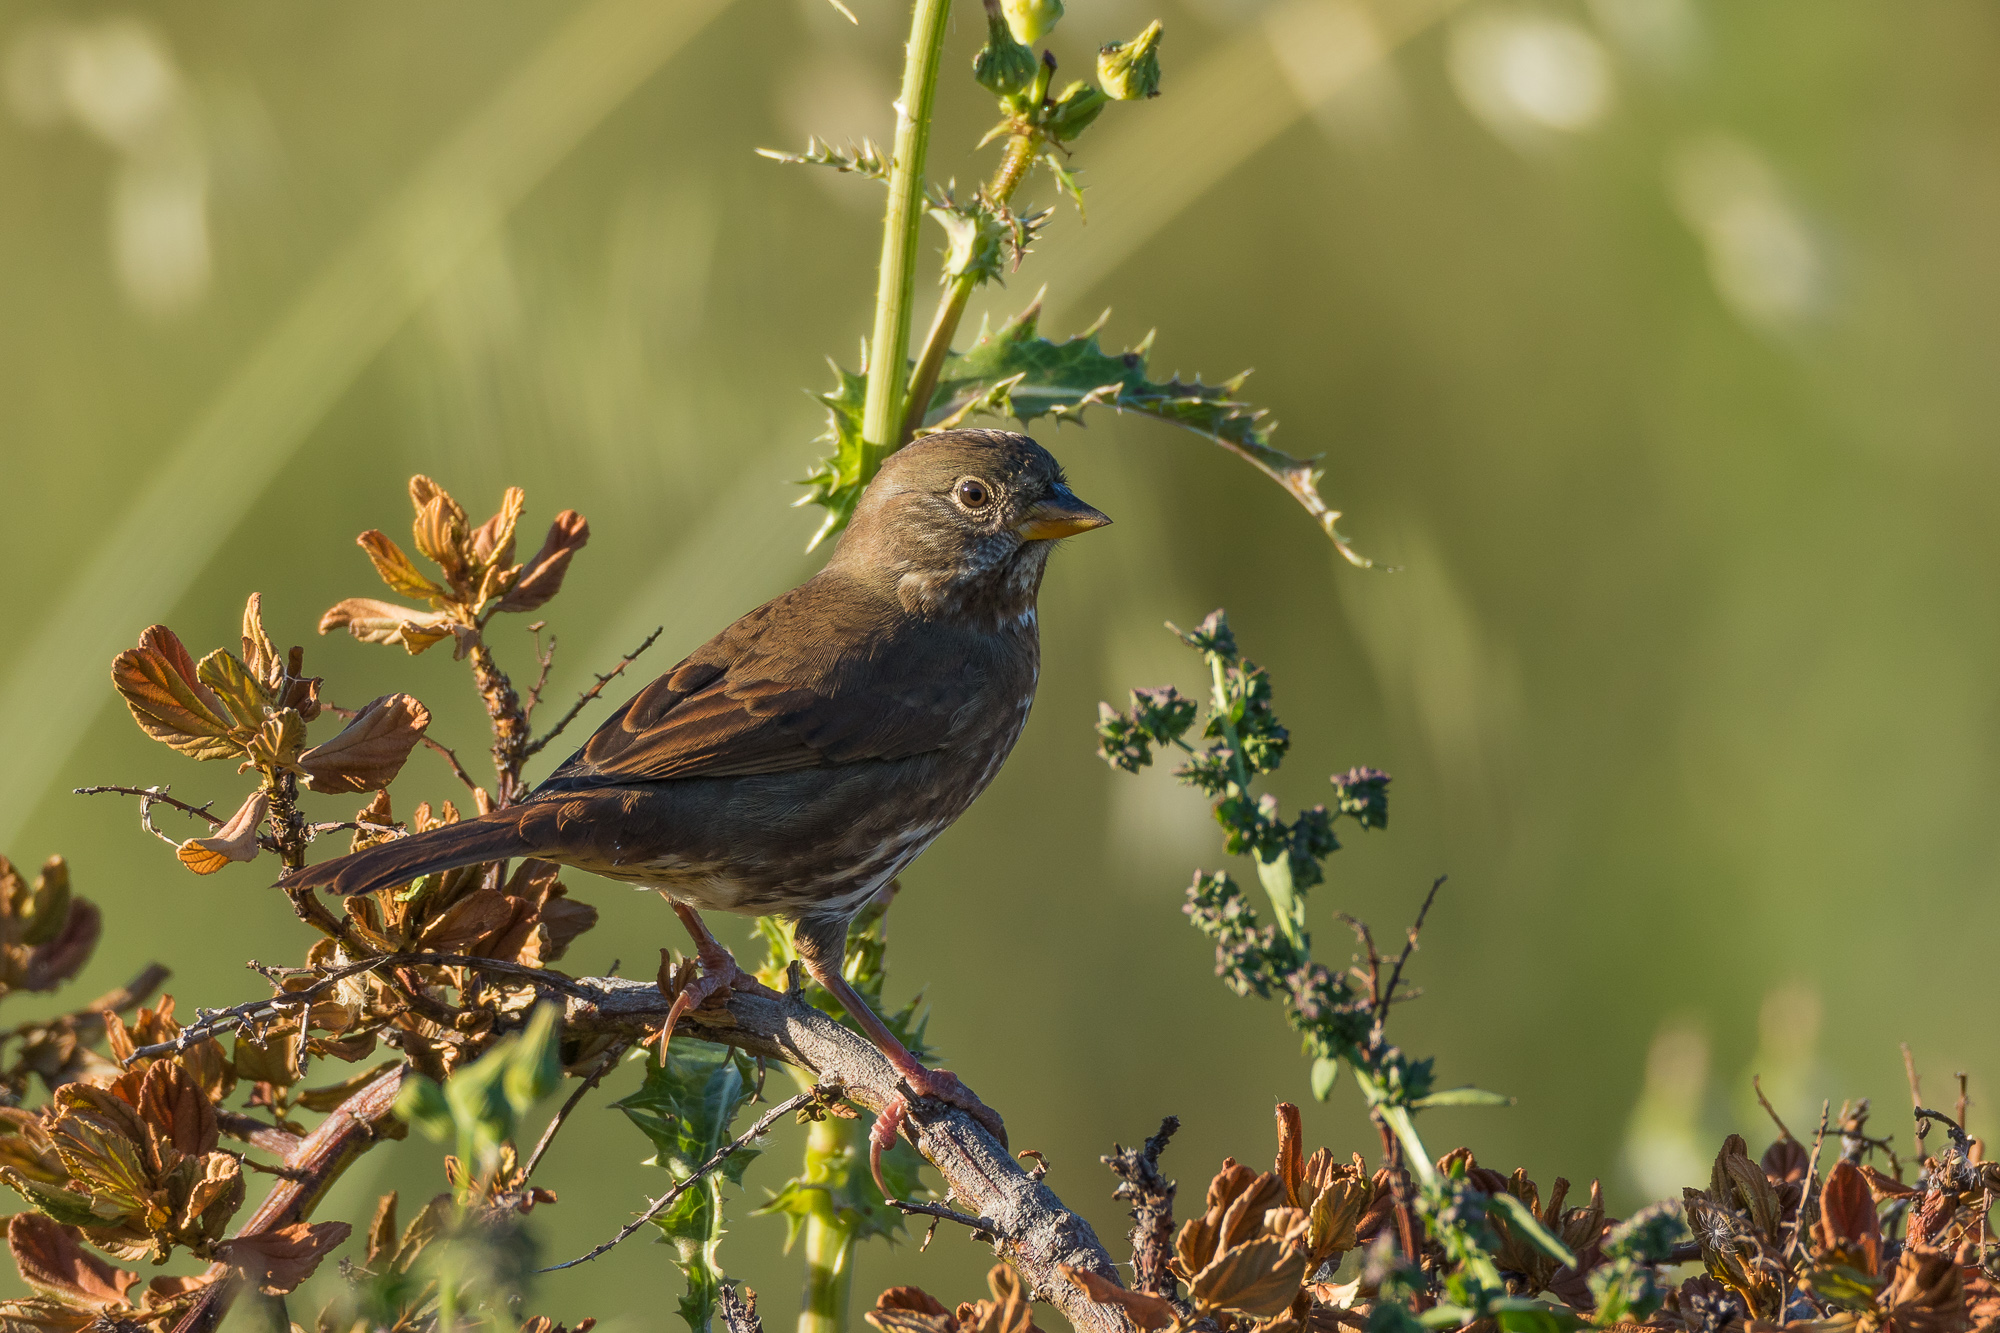
Fox sparrows have a wide range, which includes both breeding and wintering in the Bay Area. However, I’ve seen them more commonly in the winter. These guys are definitely more rare than some of the most common sparrows, and I was happy to catch one on camera as it stopped for a few quick seconds on a branch.

A bewick's wren perches on a narrow branch, Redwood Shores, CA.
A bewick’s wren perches on a narrow branch, Redwood Shores, CA.

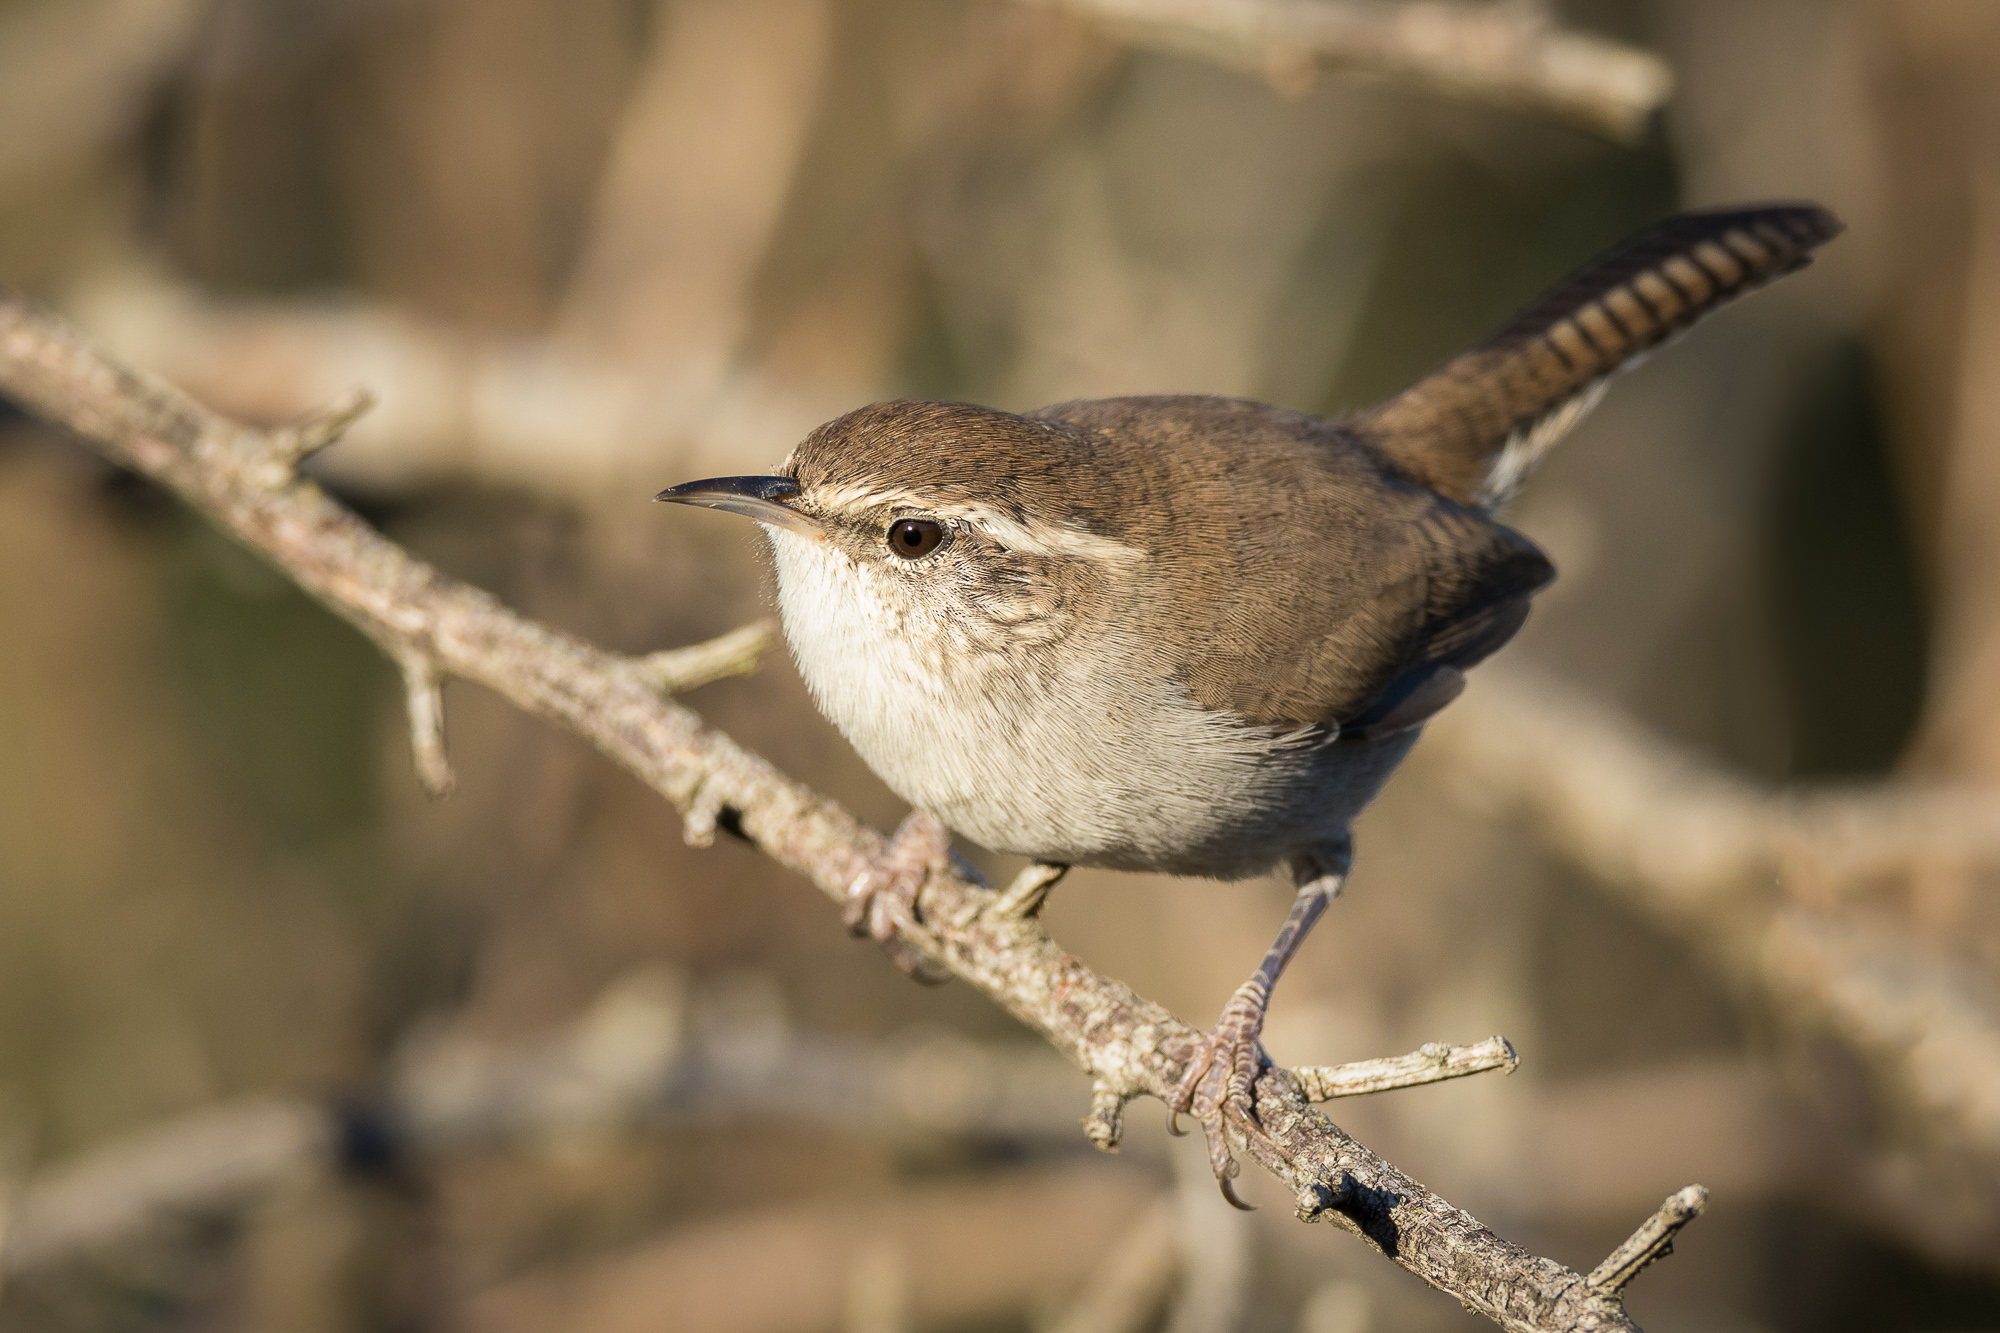
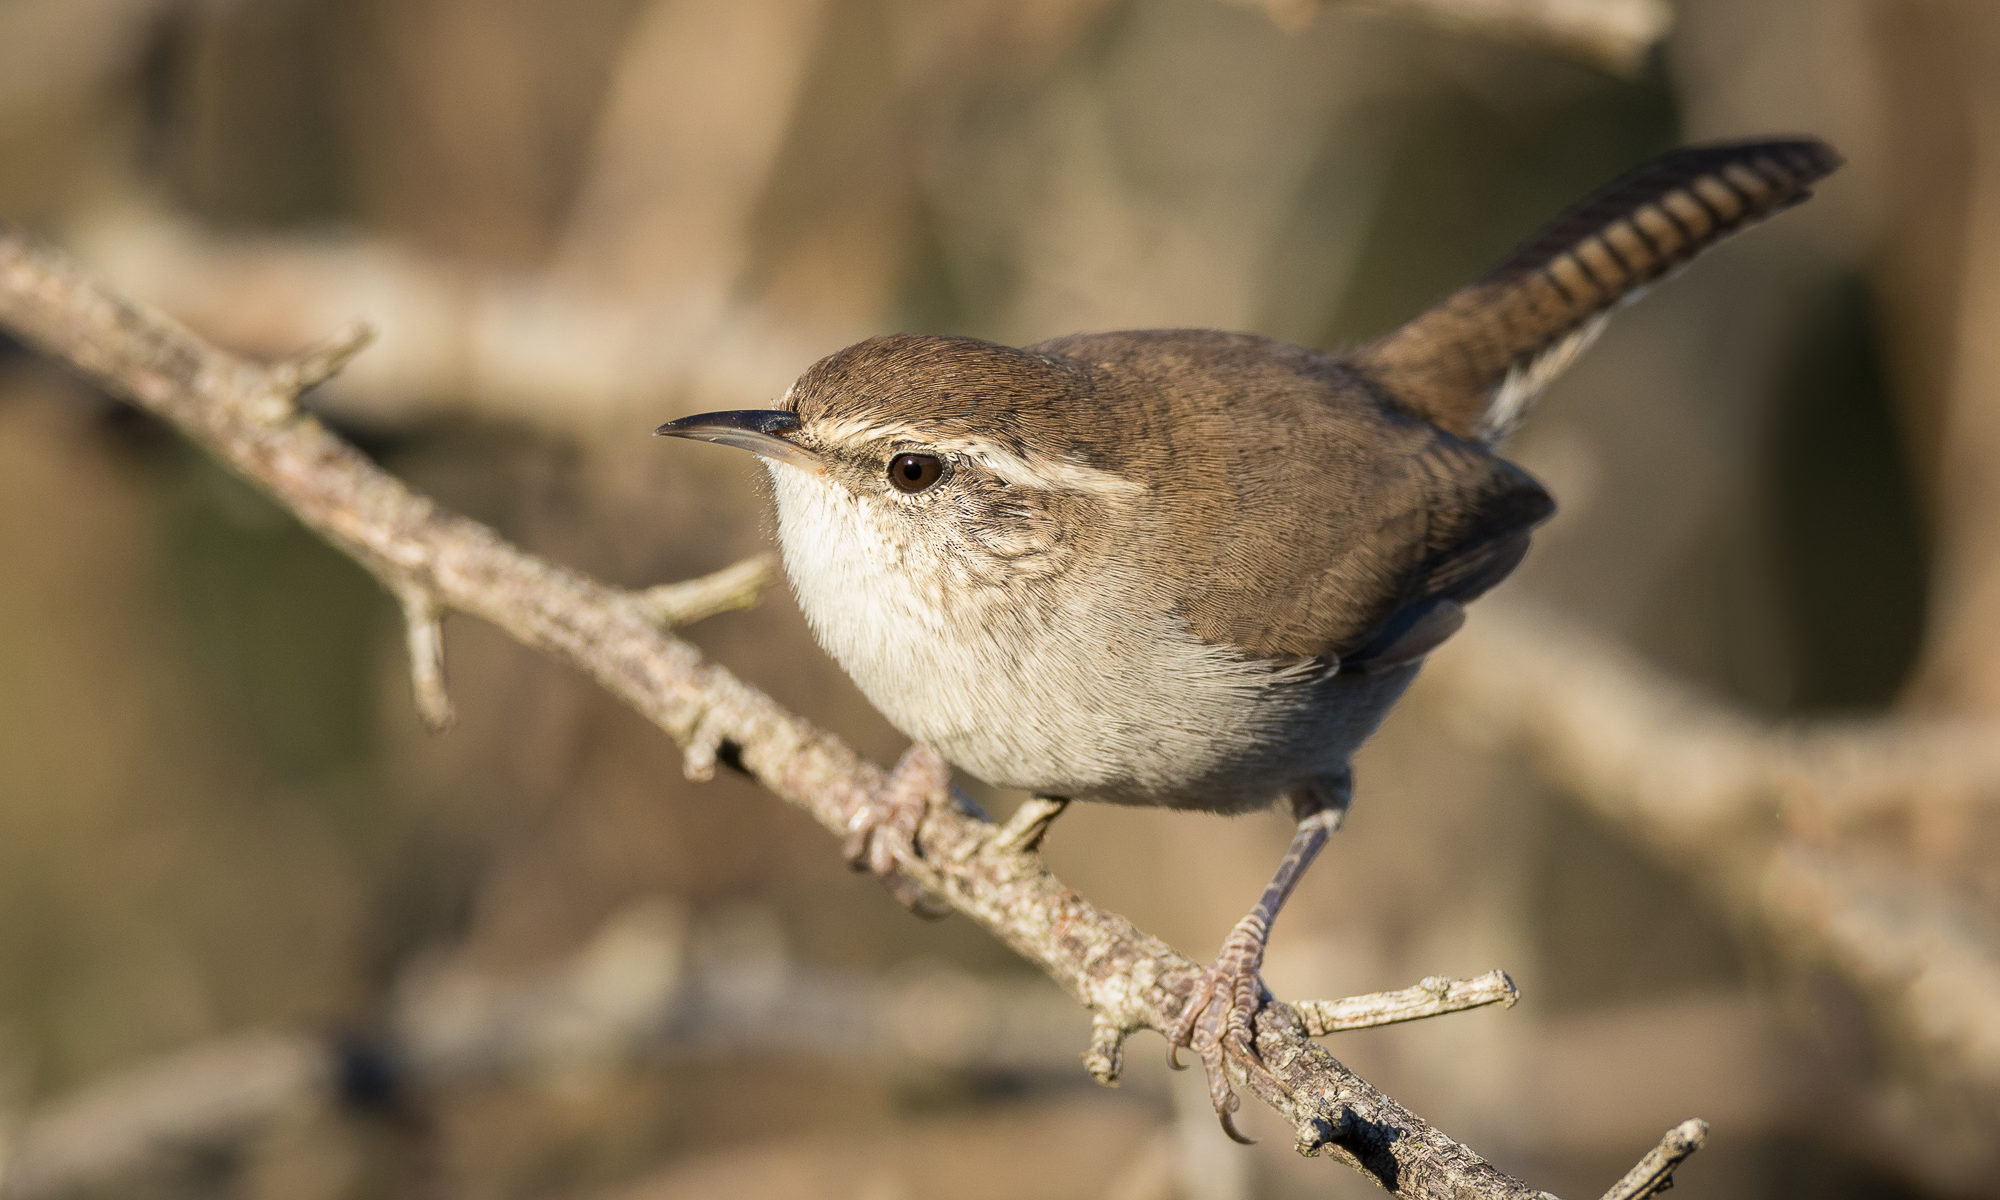
I’m always happy to see these wrens flitting about. They are uncommon enough to warrant excitement, and it was nice to capture one in a natural environment. I have a family of Bewick’s wrens that visit my front yard, but photographs of bird feeders are relegated to my stock collection.

A white-crowned sparrow perches on the top of a bush, Redwood Shores, CA.

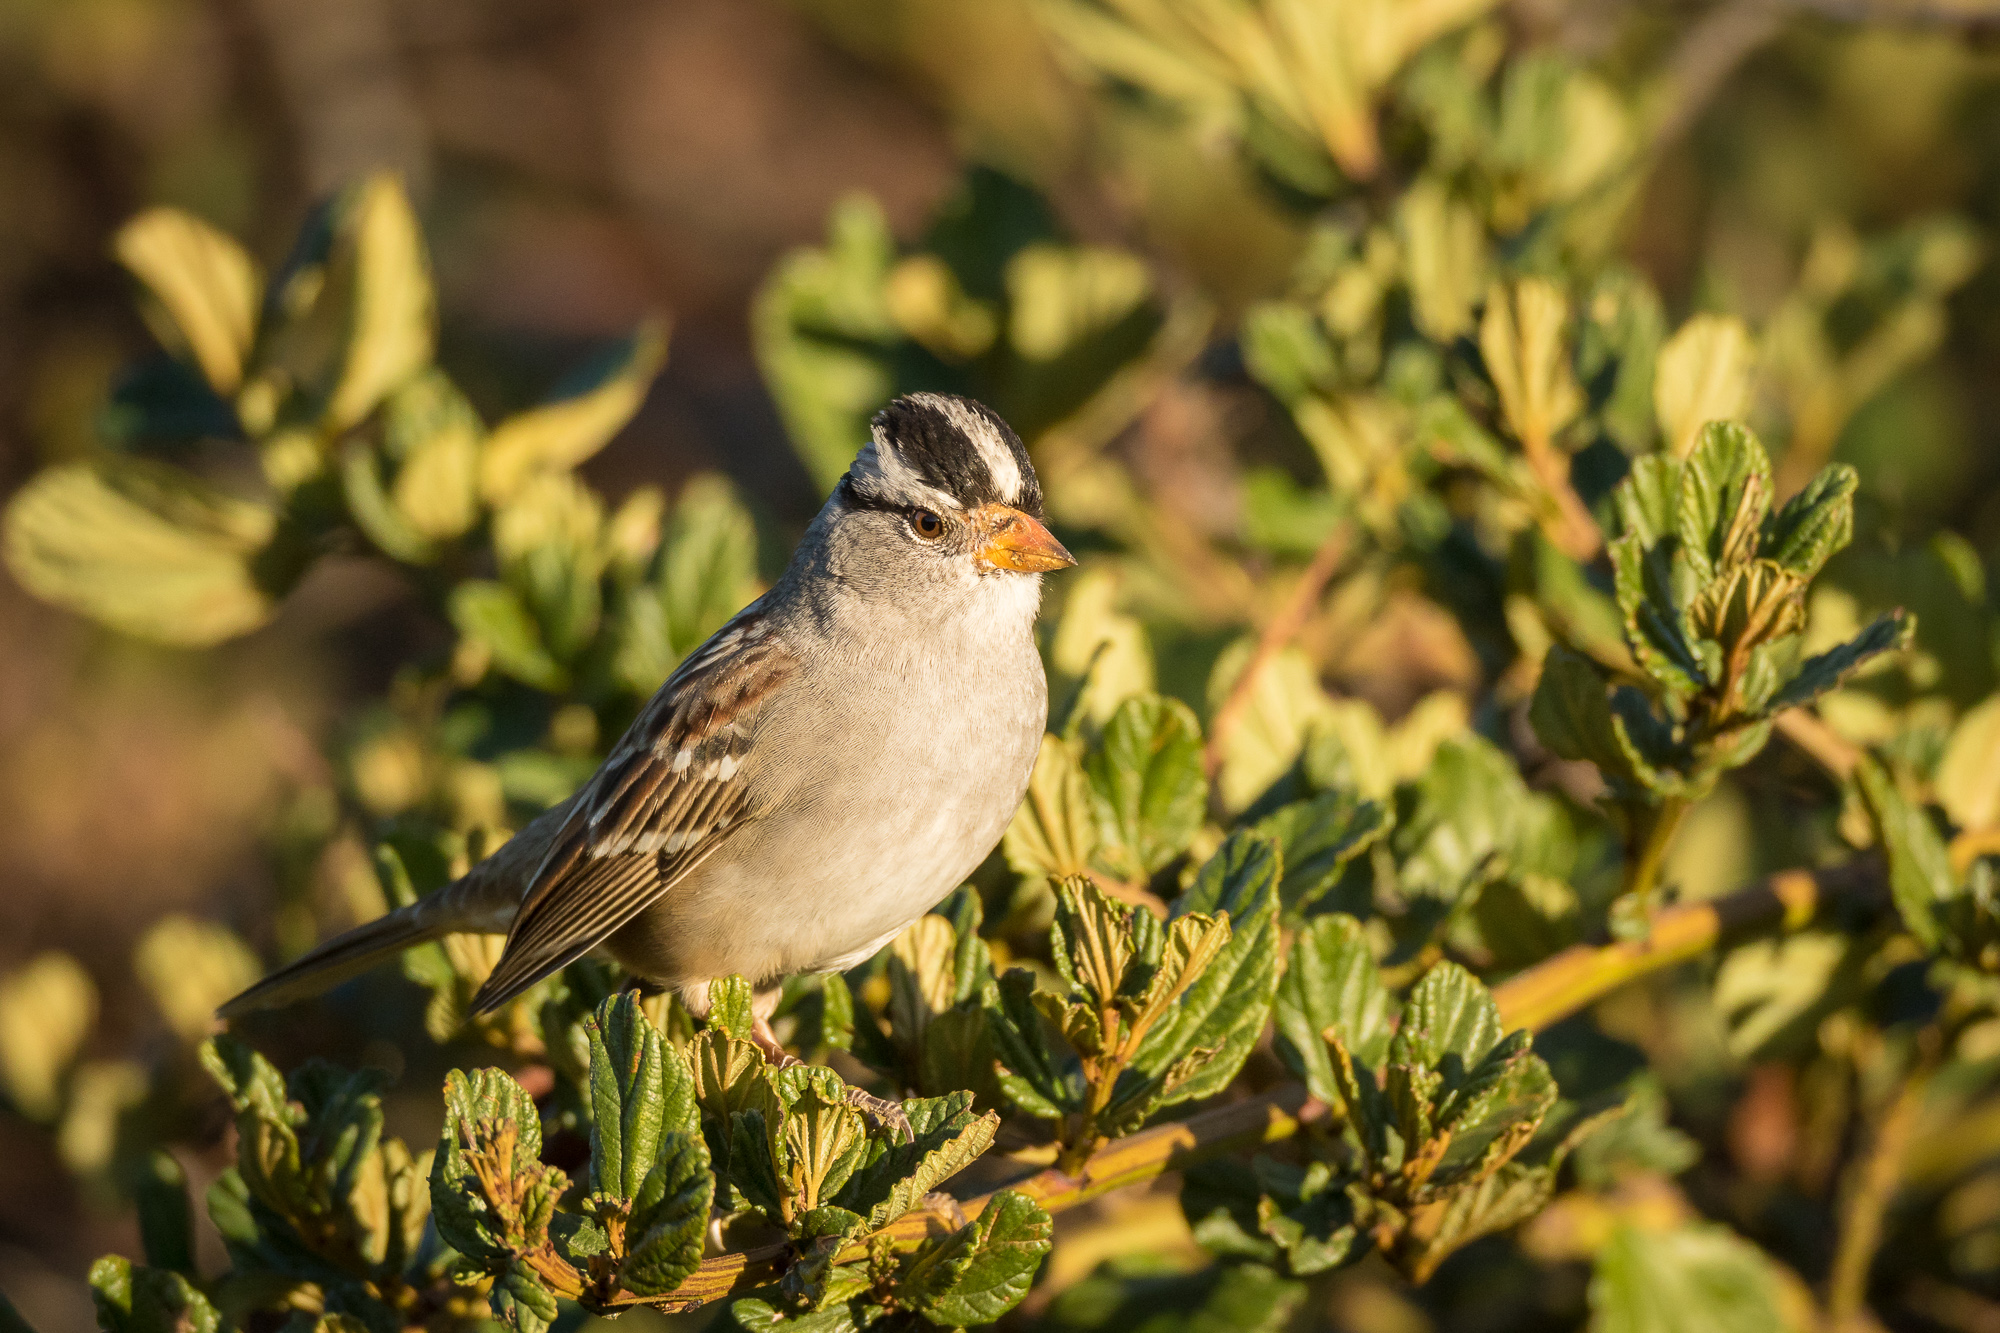
White-crowned sparrows are very common during the winter along the bay, but are not seen here in the summer months. However, they are year round residents just over the hill along the coast. Seeing white-crowned sparrows often reminds me of the diversity of San Mateo county and how you can see an entirely different ecosystem of birds by traveling a few short miles.

A great egret stands next to a water channel, looking for fish, Redwood Shores, CA.

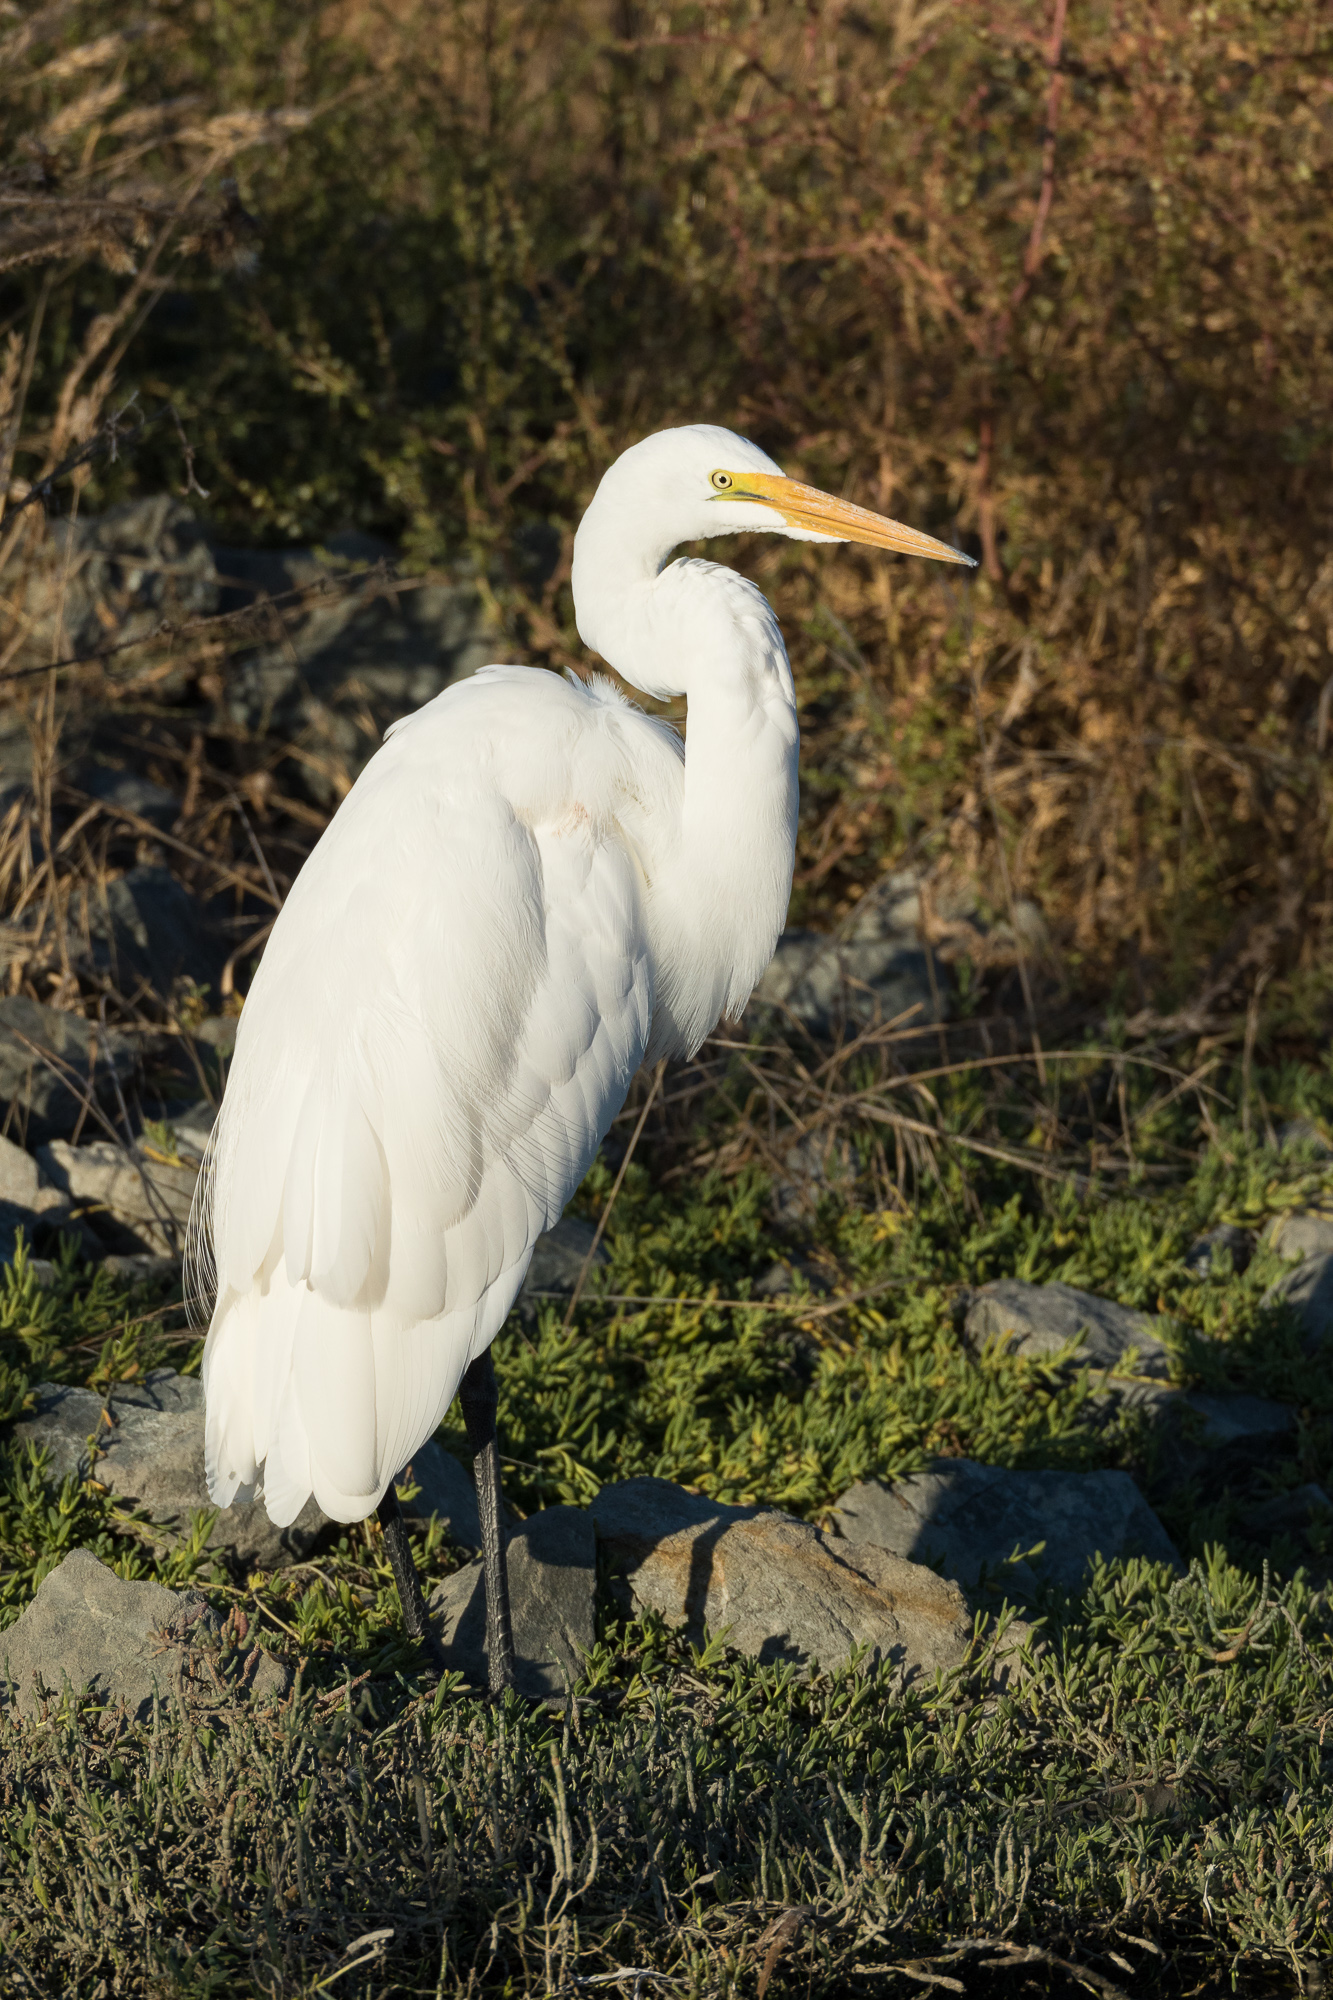
Finally, I rounded out my afternoon with the big daddy of the marsh, the great egret. They are very common, but also beautiful. Here I found a nice looking specimen so I spent a little time photographing him. Overall, it was a pretty birdy afternoon – I’m looking forward to the influx of wintering waterfowl that will bring great visual variety to the area.

Gear I used to create the photos in this post:

Use Lightroom’s Match Total Exposures Feature For Quick And Dirty Panoramas

A great blue heron stands along the shore of a canal in early morning light

When I shoot landscape panoramas, in addition to tripod use and careful alignment, I always follow one basic technique – set my camera in manual exposure mode. To determine the optimum exposure for a panorama, I set my aperture (typically between 11 and 16 for landscapes), and meter different parts of the scene. I select the brightest portion of the scene and over-expose the meter to a point that no highlights are blown out. Then I set the camera to manual exposure, dial in the appropriate shutter speed, and I’m ready to capture all the frames of the panorama, knowing that they will blend together nicely in post production.

However, when I am photographing birds or wildlife panoramas, I am often forced to use quick and dirty techniques. These panorama situations usually arise when I am close enough to an animal that their face can fill an entire frame, but I still want to capture their entire body. Instead of backing away, I usually resort to taking multiple overlapping images, knowing I can stitch them together later. This often happens with large water birds such as this great blue heron, that are docile enough to allow me to get close.

Because I know that the animal can move at any time, I need to be quick with my overlapping photos, taking them in rapid succession. This means I don’t have time to carefully meter the scene and dial in the optimum exposure. Usually I will leave my camera in aperture priority (for overlapping photos to stitch together, aperture MUST be the same throughout all images) and let the camera decide the exposure. Usually no photo is more than 1 stop from any other photo.

Now that I’ve taken my photos and have imported them into Lightroom, I need a quick way to align the same exposure across all photos. Enter the “hidden” Match Total Exposures feature.

Use the Match Total Exposures feature to synchronize the exposures between frames that will make up a panorama.

I pick one of the photos with which to optimize the exposure. Once I’ve adjusted the exposure slider to my liking, I select all the photos in the series and click the menu Photo->Develop Settings->Match Total Exposures. All of the other photos in the series will move their exposure sliders up or down so that the adjusted exposure is matched to the original. For example, let’s say we have three photos all shot at f/5.6, with the following shutter speeds: 1/500, 1/250, and 1/1000 (the exposures will typically be much closer, but I’m using easy math for illustrative purposes). If the first photo (1/500 seconds) is selected as the original to match, then the exposure slider for the second photo will move up one stop and the exposure slider for the third will move down by one stop. This is a quick and easy way to make sure the exposures for all photos in the series are similar so that they blend properly.

Once I’ve adjusted all the exposures, I keep them all selected and click Photo->Edit In->Merge to Panorama in Photoshop. This will result in a perfectly blended panorama.

Bird Photography With The Canon 7D Mk II

A great blue heron stalks fish in still shallow water, Belmont, CA.

I spent about an hour this morning doing some bird photography with my new 7D Mk II. My primary use for this camera will be birds and wildlife, and I found and photographed some of the usual suspects around my home. This is not meant to be a formal review by any means, but I wanted to share some of my first impressions.

A black-crowned night heron perches above water in pre-dawn light, Belmont, CA.

Aesthetics

Before we get to performance, I have to address how the camera felt out in the field. It was a real joy! The build quality is solid and the camera was extremely responsive and accurate. Ergonomically, the buttons are laid out well, and I can tell a lot of thought went into designing the UI. The number of settings on this camera can be daunting, but almost everything can be customized to suite your exact photography needs.

A golden-crowned sparrow perches atop an ornamental bush, Belmont, CA.

Auto-focus

Obviously auto-focus capabilities are one of the headliner features for this camera. Canon’s new auto-focus debuted on their flagship pro body, and have been filtering down to less expensive cameras in the last couple of years. I haven’t tried out the myriad AF algorithms available (I’ll do further testing with these using birds in flight), but I can say that auto-focus was fast and accurate. Almost everything I captured was tack sharp. I’ll be setting up the camera with different AF settings depending on whether I’m photographing stationary animals or birds in flight.

A blacktail jackrabbit pauses in the morning light to watch for predators, Belmont, CA.

Noise Performance

As the sun was rising, I shot mostly at ISO 1600, gradually dropping down to ISO 400 as the day got brighter. At ISO 1600, there is still some noise visible in the shadows, but it was easily corrected in post processing. I found very clean shadows at ISO 800 and below. With my previous camera (7D), my starting ISO was usually 400 and I’d go up from there if the situation demanded it. Based on the performance of the Mk II, I will probably do most bird photography at ISO 800, giving me a full stop of extra light to play with in most circumstances.

A great blue heron is reflected in still water in early morning light, Belmont, CA.

Frame Rate

Shooting at 10 frames per second felt awesome. Even though I’m used to 8 fps with the older 7D, the incremental speed boost was noticeable. While I didn’t have any action situations that called for this speed this morning, having that capability was reassuring. With the large buffer, I never hit any card write delays, even though I was shooting with a slow card.

A black-crowned night heron stands on a buoy, watching for fish, Belmont, CA.

Silent Shooting

At one point, I crept close to a black-crowned night heron and began to fire off 10 fps bursts (mostly just for fun). The chatter of the shutter was loud enough to get his attention, and he stared at me, looking a bit anxious. I then remembered that the camera features a silent shutter mode (it applies extra dampening to the shutter mechanism so that it is very quiet). I set the camera to silent burst mode. This reduces the fps from 10 down to what felt like 3 or 4 fps, but it was nearly silent! I continued shooting photos of the now comfortable bird. This feature will actually be very helpful for getting close to some of the more sensitive wildlife – a nice little bonus.

A greater yellowlegs is reflected in shallow still water, Belmont, CA.

Overall Image Quality

So far, the results are fantastic. One caveat is that at the time of this writing, Adobe does not yet support the camera’s RAW files, so I had to use Canon’s software to convert to tiff before processing them in Lightroom. I’m sure I’ll get better results once I can process the RAWs directly with Lightroom, as Canon’s processor seems very poor. But the images are sharp, and the tones are pleasing. Auto white balance seems accurate. If anything, it seems that the Mk II overexposes a little more than the 7D, but I’ll get a feel for where the exposure compensation needs to be for various lighting conditions as I use the camera more.

Of course, the camera also has some goofy crowd-pleasers like multiple exposure and in-camera HDR. While I wont be using these for any serious work, they can be fun to muck around with if you’re bored.

A black-necked stilt fishes in shallow water, Belmont, CA.

Overall, this is a fantastic camera, and I had a very enjoyable first time out with it!

A Counter-intuitive Tip To Tack Sharp Photos With A Long Lens

The hues of twilight cast offshore sea stacks in a blue glow as waves wash around them, Crescent City, CA

On my recent trip north up the California coast to photograph redwoods and rhododendrons, I also had an opportunity to shoot sea stacks just offshore in Crescent City, CA. After shooting a bit with my 70-200mm, I really wanted to go for a unique perspective of these rocks and stack them on top of one another. So I grabbed my go-to bird lens, the 800mm f/5.6. Using a Canon 7D with a cropped sensor gave me an equivalent focal length of 1280mm.

I waited until the sun set, giving me photos with the cool blue of dusk, and allowing me to slow my shutter speed to turn the crashing waves into a calming mist. This is the effect I was after – hard, sharp rocks shrouded in a blue fog of moving water. However, as soon as my shutter speed got longer than 1/100th of a second and started creeping toward the 1 and 2 second mark, the results on the back of my LCD were horribly blurry.

In normal shooting conditions with this lens, I never like to let the shutter speed drop below 1/250th of a second, and only if I have a stationary subject do I lock down the gimbal head on my tripod and go for something slower. But usually 1/100th of a second is my slowest usable shutter speed. What to do in this situation? Even by bumping the ISO very high I couldn’t achieve a fast enough shutter speed in these darkening conditions, and doing so would also counteract the effect of the moving water.

The solution seemed counter-intuitive at first. I found that by greatly lengthening my exposures, I was able to achieve much sharper results! The initial blurriness I was seeing was caused by the shutter vibration, amplified by the extremely long focal length (and yes, I was using mirror lockup). When I increased the exposure time, the percentage of time that the mirror shake impacted the overall exposure time was reduced, thus creating a sharper image. Using this principal, I found that by exposing for 30 seconds, I was able to achieve the sharpest results.

A couple things to keep in mind. First, this technique will only work if there is no wind. Even a slight breeze will blow a huge lens like that back and forth, ruining any chance of a long exposure. Second, make sure to check sharpness by zooming in to your resulting photo on the camera’s LCD. Never trust sharpness from a photo displayed 3 inches across – everything looks sharp when it is that small!

So next time you’re out with a giant lens trying to do landscape work (really not a very common combo!), remember to experiment with the slower shutter speeds. You might just find some sharpness in there.

Copyright 2017 Hank Christensen