Strive For Separation

One goal of nature photography is to take the chaos of a wild landscape, and using nothing but the perspective of the rectangle of your camera’s view, to simplify and distill the scene into a singular message. One of the most chaotic environments in which I shoot regularly is a forest. Once you combine tree trunks, branches, leaves, and vegetation, you are often presented with quite a mess of a scene. Finding patterns and removing the extraneous elements can be a huge challenge.

One technique I use to help the viewer see the intended patterns I am trying to convey is to use and pay careful attention to the separation of the main elements of my photo. Here are several forest scenes that I shot on a recent trip to the San Juan mountains in Colorado. With each, I spent a great deal of time in the field moving the camera and field of view to just the right location, to make sure the trees were not merging with each other in ways that detracted from my vision.

Bone white aspen trunks create abstract lines over distant fall foliage, Ridgway Colorado

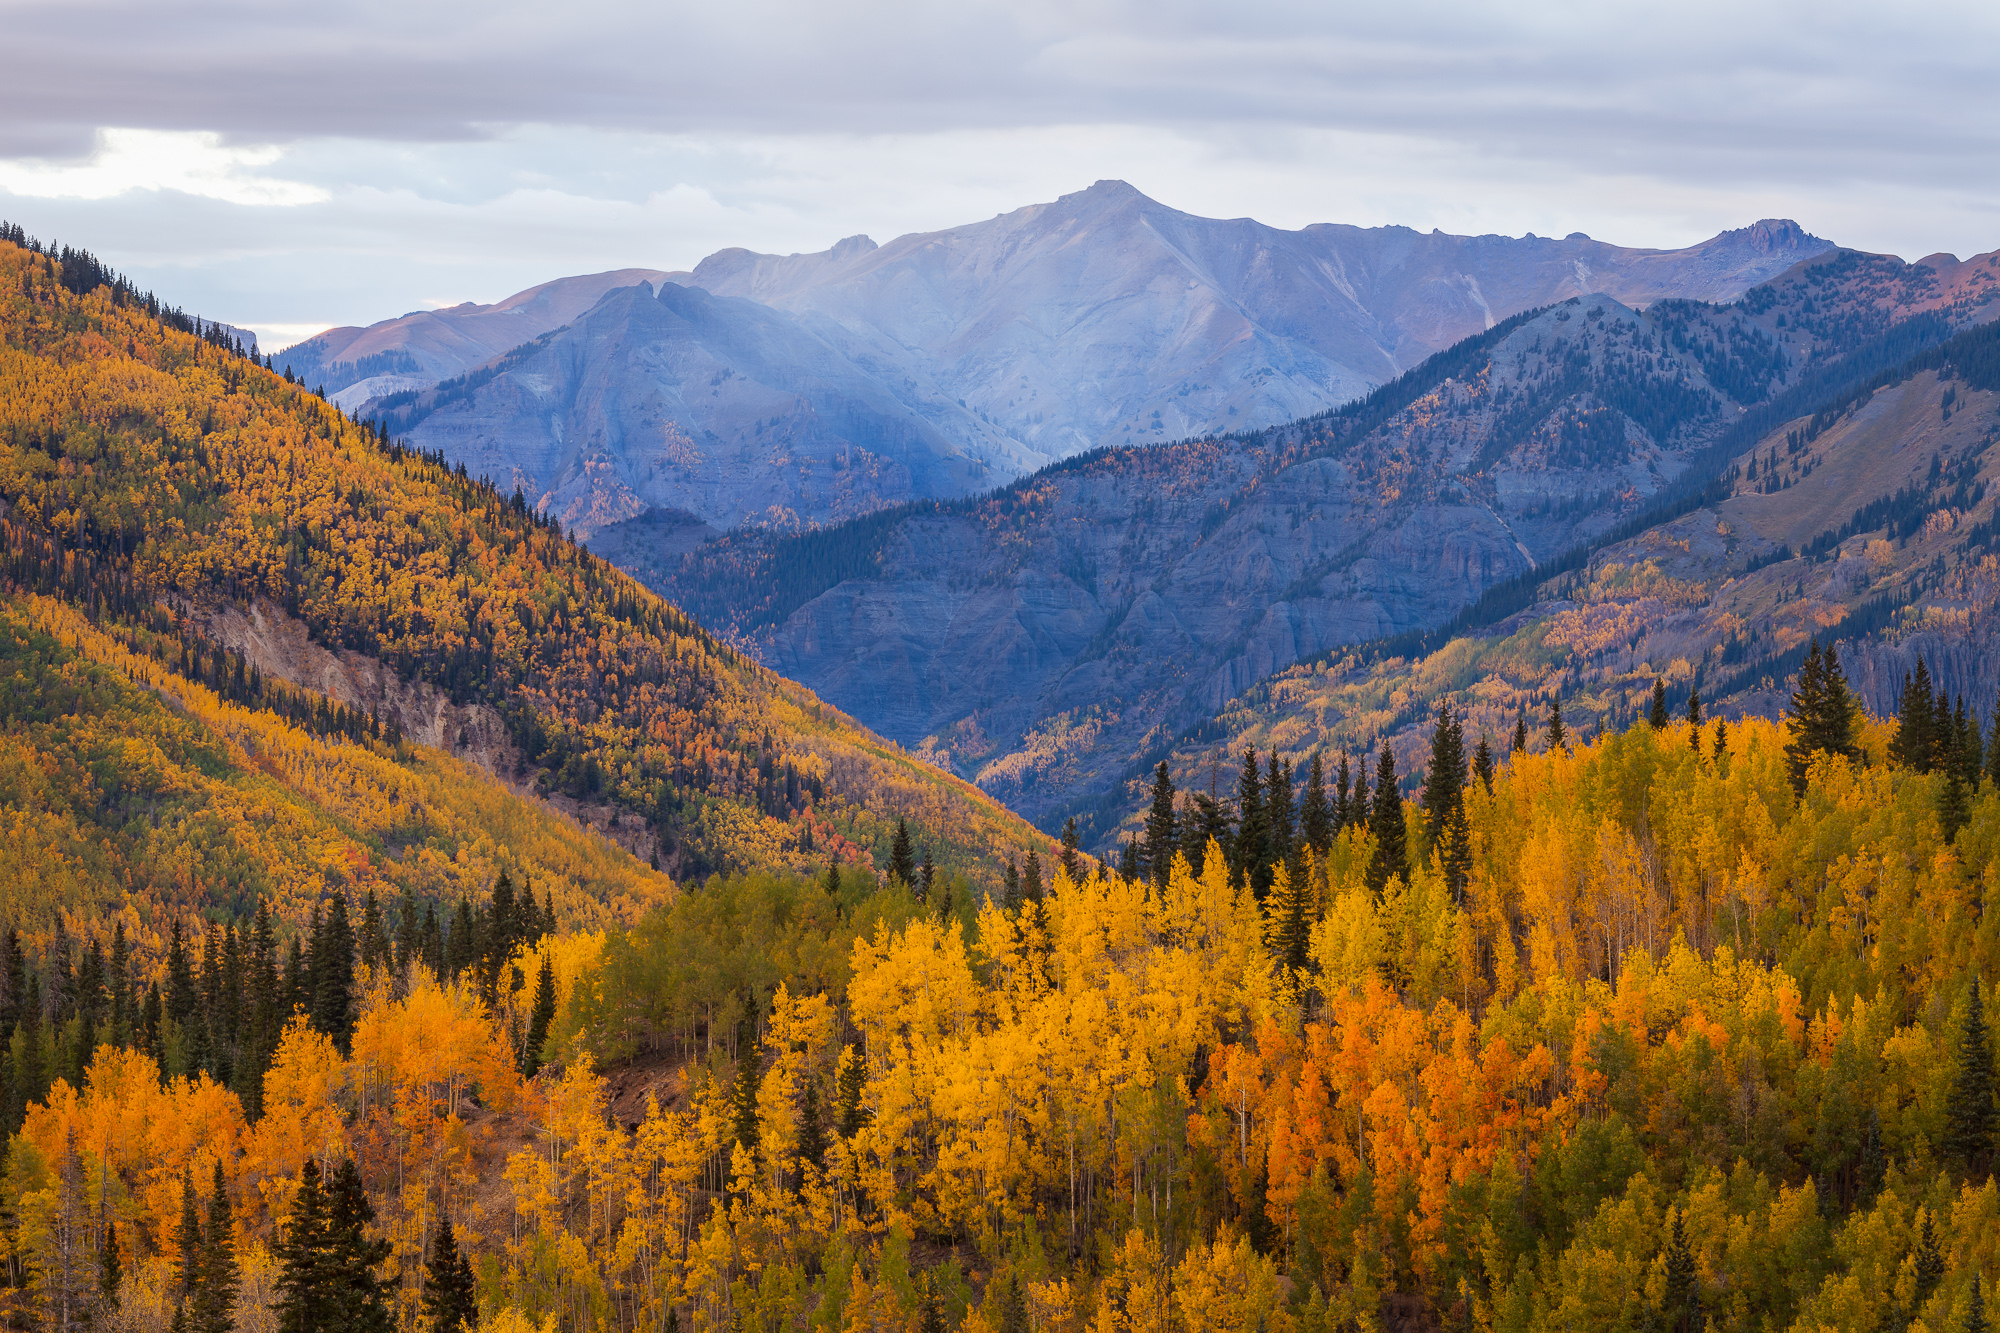
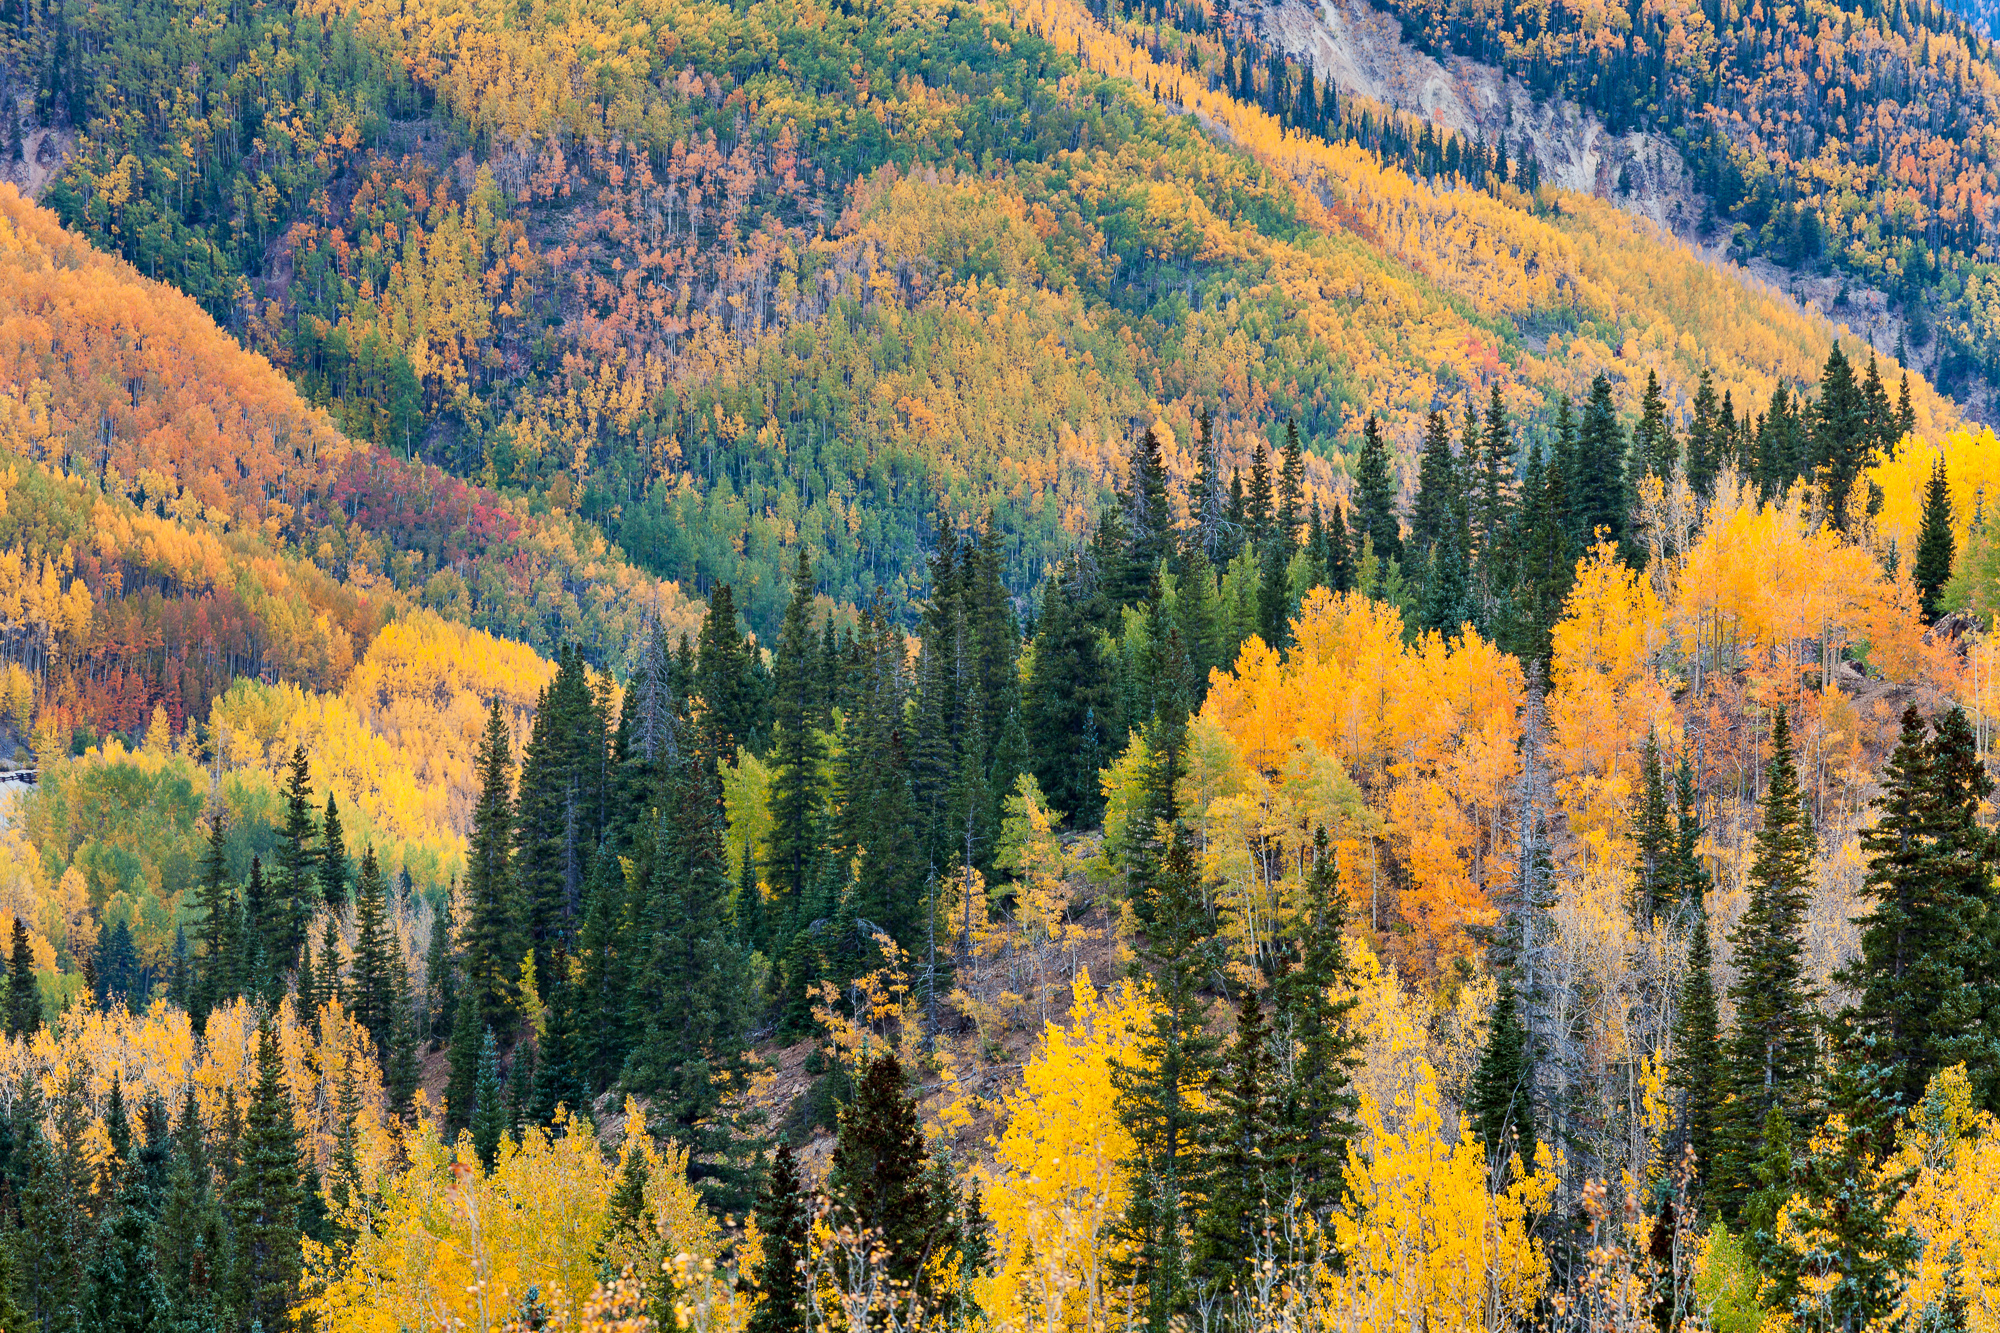
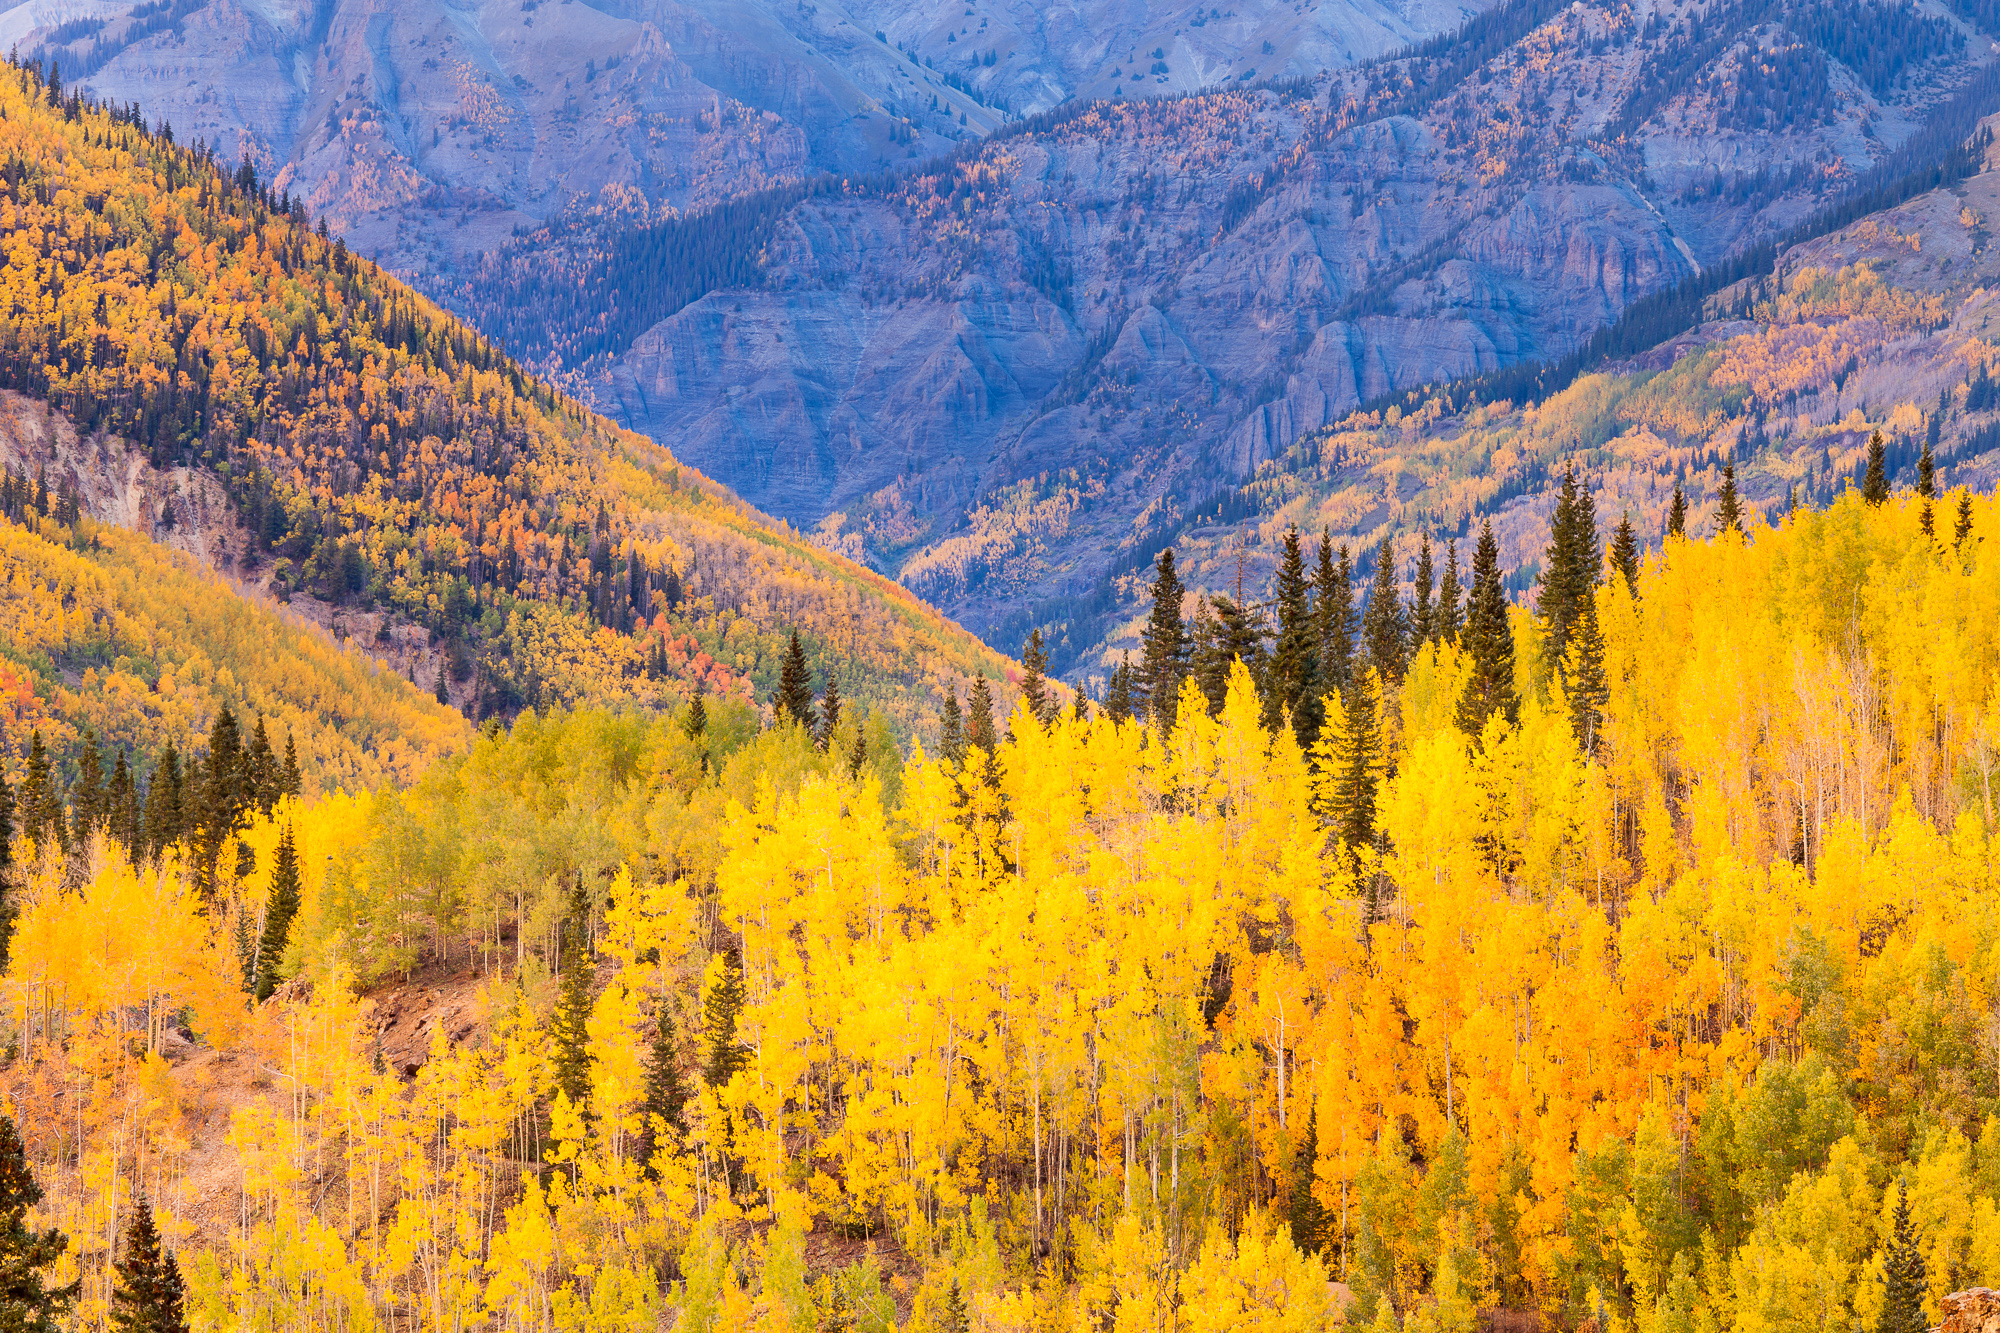
When I took this photo, I was in a location with a dirt road running along one side of a narrow valley. The opposite side of the valley was covered with a kaleidoscope of fall colors – a beautiful display. Above the road on my side of the valley was a stand of aspen, with perfect bone-white trunks. I knew the shot I was looking for – now it was a matter of hoping I could find the right composition.

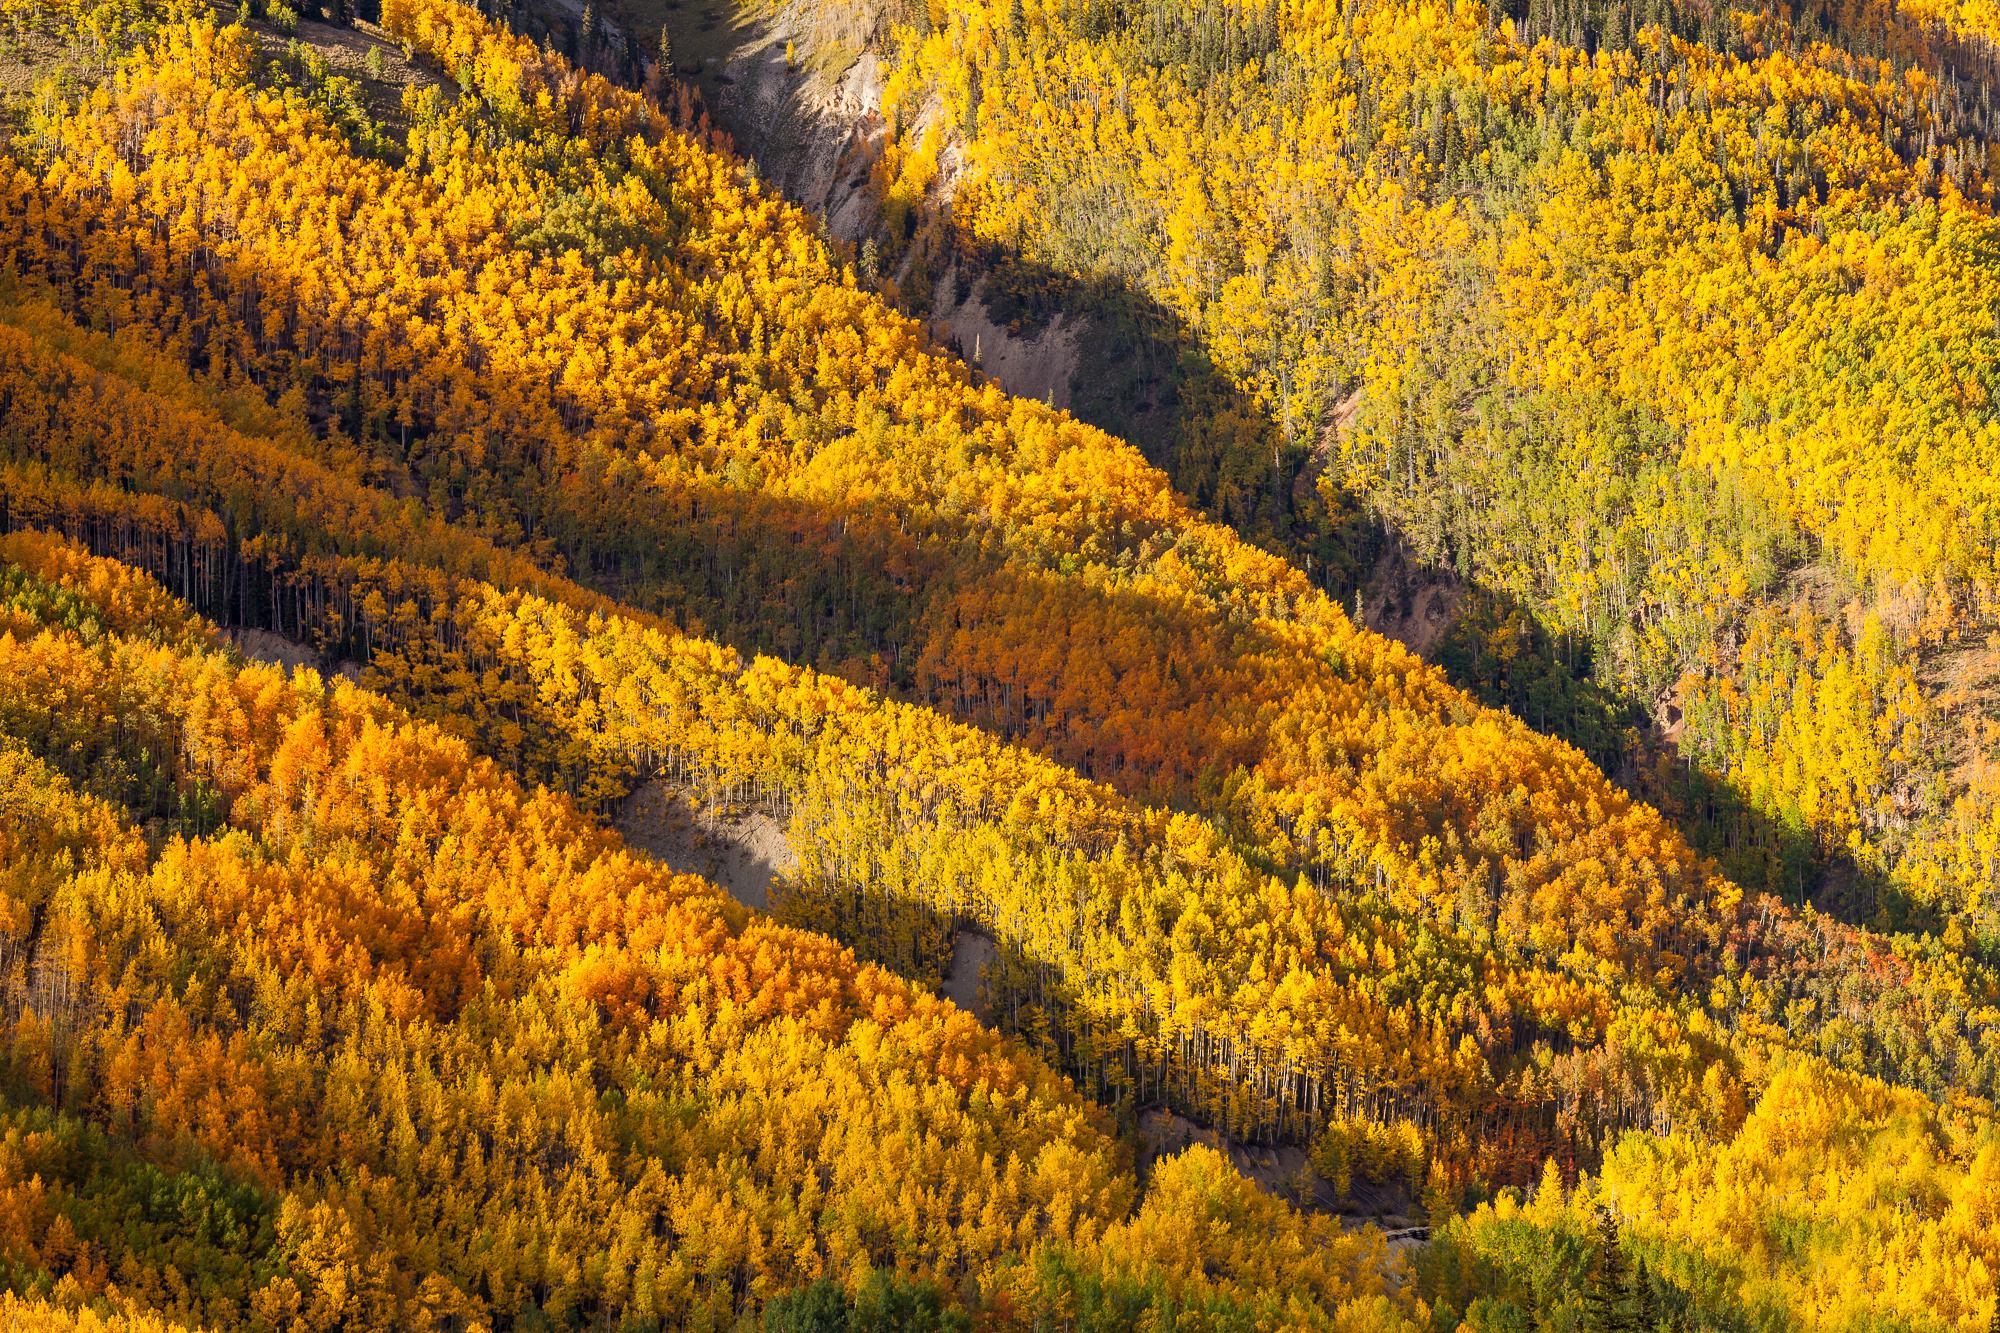
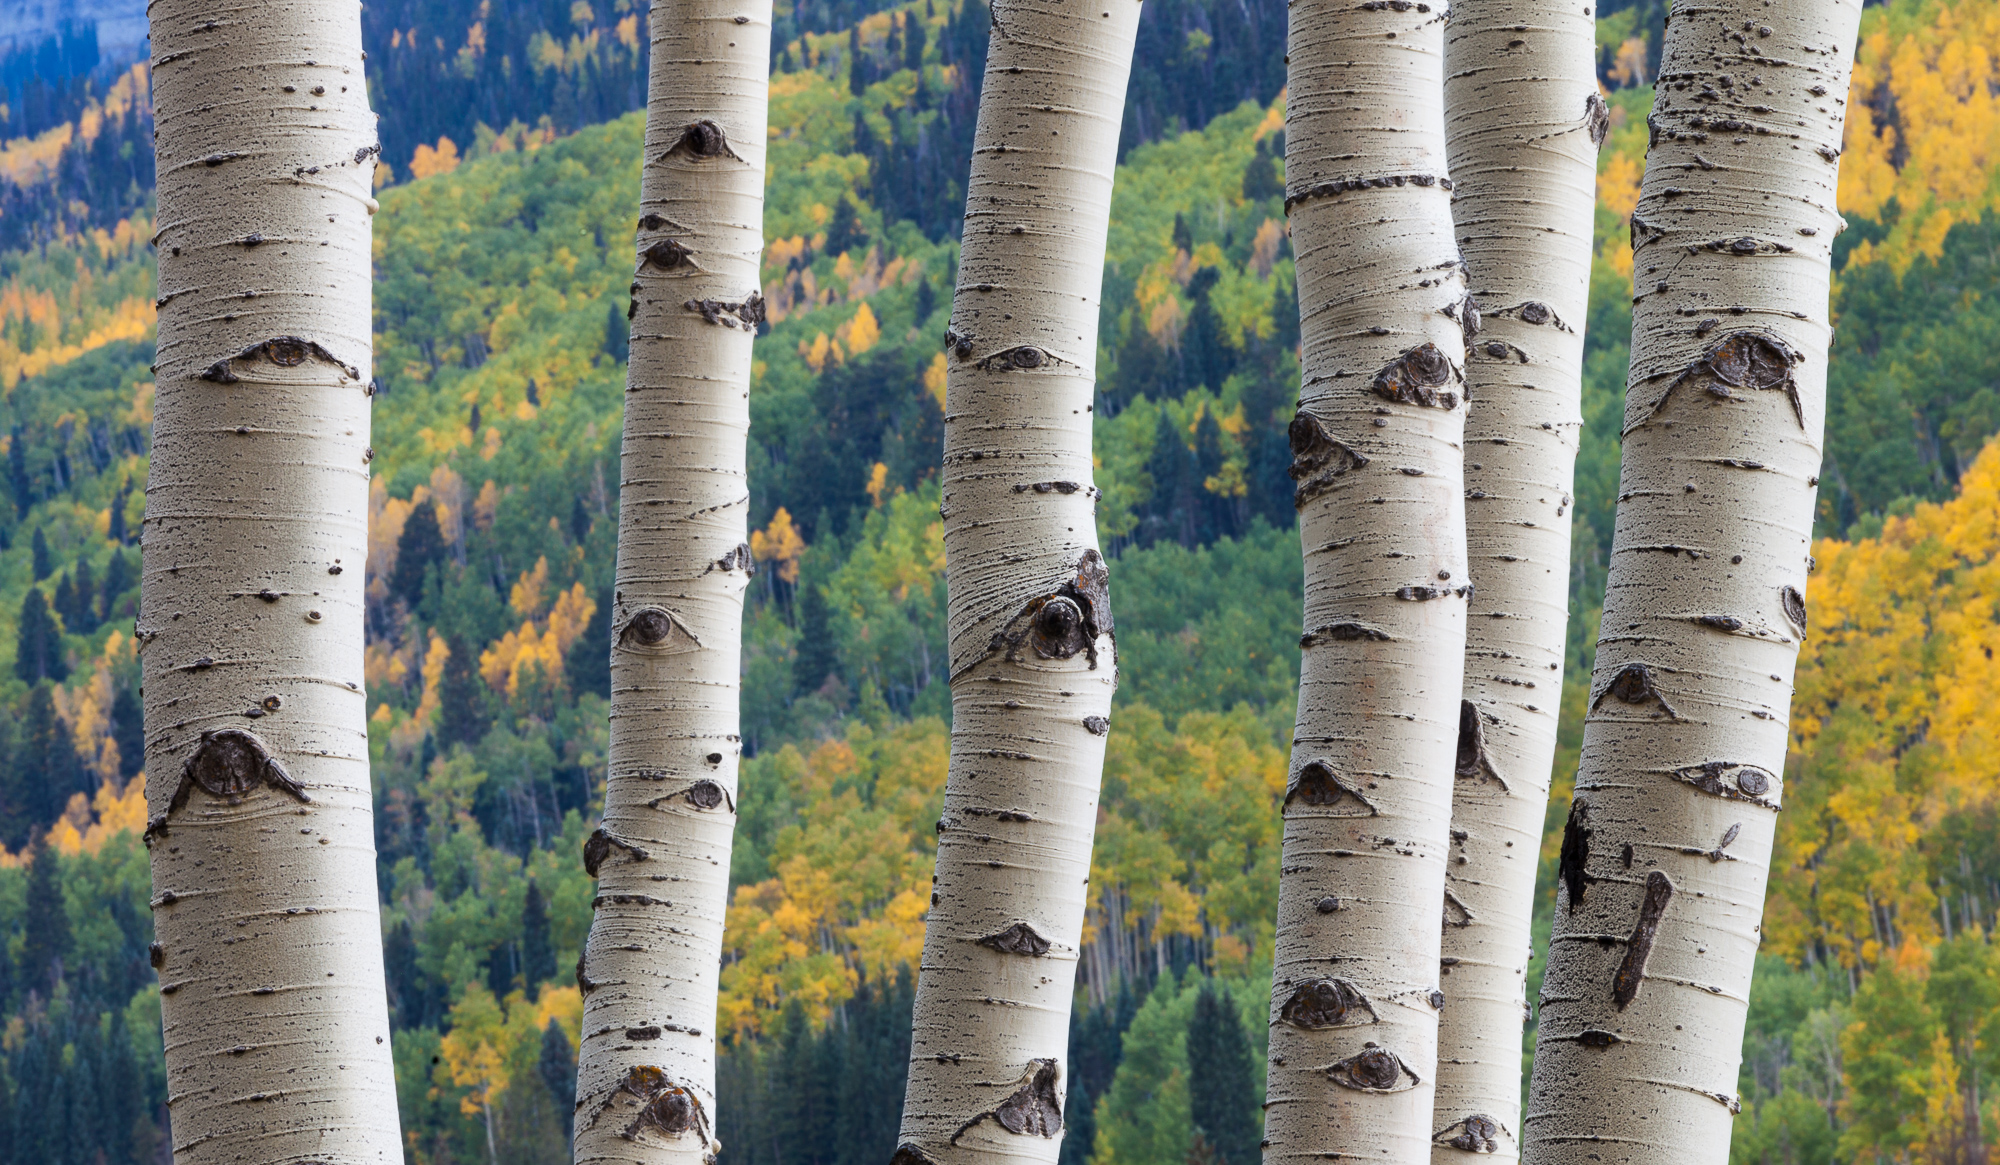
I moved up the steep slope and into the aspen grove. Using a medium to long lens and moving up-slope above the trees, I could shoot straight through a select group of trunks, using the beautiful colors from the other side of the valley as my backdrop. Now was the truly challenging part – I needed to find just the right group of trees that showed a consistent pattern of separation from one another. I finally found some good candidates and spent a while getting my tripod into the right location. Working on such a steep muddy slope made the work slow and arduous. I slipped more than once, preferring to let my clothes take the brunt of the mud rather than my expensive gear.

In the photo, you’ll notice that the spacing between the left and right edges and the left and right most trees is the same. I tried to keep similar spacing between each tree, so as to repeat this pattern across the frame. The trouble trees are the three right most; but after working with them a while, I began to really like how they broke the perfectly even pattern. It brings just a touch of wildness into the photo, hinting at the chaos of this forest.

Thick fog shrouds a forest of aspen, Ridgway, Colorado

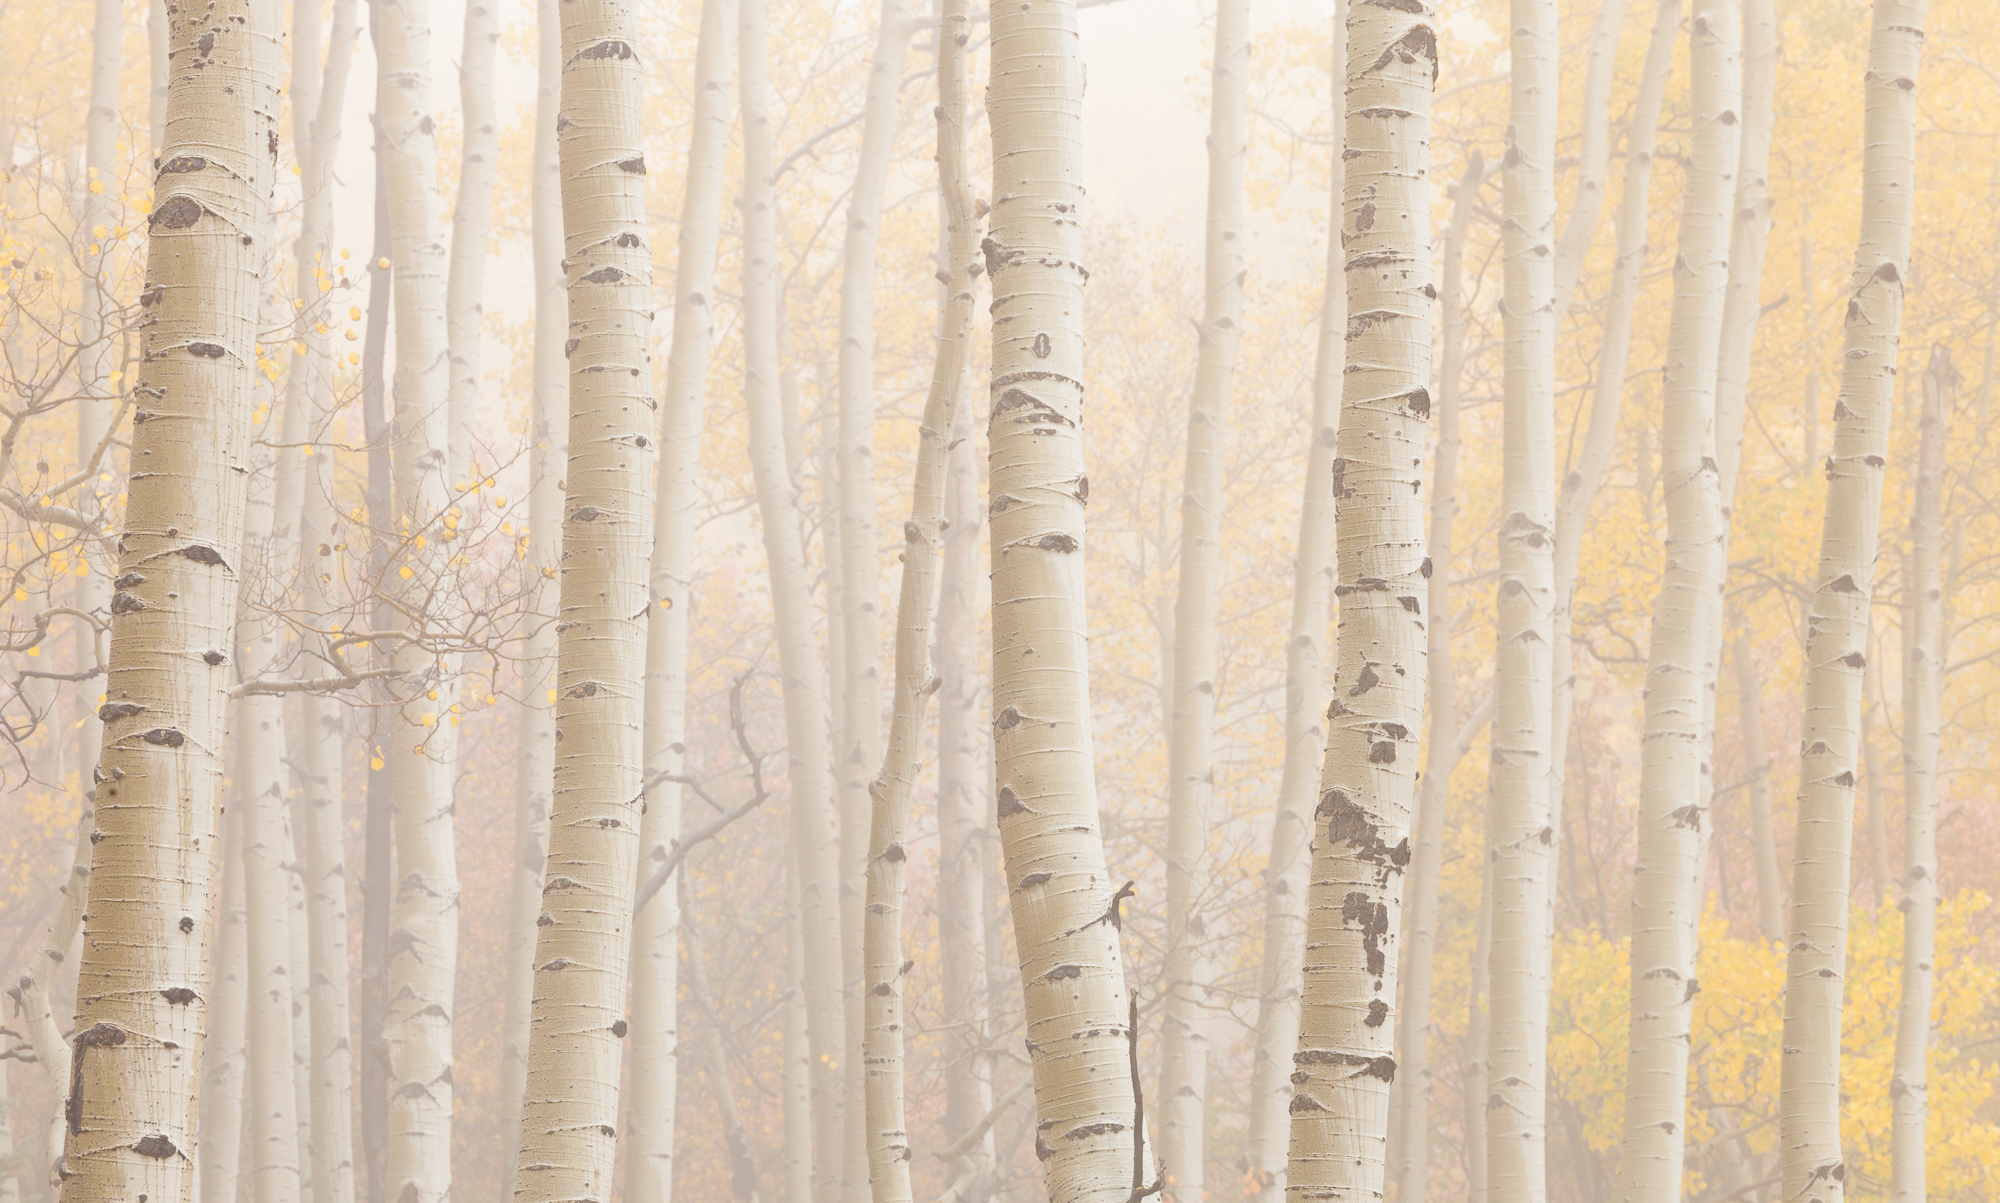
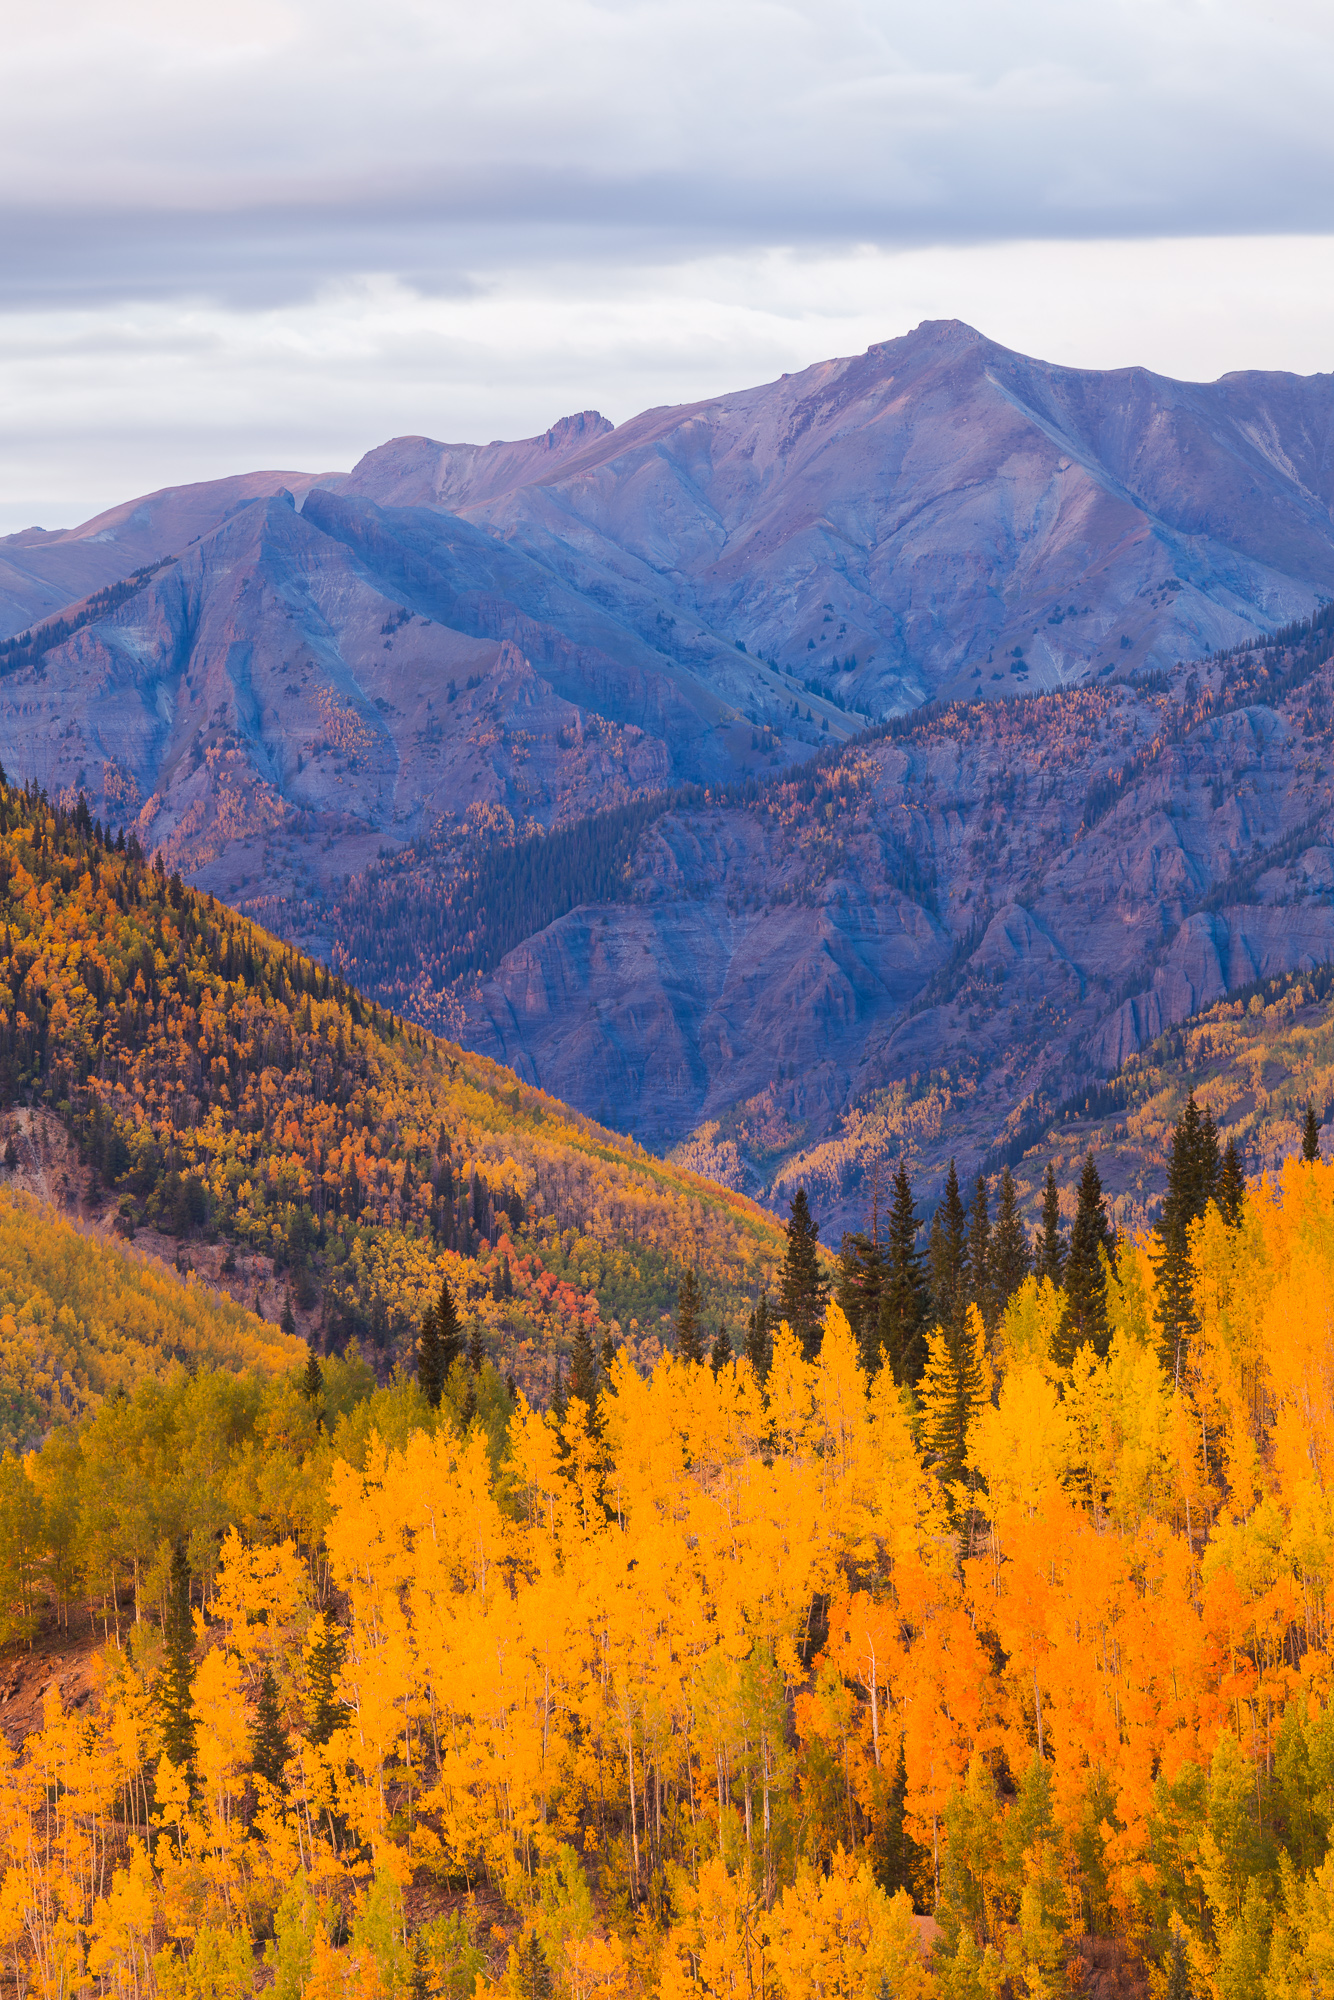
Another great natural phenomenon to take advantage of to help simplify a scene is fog. This can work especially well to simplify a forest scene, and it worked very well with aspen. Again, I worked on creating an even spacing across the closest trees, knowing they would be rendered in the photo with the most contrast. With these photos, it is especially important to pay very careful attention to the edges of the frame.

Fallen aspen leaves carpet the forest floor casting the trunks in a golden white

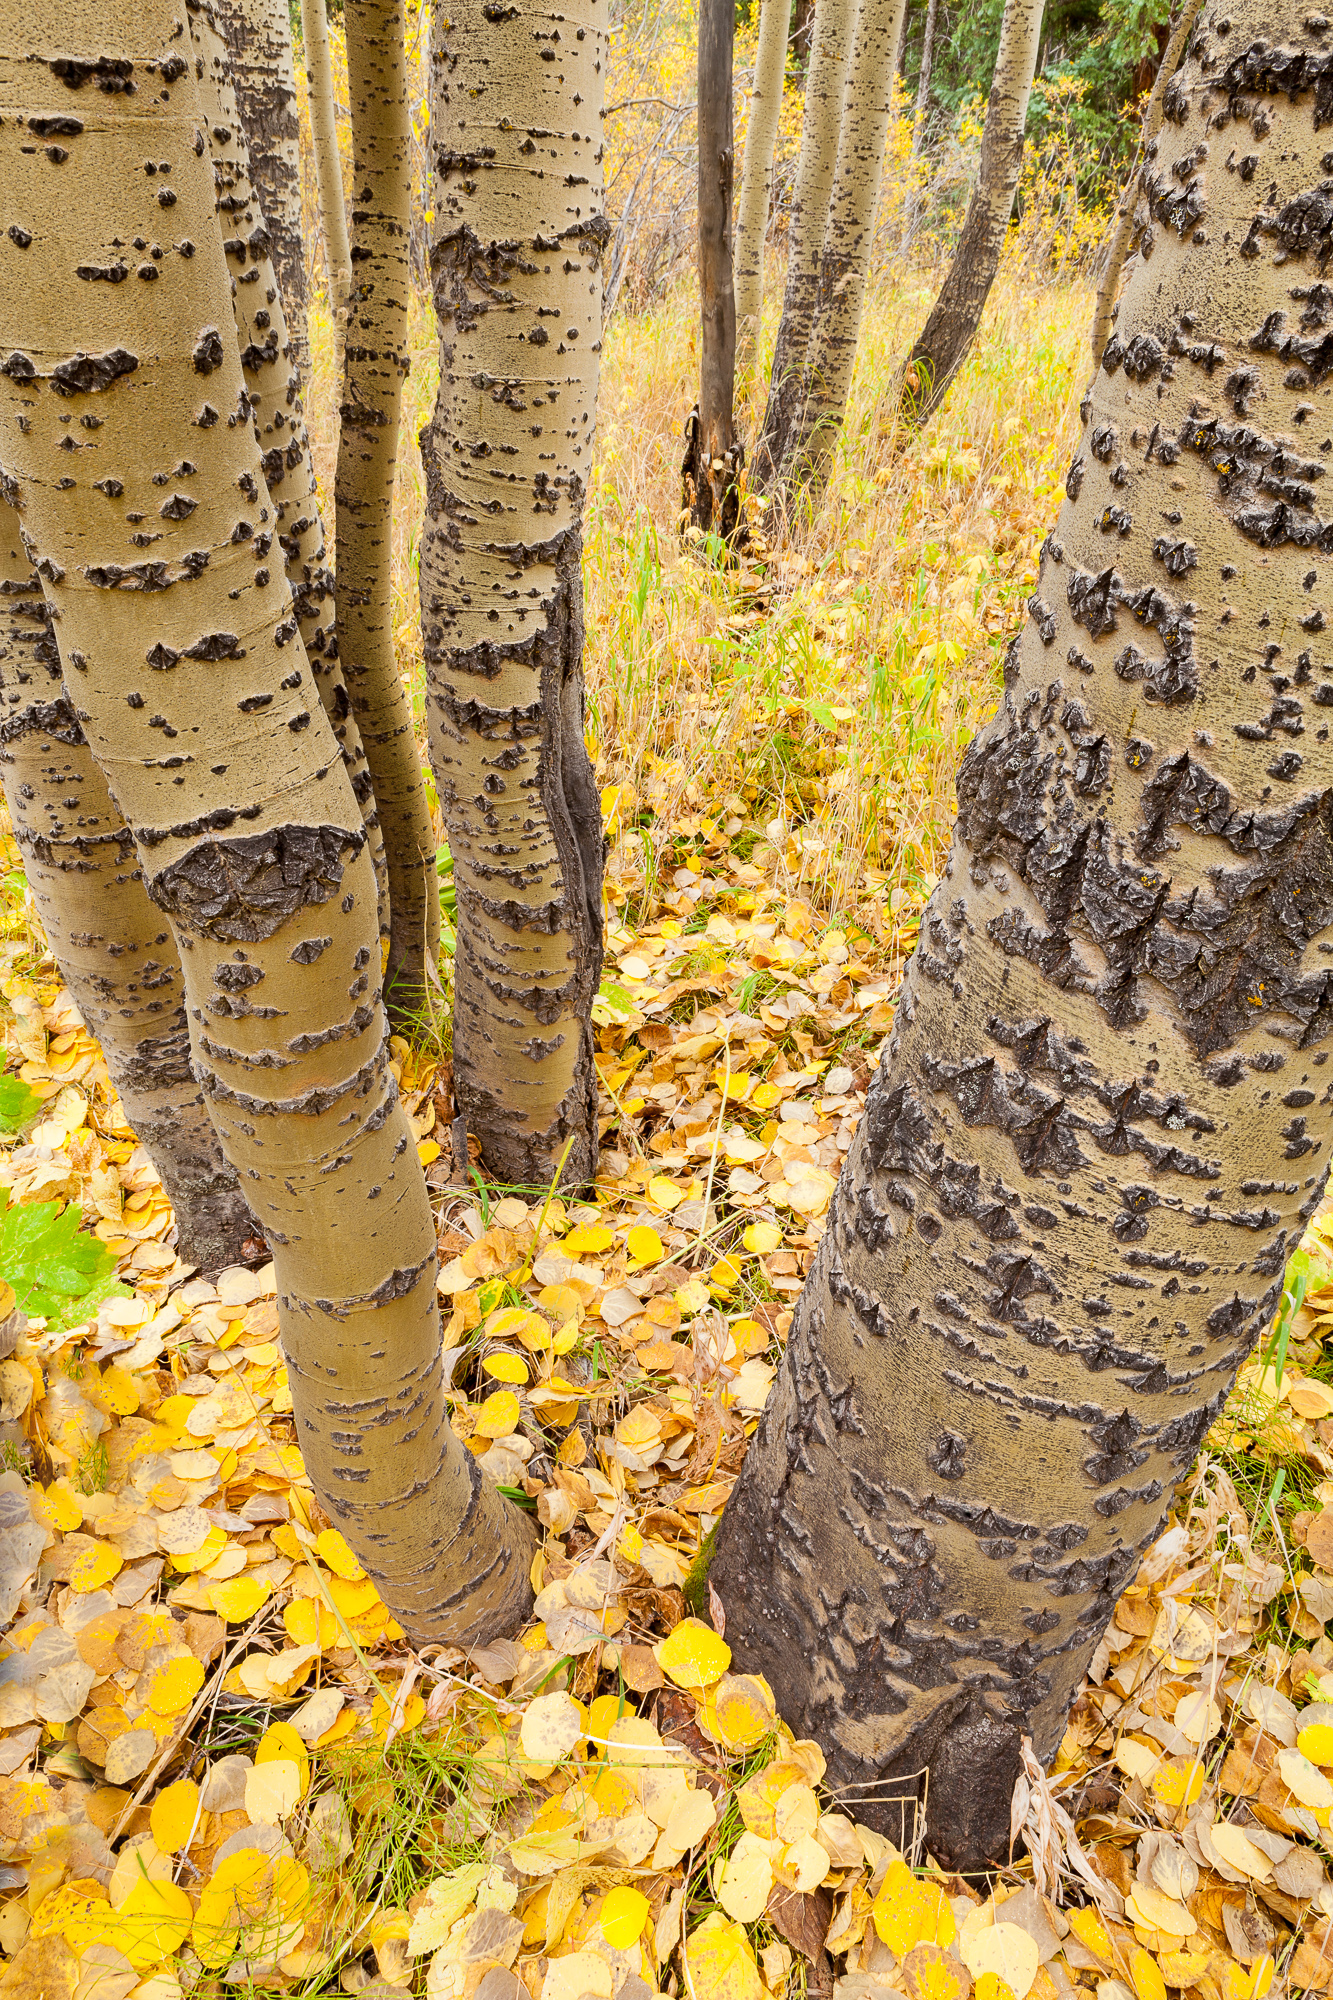
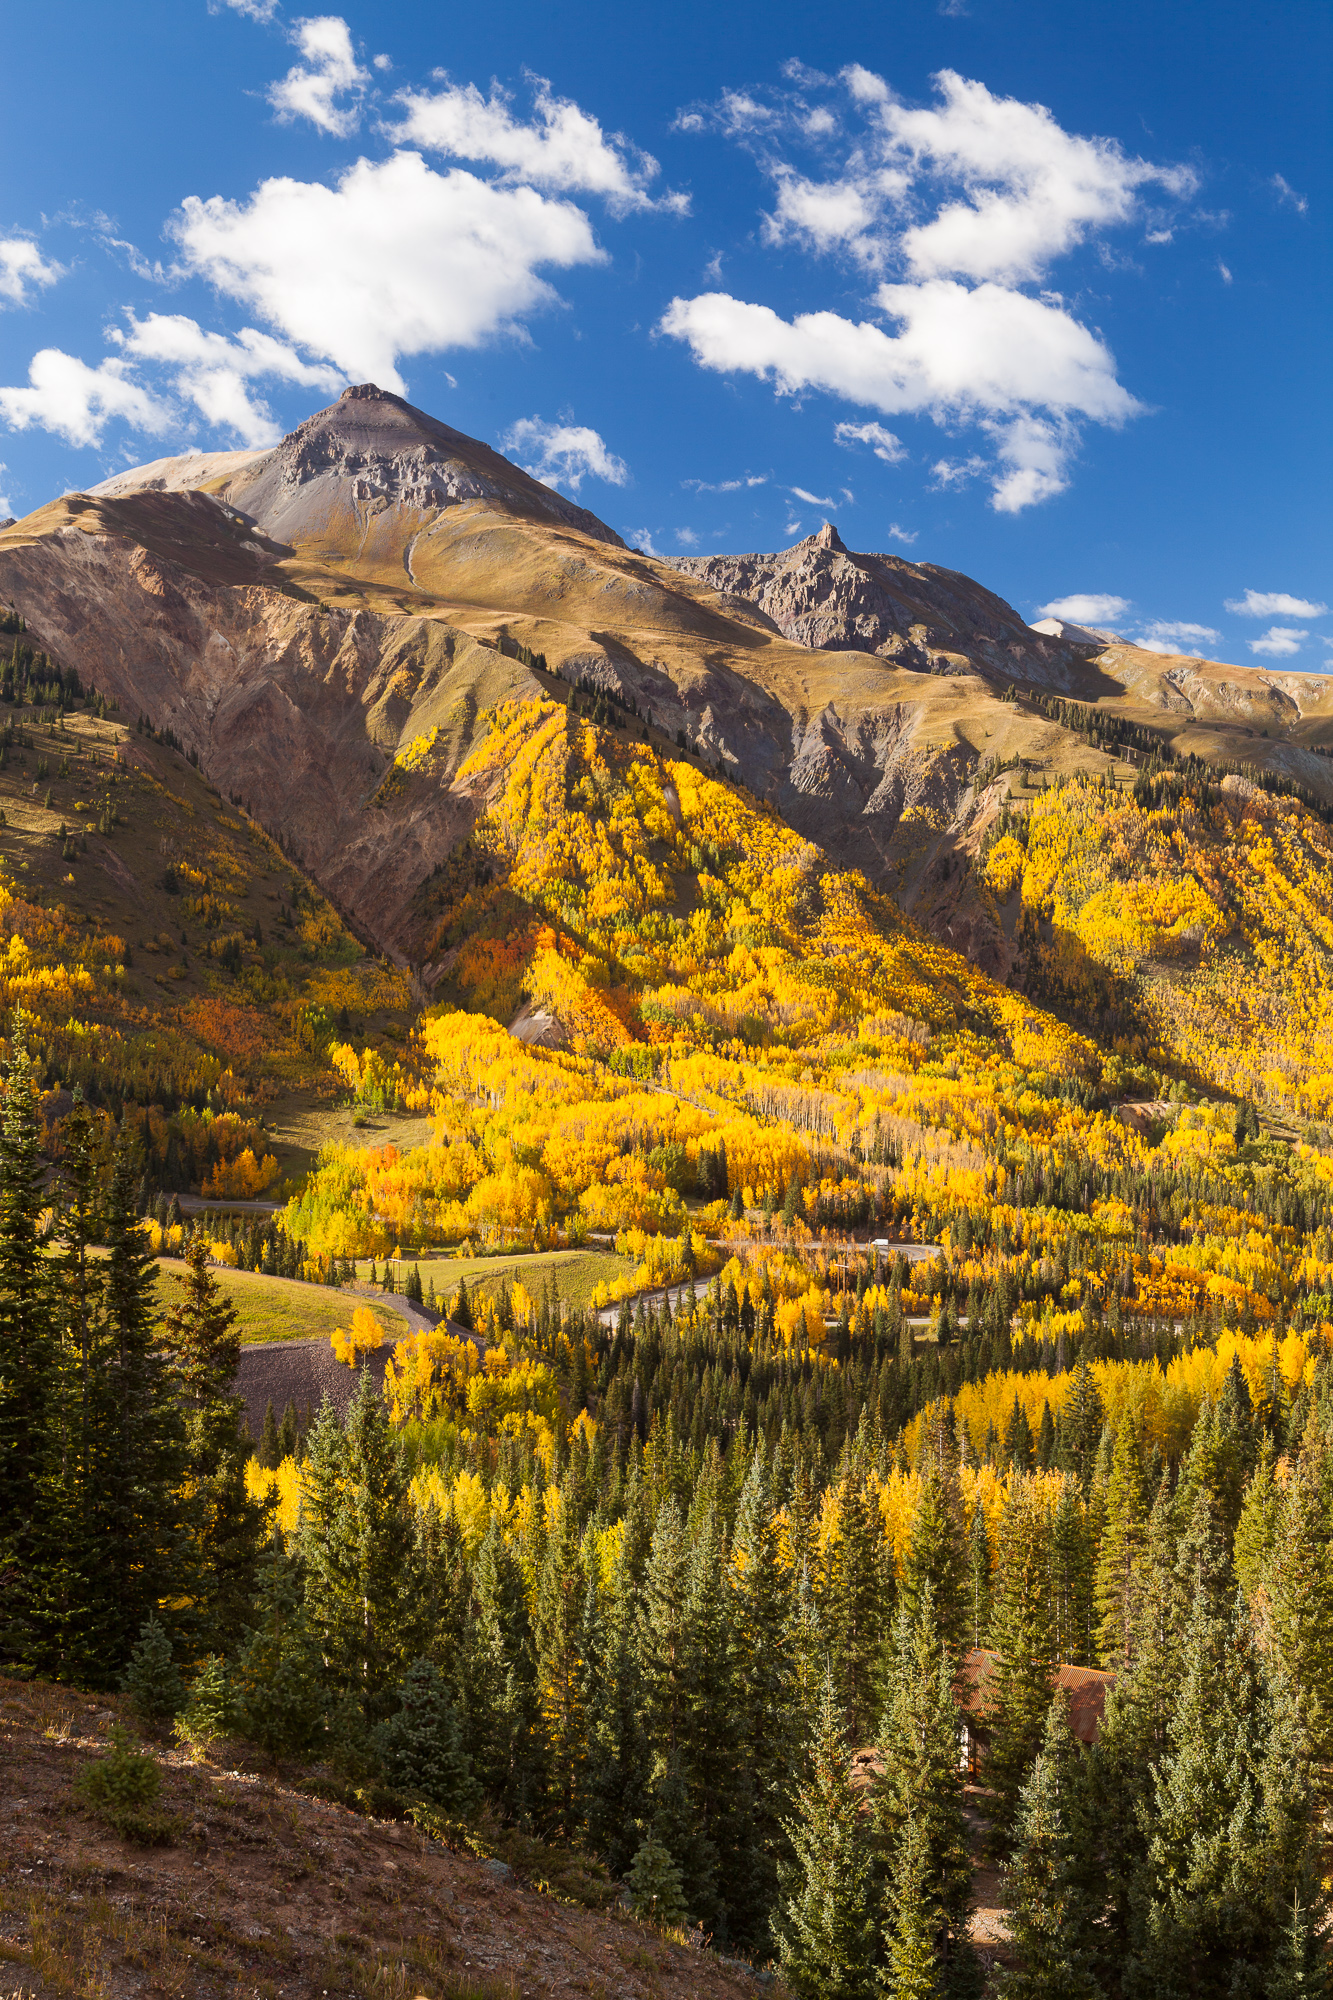
This last photo was perhaps the most difficult of the three. I saw the foreground cluster of trees, and as I moved closer, I saw a repeating cluster in the background, a perfectly placed V shape in the similarly shaped void between the right most tree and the trees to the left of the frame. However, seeing it and shooting it were different beasts. Instead of using my perspective to flatten a three dimensional scene across the frame as in the previous two photos, here I was using the shapes to accentuate the depth of this pattern.

Once I got the tripod and camera in place to get the background cluster of trees where I wanted them, I spent time working on smaller separations appearing in the left most cluster. Some of the trees I could stack on top of each other and hide from the camera’s view-port, but there was one distant tree that kept creating problems. Finally, I got into a position which put the distant tree into a spot that prevented it from peaking out from behind the foreground trees, and I knew I had it.

Although I was working with depth in this photo, the goals were the same as the previous photos: to simplify the chaos of nature into a digestible, understandable subject. Paying special attention to control the spacing between primary elements in the photograph can help achieve this goal.

Bird Photography With The Canon 7D Mk II

A great blue heron stalks fish in still shallow water, Belmont, CA.

I spent about an hour this morning doing some bird photography with my new 7D Mk II. My primary use for this camera will be birds and wildlife, and I found and photographed some of the usual suspects around my home. This is not meant to be a formal review by any means, but I wanted to share some of my first impressions.

A black-crowned night heron perches above water in pre-dawn light, Belmont, CA.

Aesthetics

Before we get to performance, I have to address how the camera felt out in the field. It was a real joy! The build quality is solid and the camera was extremely responsive and accurate. Ergonomically, the buttons are laid out well, and I can tell a lot of thought went into designing the UI. The number of settings on this camera can be daunting, but almost everything can be customized to suite your exact photography needs.

A golden-crowned sparrow perches atop an ornamental bush, Belmont, CA.

Auto-focus

Obviously auto-focus capabilities are one of the headliner features for this camera. Canon’s new auto-focus debuted on their flagship pro body, and have been filtering down to less expensive cameras in the last couple of years. I haven’t tried out the myriad AF algorithms available (I’ll do further testing with these using birds in flight), but I can say that auto-focus was fast and accurate. Almost everything I captured was tack sharp. I’ll be setting up the camera with different AF settings depending on whether I’m photographing stationary animals or birds in flight.

A blacktail jackrabbit pauses in the morning light to watch for predators, Belmont, CA.

Noise Performance

As the sun was rising, I shot mostly at ISO 1600, gradually dropping down to ISO 400 as the day got brighter. At ISO 1600, there is still some noise visible in the shadows, but it was easily corrected in post processing. I found very clean shadows at ISO 800 and below. With my previous camera (7D), my starting ISO was usually 400 and I’d go up from there if the situation demanded it. Based on the performance of the Mk II, I will probably do most bird photography at ISO 800, giving me a full stop of extra light to play with in most circumstances.

A great blue heron is reflected in still water in early morning light, Belmont, CA.

Frame Rate

Shooting at 10 frames per second felt awesome. Even though I’m used to 8 fps with the older 7D, the incremental speed boost was noticeable. While I didn’t have any action situations that called for this speed this morning, having that capability was reassuring. With the large buffer, I never hit any card write delays, even though I was shooting with a slow card.

A black-crowned night heron stands on a buoy, watching for fish, Belmont, CA.

Silent Shooting

At one point, I crept close to a black-crowned night heron and began to fire off 10 fps bursts (mostly just for fun). The chatter of the shutter was loud enough to get his attention, and he stared at me, looking a bit anxious. I then remembered that the camera features a silent shutter mode (it applies extra dampening to the shutter mechanism so that it is very quiet). I set the camera to silent burst mode. This reduces the fps from 10 down to what felt like 3 or 4 fps, but it was nearly silent! I continued shooting photos of the now comfortable bird. This feature will actually be very helpful for getting close to some of the more sensitive wildlife – a nice little bonus.

A greater yellowlegs is reflected in shallow still water, Belmont, CA.

Overall Image Quality

So far, the results are fantastic. One caveat is that at the time of this writing, Adobe does not yet support the camera’s RAW files, so I had to use Canon’s software to convert to tiff before processing them in Lightroom. I’m sure I’ll get better results once I can process the RAWs directly with Lightroom, as Canon’s processor seems very poor. But the images are sharp, and the tones are pleasing. Auto white balance seems accurate. If anything, it seems that the Mk II overexposes a little more than the 7D, but I’ll get a feel for where the exposure compensation needs to be for various lighting conditions as I use the camera more.

Of course, the camera also has some goofy crowd-pleasers like multiple exposure and in-camera HDR. While I wont be using these for any serious work, they can be fun to muck around with if you’re bored.

A black-necked stilt fishes in shallow water, Belmont, CA.

Overall, this is a fantastic camera, and I had a very enjoyable first time out with it!

Many Slices Of A Scene

When arriving at a new location to photograph, it is easy to get over-excited, and like a moth to a flame, focus all attention directly on the obvious composition. This is easy to do when shooting a grand vista, and more than once I’ve gotten so caught up in this one shot, that only later do I realize that I’ve missed many other great photos that could have been captured there.

On a recent trip to Colorado, I kept this top of mind as I shot a valley filled with beautiful aspen. I made sure to look for many different photos to be made within the scene. This is a good example of thinking of different ways to capture a scene, because I didn’t even move the tripod – here are six different shots taken from the same spot.

Light beams cut through afternoon storm clouds over Abrams Mountain, Ouray, Colorado

I started with the “obvious” grand vista shot. Situated on a bluff overlooking this valley, I shot down the valley at the mountain capping it off. Of course, waiting for just the right moment is also important, and here I captured a ray of light that broke through the clouds for a moment, illuminating the peak.

Abrams mountain rises above lower slopes filled with bright fall colors, Ouray Colorado

My next shot was essentially the same shot, but in a vertical orientation. When the landscape allows for it, I always try to capture both vertical and horizontal shots, offering variety for my stock collection.

Fall colors explode on the slopes of Hayden Mountain, Ouray, Colorado

Turning to my left, I shot another vertical, this time of Hayden Mountain. The groves of aspen climbing up its lower slopes were ablaze in fall color glory.

Mountain slopes exhibit a kaleidoscope of color in the fall, Ouray, Colorado

Now it was time to switch to a telephoto lens (in this case my 70-200mm) and focus on abstracted swatches of fall color.

Mountain slopes exhibit a kaleidoscope of color in the fall, Ouray, Colorado

Telephoto lenses are great for carving out smaller sections of a landscape. If the landscape holds enough detail interest, there are likely many different photographs to make from a single scene. Here the collection of colors was changing from spot to spot, providing strong abstract photos, each unique from one another.

Abrams Mountain caps the end of a valley filled will fall color, Ouray Colorado

Finally, I made a shot similar to my first, but this time leaving out the sky and mountain top. Using the telephoto I created a photo that was more about the variety of color (the warm colors of the forest contrasting with the cool blues of the base of the mountain) than it was about a mountain scenic.

I tried a variety of other shots from this spot (panoramas, cloudscapes, etc), some more successful than others. But by the time I left, I felt I covered the area pretty thoroughly photographically.

Finding Originality In Arches National Park

An old log twists around a fall bloom, Arches National Park

Like many of the most visited national parks, Arches in Moab, Utah offers the visitor many spectacular natural wonders. But for the photographer, these more popular parks can be a real challenge – how do you find originality in a place that has been covered with a camera so thoroughly? I found this especially true when I visited Arches this past September. It was true that everywhere I turned I saw famous arches, but that was just the problem – they were all famous. Sure, I still set about capturing them for myself, but looking back, are any of these photos of which I’m really proud? How does this differentiate my portfolio from any of the thousands of talented photographers that visit every year?

Another challenge of this park is that in many areas, visitors are restricted to established trails. While I can certainly appreciate the reasons (the main one being the fragile biological soil crust supporting life throughout the desert), it is not my idea of freedom of exploration with a camera!

I thought about these challenges as I explored the park in 90+ degree heat. The last time I was here there was a fresh blanket of snow on the ground, so the dry desert look was bumming me out a little. I had already taken a midday hike out to Delicate Arch (purposefully leaving all my heavy camera gear back at the car), and I was getting impatient for sunset, even though I had not yet scouted an acceptable location. Finally, I saw something of interest just off trail, and it wasn’t surrounded by twenty photographers! An old twisted log created some interested shapes, and had the bonus of wildflowers growing at its base. And you know what? Not a single arch in sight! Oh well, just because I’m in a place famous for arches doesn’t mean all my shot HAVE to include arches.

I set about creating a composition that I liked. This process is usually a mixture of pre-visualization and experimentation. I knew I wanted to get in relatively close to the flowers and the log, and I wanted something fairly wide to include the cliff beyond. Probably no wider than 24mm, so I attached my 24-70 and got my tripod legs low and splayed out. Slowly I worked the camera and tripod in and out of the scene, watching the edges of my composition, and adjusting the tripod legs as necessary. When working in this way in a busy location, don’t worry about others stopping behind you to watch what you’re doing, and sometimes wondering what it is you are taking a picture of (rest assured, this WILL happen).

After about 10 minutes, I had my shot in the bag and was ready to move on. While certainly not a portfolio quality shot, I was happy to have found something that allowed me to express my creativity, and come away with something that wasn’t also on hundreds of other photographers’ memory cards that day.