Right Tool For The Job – Full Frame Vs Cropped Sensor

Recently I was asked by a prospective digital camera buyer about my opinion on full frame verses cropped sensors. The answer is actually not very simple, so I thought I’d expand on my thoughts in this post.

For those who aren’t familiar with these terms, full frame refers to a digital camera that has the same sensor size as 35mm film. This became the prevailing film standard, and most of today’s digital SLR lenses use this size to calculate their relative lens magnification factor. A cropped sensor camera is a digital SLR that has a sensor smaller than 35mm film. These cameras use the same lens focal length scale, but apply an additional “magnification factor” to the 35mm numbers. For example, Canon’s cropped sensors apply a 1.6X magnification factor to lenses as compared to 35mm-sized sensors. If a full frame camera used a 50mm lens, the perceived magnification factor using the same lens of a cropped sensor camera is 50mm X 1.6 = 80mm. In other words, in the resulting photos, it appears as if the camera was zoomed into 80mm when using a 50mm lens on a cropped sensor camera.

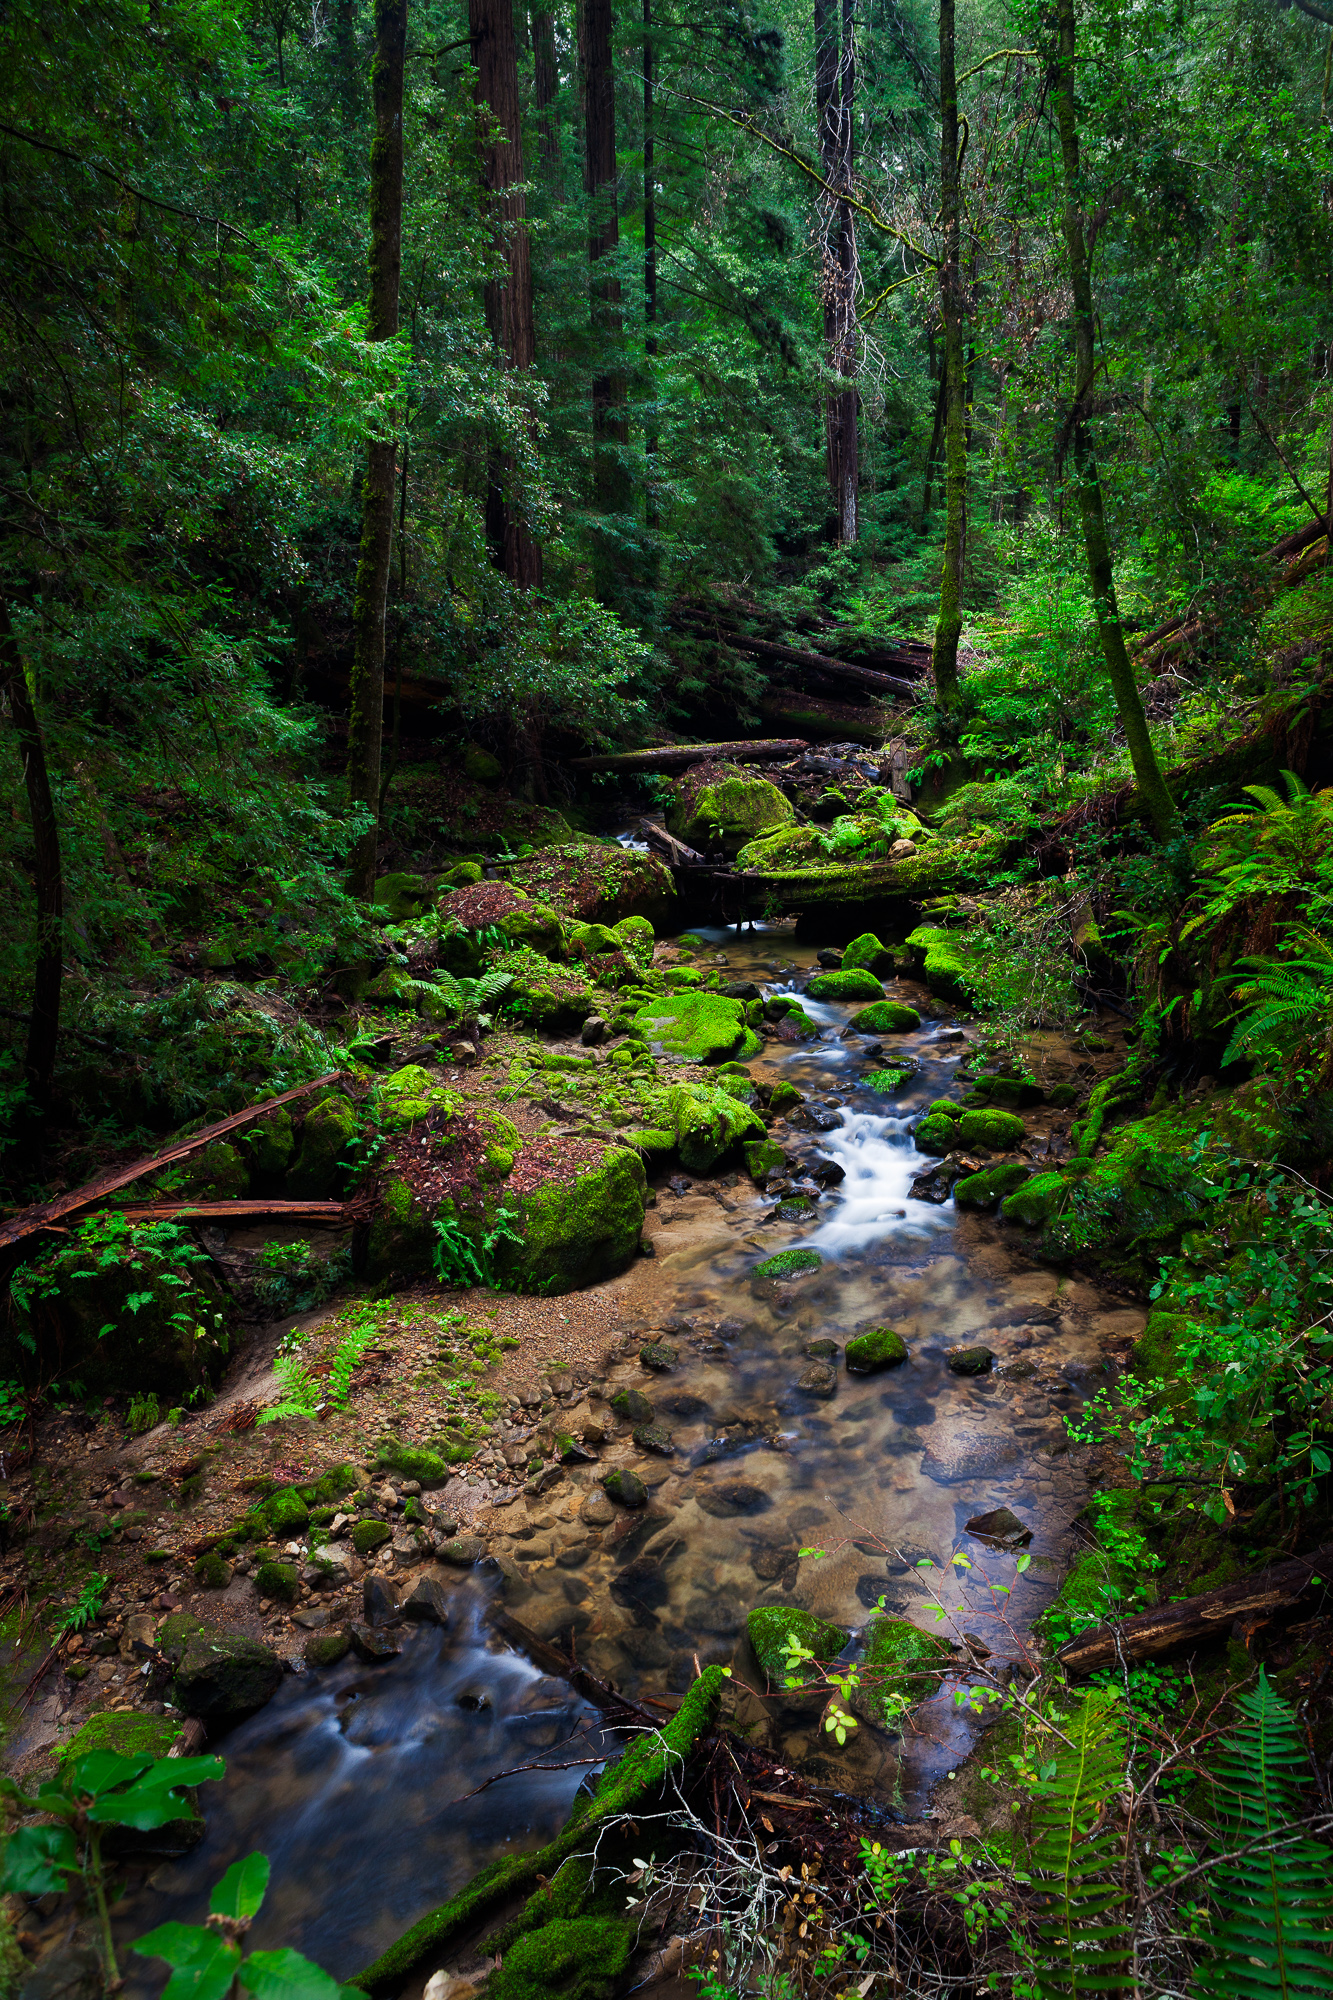
So which is better? As with any tool, it depends on the job. I use both full frame and cropped sensor cameras regularly in my photography. When I’m shooting landscape, architecture, or macro, I typically use a full frame camera. My current workhorse is the Canon 5D MkII (now practically a dinosaur of a camera!), which allows me to use a full range of lens focal lengths, including my widest. In these shooting conditions, camera features such as auto focus and frame rate are not as important to me as pixel count and low digital noise. With this camera, I shoot from a tripod most of the time and work slowly and methodically through the scene, getting as much right in camera as possible.

Barrel cactus is just starting to bloom in the Alabama Hills, Lone Pine, CA

The photo above is an example of using a full frame camera with a wide angle lens. Here my 17mm lens truly gave me the wide angle using my full frame sensor, instead of the appearance of a 27 mm lens (17 X 1.6) if I used a cropped sensor. I worked from a tripod, manually focused, and shot at ISO 100.

When I’m shooting bird and wildlife photos, I always use a cropped sensor. This gives my long lenses that extra reach, and cropped sensor cameras tend to have slightly lower pixel count, which allows for faster frame rate. My cropped sensor workhorse is the Canon 7D, which has my most important traits for these shooting conditions – fast auto focus and high frame rate. While low noise is always desired, here the highest pixel count is not as important, as wildlife and bird photos typically don’t end up in huge prints. Pairing this camera with a 400 mm lens allows me to handhold while photographing giving me lots of mobility. When I use it with my 800 mm lens, I get the equivalent of 1280mm due to the lens multiplication factor. This gets me in close to my subjects without needing tele-extenders, which reduce auto focus performance.

Crouching down and ready to strike, a juvenile green heron watches the surface of the water for movement

The photo above is an example of using a cropped sensor camera with a long lens. Using the equivalent of 1280 mm (800 X 1.6) allowed me to be far enough from my subject to not disturb it from its normal behavior. I was also able to shoot many frames per second to capture the perfect body and head position while the green heron was fishing.

Just as a carpenter wouldn’t just use one type of hammer, a photographer won’t resort to just one type of camera. If you are just dipping your toes into the world of digital SLRs, think first about what type of photography you’d like to explore first. That will likely help you list your desired features and point you to the right tool for the job.

Recent Publication – Backpacker Magazine

A backpacker descends from Horton Pass through Eagle Creek Canyon, Eagle Cap Wilderness, Oregon

The image above made its way into the June 2014 issue of Backpacker Magazine. The backpacker featured here is actually my dad – he and my brother agreed to be backpacker “models” on a trip to Eagle Cap Wilderness in Oregon a few years ago. As I mentioned in a recent article, you never know when a past photo will be used in the future, so it pays (literally!) to be well organized with your photo archive.

Occasionally while hiking with others, I lag behind so that I can get natural backpacking shots against stunning scenery. Sometimes these types of shots can work much better than planned photo shoots – this way I tend to get a more natural look out of my subjects.

Hiker And Halfdome

A backpacker stands on an outcropping admiring the view while Half Dome rises high overhead, Yosemite National Park

I created this photo on a backpacking trip a few weeks ago. I set out with a couple of friends, Frans and Mark, and our three day plan was to hike along the northern rim of Yosemite Valley from Snow Creek to Yosemite Falls.

I knew our best photo opportunities would likely be on the first evening. Snow Creek is located along the rim of Tenaya Canyon, directly across from the face of Half Dome. I had been here once before, and ever since that trip I had been visualizing the photos that I wanted to create there.

Primary on my list was a shot of a backpacker with the face of Half Dome looming high above. Half Dome is most famously viewed from the side, as most photographs of it are taken from the perspective of Yosemite Valley. In order to be successful, this photo had to have a few specific characteristics.

First of all, I knew I needed to use a long lens. I wanted to render the backpacker fairly large in frame, but also render the dome as large as possible. This meant that I needed to be close to the hiker and stack the layers of depth on top of one another, so that both near and far subjects would be large in the photo. Had I used a wide angle, the dome would be much smaller than in my vision.

Secondly, I wanted to shoot this in late afternoon with clear skies to the west. When the sun sets, its light moves all the way up Yosemite Valley and strikes the face of Half Dome, giving it a warm orange glow. On this particular day, I could have done with some clouds to the south and east, so that I’d get a little sky interest, but I worked with what nature gave me.

One thing I didn’t think about beforehand was the fact that the plateau from which I was shooting would be completely in shadow. This meant that in order to properly expose the cliff face, the backpacker would be too dark to clearly see details. After some experimentation, I decided to go with high contrast and render the backpacker as a detail-less graphic silhouette. I think this works very well in the final image, as it creates more emotional impact for the viewer. Those who travel this nation’s back country can easily see themselves standing in the photo, experiencing a glorious sunset.

Mark and Frans graciously volunteered to be my models, and I ended up choosing this photo of Mark as my favorite. In order to add more of the scene, I took additional photos of Half Dome and stitched them to the first shot to create a panorama. This really completes the scene, showing the entire cliff from which Half Dome emerges. We had a great (and cold) three days in the wilderness, and as I suspected, the photos I took from Snow Creek ended up being my favorites.

Try, try, and try again

Waddell Creek flows through a green forest along the Berry Creek Falls trail, Big Basin Redwoods State Park

One of the keys for any budding photographer is to shoot often, and stay well organized. You never know when photos you have taken in the past might some day become marketable. Several years ago, I shot a series of photographs on spec for a national magazine, including the photo you see here. Shooting on spec means that the magazine is requesting a photo with particular specifications, but has not given you an assignment and guaranteed publication. This is something I wouldn’t recommend unless it is almost no cost to you (including time spent!). My brother graciously volunteered to come along an be my model for the day.

Unfortunately, the magazine didn’t use my photographs for the intended article (in fact, I don’t know if they ended up running that article at all). This happens all too often with editorial publishing, which is why shooting on spec is almost never a good idea, especially if photography is your primary source of income. However, a couple of years later, that same national magazine did print one photo from this outing for a different article, and just recently another magazine is looking at these photos for publication as well.

The only way this was possible was for my photos to be well organized so they were easy to submit for other uses over the years. This means they were well captioned, titled, and tagged with keywords. Even though the original intent for the photos fell through, they were still very usable and have become part of my photo archive. Who knows when one of these photos will be used again in the future?

Copyright 2017 Hank Christensen