How To Scout A Location For Landscape Photography

Hang around a group of landscape photographers long enough, and you’ll undoubtedly hear them talking about location scouting. As the old saying goes, understanding your subject better will improve your photographs of the subject. This is true for all kinds of photography (wildlife, architectural, portrait), and landscapes are no exception. Location scouting is the process of getting to know a particular landscape better, and is an important aspect of improving your landscape photography.

Before we talk about the nuts and bolts of how to conduct a proper location scout, let’s talk about various types of scouting and how each might bring a new perspective on an imperfect landscape.

Seasonal scouting

Location scouting can be done long before the final photo is taken, sometimes even years. Anytime I visit an area for landscape photography, I not only try to create the best photograph I can at the time, but I also imagine what the scene might look like during different times of the year. Would that alpine meadow make the perfect foreground if only it were covered in wild flowers? Would those high mountain slopes pop if the aspen groves were in peak fall colors? Or if the tree line was blanketed with fresh snow?

Sometimes certain areas don’t look very good when I first visit, but in a different season, it would shine. In those cases, I make a mental note to come back in the season I think will show the area at its best, and do research to find out optimal timing for those seasonal elements. But while I’m there, I can spend the time finding some of the shots that I will eventually take, even if it ends up being years later.

Ponytail Falls shoots outward from a cleft in a rock cliff, and cascades over large stones below, Columbia River Gorge, Oregon

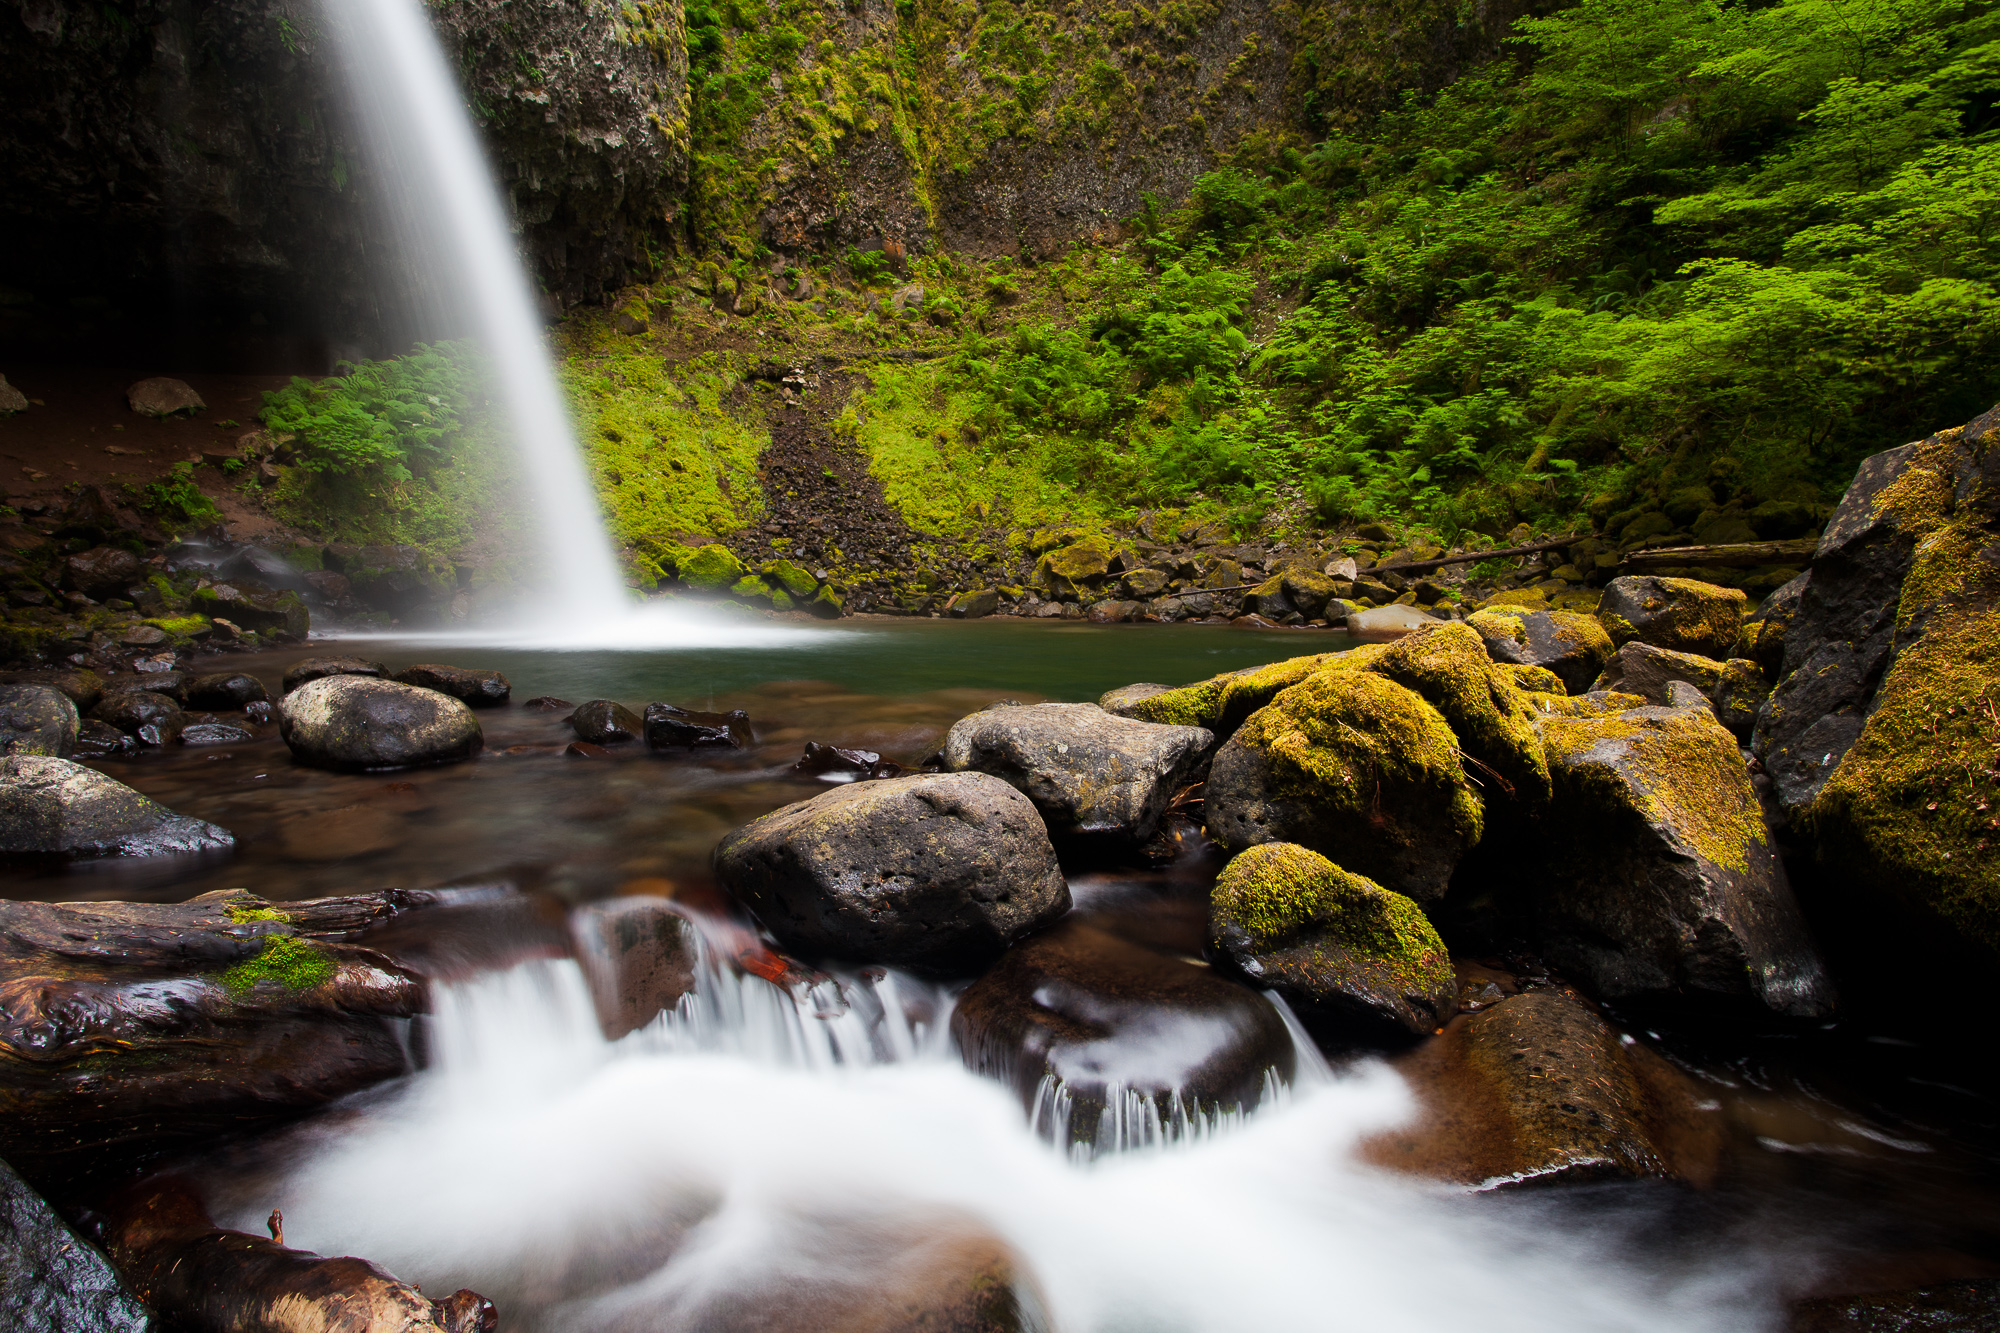
In this example, I first visited Ponytail Falls in Oregon’s Columbia Gorge in late fall. The trees were bare and the moss on the river’s rocks was brown. It was still a pretty scene, but I knew that by visiting the same area in the spring, I would green up the scene, and catch the falls at peak water flow. I returned in spring a couple years later to capture the photo above. Having already scouted the area and set up my shot made the return trip easy, as I had already formulated my target compositions in my mind.

Scouting for a different time of day

Scouting an area for a future season is an extreme example of the practice. More often, we’re scouting in anticipation of different light on the scene. Examples include visiting an area in the evening in anticipation of sunrise light, visiting midday while waiting for a beautiful sunset, or even waiting for a passing squall to reveal the full glory of its post-storm light show.

The tetons rise behind a stand of fall aspen, Grand Teton National Park

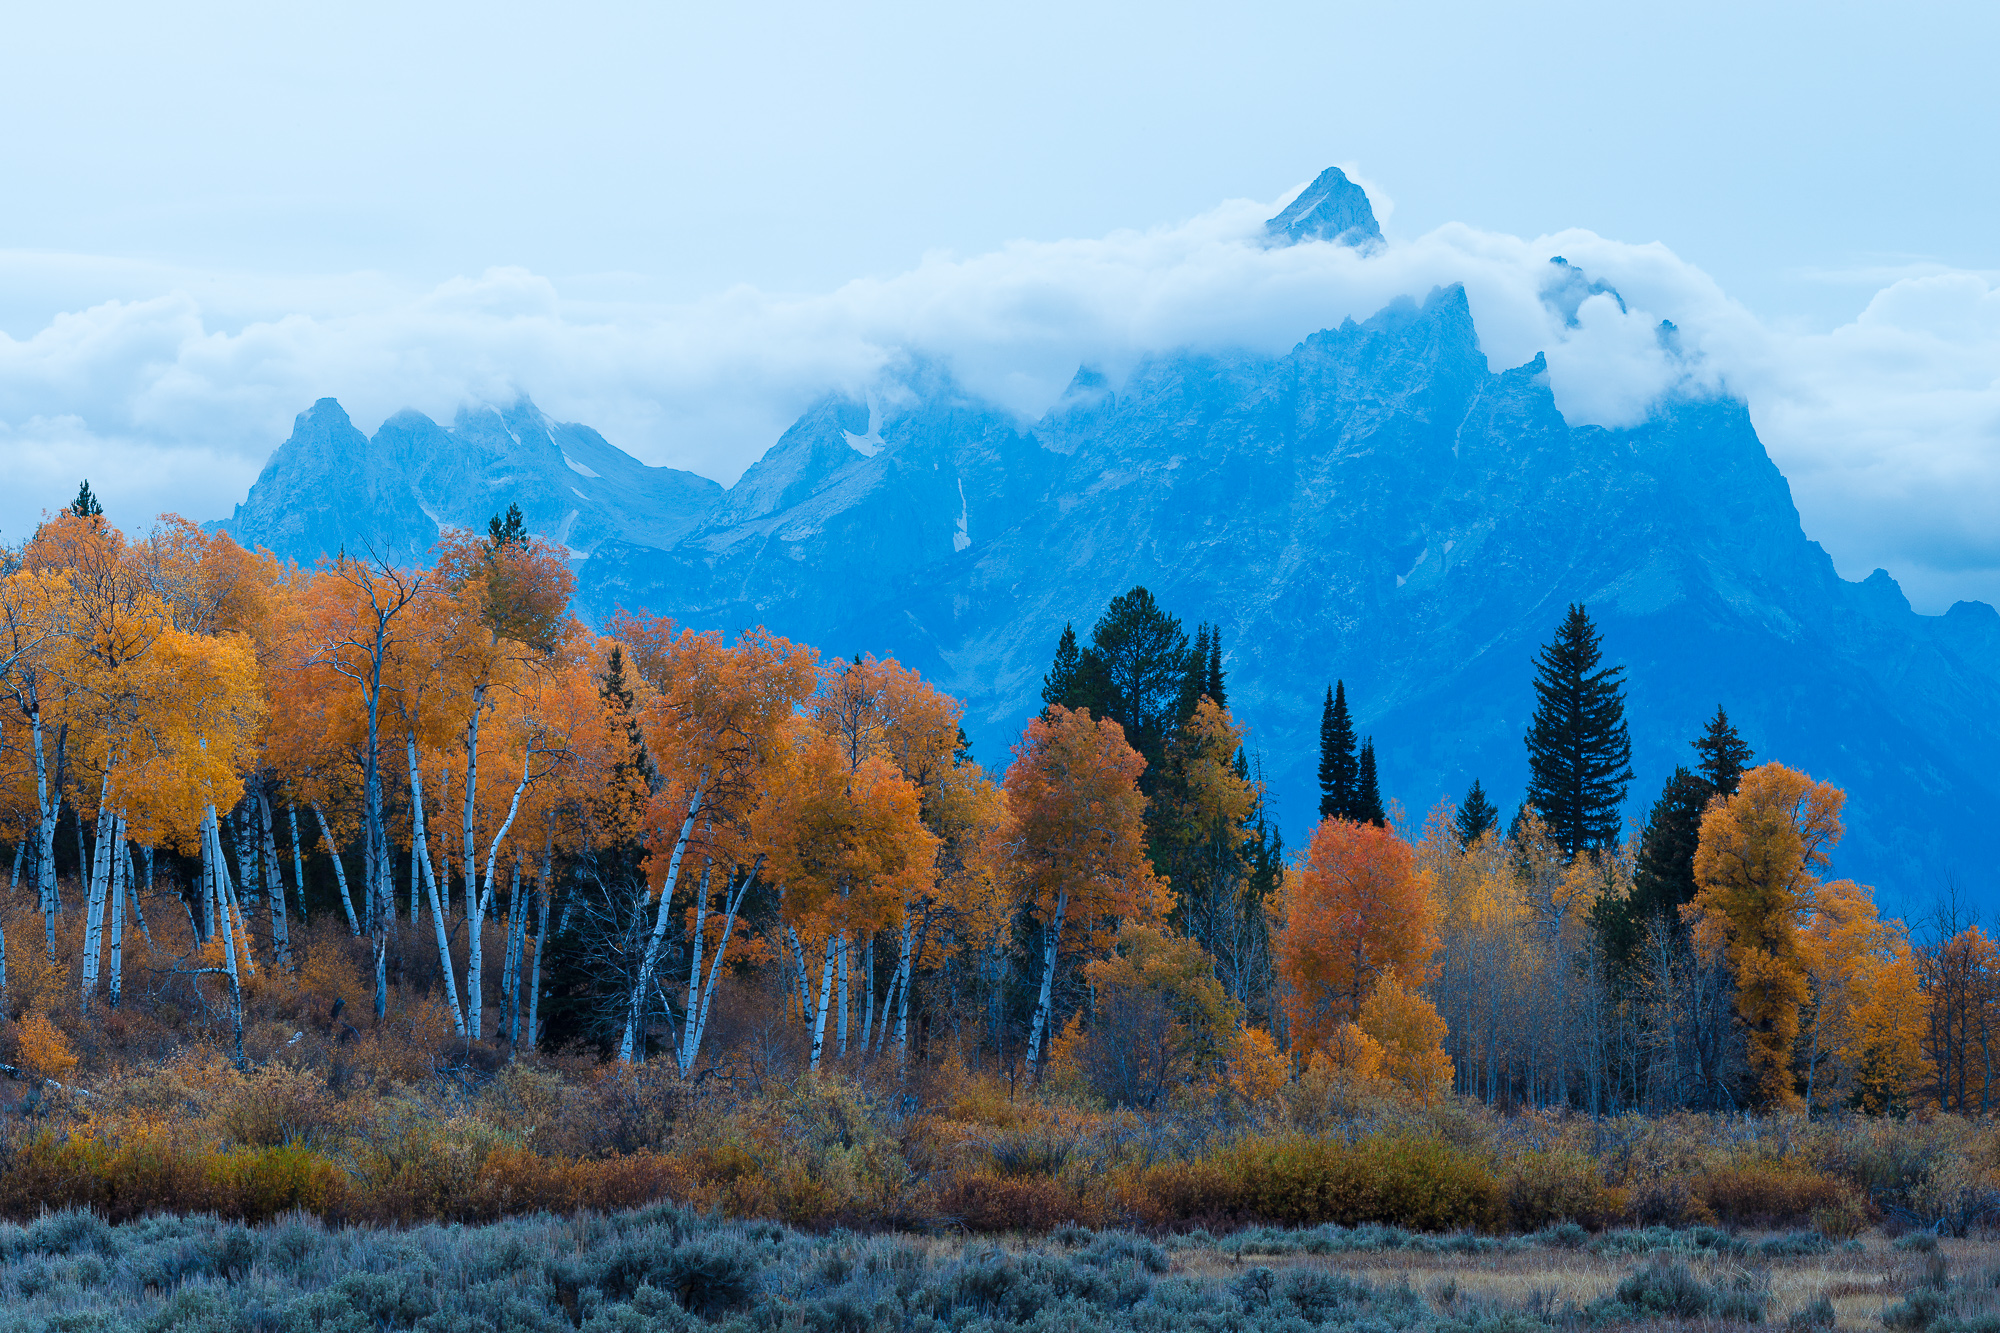
The photo above was taken on a trip to Grand Teton National Park with some friends. We scouted out a beautiful aspen grove in full fall foliage with the Tetons rising behind. However, the sunset we were hoping for failed to materialize with heavy cloud cover all the way to the western horizon. One of my friends suggested that although we had been targeting this location for a sunset, it might actually look spectacular at sunrise, as both the Tetons and the aspen grove would be front lit, slightly from the left. This would give definition to both the mountain and trees, and hopefully the sunrise would reveal some of that nice fall color throughout the grove. With another visit in mind, I spent some time composing the shot above, in anticipation of sunrise light.

The sun just lights the top of the Tetons as it rises behind a grove of aspen in their fall colors, Grand Teton National Park

A couple of days later, I was rewarded by the preparation. We arrived just before dawn, and because of my earlier visit, I knew exactly what my composition would look like. I quickly reset the shot based on GPS coordinates I took the previous visit. Using the exact spot I had set up in previously, as well as my reference shot from two days earlier, I took all the guesswork and stress of finding a shot that morning. Now it was just a matter of waiting for that beautiful light to brush through the aspen grove and make those yellows and oranges glow.

The on-site scout

The last type of scouting (and often the most frantic) that I do is what I call the “on-site”. This stems from me showing up unprepared, but still needing to quickly assess the area and find those great compositions that convey the essence of the area to the viewer. This is much easier done when showing up for a sunset shoot, because you typically have a few hours of daylight in which to scout and set up your shot for the magic hour. On-sight scouting for a sunrise shoot is much more difficult, because even if you show up early, you have to wait until pre-dawn light before you can see the scene well enough. It is very hard to create compositions in the pitch black of night!

Sunlight moves down the mountains to the west of Salt Creek, now a dried salt flat, Death Valley National Park

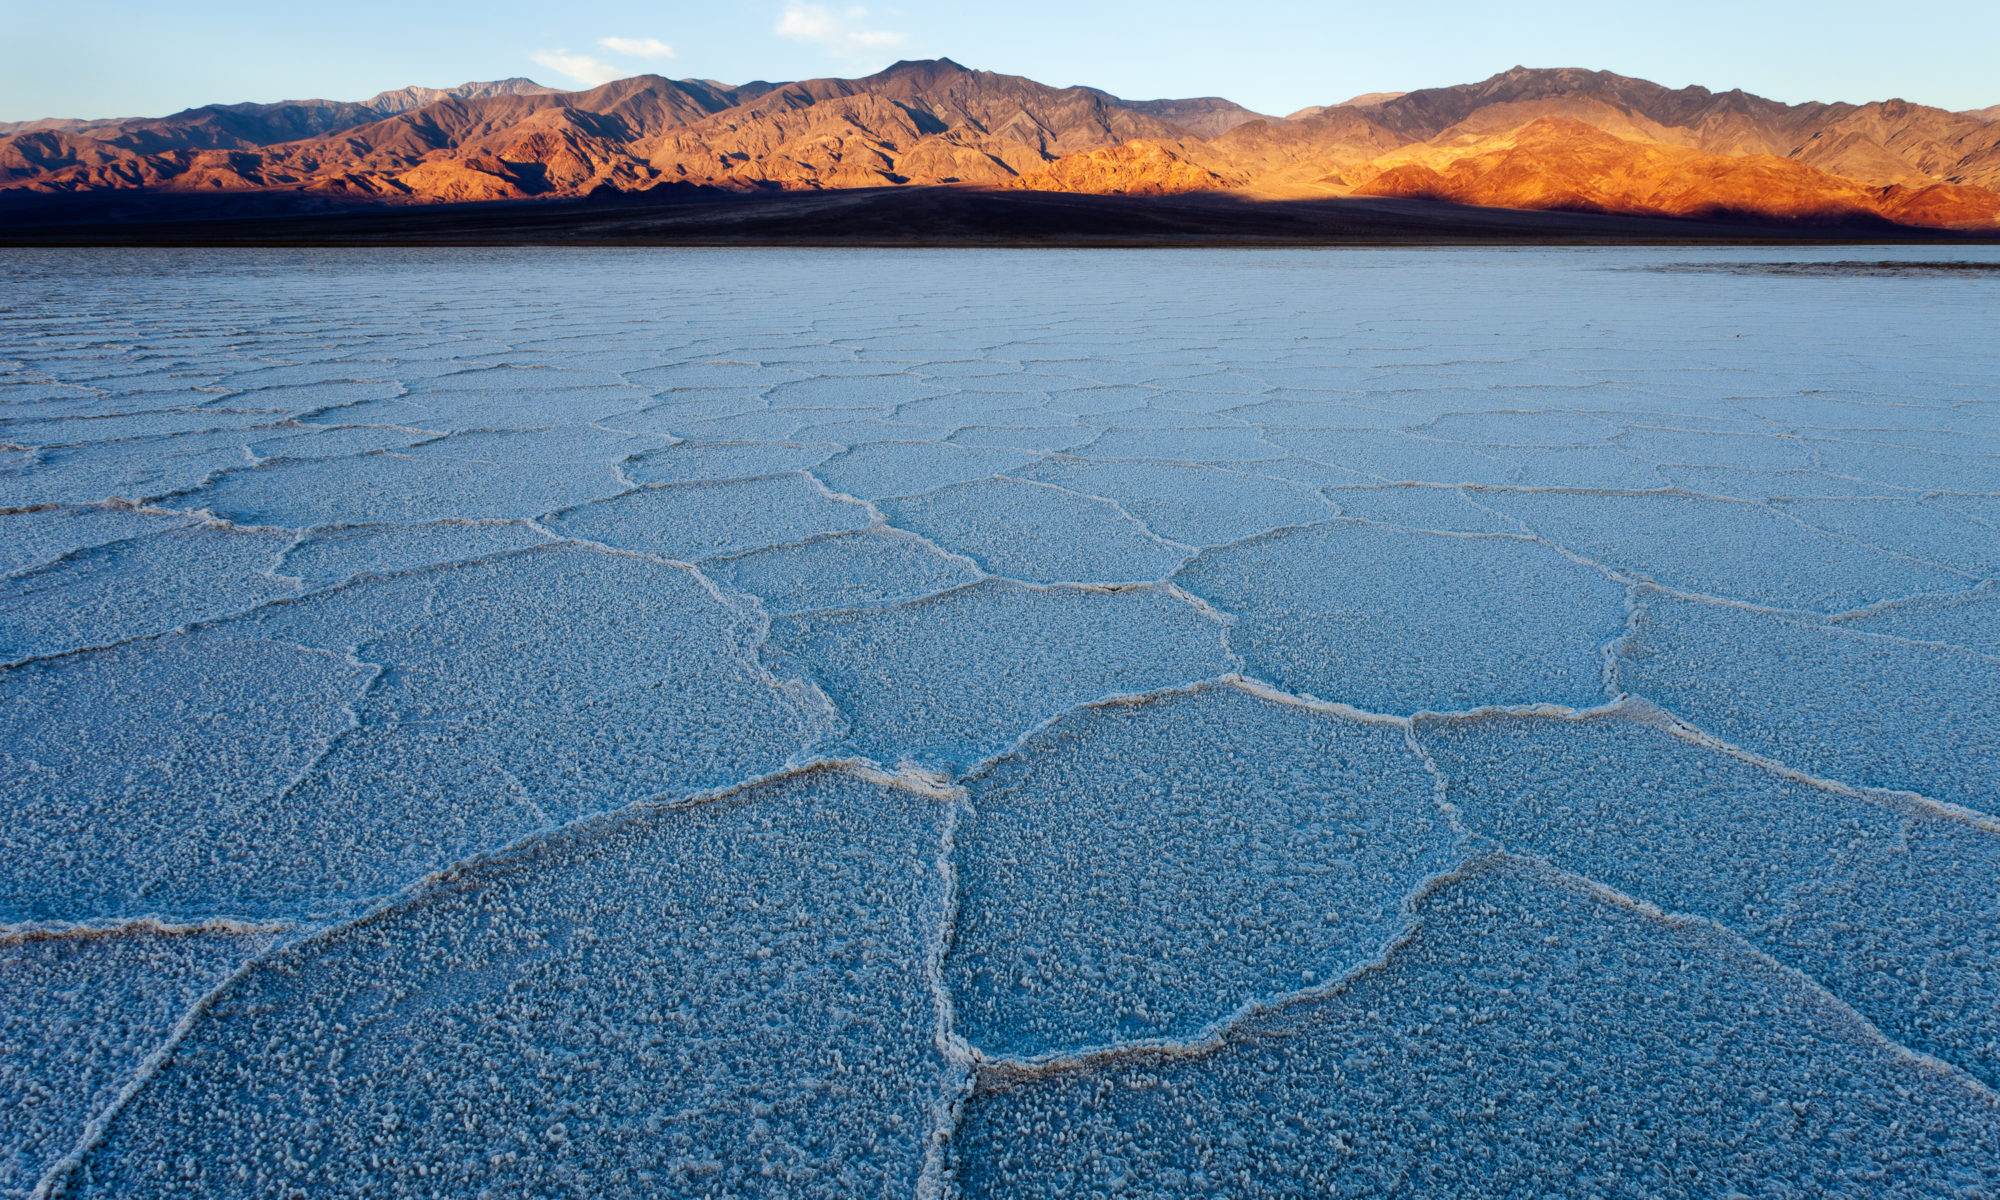
The photo above was the result of one of those rare pre-sunrise on-sight scouts. This shot was taken on my first trip to Death Valley National Park in the salt pan near Salt Creek. As I walked out onto the dried salt bed, I was surrounded by a thick salt crust. While this could make for an interesting foreground, it felt a little too overbearing to balance out the distant mountains. However, I had never been here before, and I didn’t quite know where to go. As I saw the sunlight start creeping down the mountain face, a composition suddenly came to me. I wanted to contrast the bright red of the sunlit mountains with the blues of the still-shaded salt. However, this thick crust of salt wasn’t working for me – I needed a much more delicate salt ridge pattern that gave more emphasis to the structure of the salt in between the ridges.

I quickly scanned the ground to the north and south, looking for a ground pattern that would help fulfill that vision. In the distance to the south I saw something that might work, but I had only a few minutes to get there and set up before the light would flood the salt pan itself, ruining the color contrast effect. I heaved my tripod (camera still attached) over one of my shoulders and ran as fast as I could across the pan. As I got close, I could see that this foreground would work out perfectly. Down went my tripod, already set up to the right height with the right, wide angle lens attached. Less than a minute later, the sun was just touching the lower slopes of the mountains, creating the beautiful color separation I was hoping for.

Scouting techniques

Now that we’ve gone over the various types of location scouting, how does one actually go about doing this? You’ve arrived to a spot with several hours to spare, but now what? For landscapes, there are three major elements I’m thinking about combining to create my composition – background, mid-ground and foreground. The goal of scouting is to essentially find each of these elements that you want to add together to create a potential composition. If the lighting is great while you’re there, wonderful. You may luck out and get your ideal photo of that location. But more often than not, it helps to think about other times or seasons in which to capture the scene.

1. Find your background:

The sun rises over Thousand Island Lake and Banner Peak, Ansel Adams Wilderness

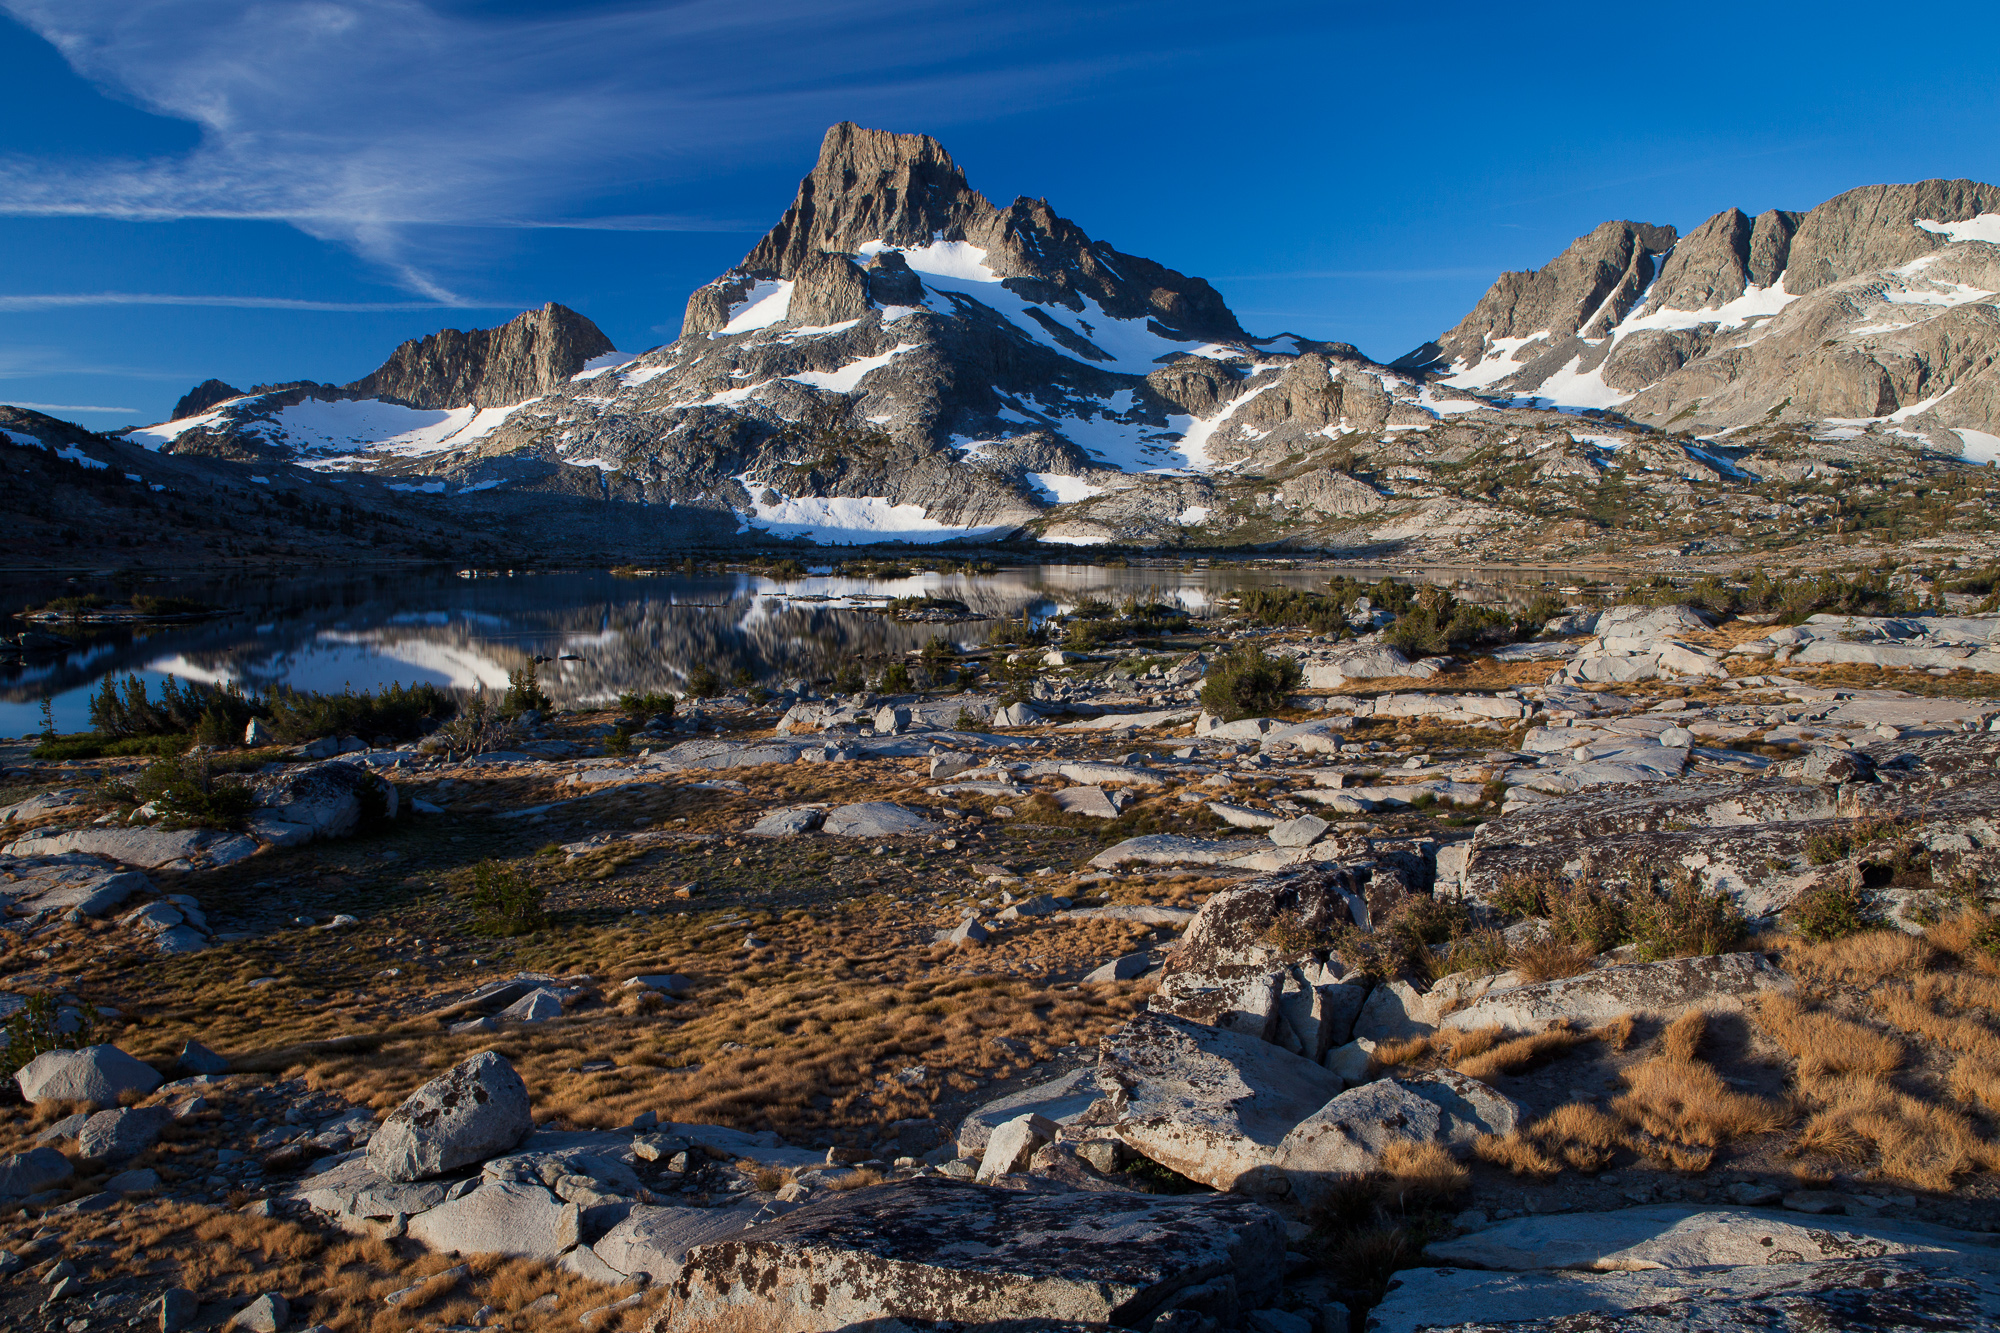
Backgrounds are easy. These are the huge dominant aspects of a landscape that typically draws you to the area in the first place. In my typical compositions, this is usually a mountain, ocean, or waterfall. In the photo above, I was backpacking at Thousand Island Lake in the Ansel Adams Wilderness of the Sierra Nevada. Banner Peak is a dominant feature of that area and hard to ignore. I knew well before my trip that I wanted to capture this massif at sunrise. One element down.

2. Find your middle ground:

The sun rises over Thousand Island Lake and Banner Peak, Ansel Adams Wilderness

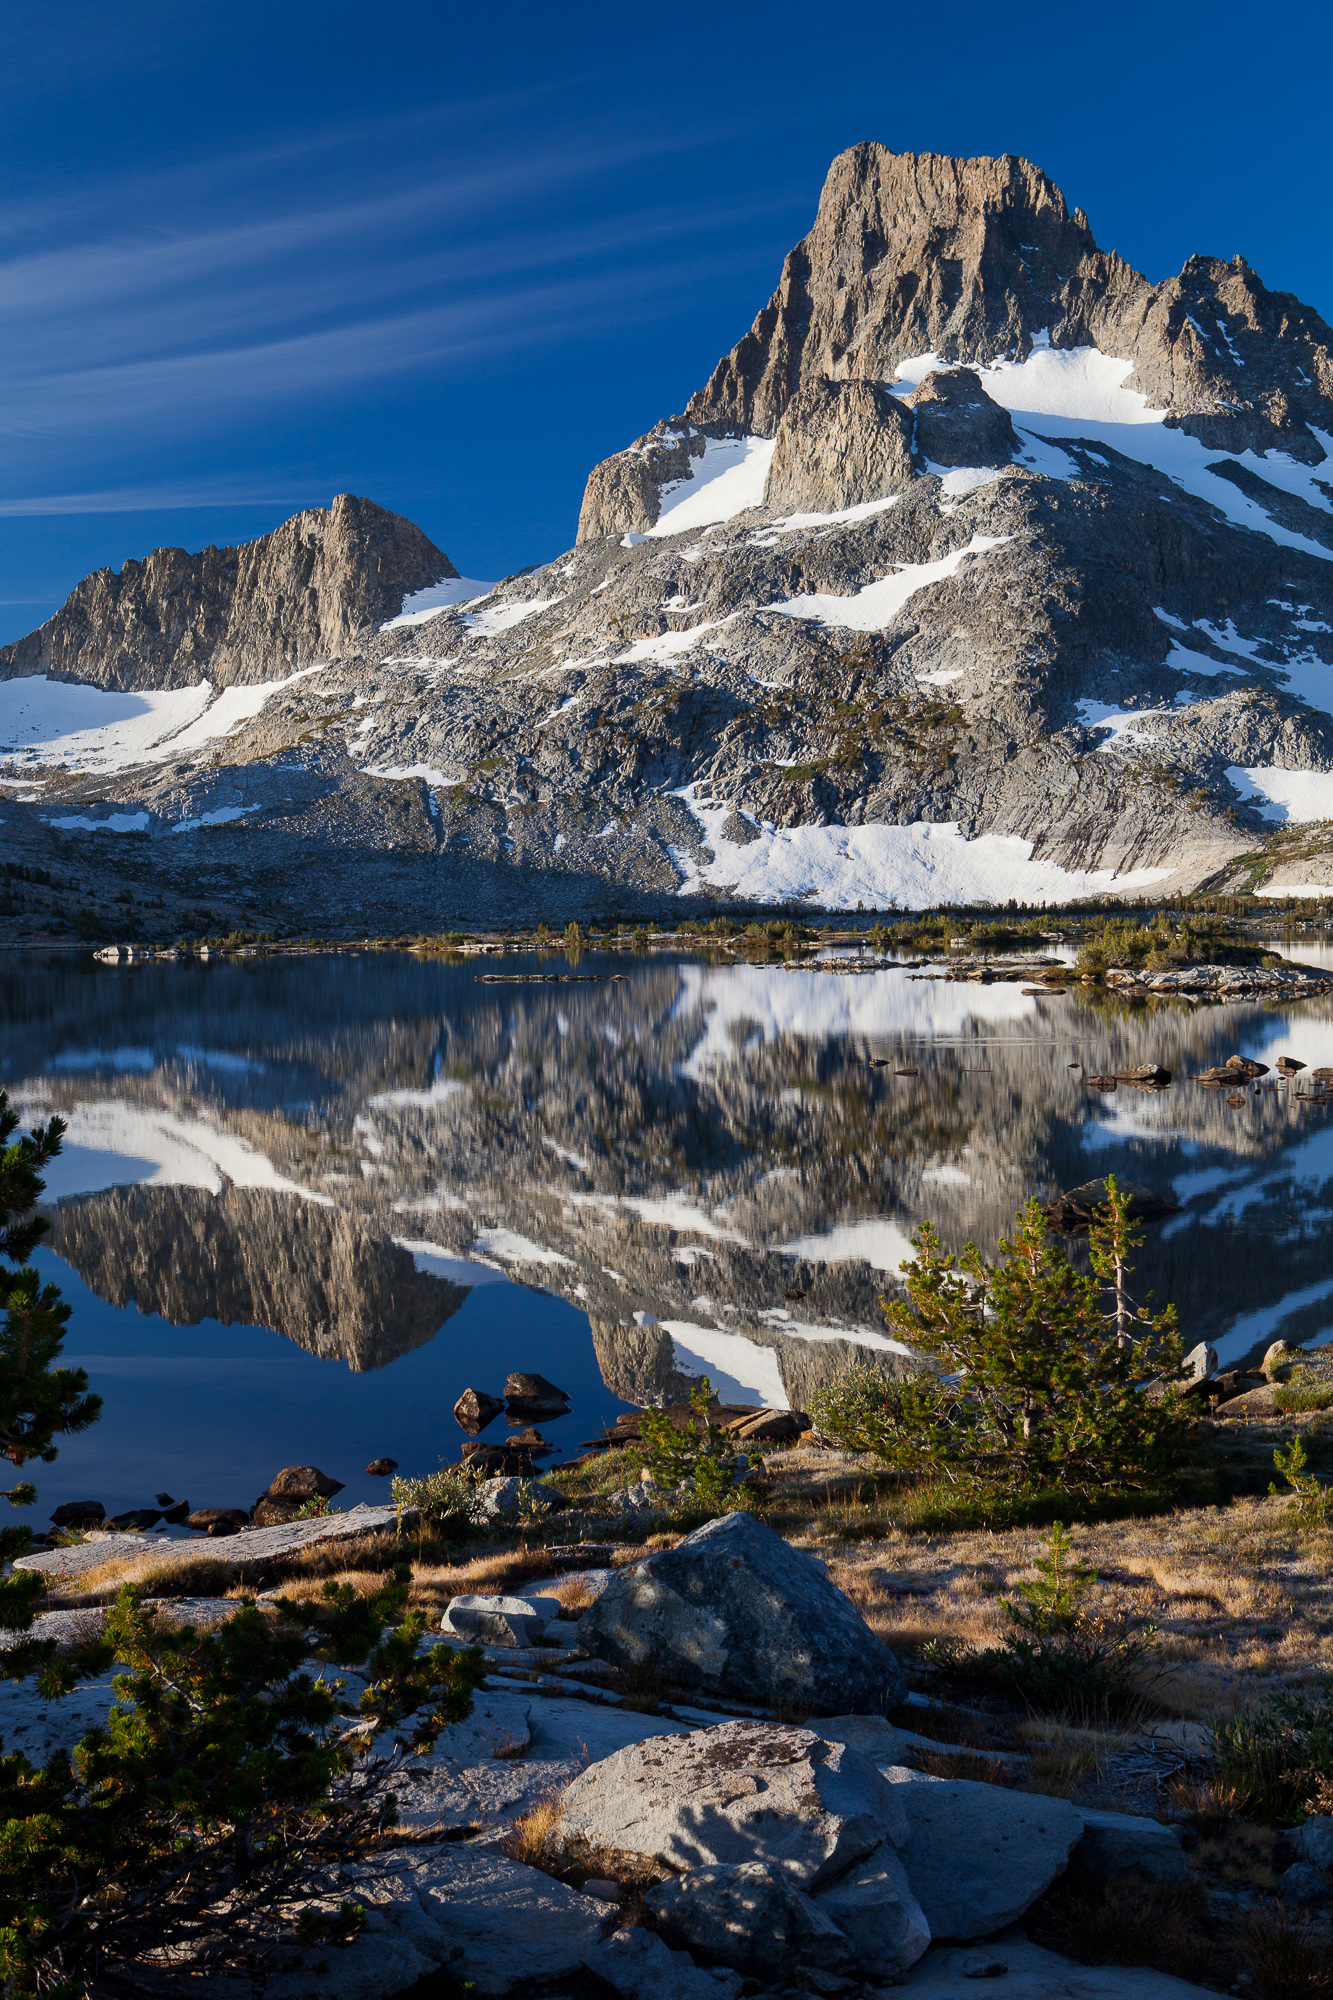
A middle ground typically ties your foreground and background together. Every landscape doesn’t need a middle ground, but I’m always assessing the area around me to find some element that will compliment, or draw the viewers’ eyes toward the background. In this case, Thousand Island Lake itself was a no-brainer. It was a calm morning and Banner Peak cast a strong reflection, doubling the impact of the mountain. Now just to find a proper foreground to lead the viewers eye into the frame, and balance the strength of the mountain.

3. Construct your composition with proper foreground elements:

Banner Peak is reflected in Thousand Island Lake at dawn, Ansel Adams Wilderness

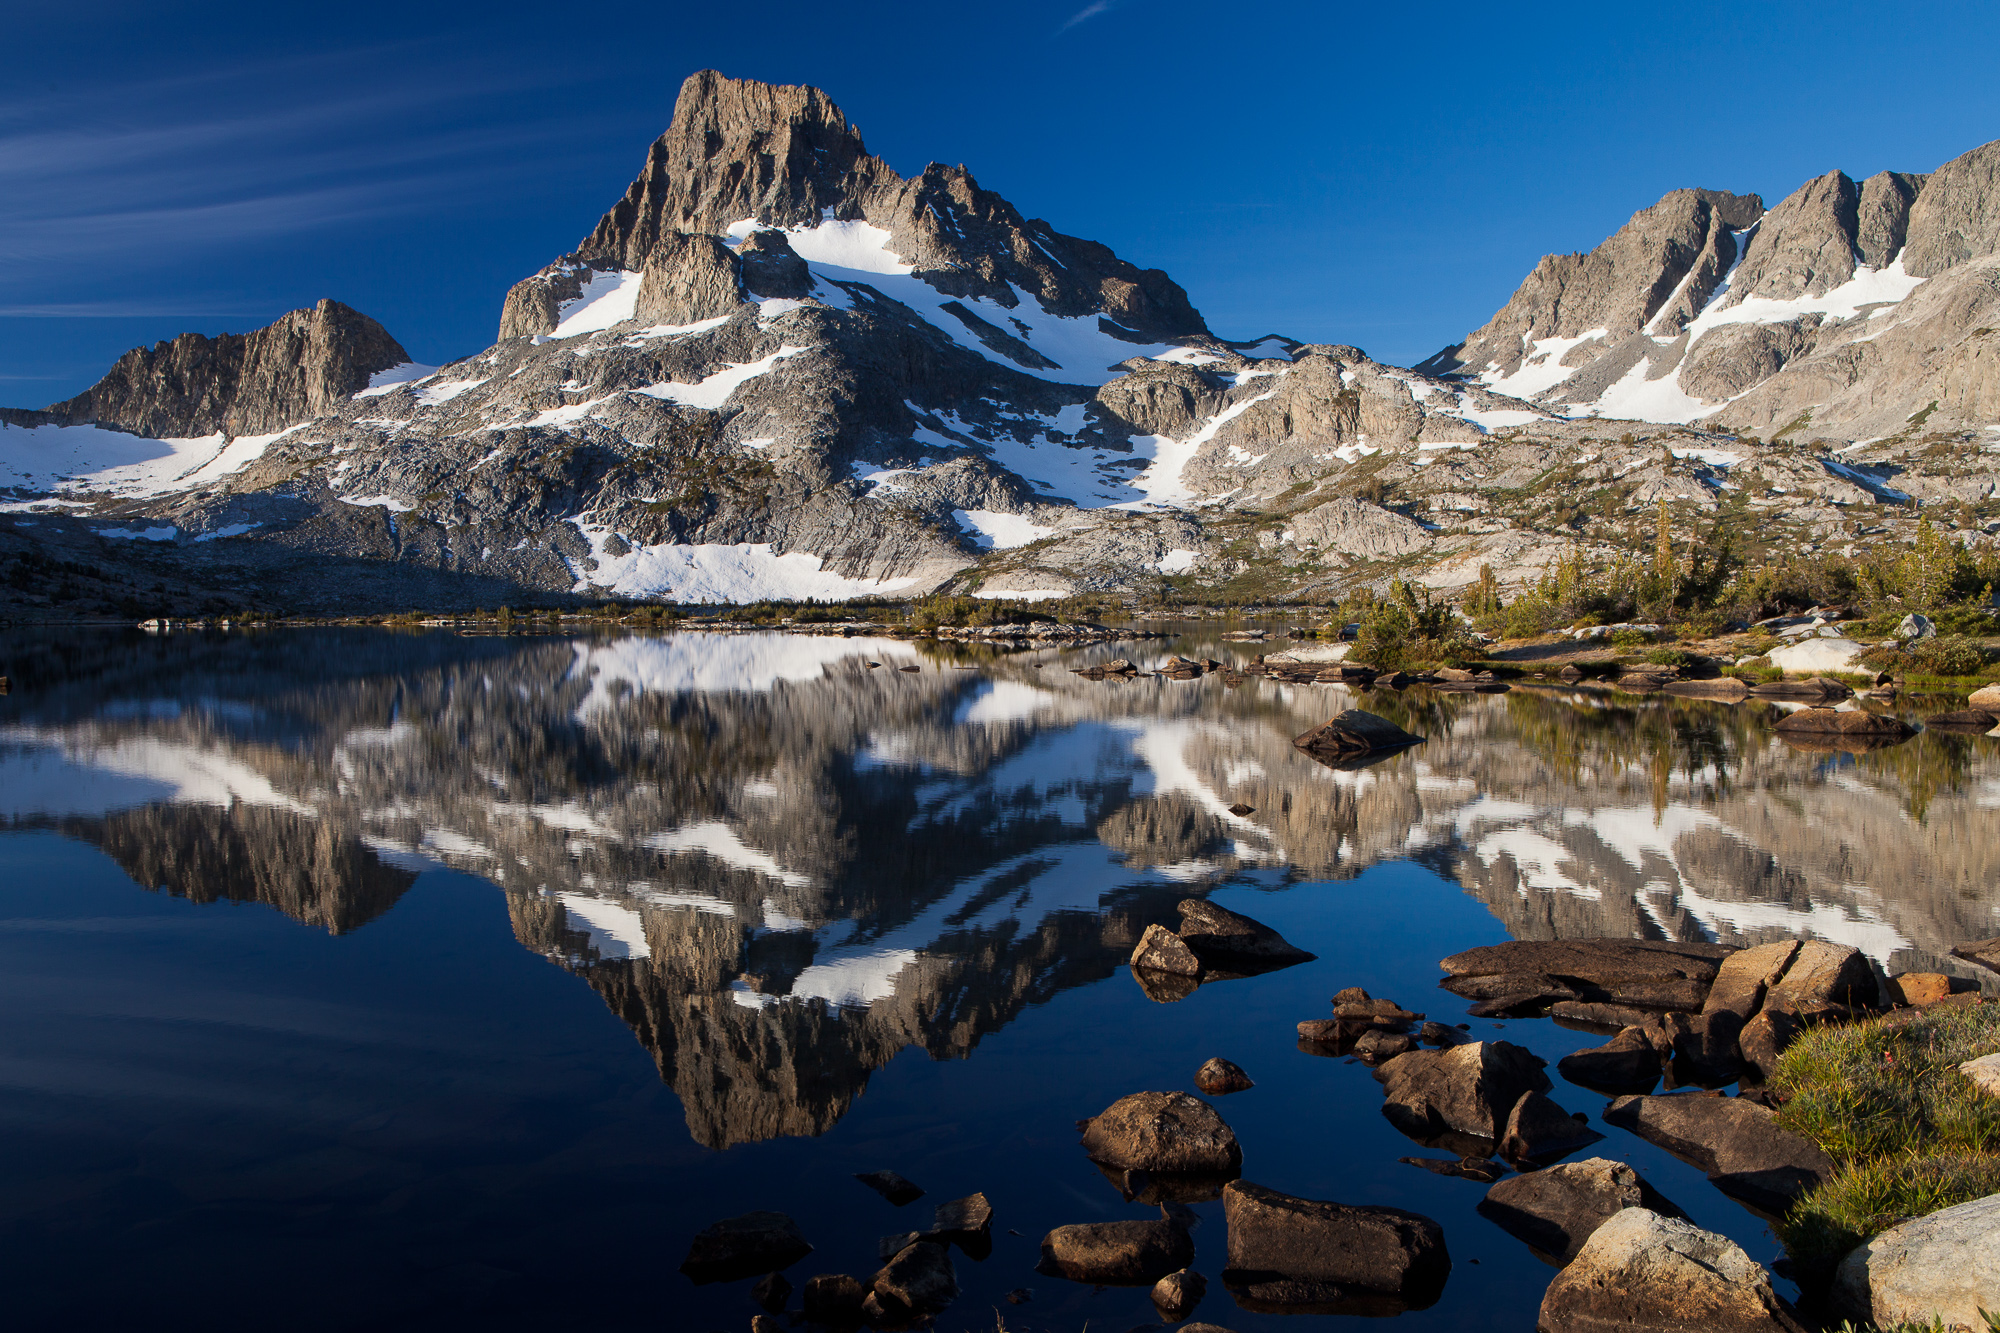
The perfect foreground usually takes some searching to find. If you see a photographer wandering around looking at their feet, this is likely what they are doing. If the angle of the lens is very wide, these foreground elements can sometimes be very small. You can often find several good options for foregrounds using the same middle and background elements. If so, shoot them all! In this case, walking along the shoreline of the lake led me to a line of rocks breaking the reflection of the deep blue sky. Perfect elements to draw the viewers eye toward the reflection and up to the peak itself. With my shot in the bag, I headed back to camp for my morning coffee.

A final word – virtual scouting

Today’s information age brings us many advantages in learning about far away places. Although I think nothing beats learning about a location like visiting it yourself, I often utilize digital exploration techniques before I go somewhere to photograph it. This helps me get my bearings and start to think about what kinds of photographs I’m going to attempt. While I won’t go into detail here, tools such as the Photographers Ephemeris, Google Maps 3D and Google Maps photo overlay help in seeing what others have captured in the area, as well as planning your own trip.

Sun lights the tip of Mt. Davis at dawn, Ansel Adams Wilderness

I often shoot remote mountain locations while backpacking. Every time I pull into a new campsite, I drop my pack and start scouting the surrounding area, thinking about sunset that night, and also sunrise the next morning. As I had never been to Davis Lakes in the Sierra Nevada before, I spent a good deal of time researching the area using the tools above. Based on the time of year and angle of the sunrise, I knew that sunrise light on the peak of Mt. Davis reflected in the lake would look fantastic. When I arrived at my predetermined campsite, I set about finding a composition that would lead the viewer’s eye right up to that beacon of light in the frame. In order to do this, I had to pre-visualize what it might look like the following morning. The next morning, I emerged from my tent and set up in the exact spot I had scouted the previous evening. Now I just had to wait for the light until it was perfect.

Next time you think of a new area you’d like to photograph, spend time beforehand learning about that location. Give yourself plenty of time to explore the area on foot, setting up several potential shots that might work well in the right lighting conditions. Above all, if mother nature does not cooperate with your photo endeavor, don’t despair! Just chalk it up to a valuable scouting trip!

Gear I used to create the photos in this post:

Location Photography – Telling A Story Through Photos

Sometimes when I go to new locations, they can be so awe inspiring that I feel photographically challenged. When this happens, I need to take a step back and think about the location’s special traits that fill me with such awe. What is important about this area – is there some natural event occurring, or some irregular weather phenomenon? In short, what are the stories this new place is trying to tell me? Answering this question often lends direction to my photography and helps me realize which stories about the area I want to share with others. (Note: although I primarily photograph natural subjects, this technique works equally well with any location or subject).

I recently used this technique when I spent several days in the Namib Desert in Namibia last year. At first, being surrounded by these huge red sand dunes was overwhelming. What should I shoot first? As I explored the desert around me, I began to recognize several stories that this place had to tell.

The most obvious story was about the sheer size of the sand dunes found here. This is the oldest desert in the world, and home to the world’s largest sand dunes. I had photographed sand dunes before, but never any of the massive size that I saw in this desert. The rust-orange massifs were more akin to sand mountains than something as temporary and fleeting as a dune. Some of the largest dunes stood over 1000 feet tall, dwarfing the sparse trees and flora that dared to grow at their feet. In the photo below you can faintly see a few trees, which give the enormity of the dunes a sense of scale.

The giant sand dunes of Namibia turn many shades of red and orange under shifting clouds, Namib-Naukluft National Park, Namibia.

Although this desert receives only 10 mm of rain each year, amazingly there are large mammals that thrive here. This was story number two. Here, a gemsbok oryx (one of Africa’s many species of antelope) roams among dry scrub and dying trees. With no ground water to drink, these animals rely on the occasional fog that rolls in from the Atlantic ocean. After the fog collects on plants and their fur, the oryx lick the scarce moisture from each other’s coats, sustaining themselves until the next foggy morning.

A gemsbok oryx stands in front of a massive dune, wet from a rare early morning thunder storm, Namib-Naukluft National Park, Namibia.

While I could take up-close portraits of oryx in other parts of Namibia, telling the story of these large antelope thriving in the desert necessitated using a shorter lens than I usually do for wildlife. A 400mm lens allowed me to include the massive red walls of sand that dominate this habitat. Again, it was important for me to use unique elements of the scene to tell the story of that location.

Gemsbok oryx cross flat ground in front of a wall of sand - the lower slopes of a massive sand dune, Namib-Naukluft National Park, Namibia.
Gemsbok oryx cross flat ground in front of a wall of sand – the lower slopes of a massive sand dune, Namib-Naukluft National Park, Namibia.

A third aspect of this desert that I wanted to show photographically was the rust orange color of the sand. This reddish orange comes from the high iron concentration in the sand and the gradual oxidation of that iron. The older the dune, the more orange it becomes. In order to offset the beautiful orange and red tones of the sand, I needed blue skies, giving my photos nice complimentary colors. Counter to most of my landscape photos, I opted to shoot in late morning or early afternoon (instead of sunrise or sunset, when the sky itself would be much warmer and closer in tonality to the sand). Had I not been thinking of how to convey the story of these ancient orange dunes, I likely would have kept my camera in the bag at this time of the day!

Afternoon light provides enough blue in the sky to compliment the reddish-orange of the dune, Namib-Naukluft National Park, Namibia.

A final story waiting to be told about this area was the play of light across the contours and textures of the dunes. The photo below was shot at sunrise, creating extreme side light and casting a sharp shadow line along the front crest of the dune. This strong shadow added shape and contrast to the dune.

Rare storm clouds cast shadows across the massive dunes of the Namib Desert, Namib-Naukluft National Park, Namibia.

The shadows in the image below manifested very differently in that they are not created by the shape of the dune itself, but rather by clouds moving in front of the sun. Because these dune ridges are actually quite far apart, a large cloud shaded only a single ridge at a time, giving me endless shadow patterns to choose from over the course of about half an hour. This was my favorite image of this type, as the closest and farthest ridges are in shadow, isolating the middle ridge in sunlight.

Rare storm clouds cast shadows across the massive dunes of the Namib Desert, Namib-Naukluft National Park, Namibia.

When I first arrived in this vast desert, I was challenged by where to start with my photography. But by focusing on those stories that made this place so special, I could use them to direct my photographic effort. It even helped me develop a shot list to try to fill during my brief stay. Next time you find yourself in a challenging location, stop and listen. Perhaps the area will open up and share its stories with you.

Indian Giant Squirrel

One of my biggest surprises on my last trip to India was encountering several giant squirrels. I am use to the cute and cuddly squirrels of North America, so it was quite a shock when I first saw one of these tree beasts. Measuring a body length of around 14 inches, and a tail length of over 2 feet, these squirrels were bordering on raccoon size!

An indian giant squirrel perches in a tree and eats a piece of banana, Mudumalai National Park, India.

Although large, they were still pretty cute, with little round ears that stick up.

An indian giant squirrel perches in a tree and eats a piece of banana, Mudumalai National Park, India.

One of the squirrels had gotten ahold of a banana from someone in our forest camp in Mudumalai. He took it up into a tree and proceeded to devour it, holding it firmly in his dexterous grip while balancing his body weight across a small branch.

An indian giant squirrel perches in a tree and eats a piece of banana, Mudumalai National Park, India.

This is a tree dwelling species that rarely leaves the upper canopy. I felt lucky to see three of these shy creatures in less than 24 hours. My last sighting was a stroke of luck. We had pulled over to let the car rest half way up a long a winding climb up to Ooty. One side of the road was a cliff towering above, and the other side was lush with the tops of trees growing far below. And there through the canopy, directly at eye level was another giant squirrel.

With a body length of 14 inches and a tail 2 feet long, the indian giant squirrel is a site to behold. Mudumalai National Park, India.

I got several photos of this guy, but this was my favorite. Although I had a direct view, I shot through some leaves at a wide aperture to give the feeling of peering through a thick forest at a shy, solitary creature.

Gear I used to create the photos in this post:
[amazon_link asins=’B00PF39PEY,B00NEWZDRG,B00IAYFDIC,B00OD71FKU’ template=’ProductCarousel’ store=’hankchristens-20′ marketplace=’US’ link_id=’a2a5a946-90dc-11e7-a7bf-b5ee2948dd18′]

Namibia 2016 Gallery

Namibia 2016

I’ve finished processing my photos from a trip to Namibia, Africa last year (yeah, sometimes it takes a while to get everything processed). Here is a gallery of some of my favorite shots.

Several plains zebra line up to drink at the Okaukuejo waterhole, Etosha National Park, Namibia.

It was a truly amazing trip, as I was lucky enough to

  • Watch endangered black rhinos congregating around a waterhole in the dead of night
  • Walk among the tallest sand dunes in the world (over 1000 feet) in the world’s oldest desert
  • Witness a rare lightning storm in the desert as thunderclouds rolled over endless dune fields
  • Visit Deadvlei, an ancient river valley dotted with 700 year old desiccated tree husks in the heart of the Namib desert
  • Drive 2500 miles (mostly on dirt roads) over 11 days, see a good variety of countryside
  • See the desert-adapted bush elephants of Damaraland
  • Check out the gallery this and much more, including numerous birds and wildlife. Click each image to see the next, or use your keyboard arrows to navigate.