Become a Better Photographer by Exposing to the Right

Sun creeps down the mountains west of the Cotton Ball Basin, Death Valley National Park

Read old photography books and you’ll find instruction on over or under exposing your camera in order to “fool” your camera into capturing the scene on film as it was in real life. Cameras are designed to render every scene at an average of middle gray, which may not be suitable for all scenes. For example, snow or beach scenes often need to be over exposed by a couple of stops or else the camera will expose the snow or sand darker than it appears in real life, giving a muddy appearance to a naturally bright scene. The same is true for naturally dark scenes. For example, if a black cat fills most of your frame, you should underexpose or else the camera will try to expose the cat at middle gray, blowing out your highlights.

However, this is not necessarily true with digital photography. As you are learning the craft of digital photography, once you graduate from shooting jpeg images to RAW images, you should learn how to “expose to the right”.
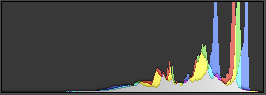
In a nutshell, this means overexposing the shot as much as possible without blowing out (or clipping) your highlights. This term is named after the fact that when overexposing, the tones captured by the camera move to the right part of the histogram that represents the possible tonal range the camera’s sensor can capture.

The principal behind this technique is simple – digital sensors capture far more digital information on the right side of the histogram (the brightest part of the image), than the left side of the histogram (the darkest part of the image). In other words, images with lots of bright, detailed areas take up more disk space (and contain more digital information) than images with dark features.

Let’s assume for example your camera’s digital sensor can capture 8 stops of light across 4096 tonal levels (in reality, dynamic range varies from sensor to sensor). The more tonal levels a sensor can capture, the smoother the transition between light and dark in the resulting photo. The f-stop measurement is logarithmic in nature, meaning a stop will capture twice as much light as one stop darker. That means using the example distribution above of 4096 tonal levels across 8 stops of light, the brightest stop will capture 2048 tonal levels while the darkest will capture only 32. There is much more digital information needed to capture the many tonal levels of the brightest stop than the few tonal levels of the darkest stop.

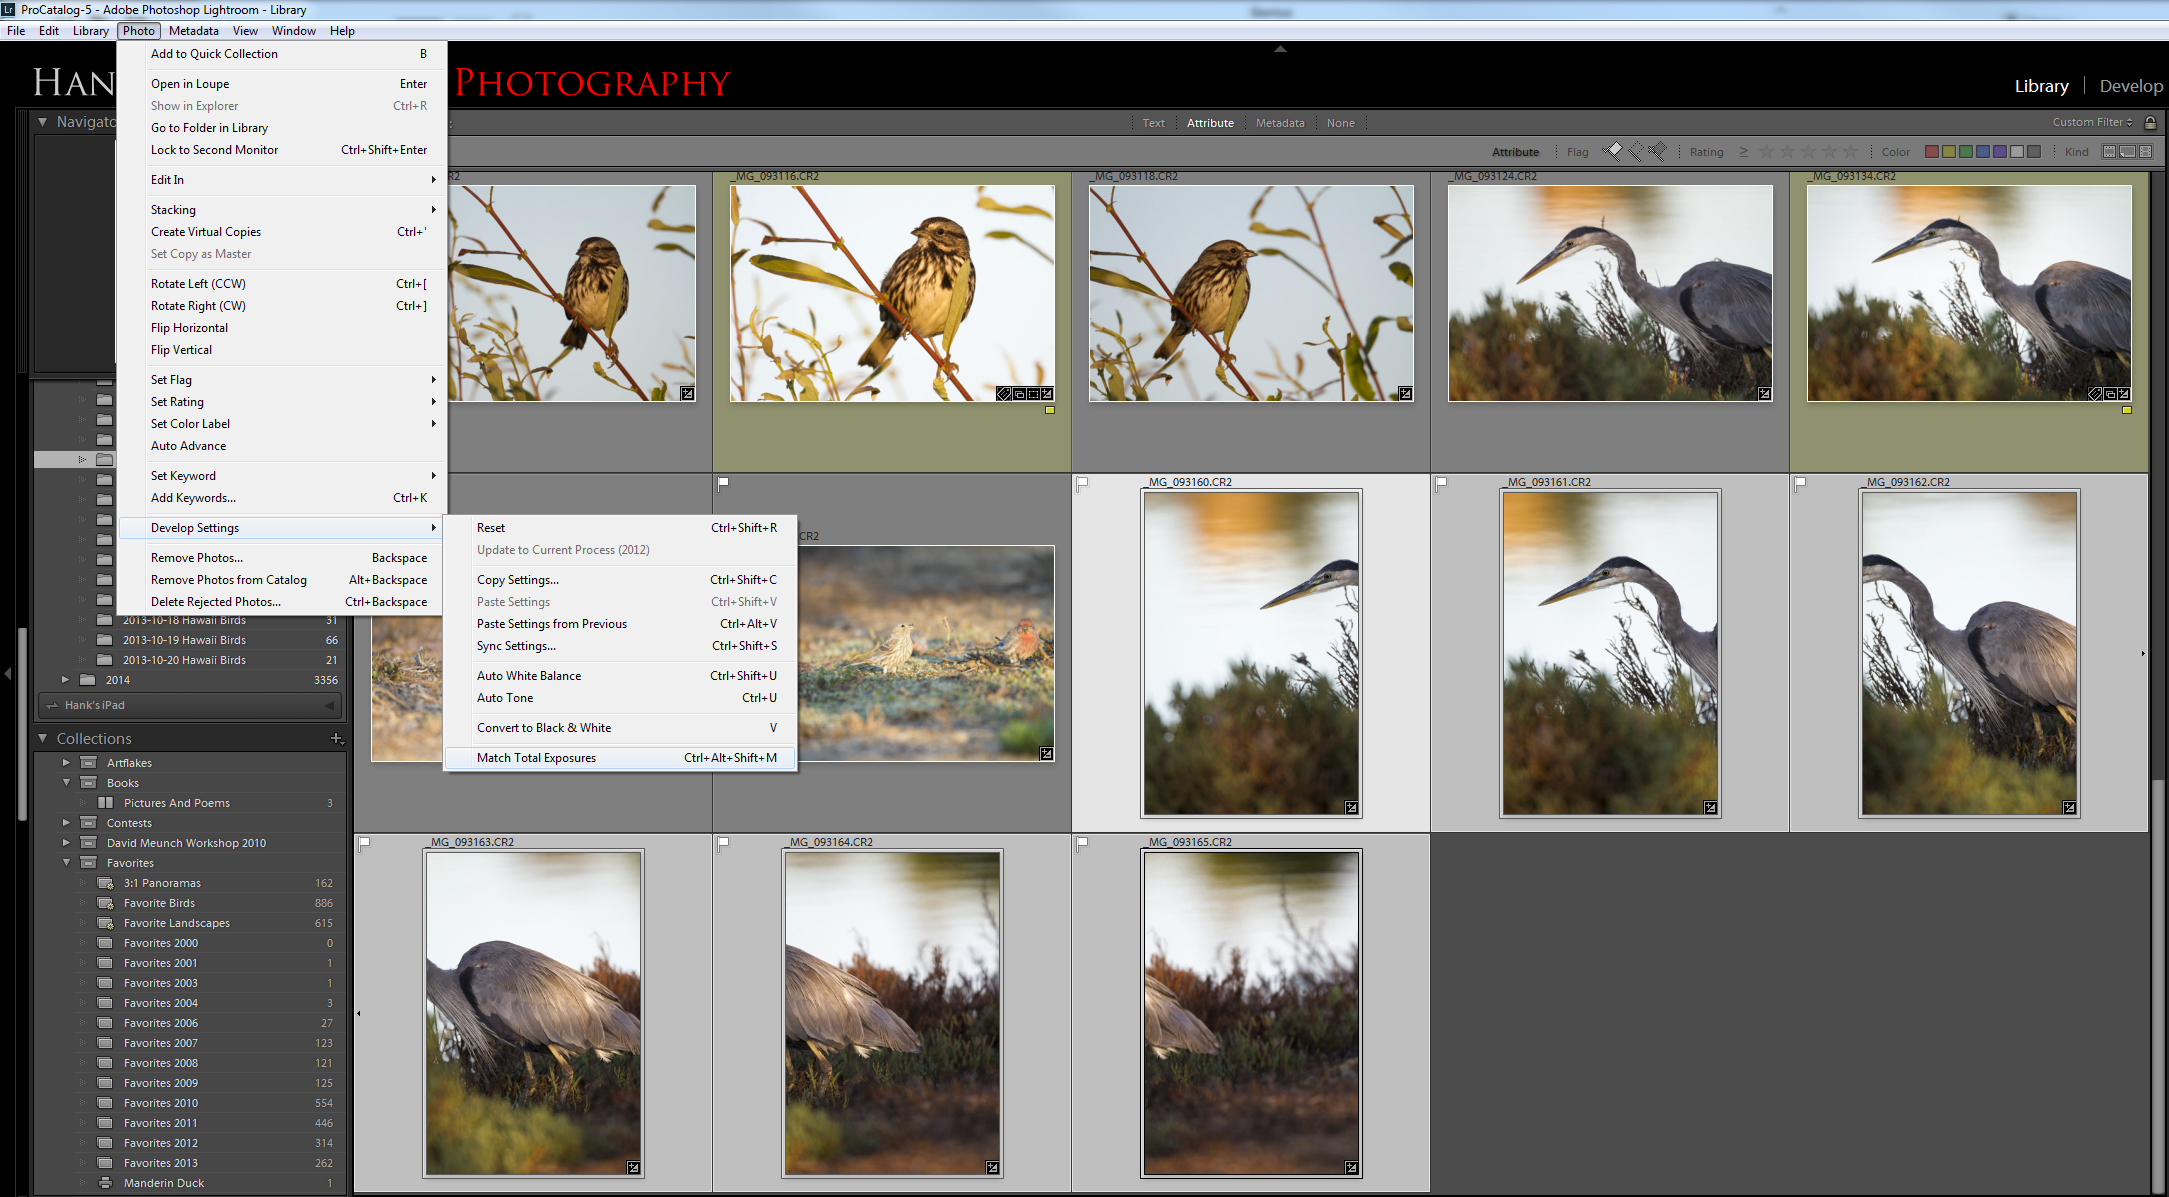
You’ve likely seen the results of this lack of digital information when trying to brighten an image in post processing. As you increase the exposure slider in Lightroom, for example, you’ll see lots of digital noise appear in the dark spots of the image. If, on the other hand, you need to make an image darker in post processing, no digital noise is added because you already had all that extra digital information in the brighter image. Therefore, the goal of exposing to the right is to capture the maximum amount of digital information as possible in the field, so that you have more options with that image in post processing.

Here are some examples:

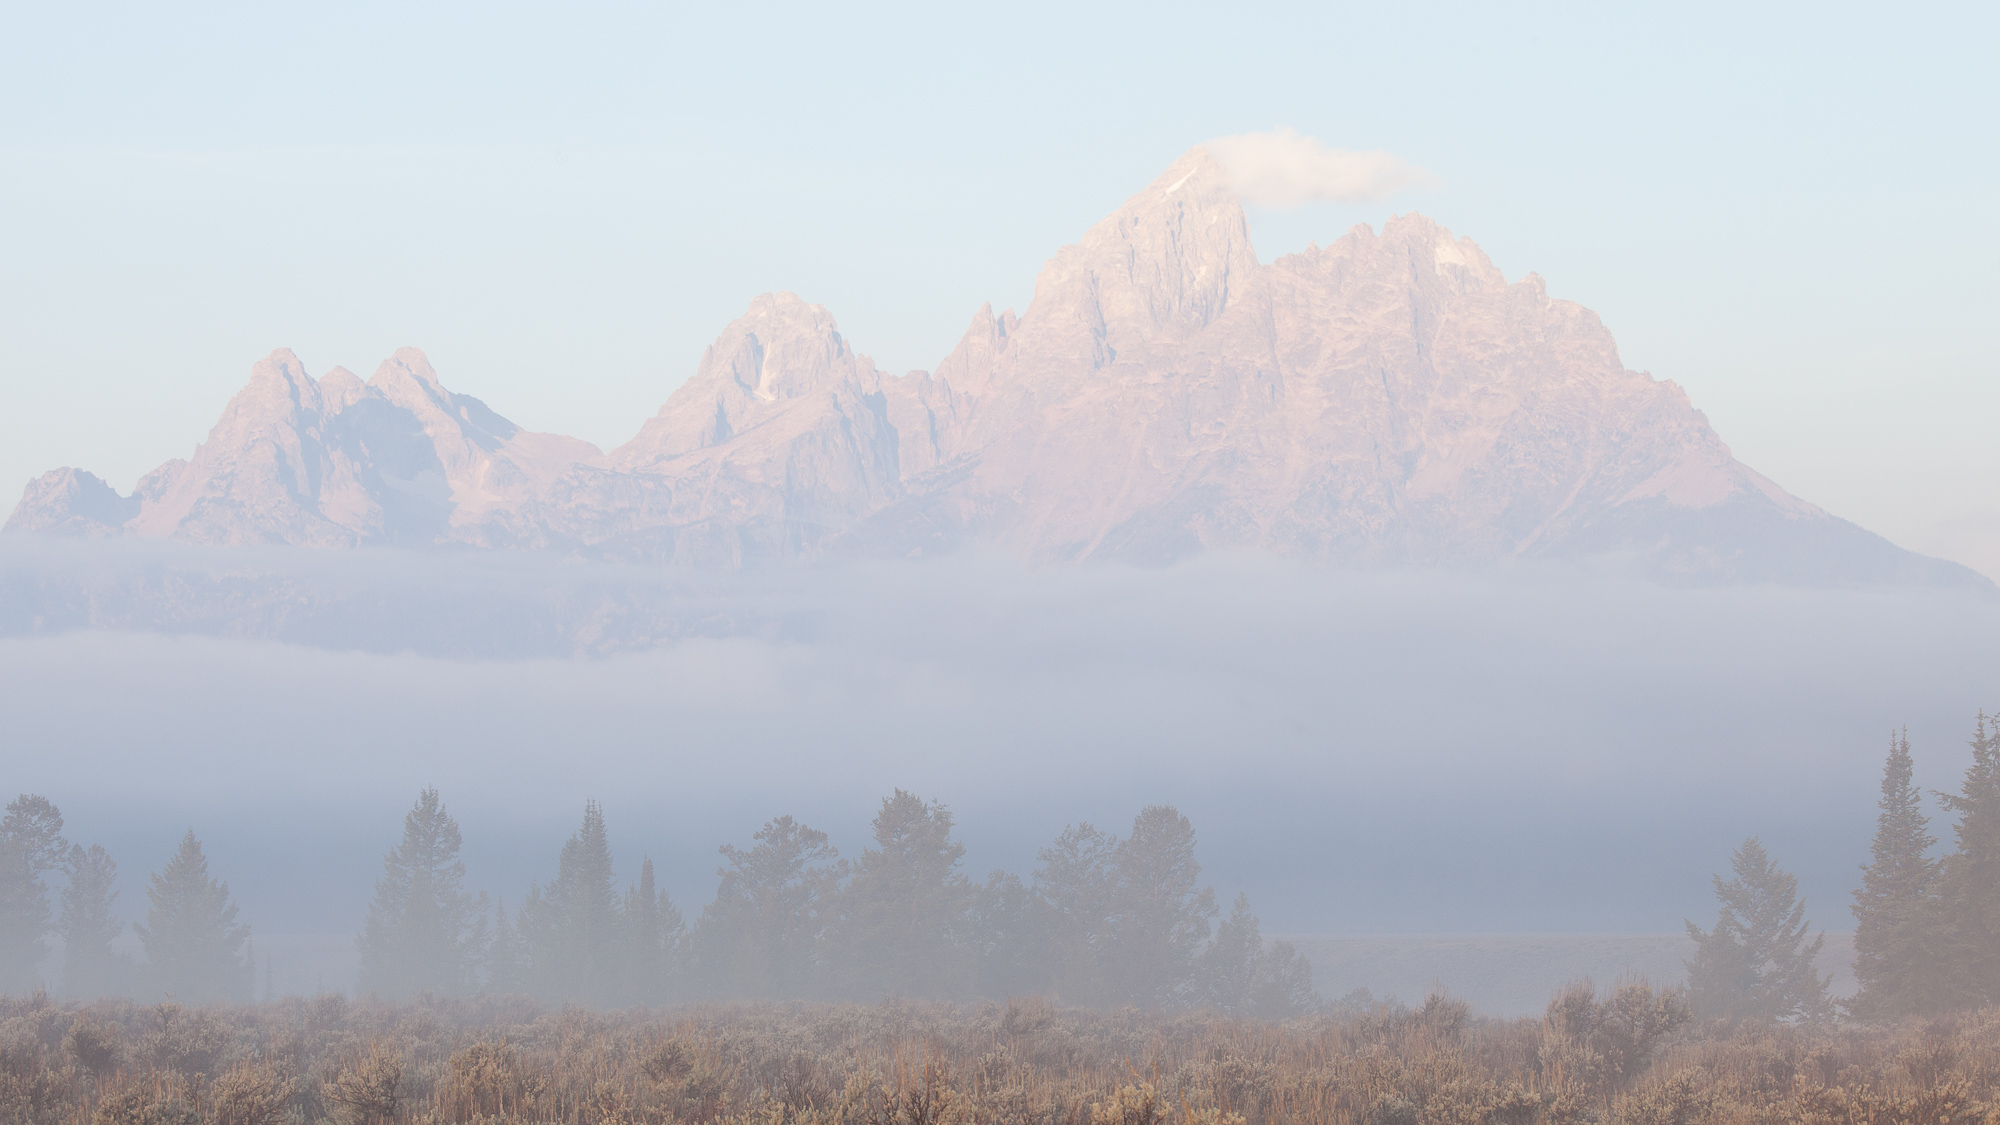
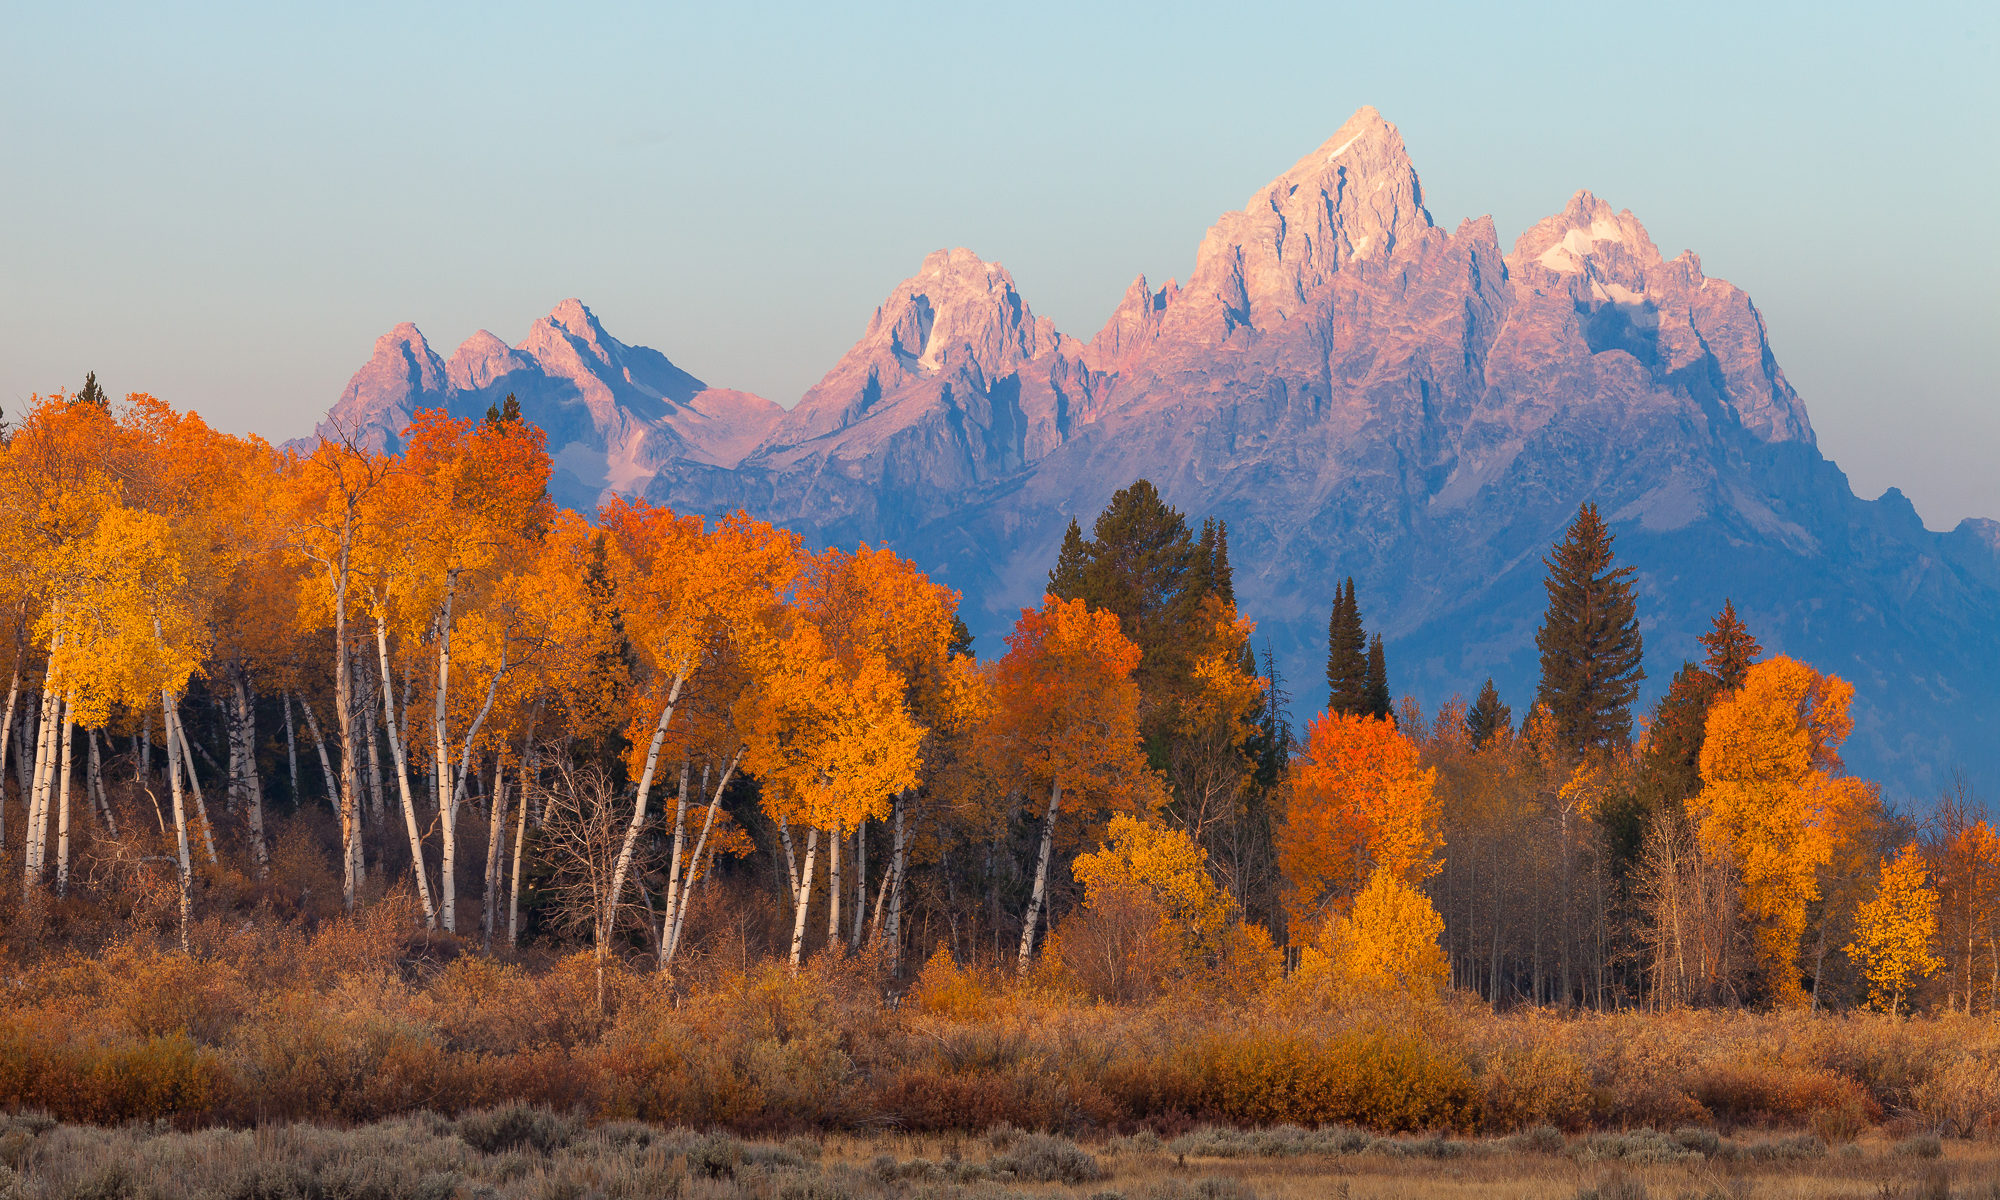
In the image of the Grand Tetons above, I set my camera’s exposure compensation to +1 1/3 stops, even though it looked terrible on the back of my camera. By trusting the core principals of this technique and relying on my experience, I knew that once I post processed the RAW file in Lightroom, I could really make the image sing. Here is the result:

A fog bank moves in front of the Grand Tetons as the rising sun illuminates the sheer peaks, Grand Teton National Park

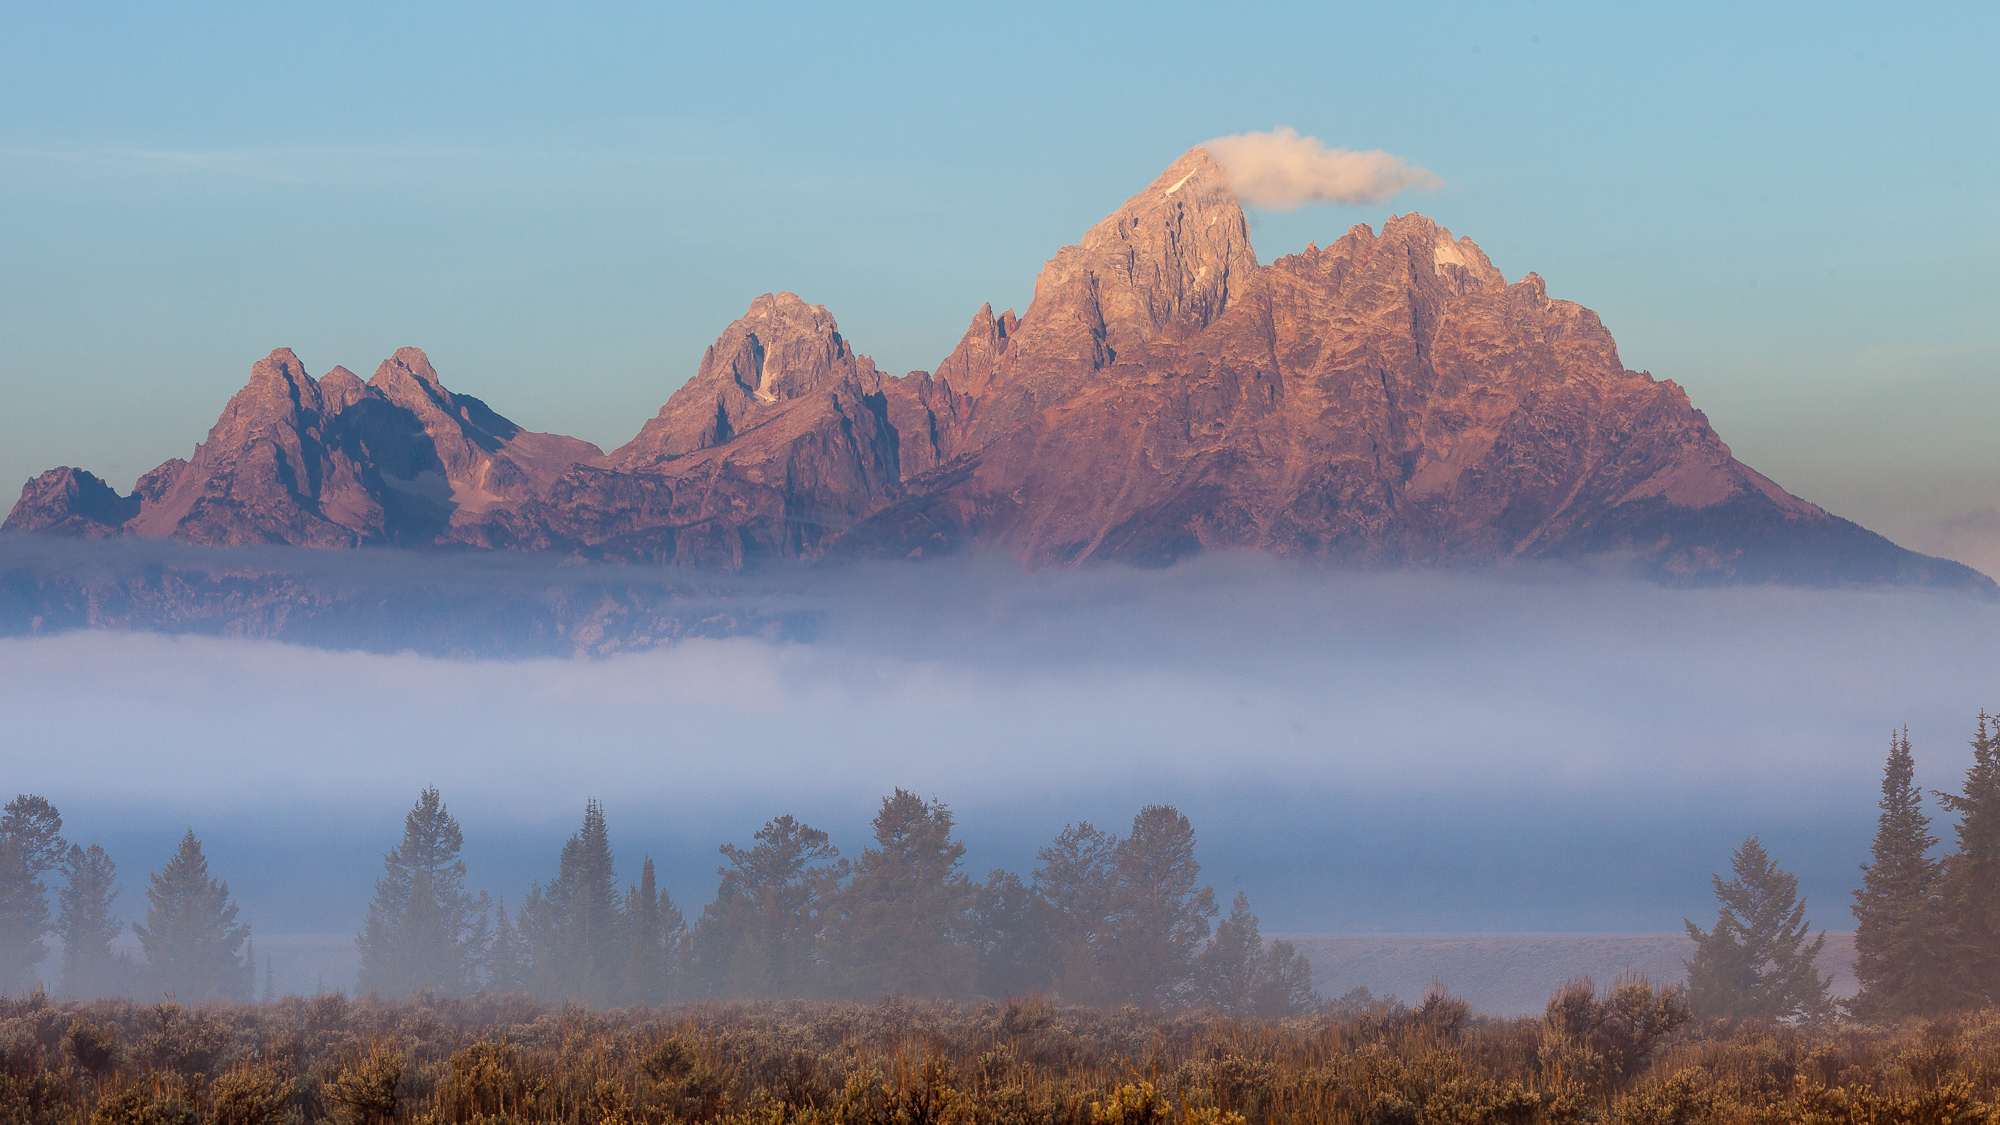
I corrected the photo in post processing by setting the black point to the left most side of the histogram. This evened out the tones across the entire histogram, adding a lot more contrast back into the photo. Secondly, I dropped the exposure slider down by about 1 stop. This corrected for the overexposure I made in the field. The real benefits can be seen when blowing this image up to inspect it for printing. The shadows are smooth and detailed – more so than if I shot at the correct exposure in the field.

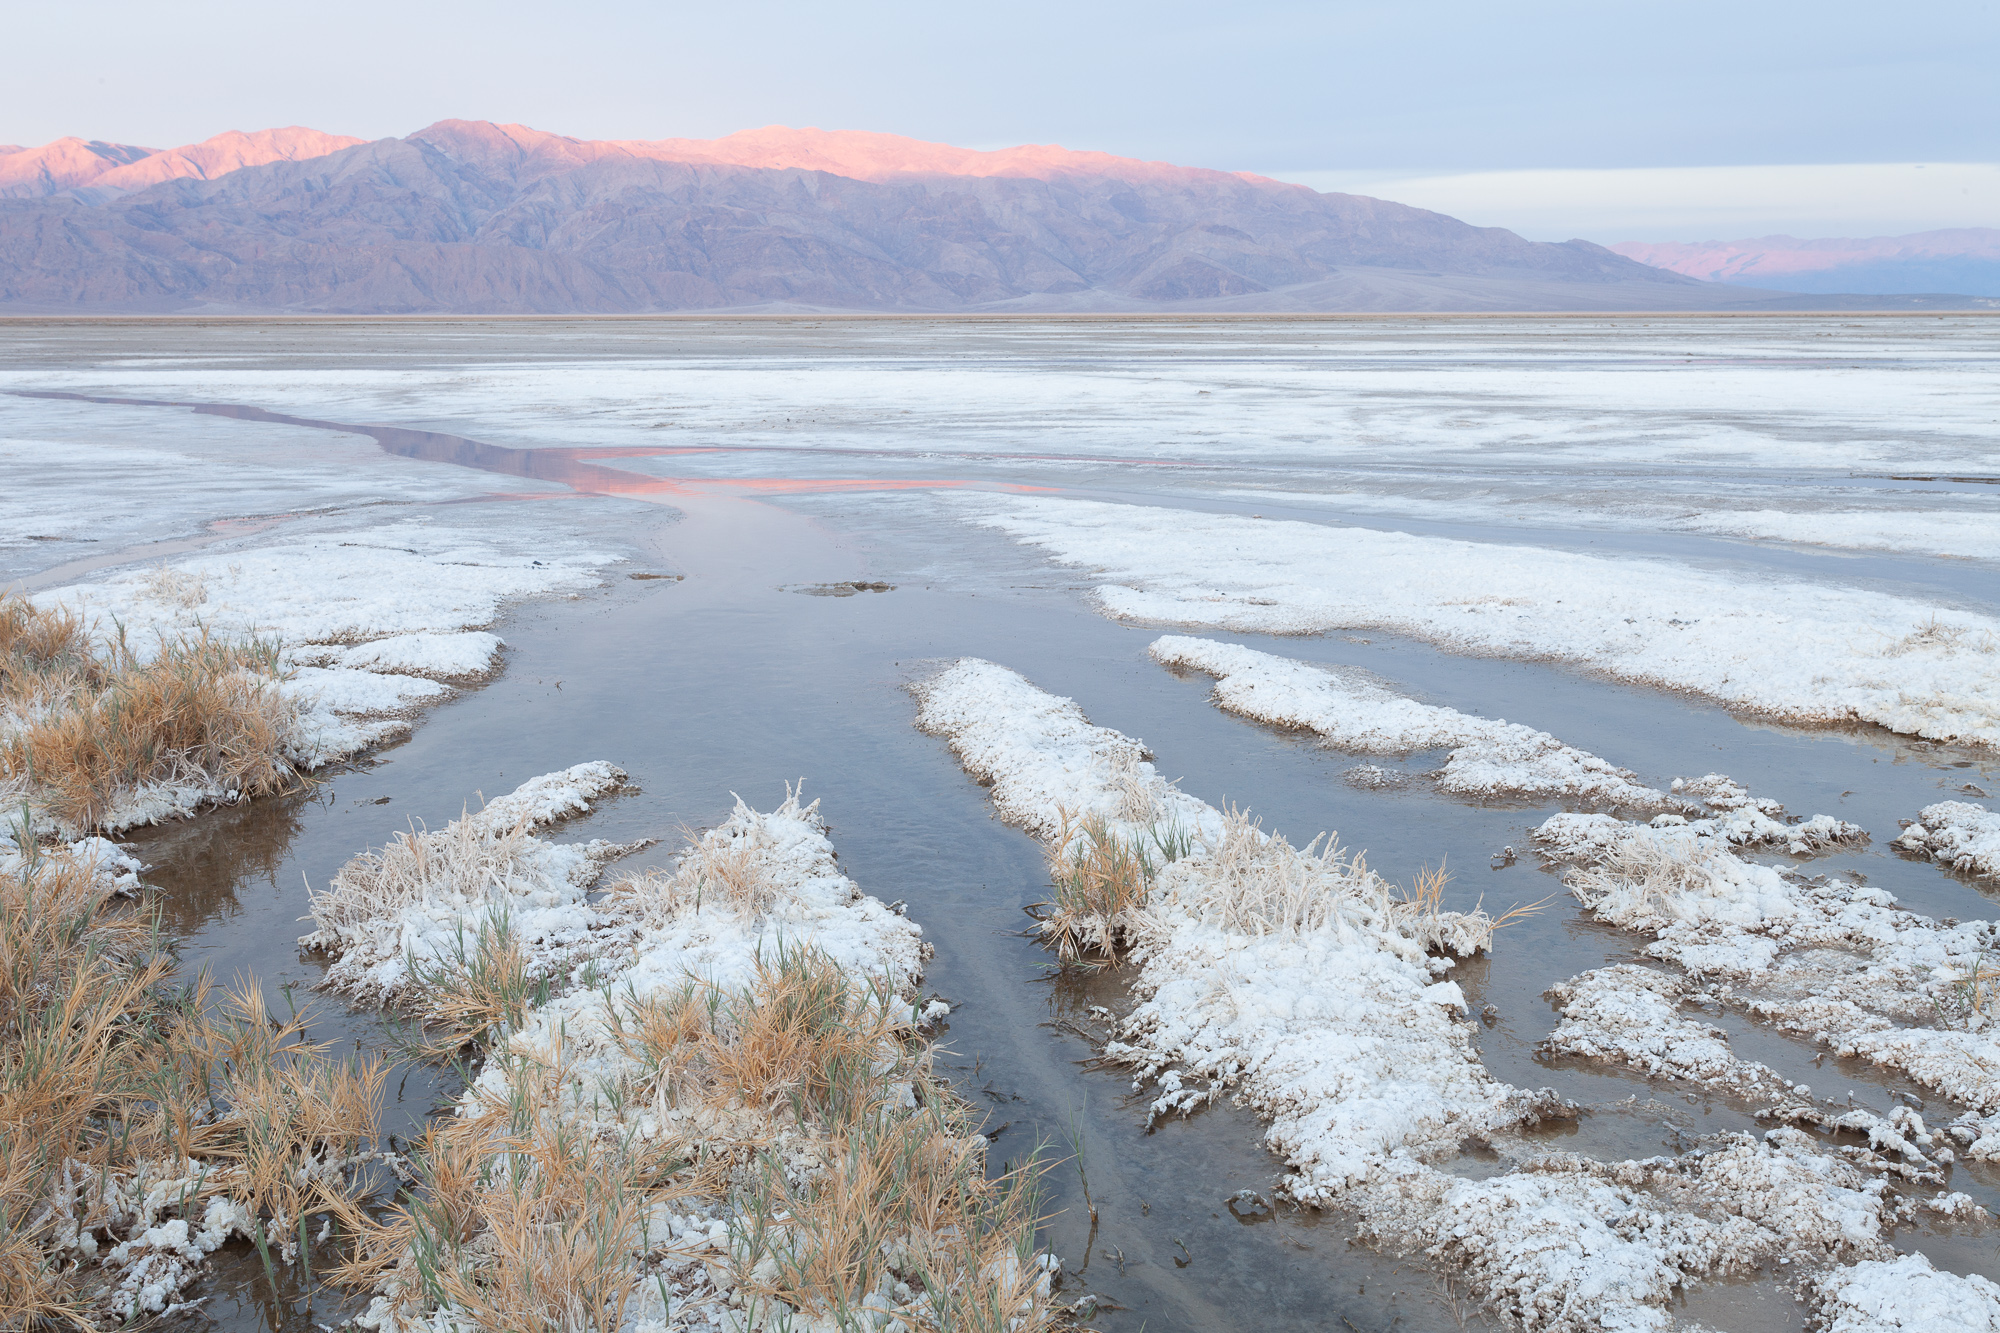
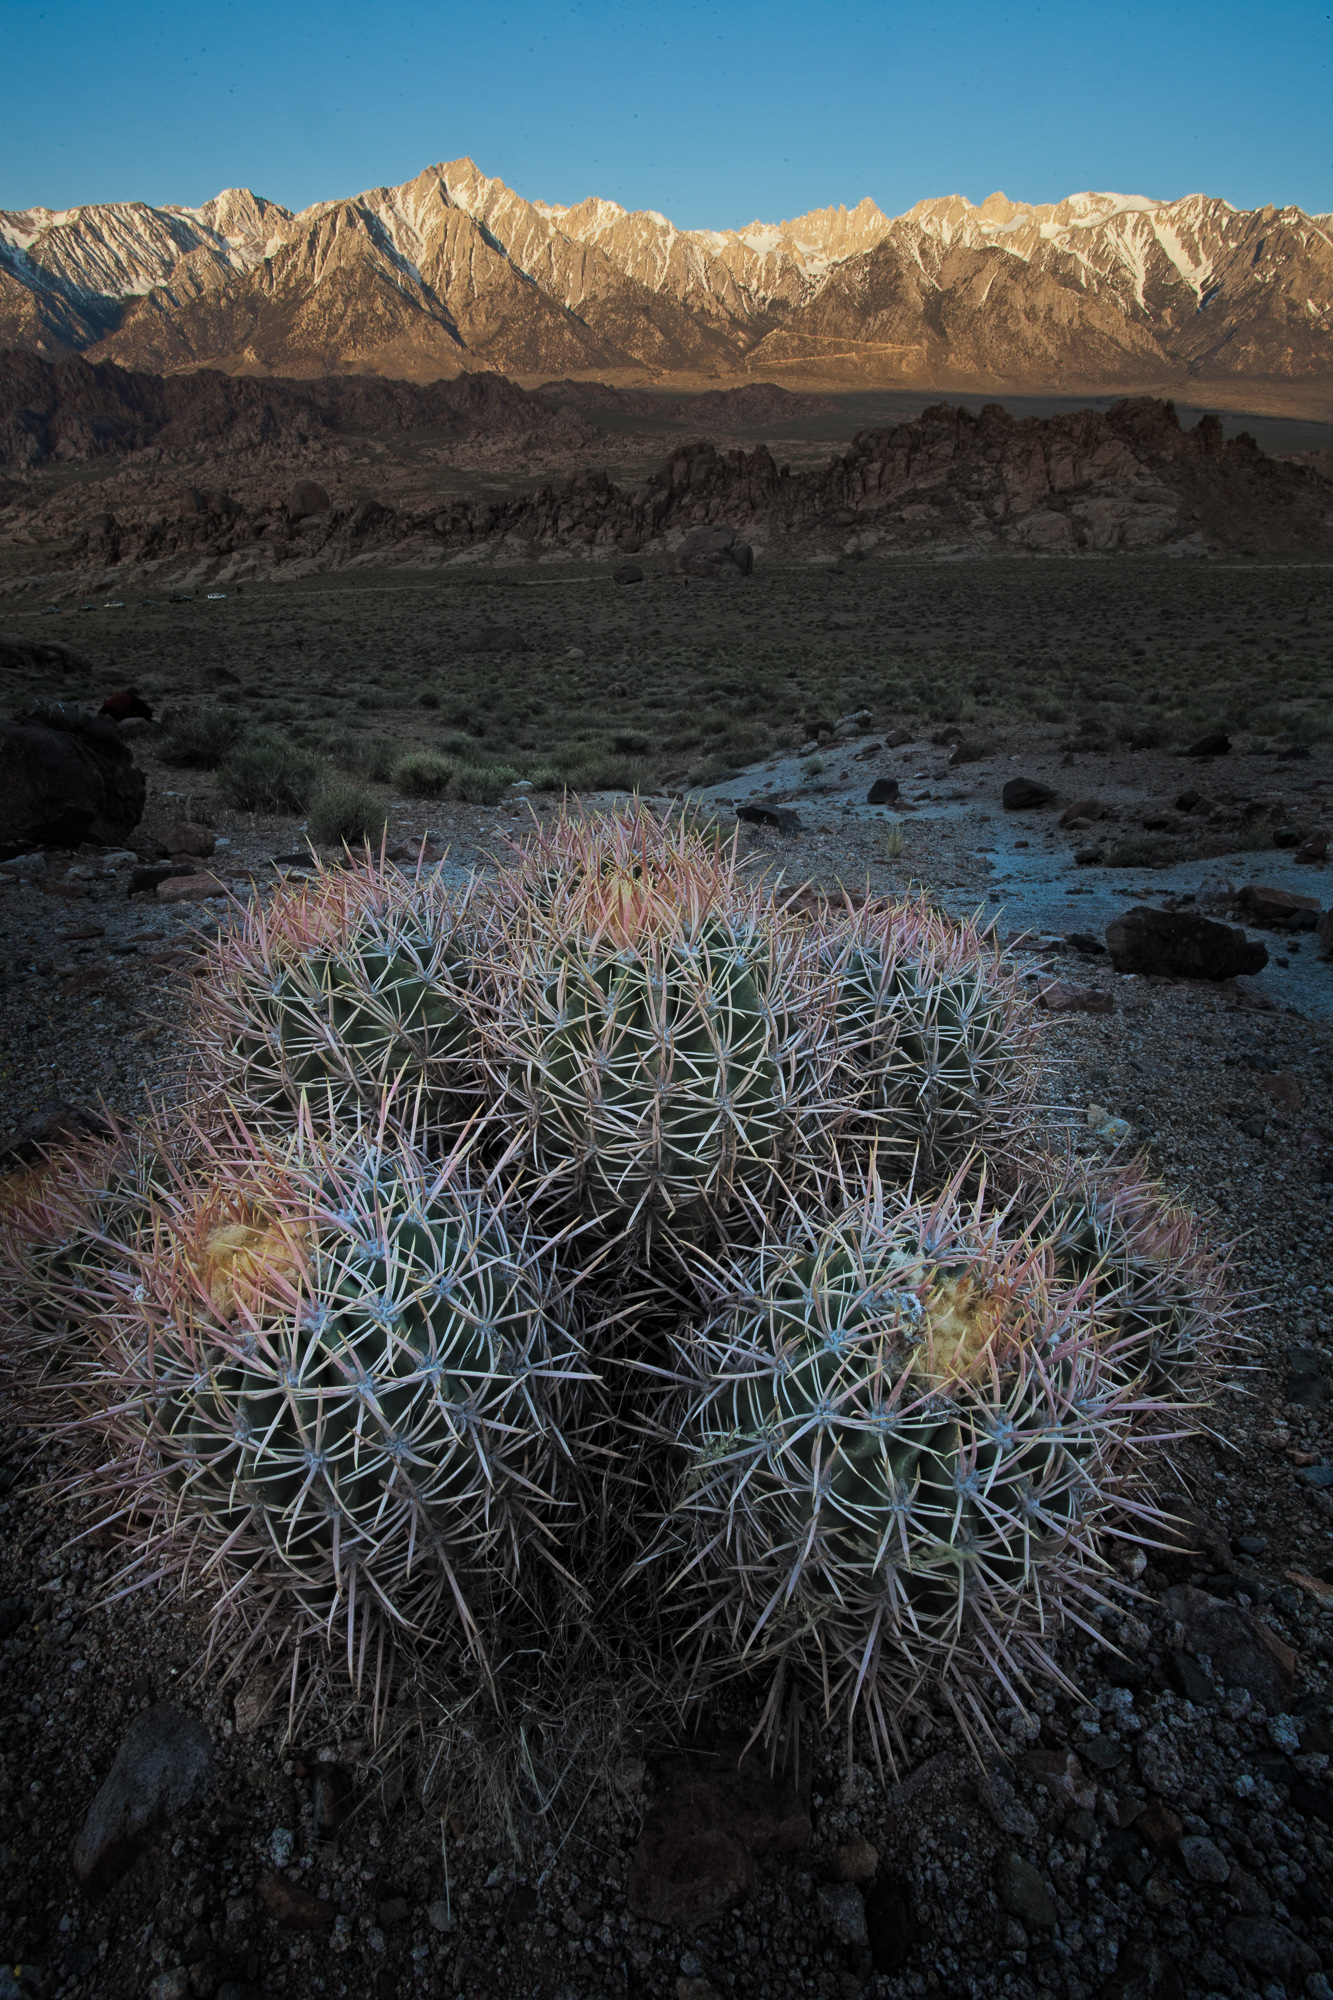
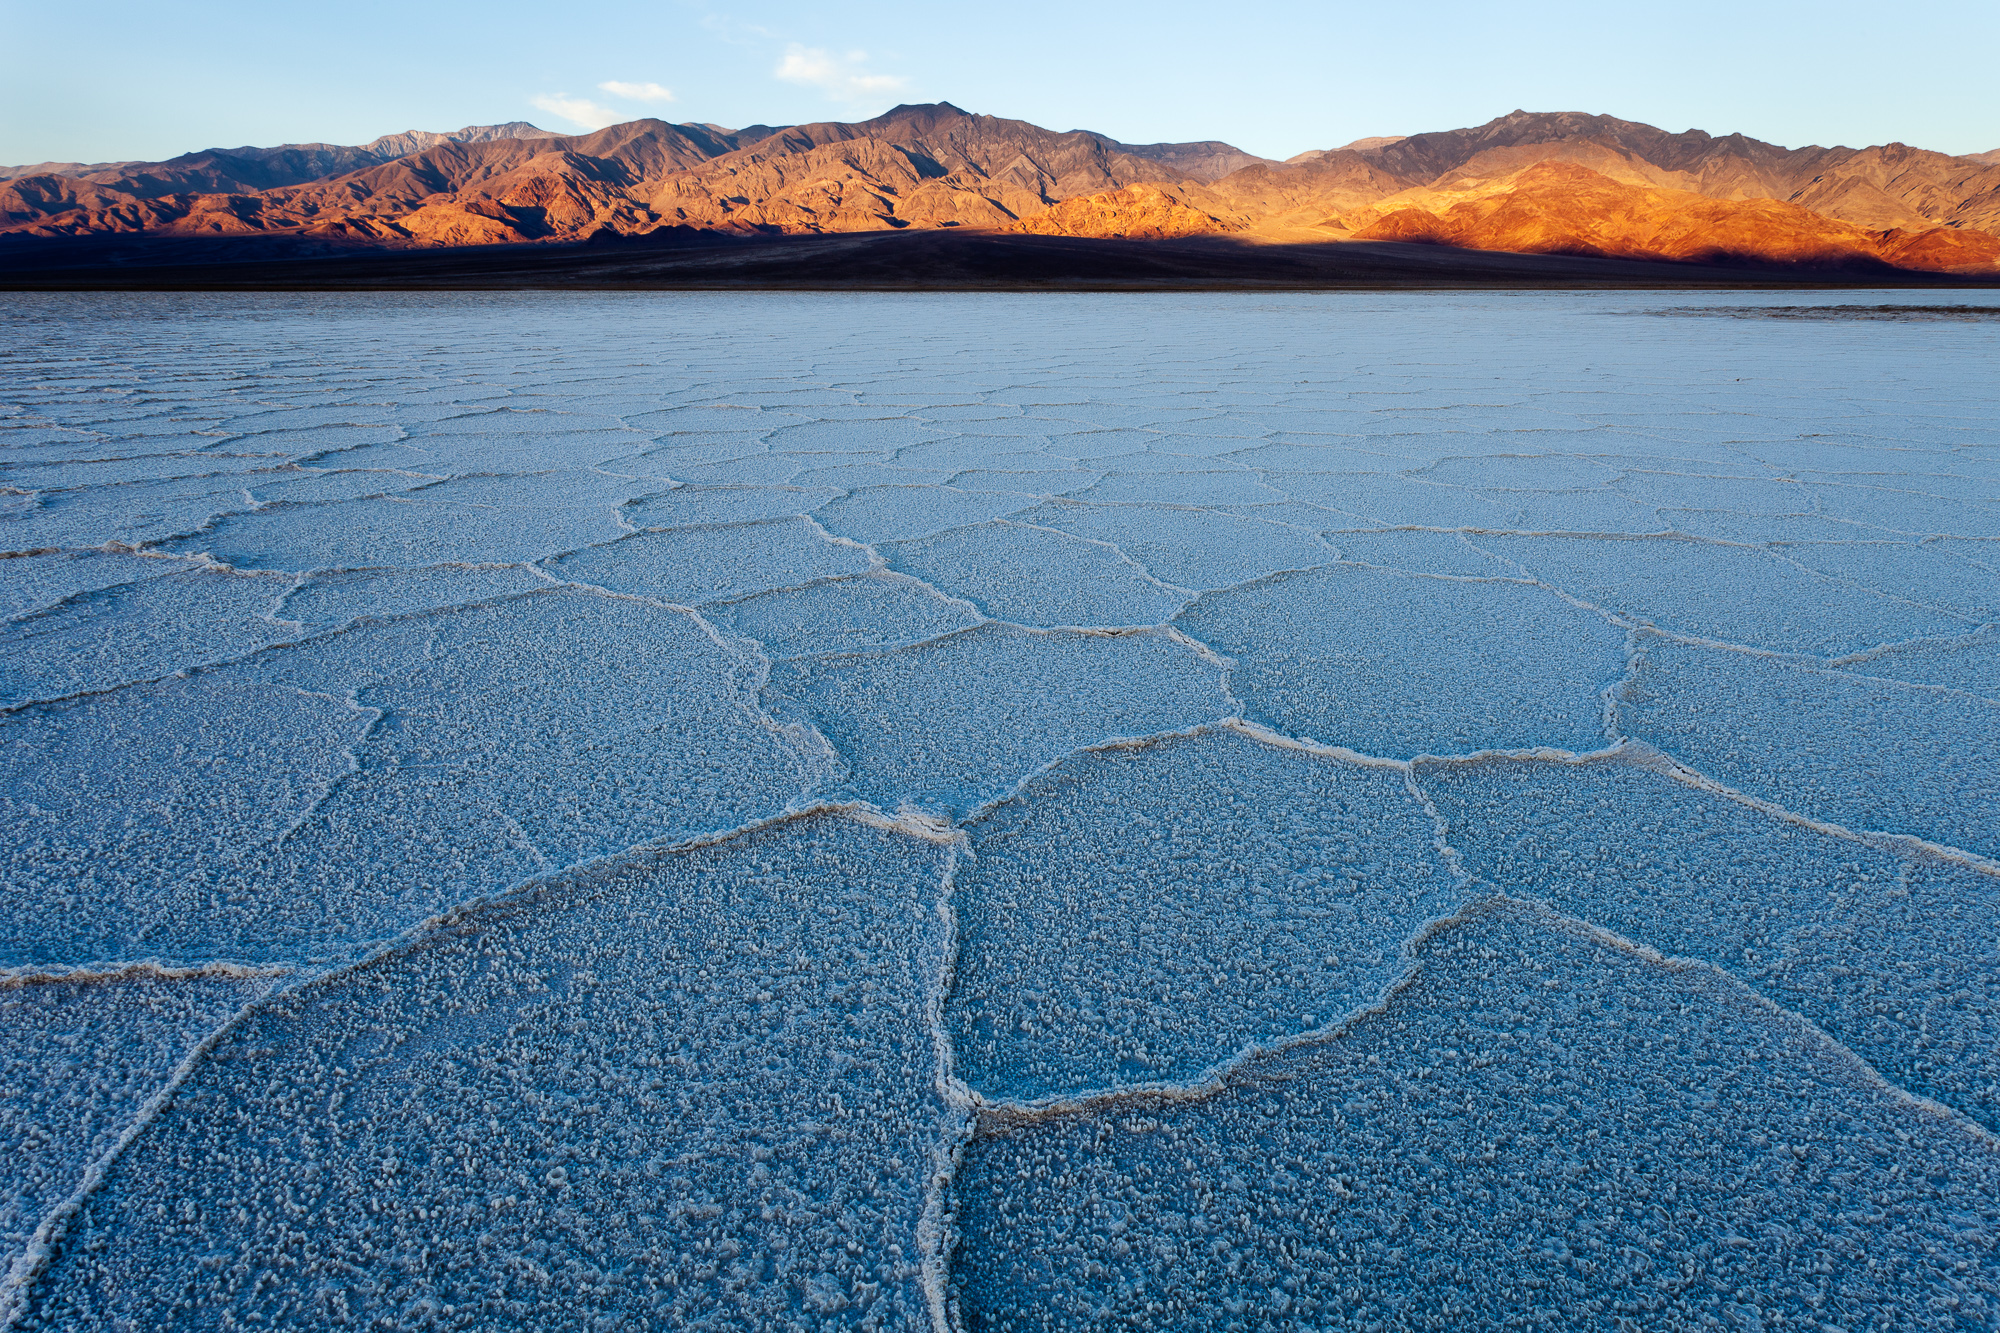
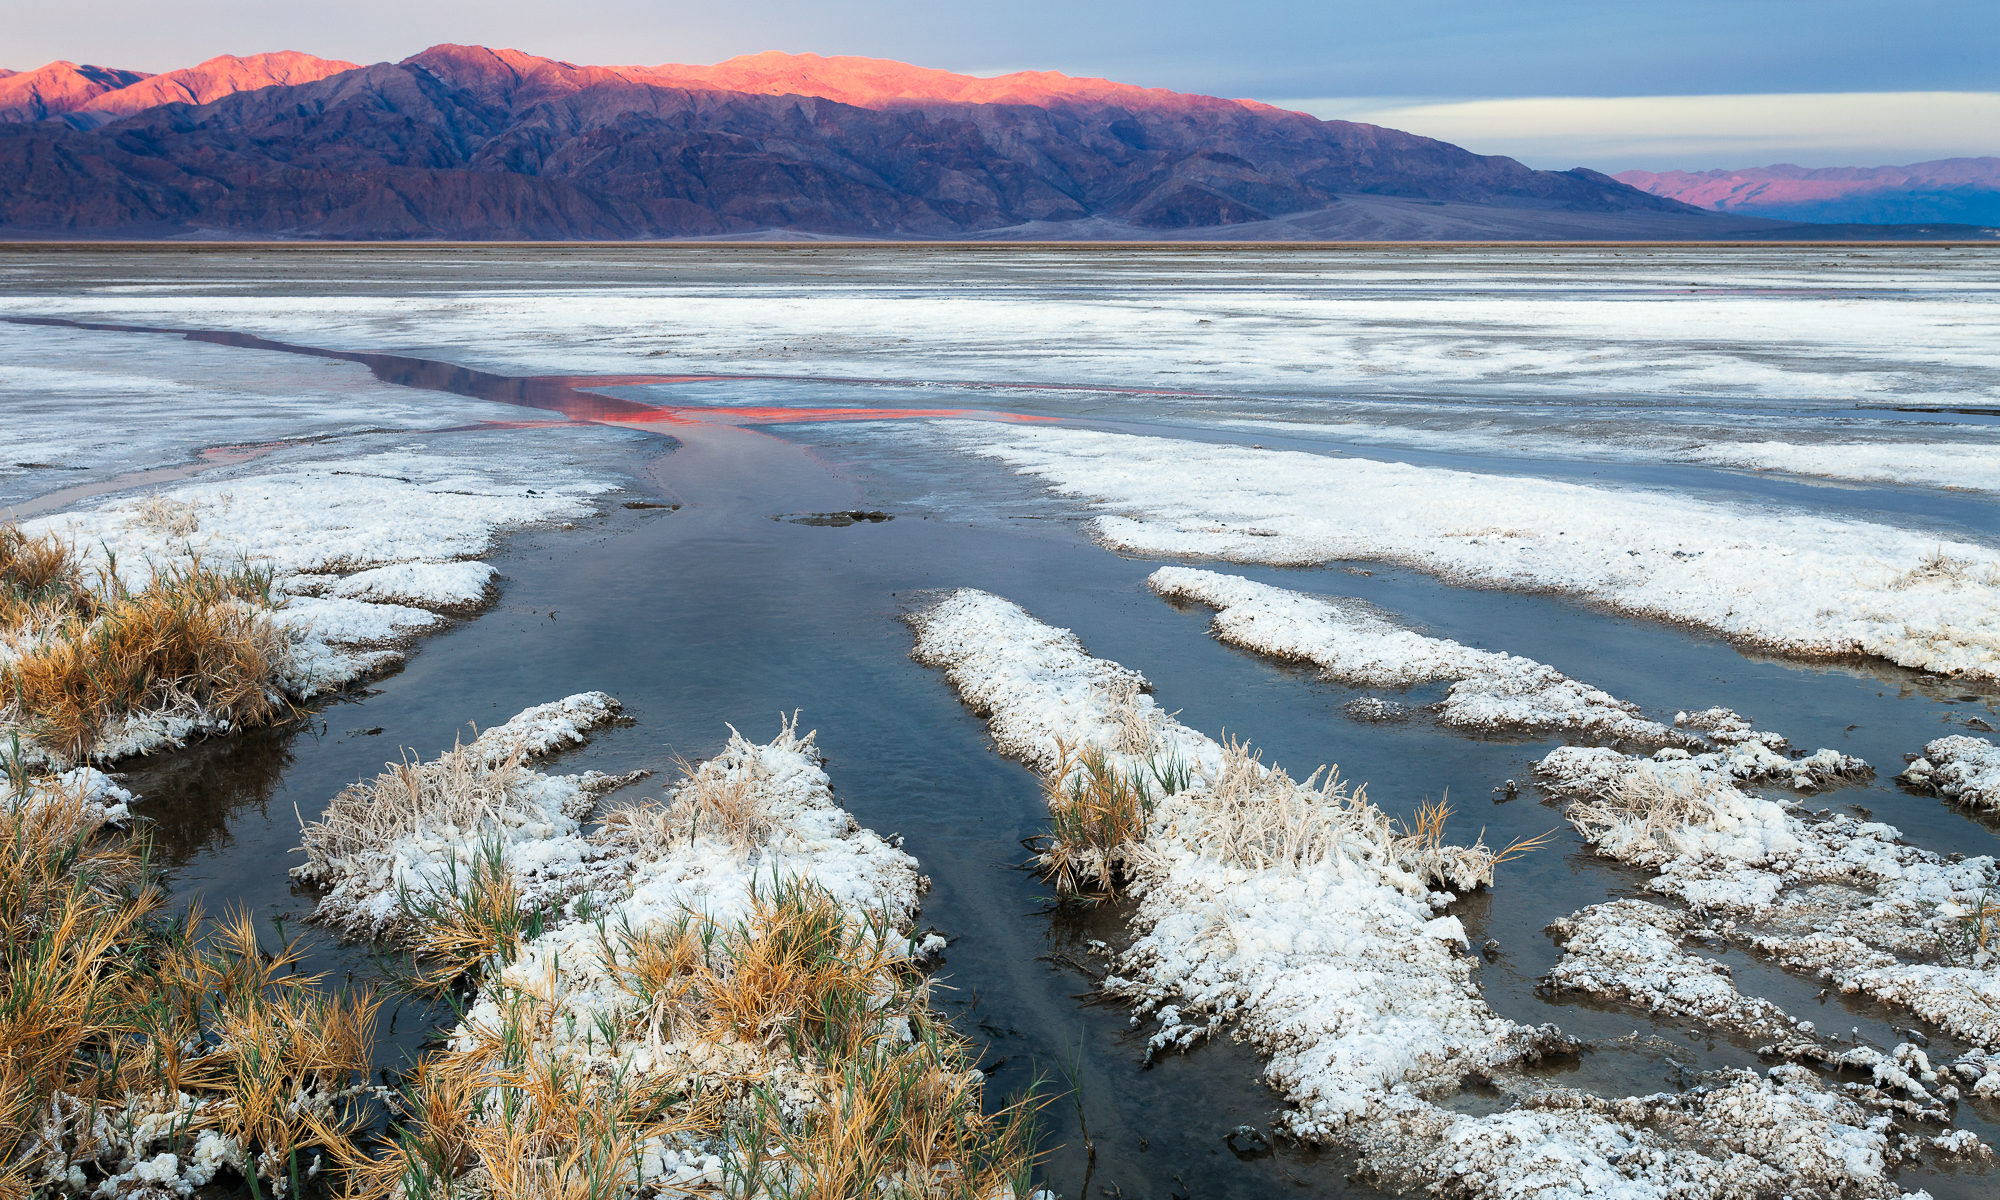
The second example is from Death Valley National Park. Here again I set the exposure compensation on the camera to 1 2/3 stops lighter than the sensor would normally expose the scene. Similar to the brightness of the fog in the Tetons example, all of the white salt in this image required an overexposure so as not to get a middle gray result.

In the field, I kept raising my exposure compensation until I saw the white “blinkies” (overexposure warning) on the resulting image, indicating some parts of the scene were blown out. This meant that these parts of the image no longer contained any detail, and would render a pure white. There is no recovery from blown out white, no matter how much post processing you do, so I lowered the exposure compensation by 1/3 of a stop until the blinkies were no longer showing.

Sun creeps down the mountains west of the Cotton Ball Basin, Death Valley National Park

The processing steps were the same as the first image – set the black point to add contrast, and lower the exposure slider until the image looked correct on a calibrated monitor.

How to expose to the right

  1. Always shoot RAW! If you aren’t shooting RAW, you are already throwing away digital information, and letting robots process your images.
  2. Turn on the histogram for your camera. Make sure that every image viewed on the rear LCD shows a histogram, which you can use to judge the overall lightness and darkness of the image.
  3. Turn on the overexposure warning. On Cannon cameras, this the “blinkie” display. Any overexposed portions of your image will flash white, letting you quickly know that you need to lower the exposure compensation.
  4. Set the camera to evaluative metering. This means the camera’s light meter will use the entire scene to evaluate the exposure. I shoot 100% of my images in this mode, and I’ve learned my camera’s metering characteristics well enough to set the exposure compensation correctly for different light and dark scenes.
  5. Shoot a couple of test shots, making sure you overexpose the maximum amount without the overexposure warning appearing in the resulting image.
  6. In post processing, correct the exposure by setting the black point. In Lightroom, this means lowering the “Blacks” slider until there are values to the left most side of the histogram. This stretches the image values across the entire histogram, increasing contrast.
  7. Finally, lower the overall Exposure slider if the image is still too bright.
  8. Print and enjoy! Congratulations, you’ve just used your camera’s sensor to its maximum, gathering the highest possible amount of digital information from the scene.

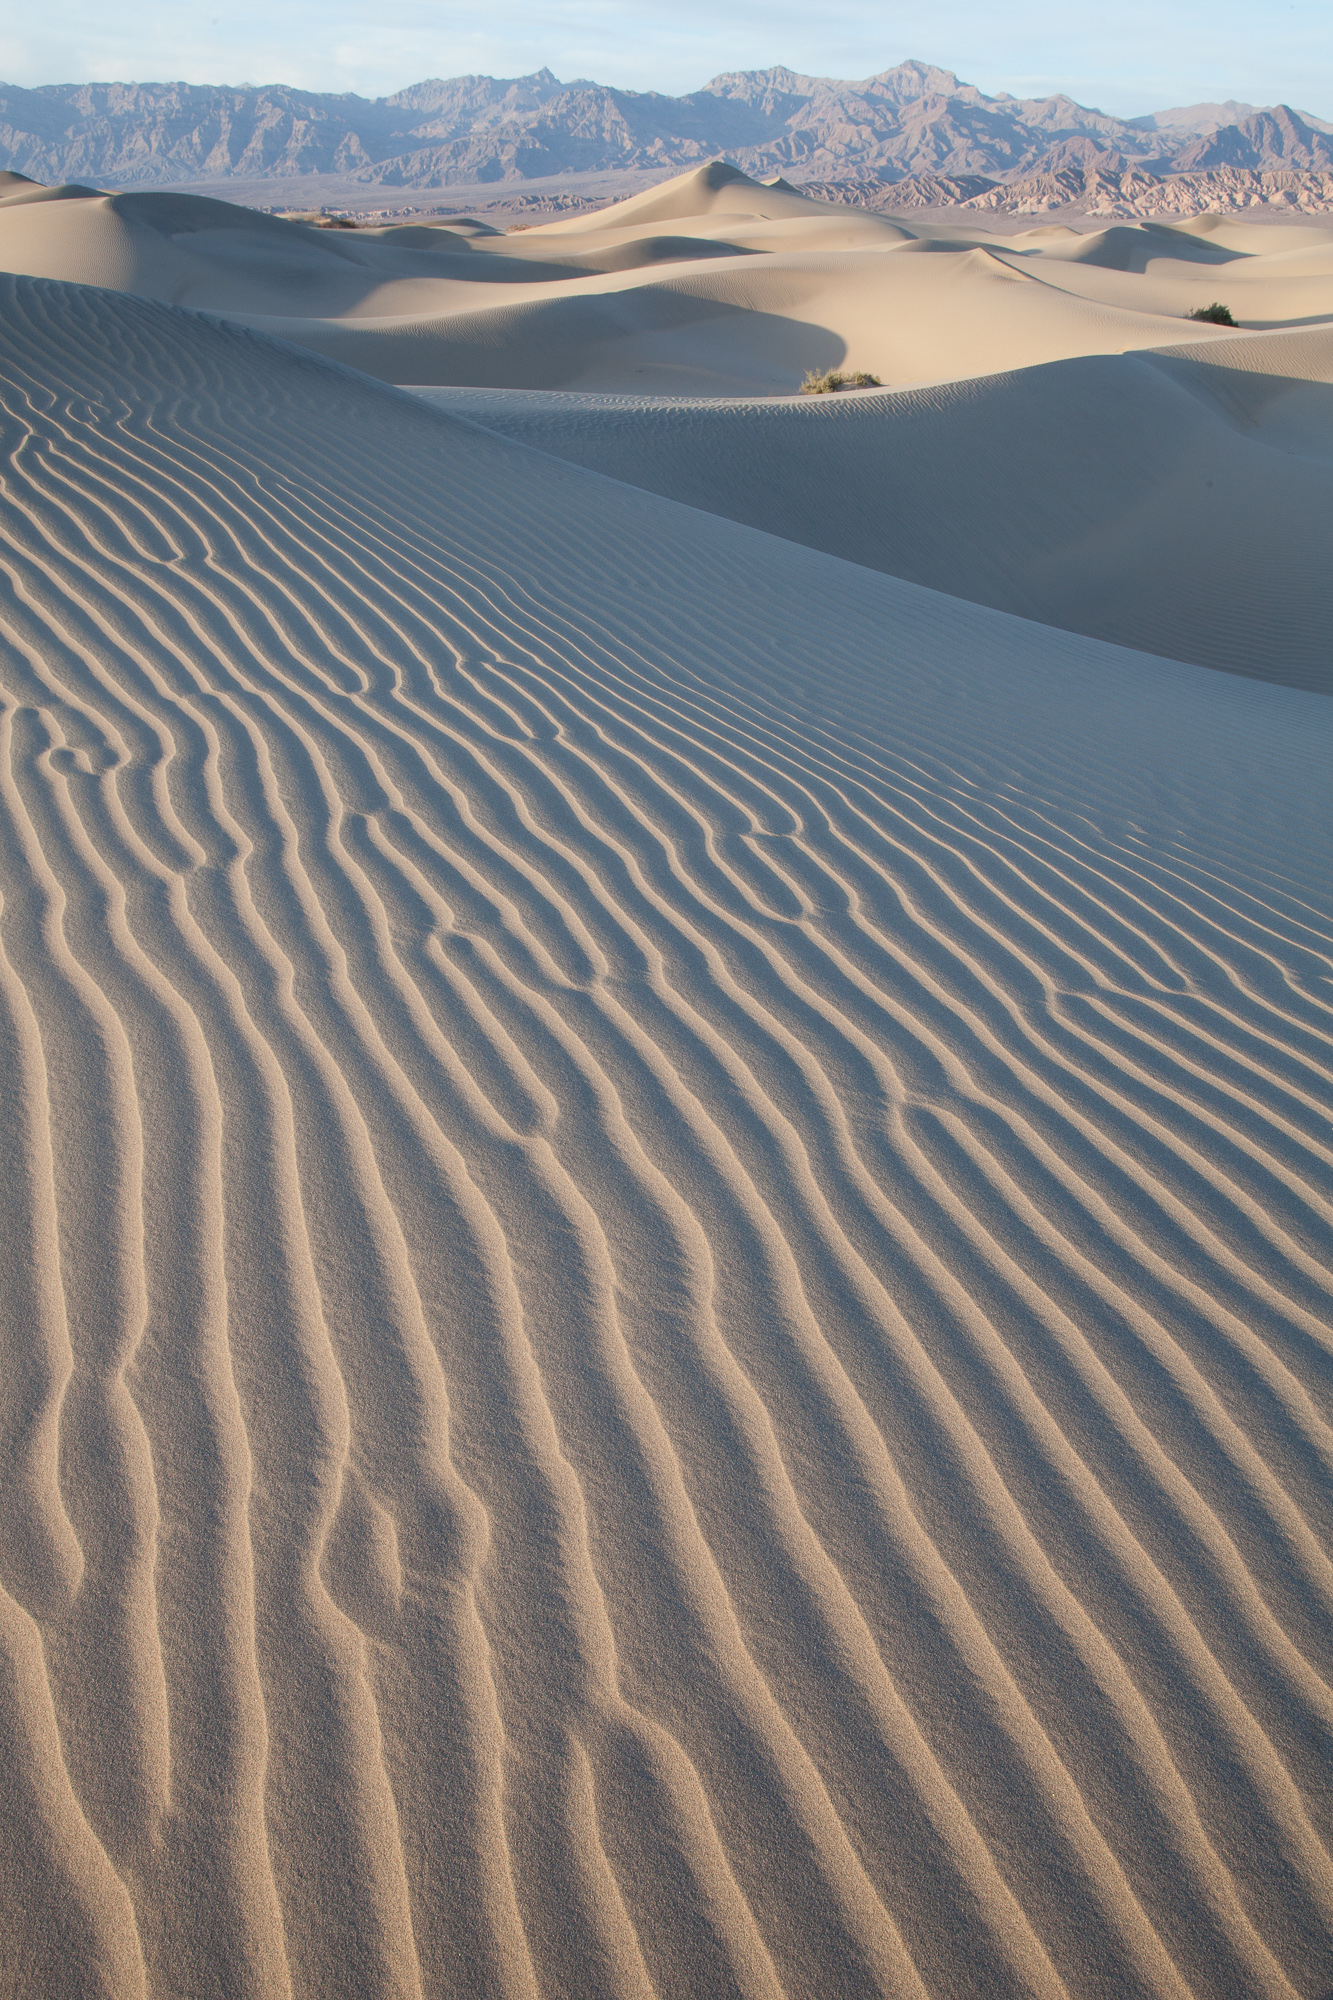
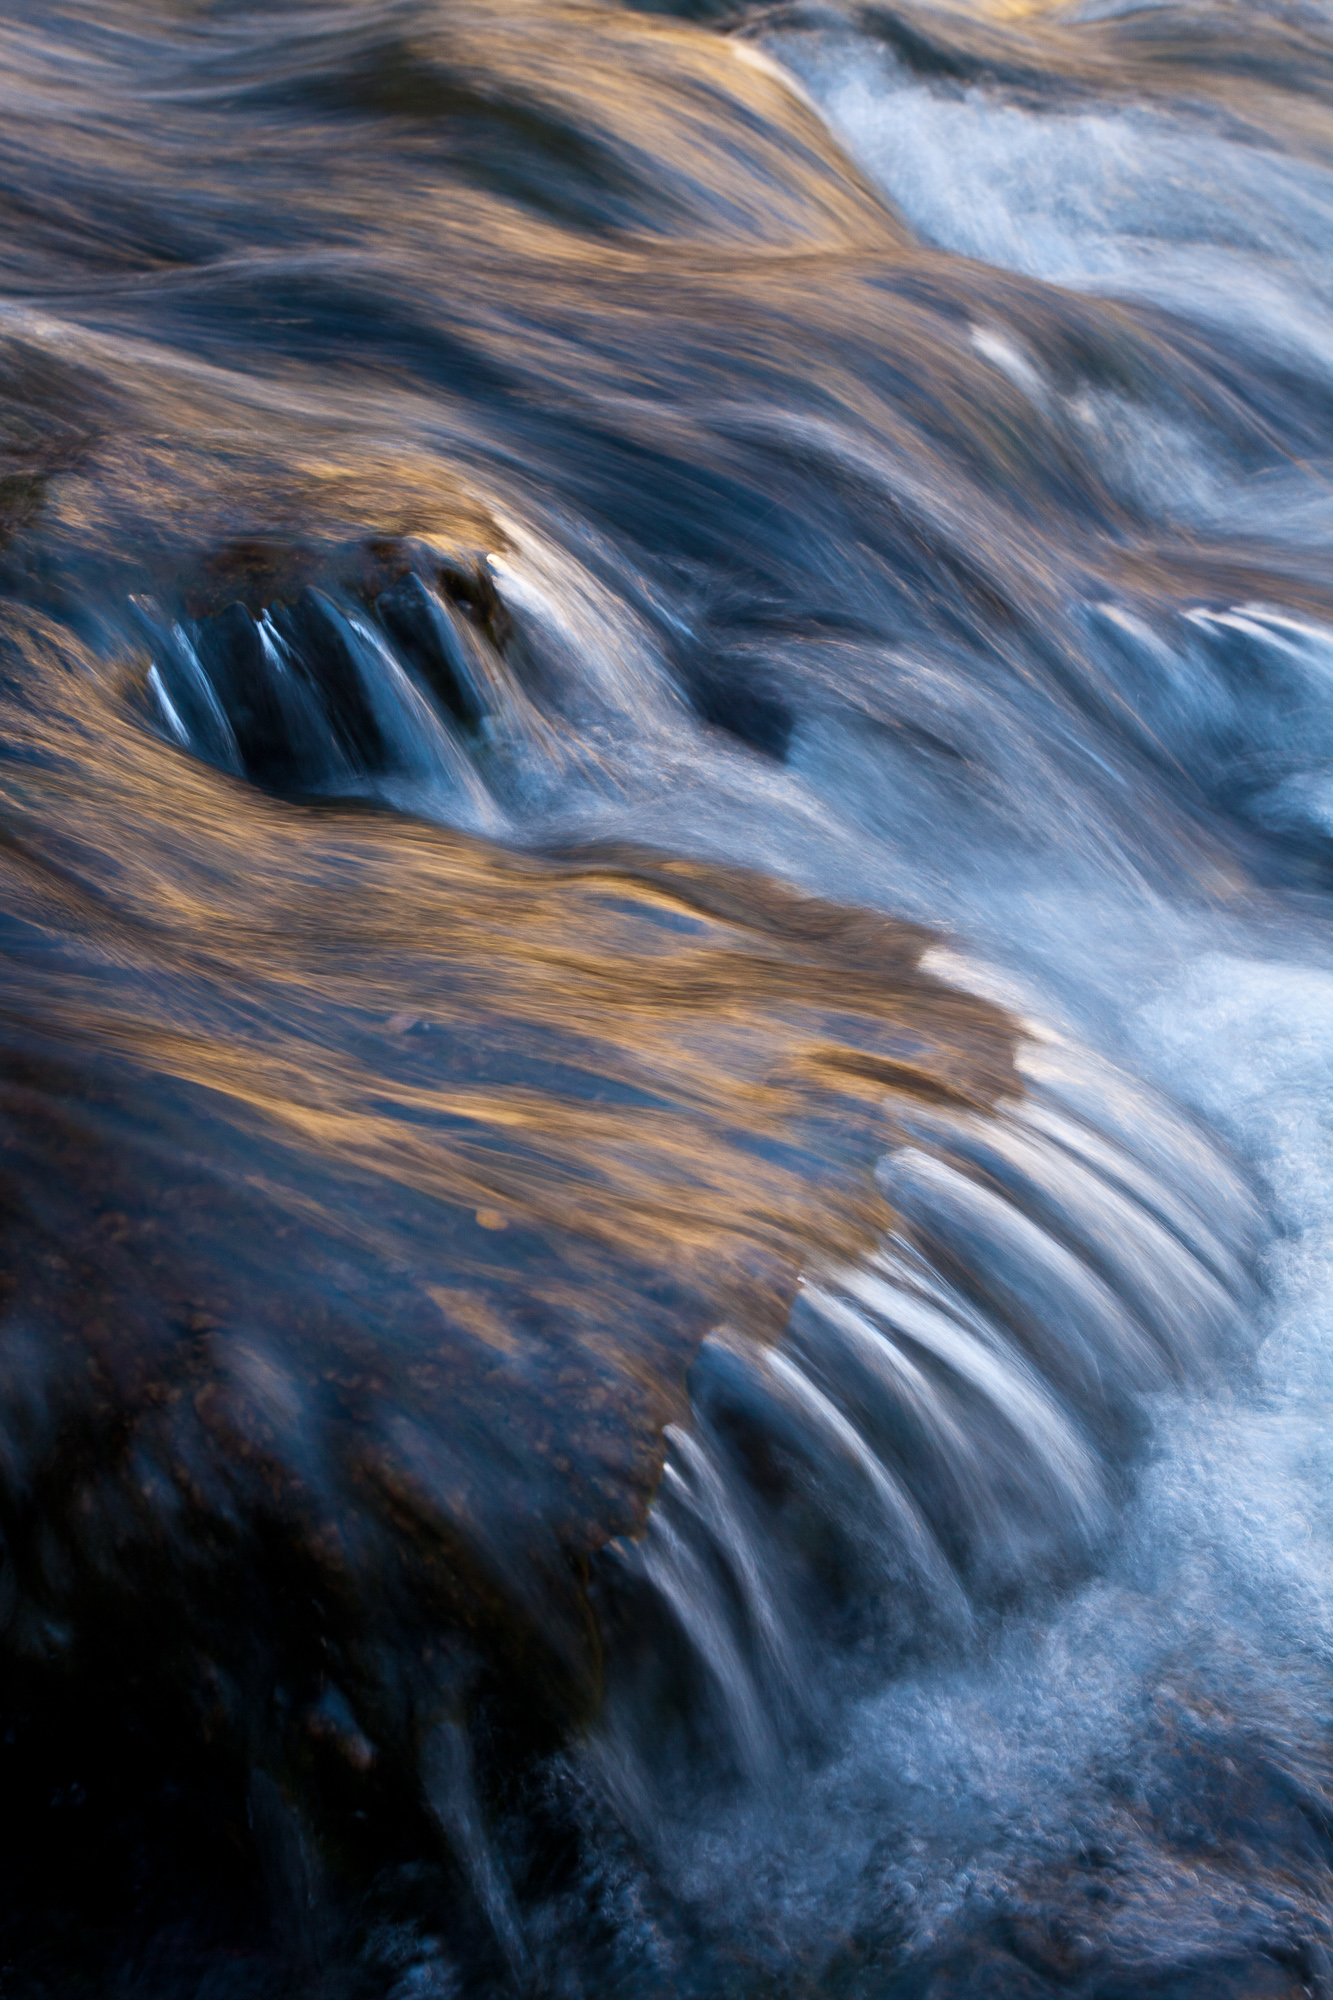
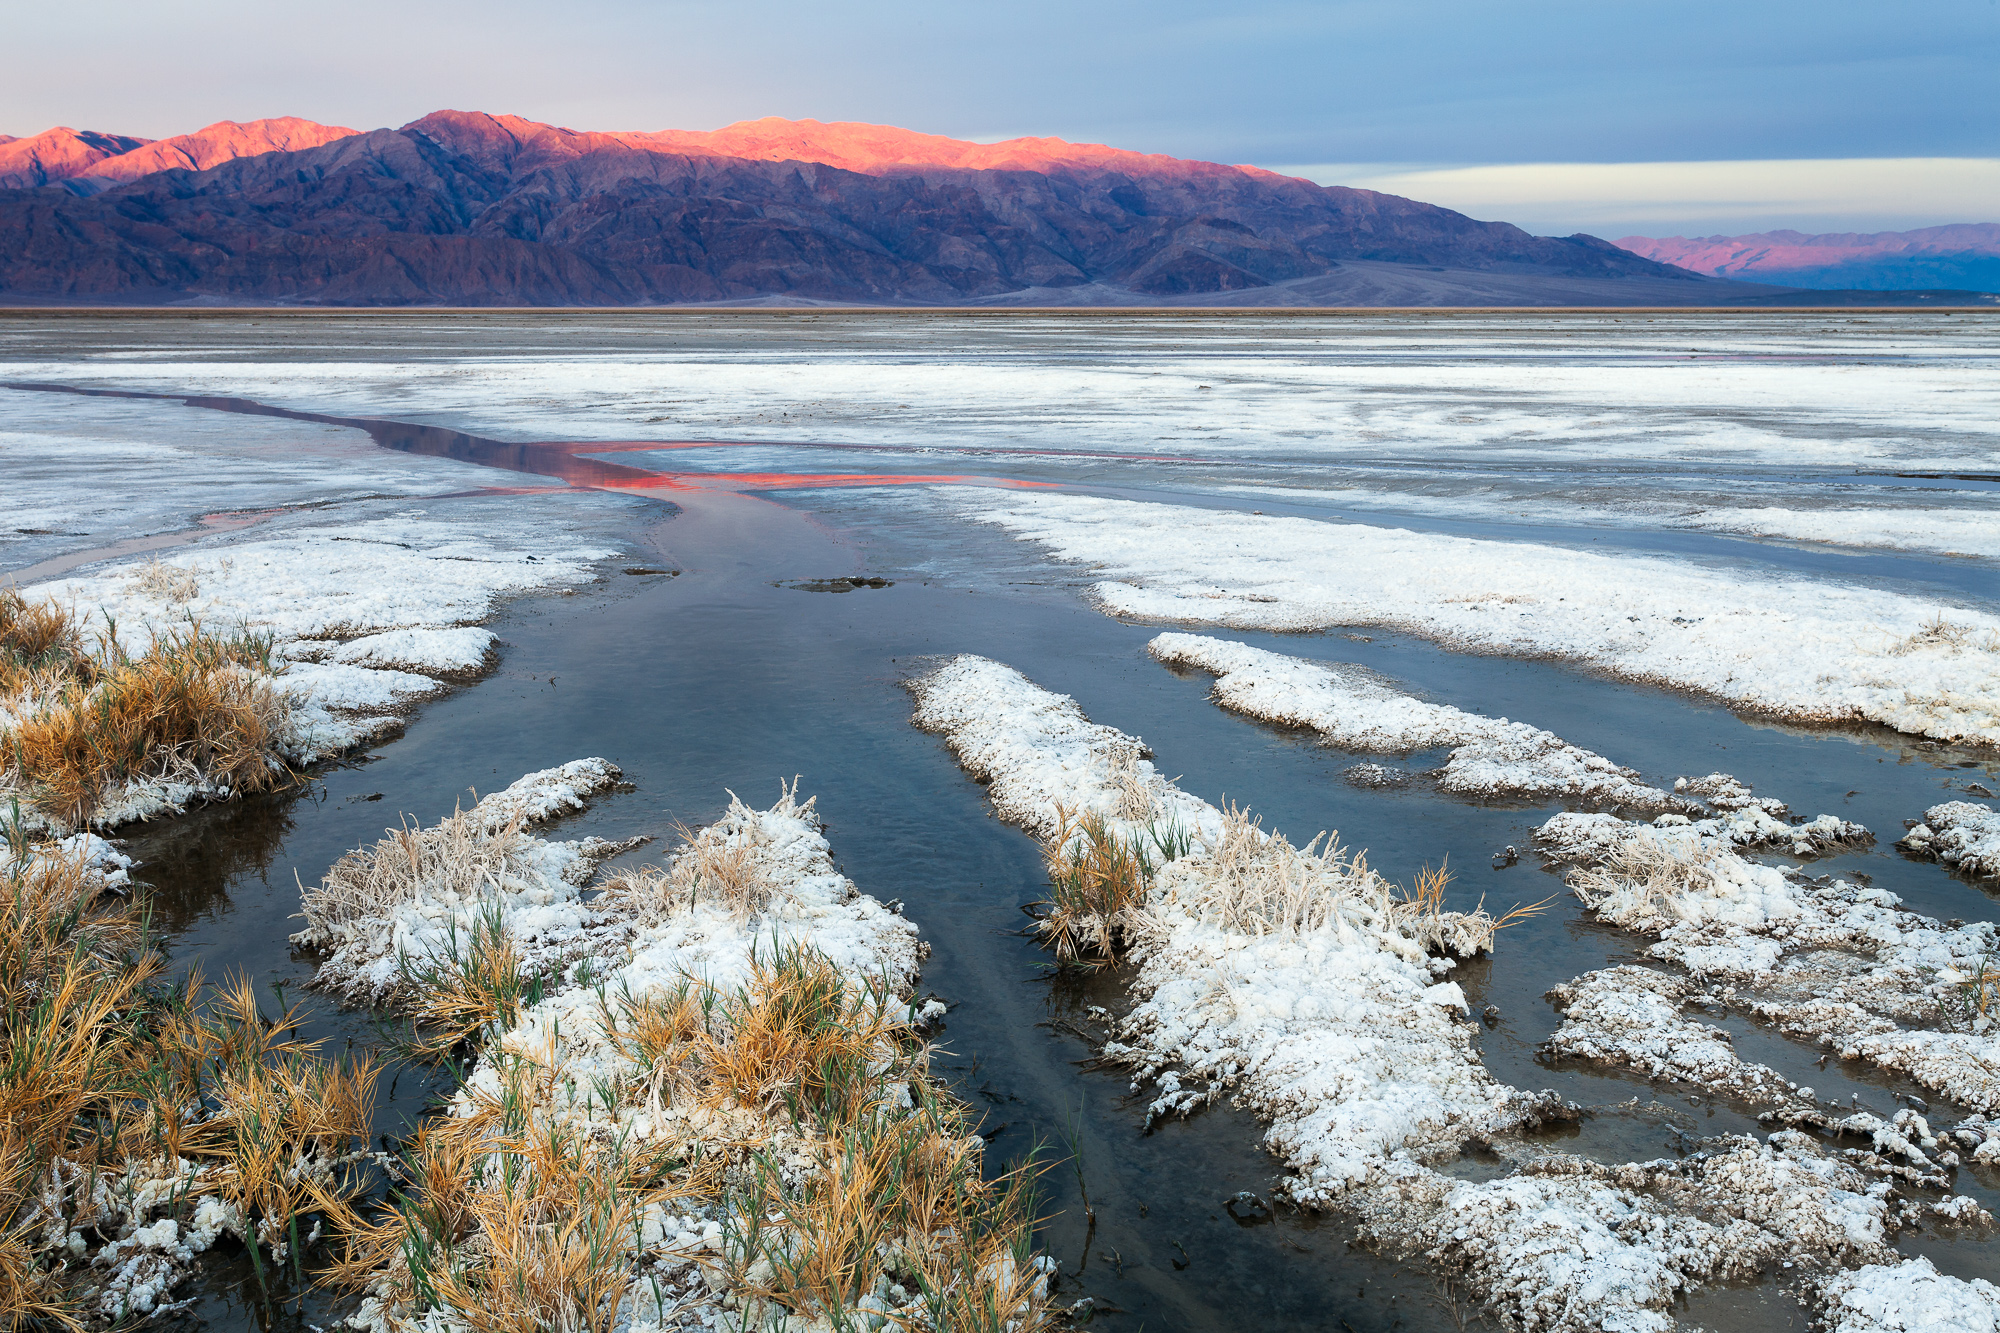
My final example is also from Death Valley National Park, this time evening light on the Mesquite Dune field. When I overexposed this scene, I lost almost all contrast in the resulting image. However, I captured a ton of clean detail in the shadows of the dunes. This detail is especially important in this image, because the shadow patterns is the main foreground element, and having any digital noise here would ruin the image.

The Mesquite Dunes stretch across the valley just north of Stovepipe Wells, Death Valley National Park

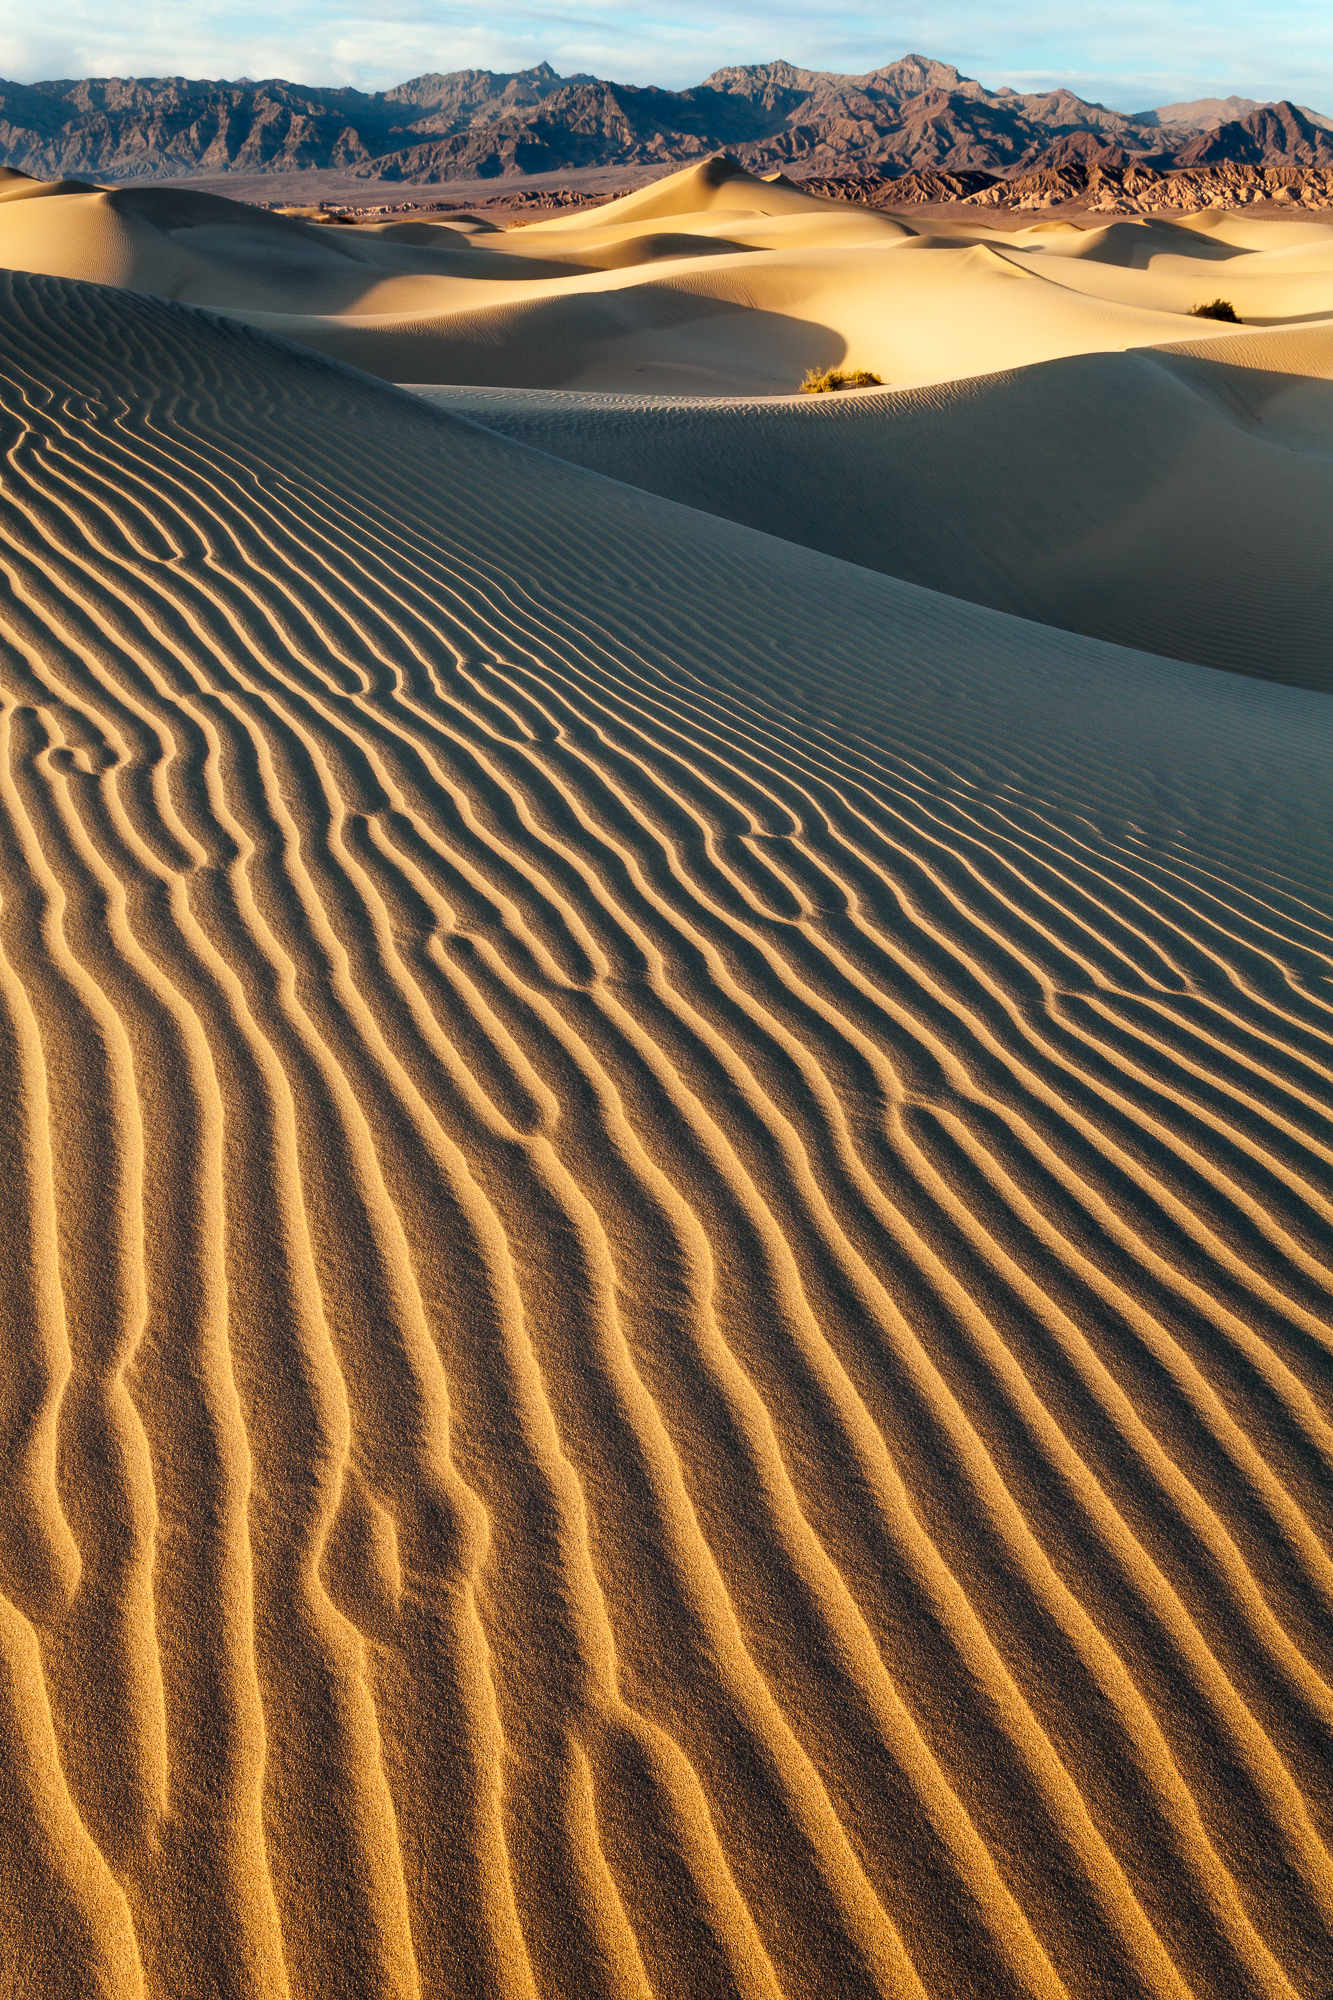
In the final image I was able to add back all the contrast that was in the real scene, and ensure I kept all my shadows smooth and noise free. Practicing this technique a few times will make it a natural part of your workflow. If you have any questions about this process, drop me a comment below, or shoot me a message through my website.

Gear I used to create the photos in this post:

How To Win a Photo Contest (including a sneaky bonus tip)

The sun just lights the top of the Tetons as it rises behind a grove of aspen in their fall colors, Grand Teton National Park

Recently I was asked to judge a photo contest for a small camera club. The skill levels of the participants ranged from beginner to advanced, and after viewing the wide variety of entries, I began to think about simple ways to increase anyone’s chance of winning. Follow some or all of the tips below to maximize your chances of your photos rising to the top of the heap. I’ve sprinkled in some photos that I’ve entered in previous photo contests.

Barrel cactus is just starting to bloom in the Alabama Hills, Lone Pine, CA

Follow the theme

Got an absolutely amazing photo of the setting sun over the ocean? If the contest theme is fall colors, then its probably best to save that great shot for a more appropriate contest. Good judges will disqualify even stunning photographs if they don’t suit the theme of the contest. Along the same lines, make sure you pay attention to all the criteria. You don’t want to waste your time or the judge’s by submitting photos that will be technically disqualified.

The Mesquite Dunes stretch across the valley just north of Stovepipe Wells, Death Valley National Park

Tell a story

Some contests provide an opportunity to fill in information about the photograph. If there is a description field, use it! But don’t just describe what the photo already shows visually. Rather, tell the story of how you captured the photo and what you were thinking when you clicked the shutter. This is your opportunity to “sell” the photograph to the judge, so use the space wisely. Any details you can provide about motivation, technique, or even processing can help cement the image in the judge’s mind so that it is remembered later.

A male ring-necked pheasant cranes his neck in between bits of grass

Get independent opinions

It is always a good idea to ask your peers what they think about the photos you are considering for a contest. Gather a selection and ask your photo friends to act as judge. You might be surprised by their choices. In the past, I’ve gravitated toward photographs that I’ve spent a lot of effort taking and processing, and that has influenced too much what I thought of it, regardless of whether it was actually a good photograph or not. Asking for others’ opinions can help prevent your personal skewing of a photograph’s merit based on the effort it took to produce it.

Silken water reflects the gold colors of fall, South Fork Bishop Creek, Inyo National Forest, CA

Point your subject into your frame (not out of it)

Whether your photograph is of a person, animal, or even mountain, it is always more aesthetically pleasing to have the subject face into the frame. That means there is more space in front of the head than behind it. The same is true for direction of motion – if an animal is walking or running, put more space in front of it than behind. So what about the mountain? Most mountains (or trees, or clouds, or …) seem to point in one direction or another. Put more space in front of the direction it is pointing than behind it. Of course, many rules are made to be broken, and sometime going counter to the rule can add a lot of tension to the photograph. But make sure that the judge will recognize and receive that tension well.

The sun just lights the top of the Tetons as it rises behind a grove of aspen in their fall colors, Grand Teton National Park

Avoid converging lines

Find plenty of separation between your photograph’s main elements and avoid converging lines. Space between major subjects helps the photo breath, and convergence can create unintended tension points and generally looks sloppy. Usually converging lines can be solved in the field by moving your camera forward, backward, side to side, or up or down. Try to find the right perspective that when flattened into a two dimensional photograph, leads the viewer easily through the frame.

Sunlight moves down the mountains to the west of Salt Creek, now a dried salt flat, Death Valley National Park

And now for the sneaky bonus tip….

Get to know your judges

If possible, try to find out who is judging the contest. Some contests will publish this information outright; others you might have to dig around a bit. Spend a little bit of internet time finding out more about the judges and what style of photography they gravitate toward. Have they judged a contest before? Which images did they choose previously? Chances are they will judge the current contest based on similar criteria. If the contest is judged by a panel, try to contribute at least one photo that matches each judge’s personal style and tastes. This may seem like cheating, but any leg you can get up on the competition is a worthy pursuit.

Dawn begins to light Lone Pine Peak and the wild rock formations of the Alabama Hills

Hopefully these tips get you thinking about photo selection and photo taking for the next contest that you consider entering. This can help you maximize you time, effort, and money!

Use Lightroom’s Match Total Exposures Feature For Quick And Dirty Panoramas

A great blue heron stands along the shore of a canal in early morning light

When I shoot landscape panoramas, in addition to tripod use and careful alignment, I always follow one basic technique – set my camera in manual exposure mode. To determine the optimum exposure for a panorama, I set my aperture (typically between 11 and 16 for landscapes), and meter different parts of the scene. I select the brightest portion of the scene and over-expose the meter to a point that no highlights are blown out. Then I set the camera to manual exposure, dial in the appropriate shutter speed, and I’m ready to capture all the frames of the panorama, knowing that they will blend together nicely in post production.

However, when I am photographing birds or wildlife panoramas, I am often forced to use quick and dirty techniques. These panorama situations usually arise when I am close enough to an animal that their face can fill an entire frame, but I still want to capture their entire body. Instead of backing away, I usually resort to taking multiple overlapping images, knowing I can stitch them together later. This often happens with large water birds such as this great blue heron, that are docile enough to allow me to get close.

Because I know that the animal can move at any time, I need to be quick with my overlapping photos, taking them in rapid succession. This means I don’t have time to carefully meter the scene and dial in the optimum exposure. Usually I will leave my camera in aperture priority (for overlapping photos to stitch together, aperture MUST be the same throughout all images) and let the camera decide the exposure. Usually no photo is more than 1 stop from any other photo.

Now that I’ve taken my photos and have imported them into Lightroom, I need a quick way to align the same exposure across all photos. Enter the “hidden” Match Total Exposures feature.

Use the Match Total Exposures feature to synchronize the exposures between frames that will make up a panorama.

I pick one of the photos with which to optimize the exposure. Once I’ve adjusted the exposure slider to my liking, I select all the photos in the series and click the menu Photo->Develop Settings->Match Total Exposures. All of the other photos in the series will move their exposure sliders up or down so that the adjusted exposure is matched to the original. For example, let’s say we have three photos all shot at f/5.6, with the following shutter speeds: 1/500, 1/250, and 1/1000 (the exposures will typically be much closer, but I’m using easy math for illustrative purposes). If the first photo (1/500 seconds) is selected as the original to match, then the exposure slider for the second photo will move up one stop and the exposure slider for the third will move down by one stop. This is a quick and easy way to make sure the exposures for all photos in the series are similar so that they blend properly.

Once I’ve adjusted all the exposures, I keep them all selected and click Photo->Edit In->Merge to Panorama in Photoshop. This will result in a perfectly blended panorama.

Strive For Separation

Thick fog shrouds a forest of aspen, Ridgway, Colorado

One goal of nature photography is to take the chaos of a wild landscape, and using nothing but the perspective of the rectangle of your camera’s view, to simplify and distill the scene into a singular message. One of the most chaotic environments in which I shoot regularly is a forest. Once you combine tree trunks, branches, leaves, and vegetation, you are often presented with quite a mess of a scene. Finding patterns and removing the extraneous elements can be a huge challenge.

One technique I use to help the viewer see the intended patterns I am trying to convey is to use and pay careful attention to the separation of the main elements of my photo. Here are several forest scenes that I shot on a recent trip to the San Juan mountains in Colorado. With each, I spent a great deal of time in the field moving the camera and field of view to just the right location, to make sure the trees were not merging with each other in ways that detracted from my vision.

Bone white aspen trunks create abstract lines over distant fall foliage, Ridgway Colorado

When I took this photo, I was in a location with a dirt road running along one side of a narrow valley. The opposite side of the valley was covered with a kaleidoscope of fall colors – a beautiful display. Above the road on my side of the valley was a stand of aspen, with perfect bone-white trunks. I knew the shot I was looking for – now it was a matter of hoping I could find the right composition.

I moved up the steep slope and into the aspen grove. Using a medium to long lens and moving up-slope above the trees, I could shoot straight through a select group of trunks, using the beautiful colors from the other side of the valley as my backdrop. Now was the truly challenging part – I needed to find just the right group of trees that showed a consistent pattern of separation from one another. I finally found some good candidates and spent a while getting my tripod into the right location. Working on such a steep muddy slope made the work slow and arduous. I slipped more than once, preferring to let my clothes take the brunt of the mud rather than my expensive gear.

In the photo, you’ll notice that the spacing between the left and right edges and the left and right most trees is the same. I tried to keep similar spacing between each tree, so as to repeat this pattern across the frame. The trouble trees are the three right most; but after working with them a while, I began to really like how they broke the perfectly even pattern. It brings just a touch of wildness into the photo, hinting at the chaos of this forest.

Thick fog shrouds a forest of aspen, Ridgway, Colorado

Another great natural phenomenon to take advantage of to help simplify a scene is fog. This can work especially well to simplify a forest scene, and it worked very well with aspen. Again, I worked on creating an even spacing across the closest trees, knowing they would be rendered in the photo with the most contrast. With these photos, it is especially important to pay very careful attention to the edges of the frame.

Fallen aspen leaves carpet the forest floor casting the trunks in a golden white

This last photo was perhaps the most difficult of the three. I saw the foreground cluster of trees, and as I moved closer, I saw a repeating cluster in the background, a perfectly placed V shape in the similarly shaped void between the right most tree and the trees to the left of the frame. However, seeing it and shooting it were different beasts. Instead of using my perspective to flatten a three dimensional scene across the frame as in the previous two photos, here I was using the shapes to accentuate the depth of this pattern.

Once I got the tripod and camera in place to get the background cluster of trees where I wanted them, I spent time working on smaller separations appearing in the left most cluster. Some of the trees I could stack on top of each other and hide from the camera’s view-port, but there was one distant tree that kept creating problems. Finally, I got into a position which put the distant tree into a spot that prevented it from peaking out from behind the foreground trees, and I knew I had it.

Although I was working with depth in this photo, the goals were the same as the previous photos: to simplify the chaos of nature into a digestible, understandable subject. Paying special attention to control the spacing between primary elements in the photograph can help achieve this goal.

Copyright 2017 Hank Christensen