Can I Ditch My DSLR For My Cellphone Camera?

The big arroyo bubbles past the high sierra trail, Sequoia National Park

Last year I finally purchased a phone with a camera good enough to take photos I was more or less happy with. So on a backpacking trip late last summer, I decided to put my new phone to the test and pit it against my bulky DSLR and associated gear that I lug along with me on my trips.

First of all, for those who haven’t backpacked before, the best preparation you can make for your trips is to shed as much carry weight as possible. This means light weight backpack, sleeping gear, etc in order to be able to hike further each day and in more comfort. I spend days weighing my gear and making tough decisions about which comfort items to leave behind. That’s why it is so painful when I add up the nearly 9 pounds of extra weight for my camera gear.

For multiday backpacking trips, I typically take the following items:

  • camera body (including l-bracket)
  • 24-70mm f/2.8 lens
  • light weight tripod and small ball head
  • cotton carrier vest (this way I can carry the camera on my chest for easy access along the trail)
  • extra bracket to attach camera to vest
  • at least 1 extra battery
Two boulders stand sentinel over a valley catching the last rays of daylight, Sequoia National Park

Because of all this extra weight, I’ve been looking for something lighter weight that could deliver equal or almost equal results as the DSLR. Enter the ultimate multi-use device, the cell phone. A couple of years ago my stand-alone Garmin GPS stopped coming with me on trips (I can navigate perfectly well with pre-downloaded maps and my phone’s GPS), and this time I was testing the new cell phone’s camera to see how it would stack up to my pro gear. I wasn’t expecting parody of features or quality, but if it was “good enough” it would save me about 9 lbs of gear – an incredible amount of weight for backpacking.

As I often do, I set out with my friend Steve to explore a new area of the Sierra Nevada over the next five days. Our destination was Sequoia National Park, departing from the remote Mineral King ranger station. We would be hiking in to intersect part of the High Sierra Trail (becoming much more popular over the last few years as the JMT has been at capacity all summer).

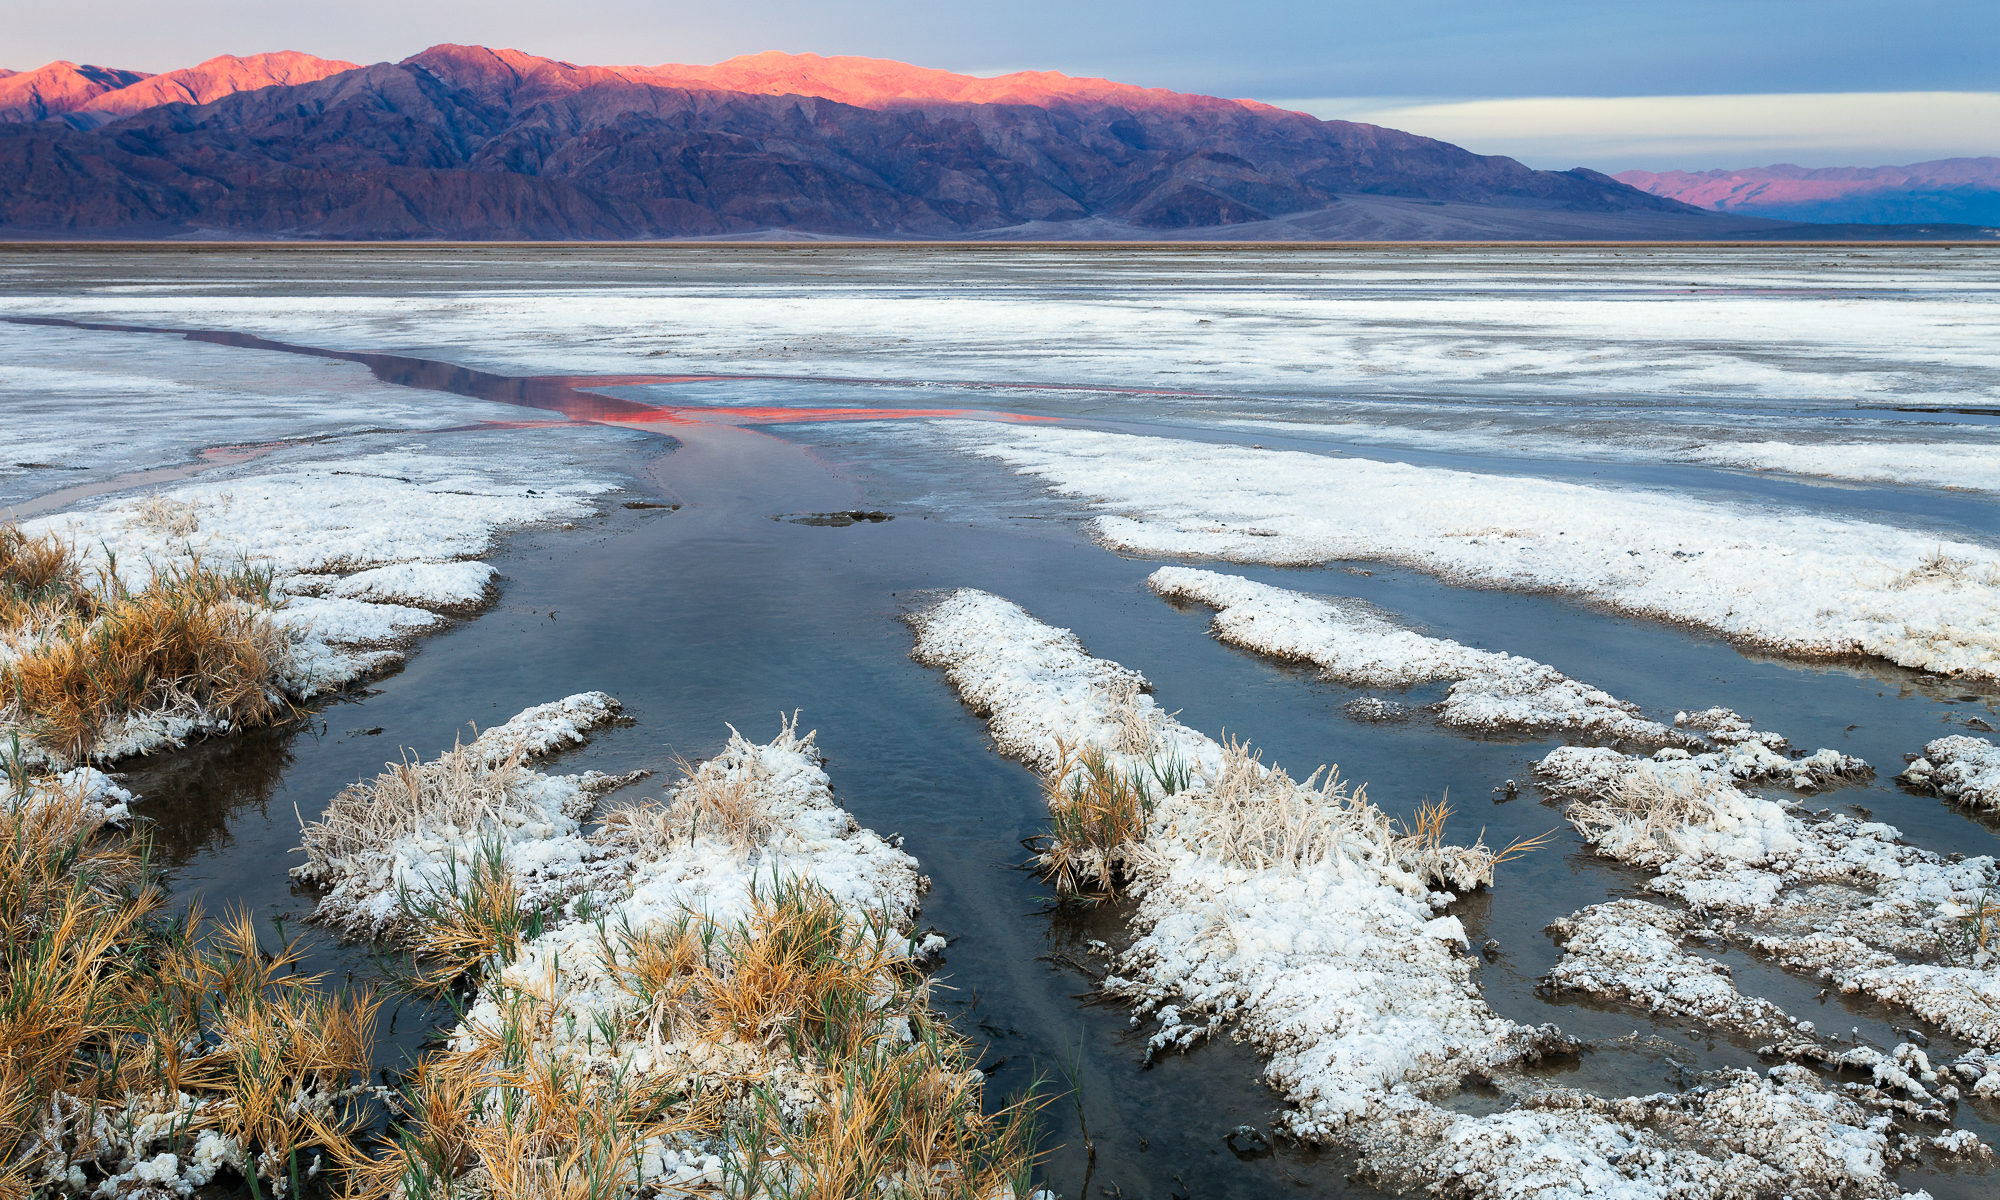
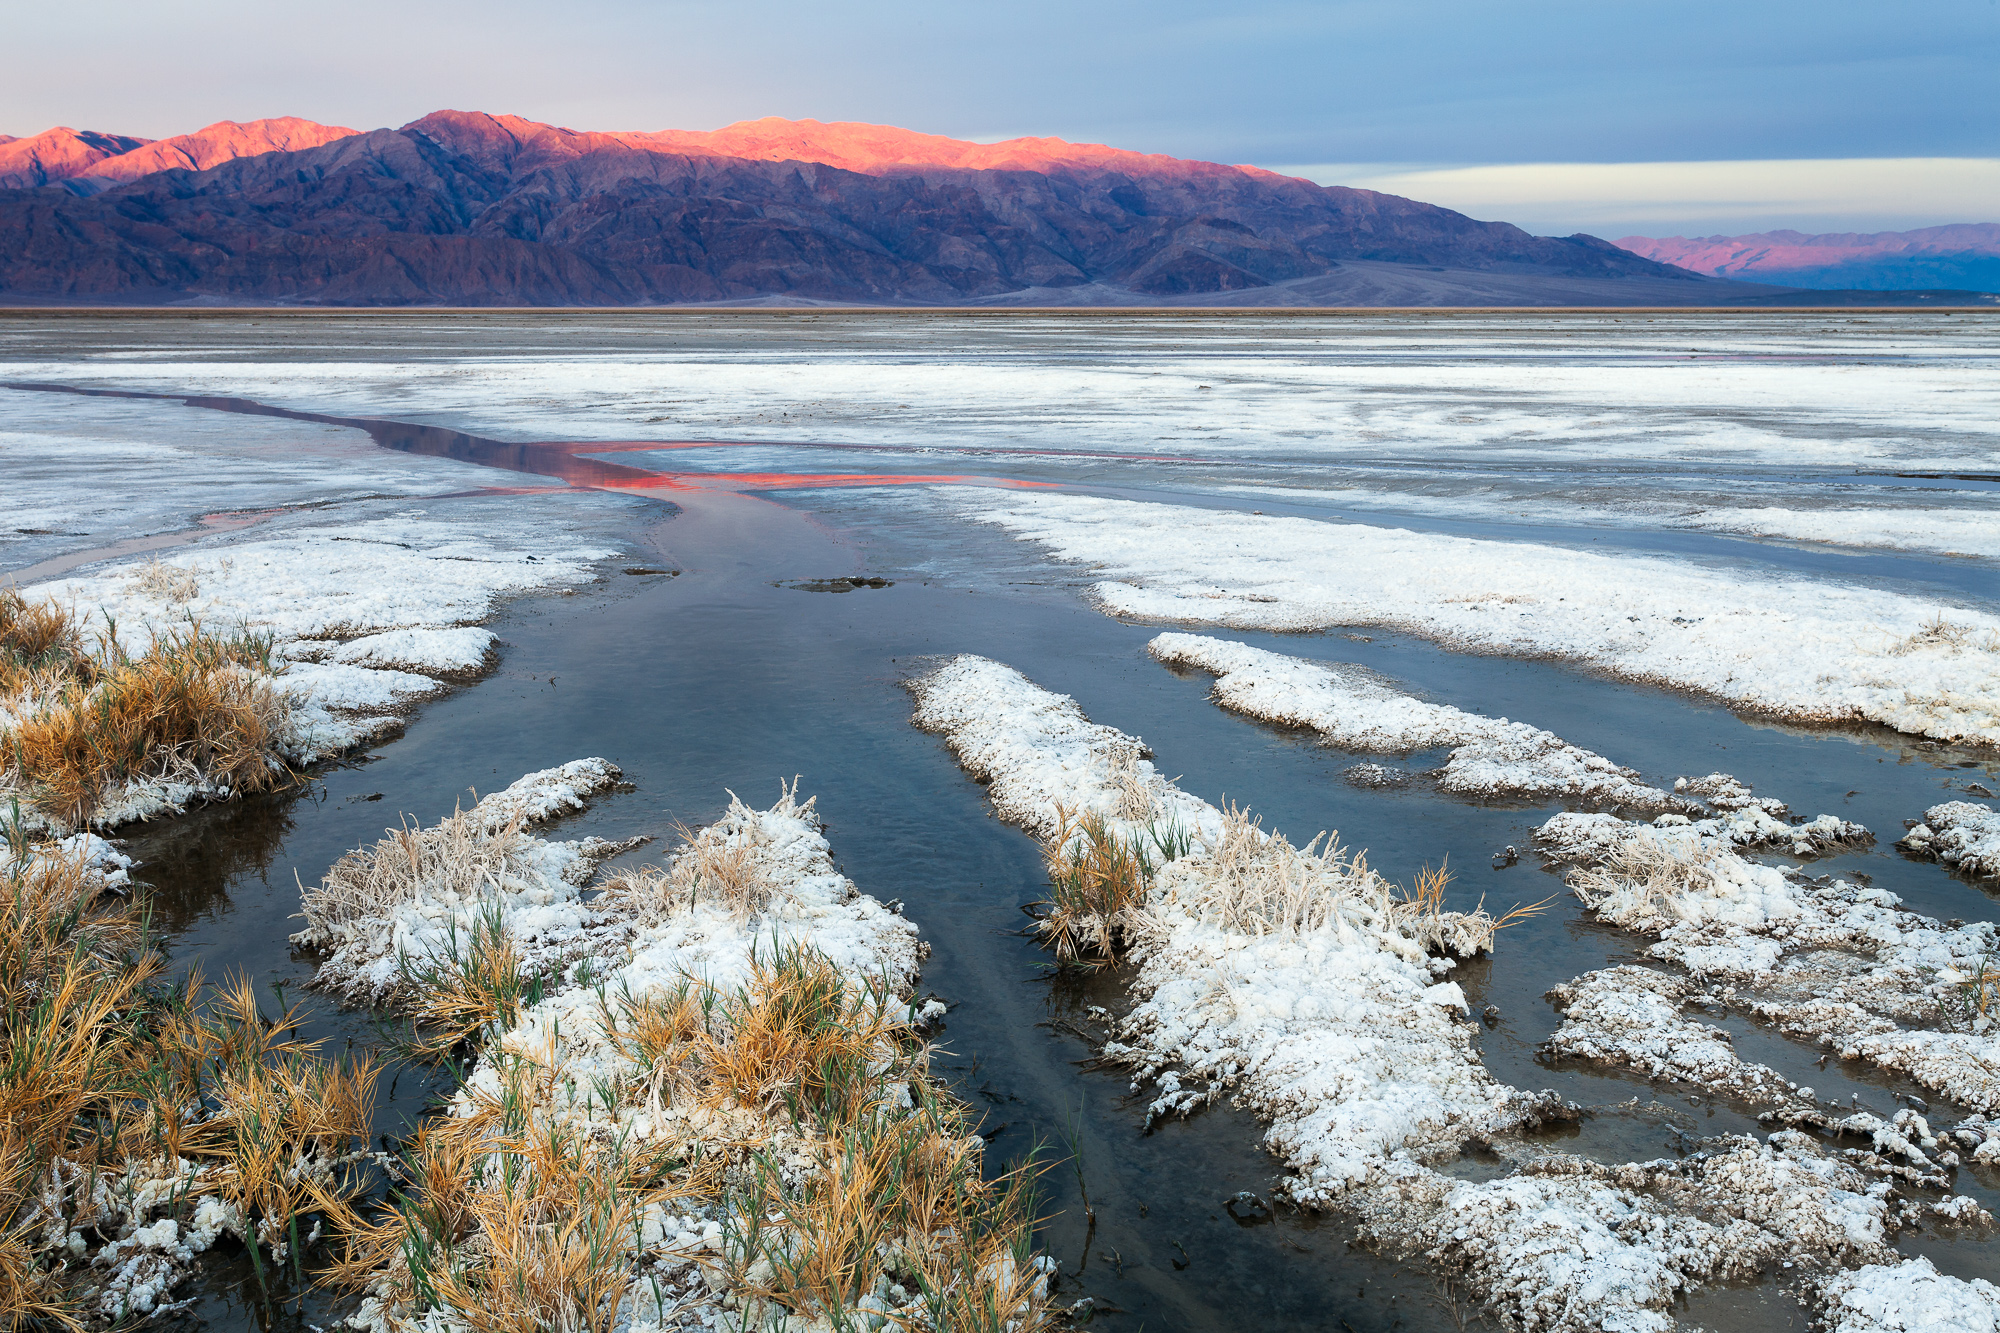
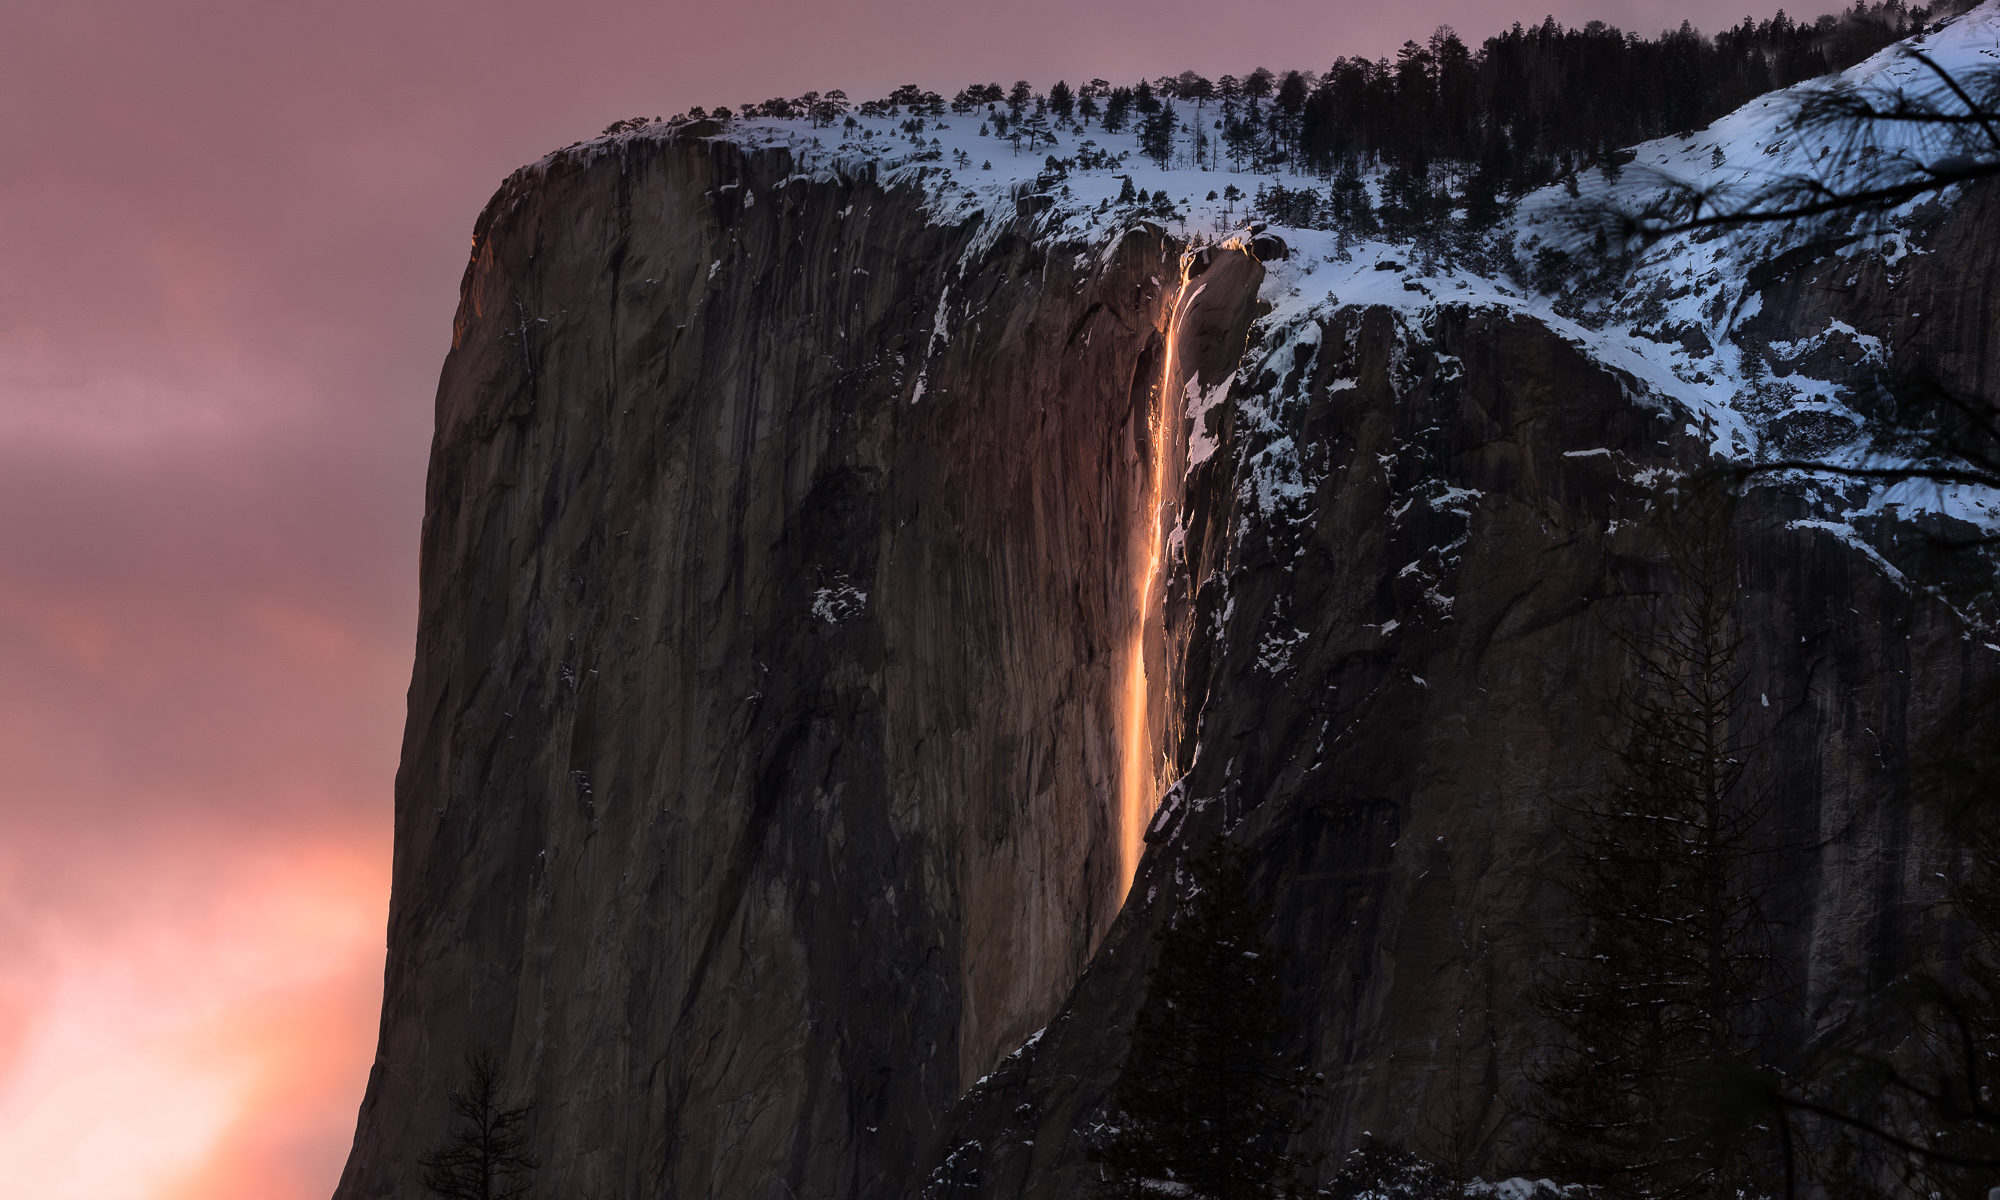
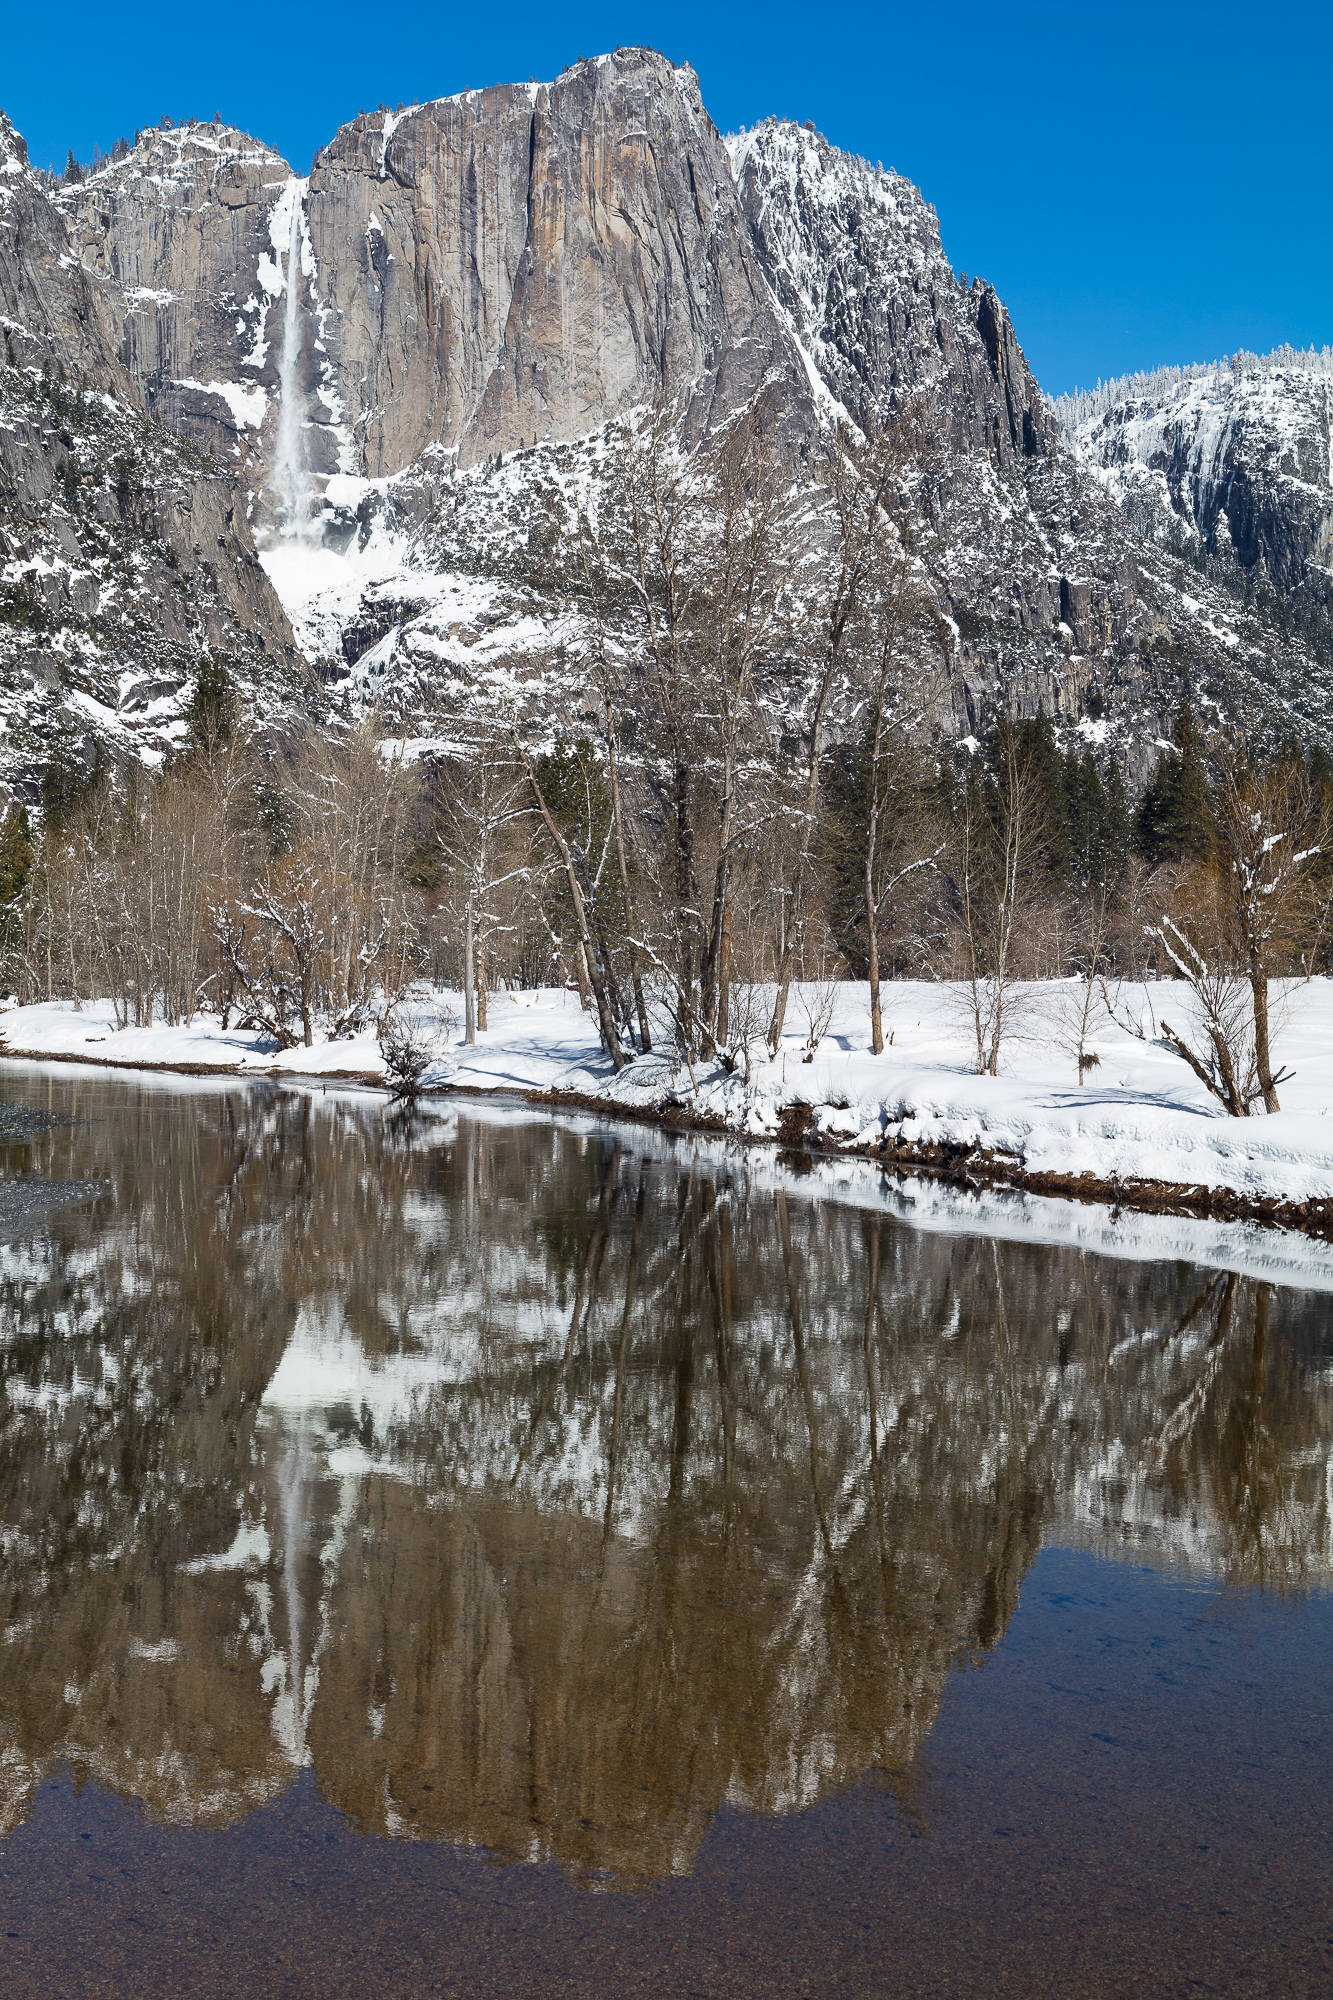
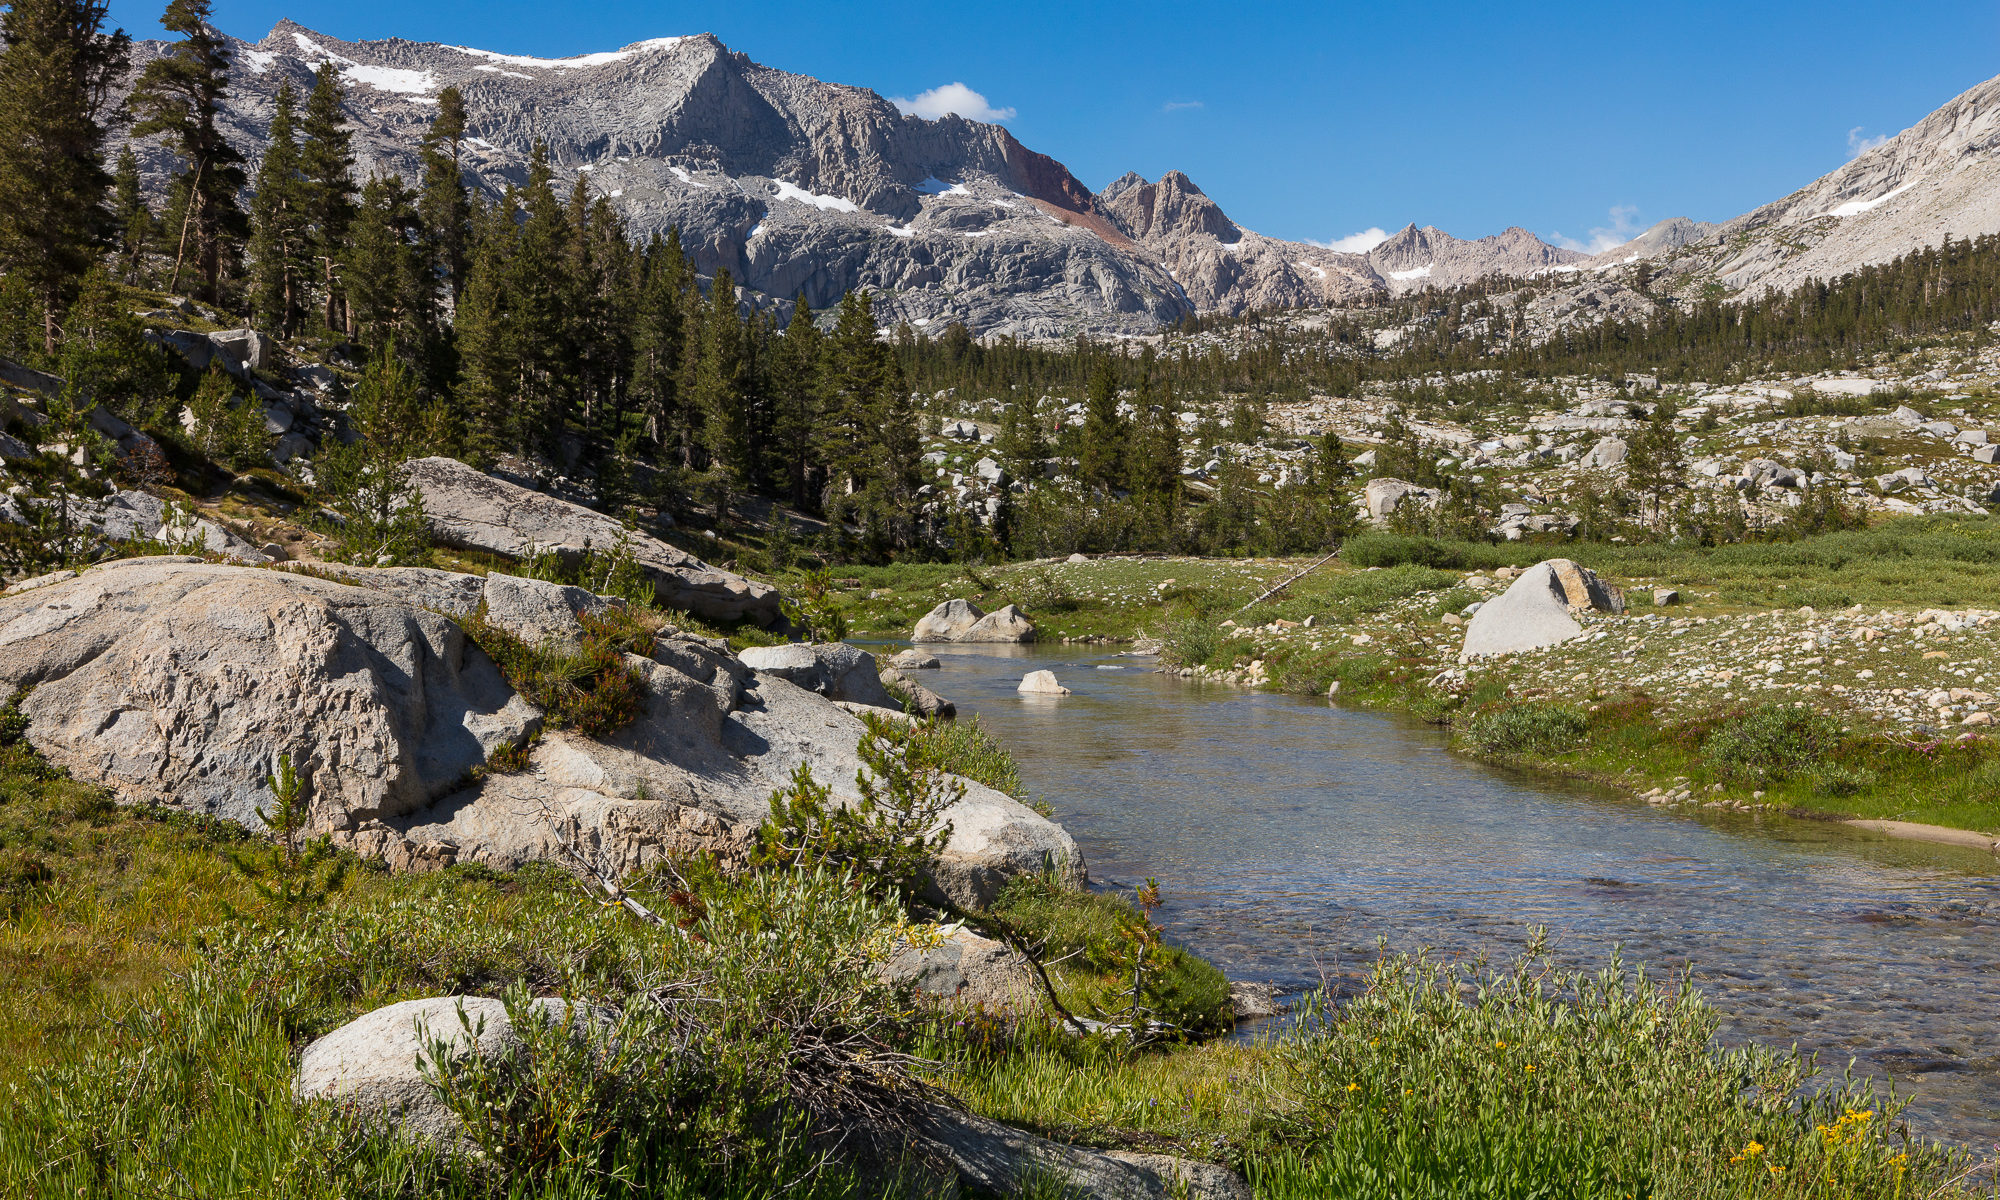
The photo above was taken with my Google Pixel, sporting one of the better cellphone cameras on the market (at the time). This was taken from our first camp at sunset, past Timber Gap. Although the phone shoots RAW, I’ve uploaded the JPG that was processed in-camera to give you an idea of automatic results. To be honest, I wasn’t able to pull much more out the photo through post-processing the RAW file – it appears as though Google’s processing algorithms do a very good job here.

On our second day, we got a very early start, and climbed to the Great Western Divide by 10 in the morning. We quickly dropped down into the next valley, and intersected with the High Sierra Trail. Our destination was further north, nestled at the top of a valley adjacent to several off-trail lakes. Neither of us had been here, but the area looked great for camping and photography based on topo maps.

One of the first things we noticed as we met the High Sierra Trail on this warm August afternoon was a relative lack of people. This was a great sign, as we enjoy the solitude of the wilderness. One of the biggest disappointments in backpacking is to struggle along a trail for hours, only to come to a spot overrun by a loud group. We attributed the scarcity of hikers to the fact that there had recently been a complete washout further up the High Sierra Trial. This caused people to either turn around to go back the way they had come, or to cancel their trips altogether. As we were not through-hiking the trail, it didn’t affect our trip at all. But we got to benefit from this temporary closure.

Wildflowers bloom just outside of nine lakes basin, with M. Lippincott in the distance, Sequoia National Park
Wildflowers bloom in the late summer, Sequoia National Park

Our long day ended in a beautiful campsite overlooking the valley we had hiked up. It was difficult to find a good spot to set up tents, but after careful searching we found a prime location. As the sun got lower in the sky, we realized that we likely had the entire valley to ourselves, as we hadn’t seen another soul for hours, and the few campsites closer to the trail were deserted.

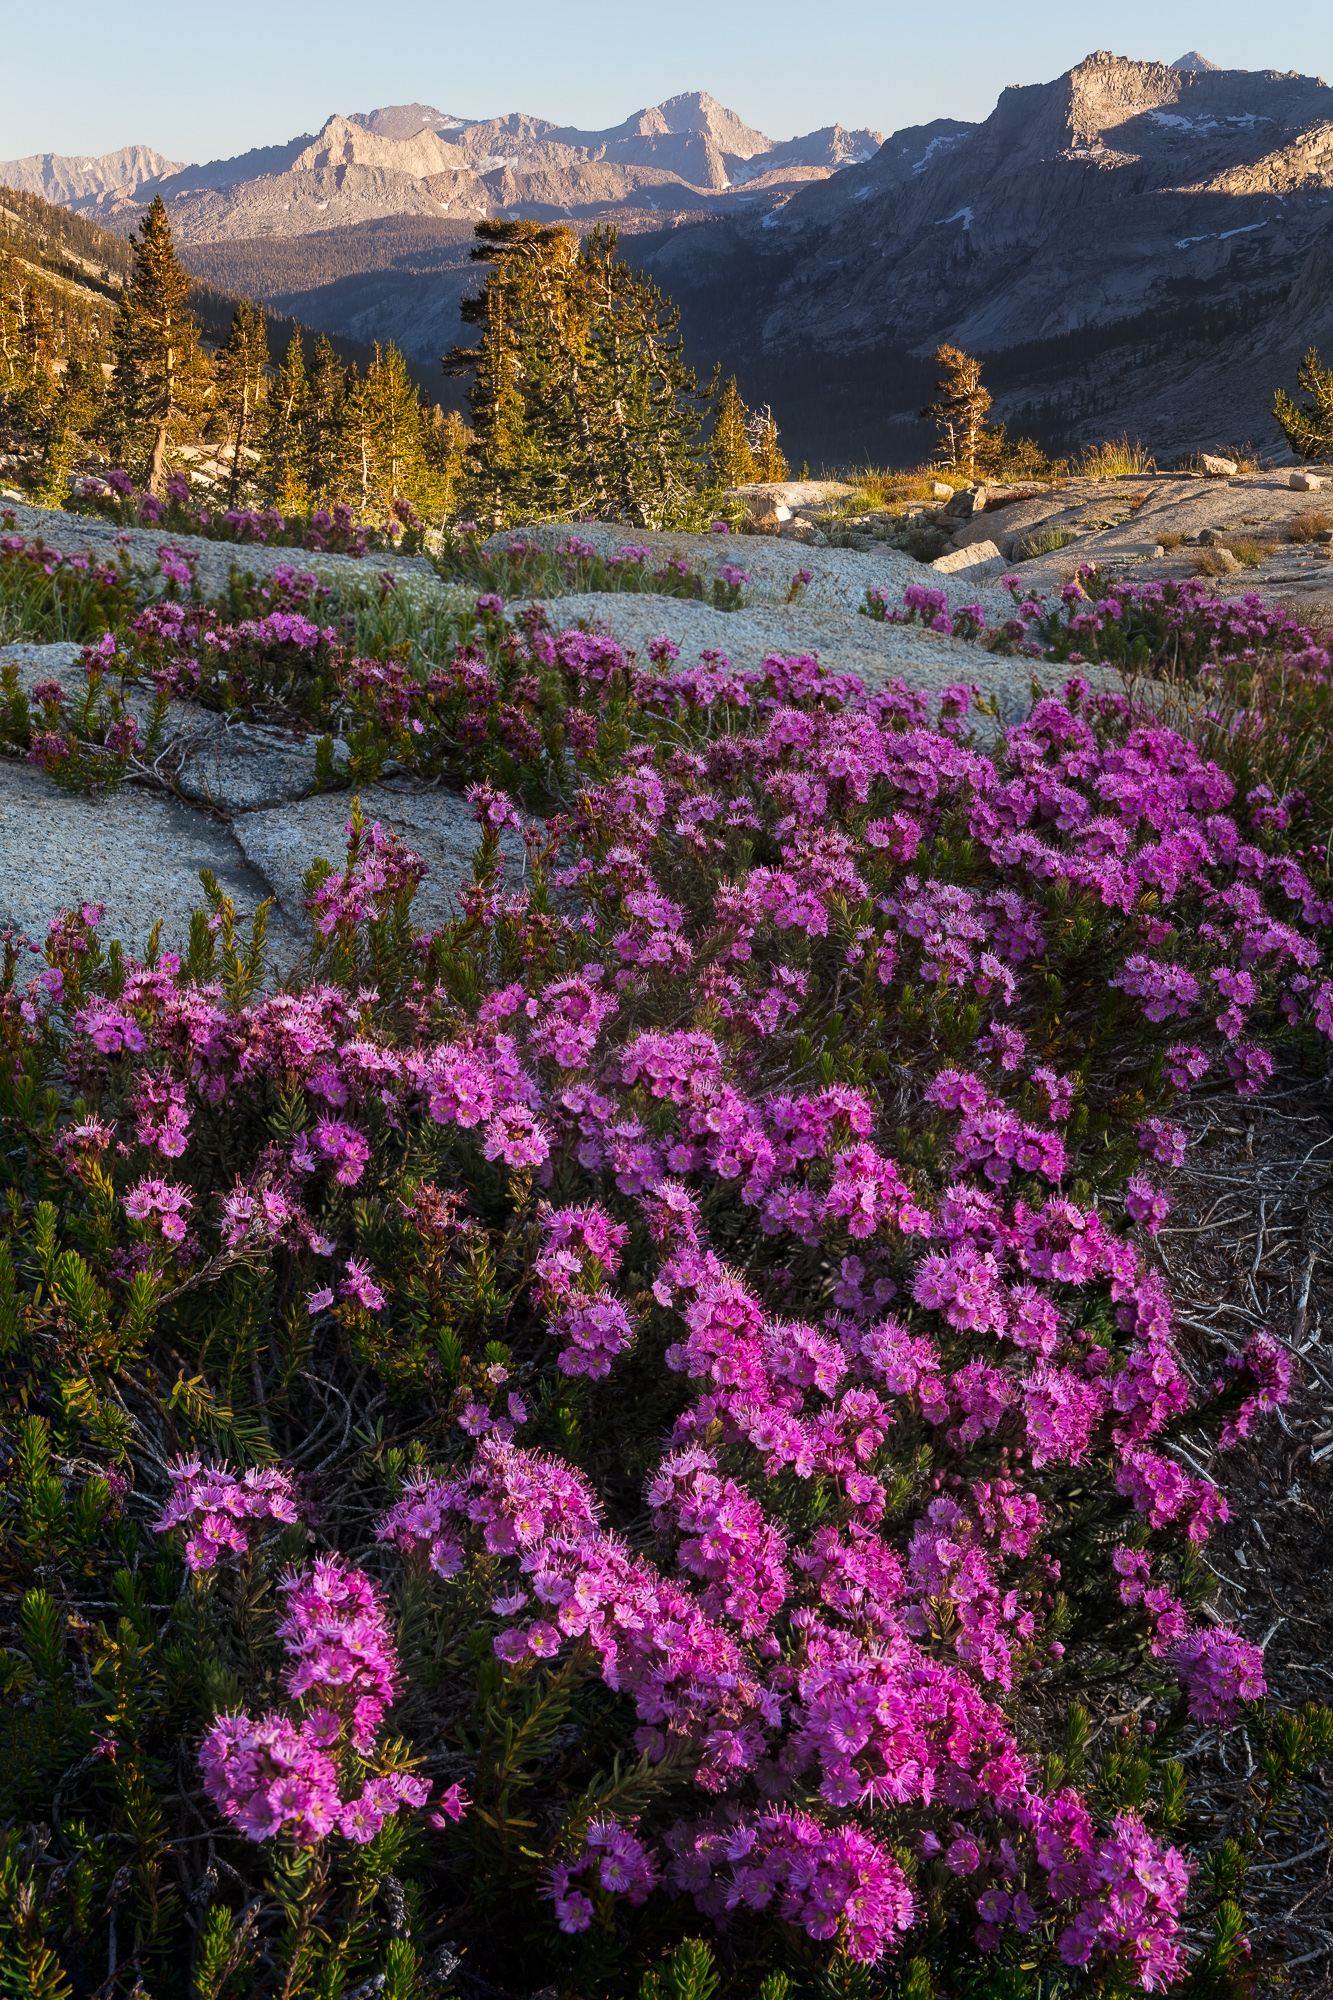
In addition to the glorious solitude, we were treated to a variety of wildflower blooms all around our camp. Even though it was already August, these flowers were in peak bloom as we were well above 11,000 feet. The photo above was focus stacked with my 50 MP Canon 5DSr. Although I took the same photo with my phone’s camera, it really couldn’t achieve the quality of the DSLR. Being able to focus stack with my DSLR gave me crisp detail throughout the entire scene, whereas the cell phone couldn’t hold that deep focus. In addition, once you zoomed in beyond regular computer screen size, the detail of the phone camera started to fall away and more digital artifacts and noise were introduced. This would affect the printability of the image, and ended up being something I just couldn’t sacrifice, even if it meant carrying an additional 9 lbs of gear.

Iceberg Lake remains cold year round, showcasing chunks of ice that float from one shore to another, Sequoia National Park
Many mountain lakes remain cold year round, showcasing chunks of ice that float from one shore to another, Sequoia National Park

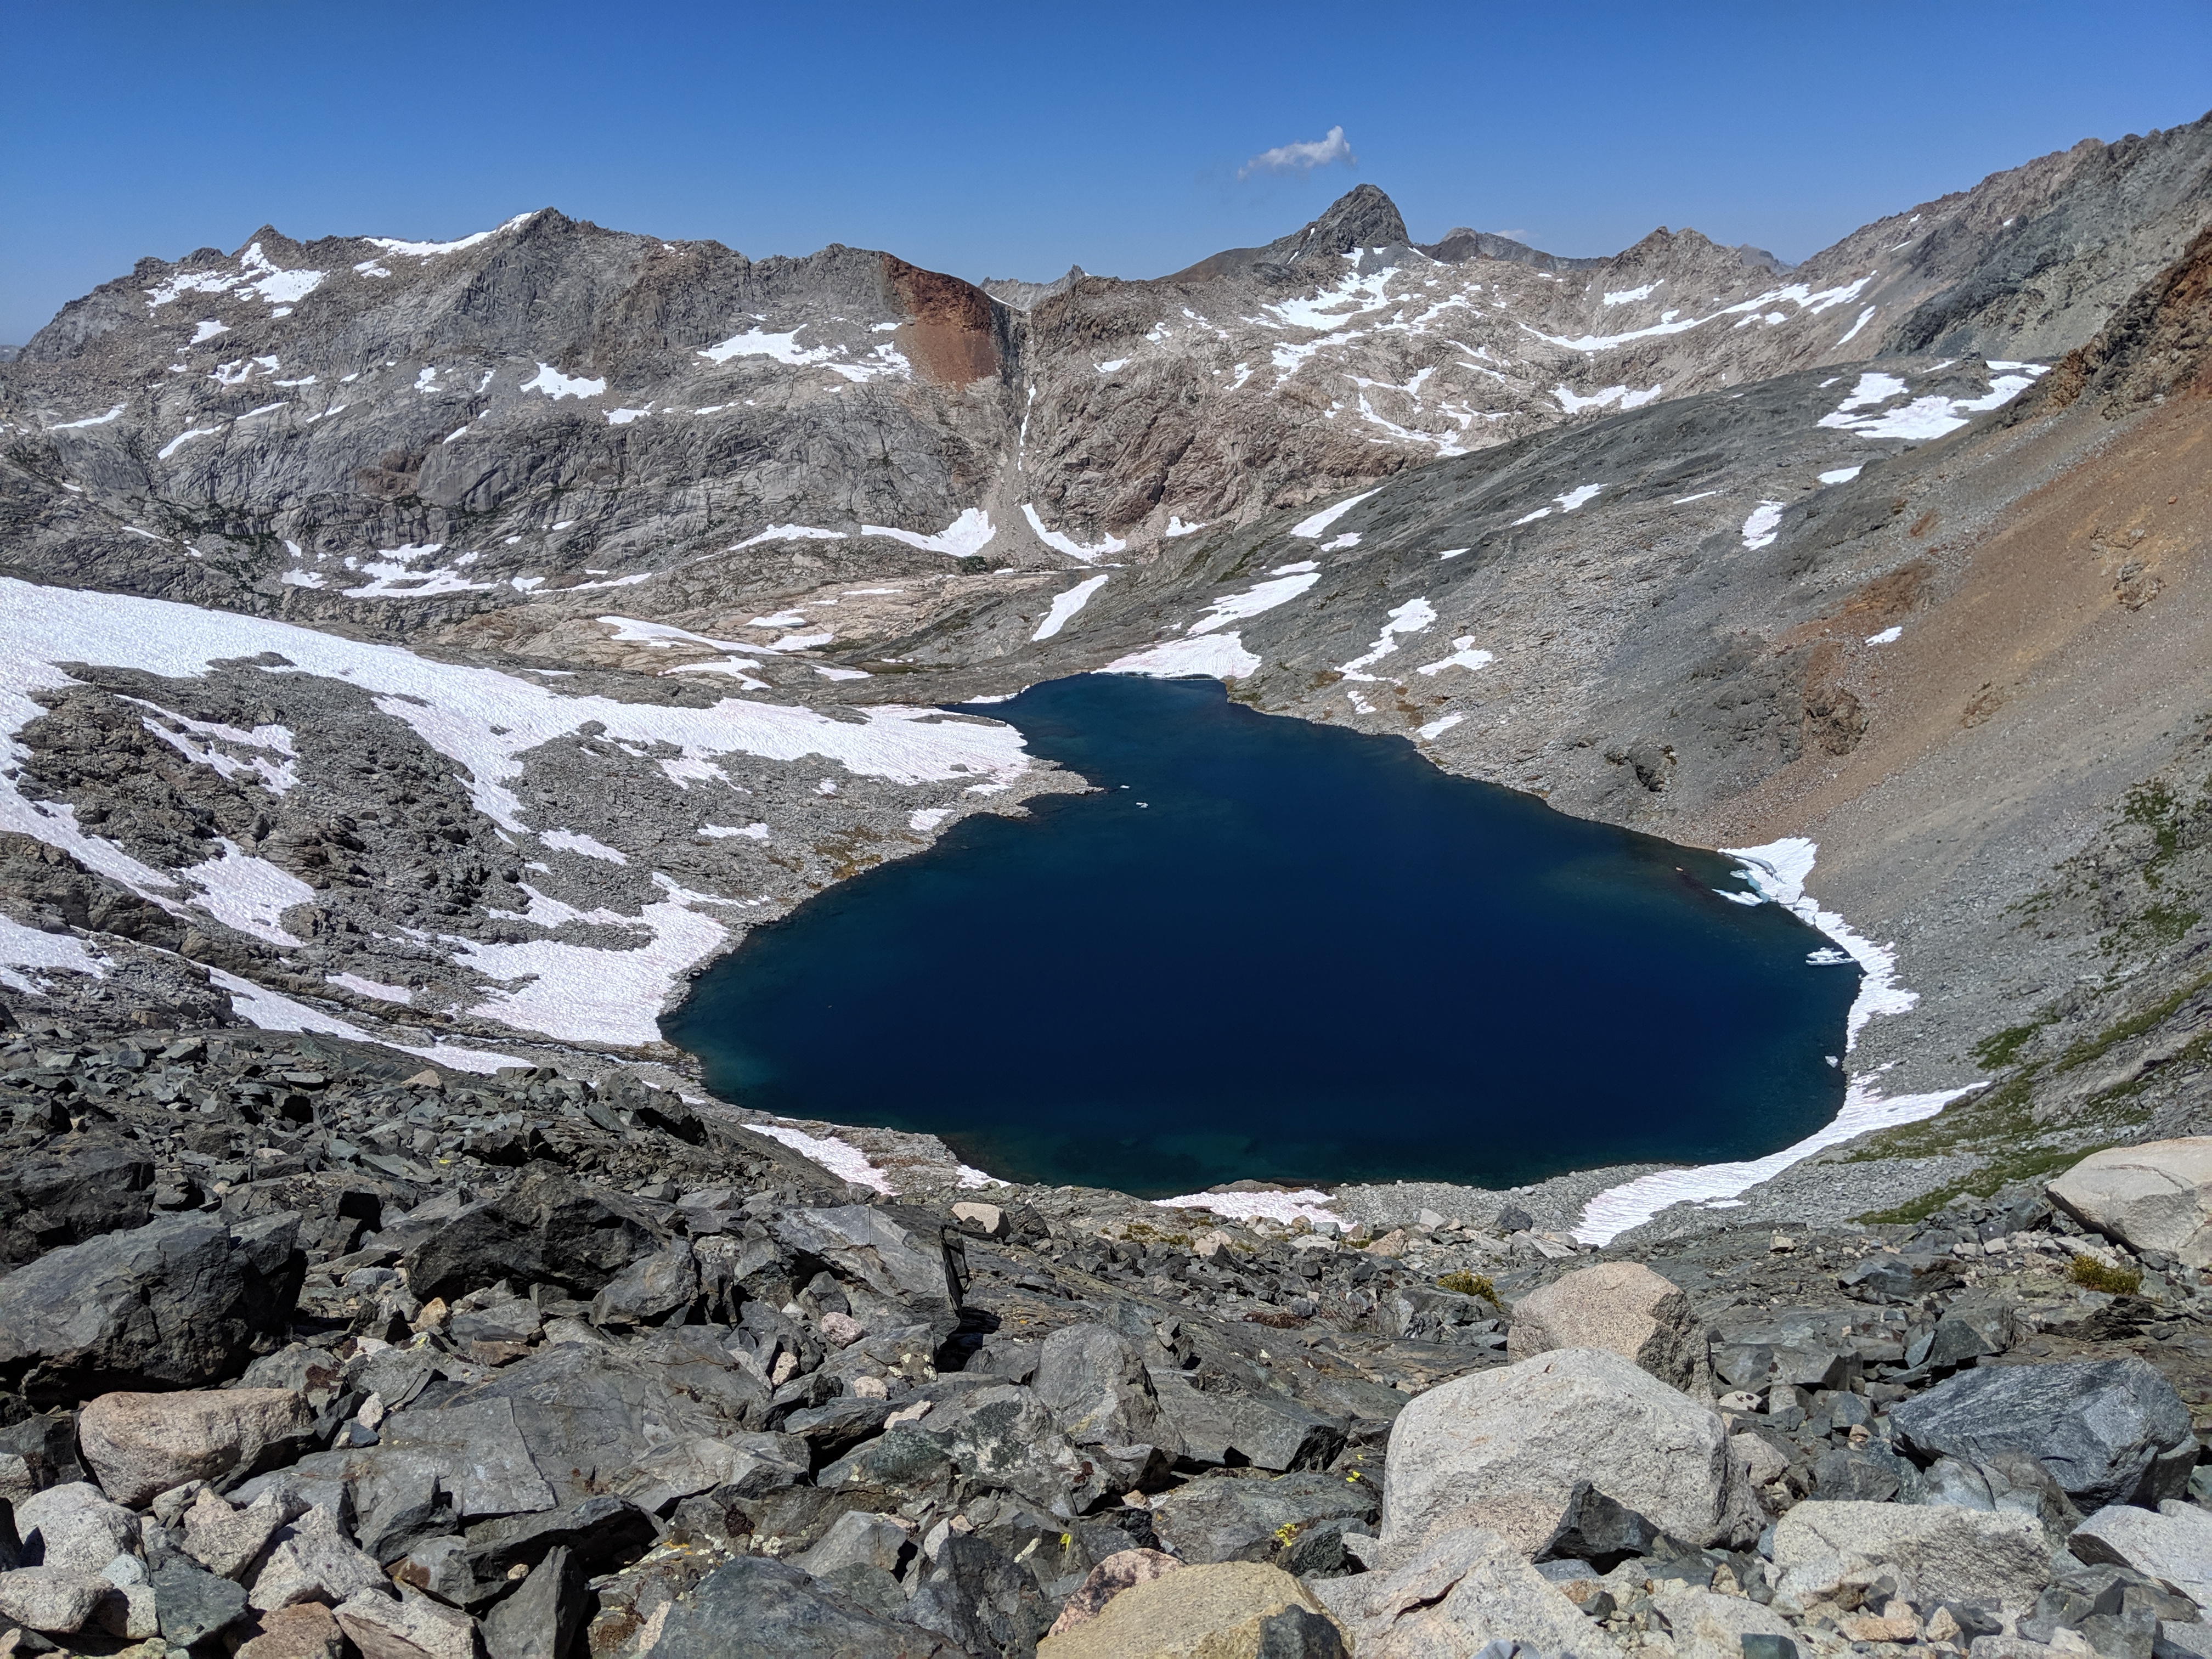
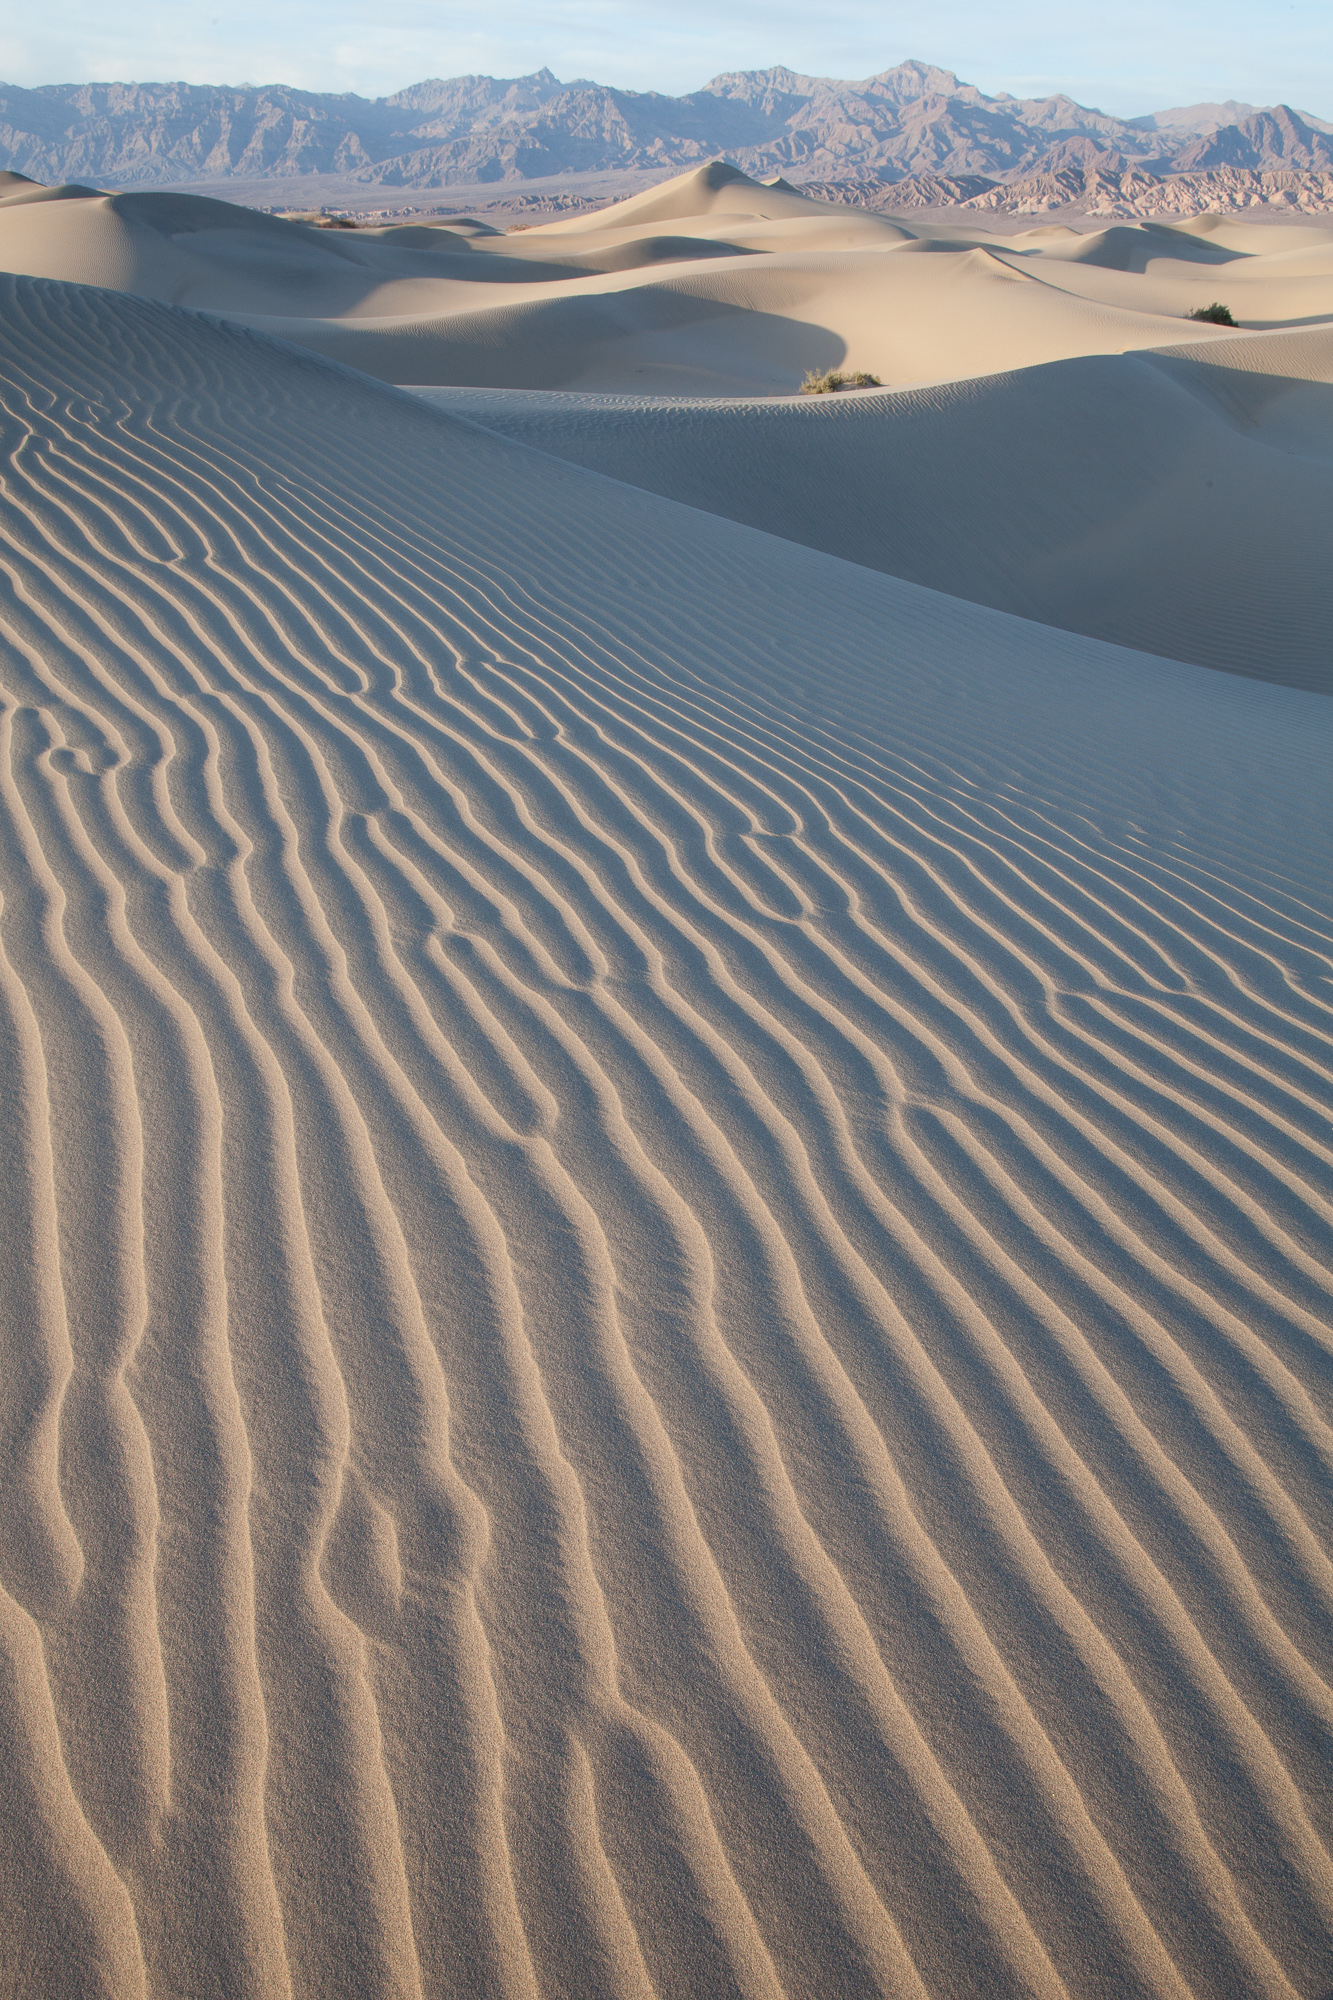
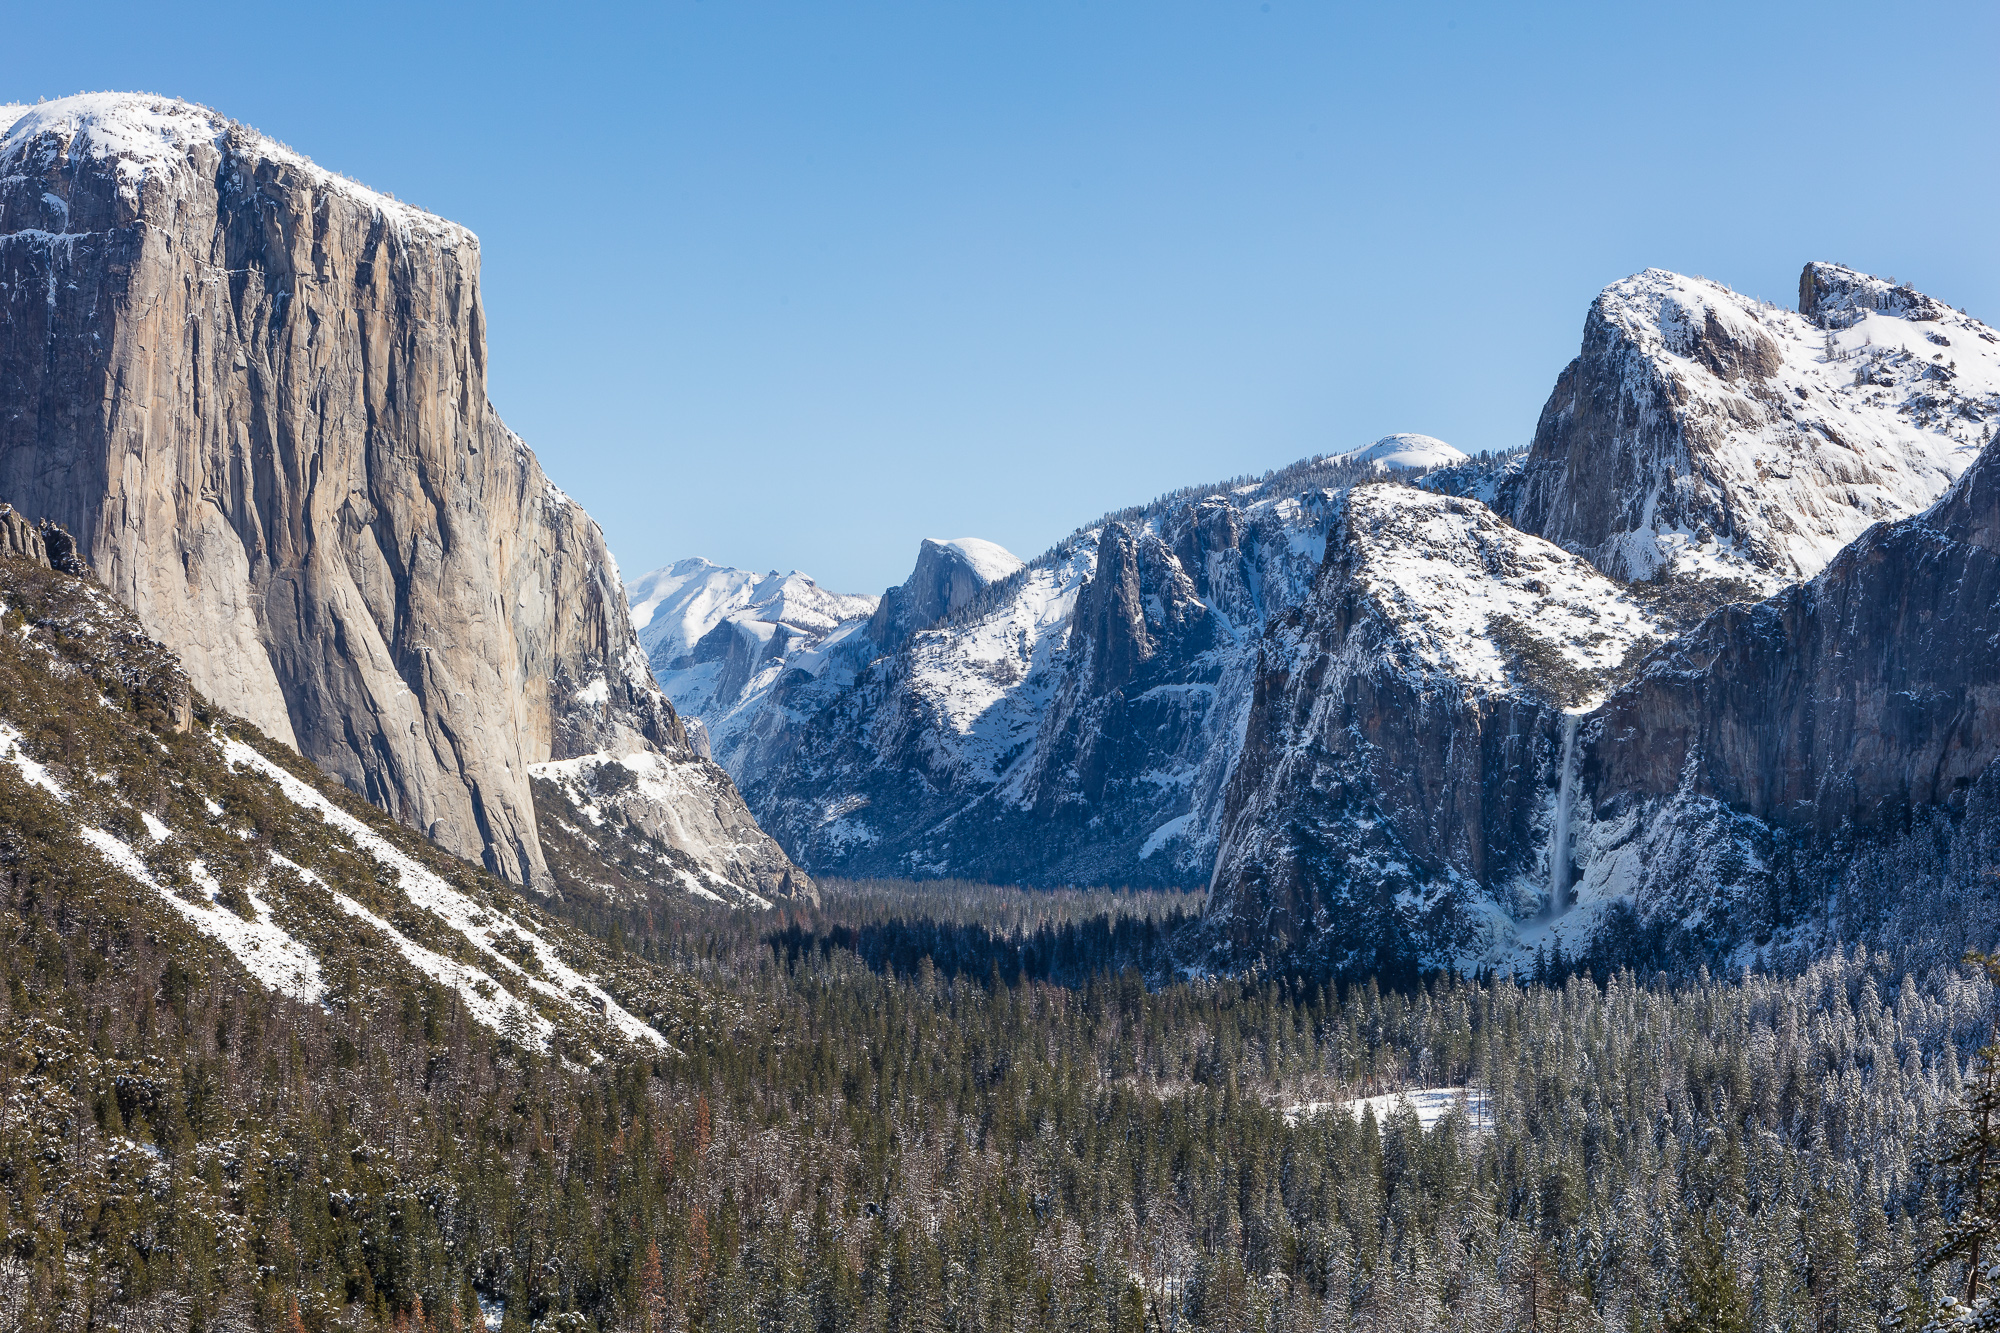
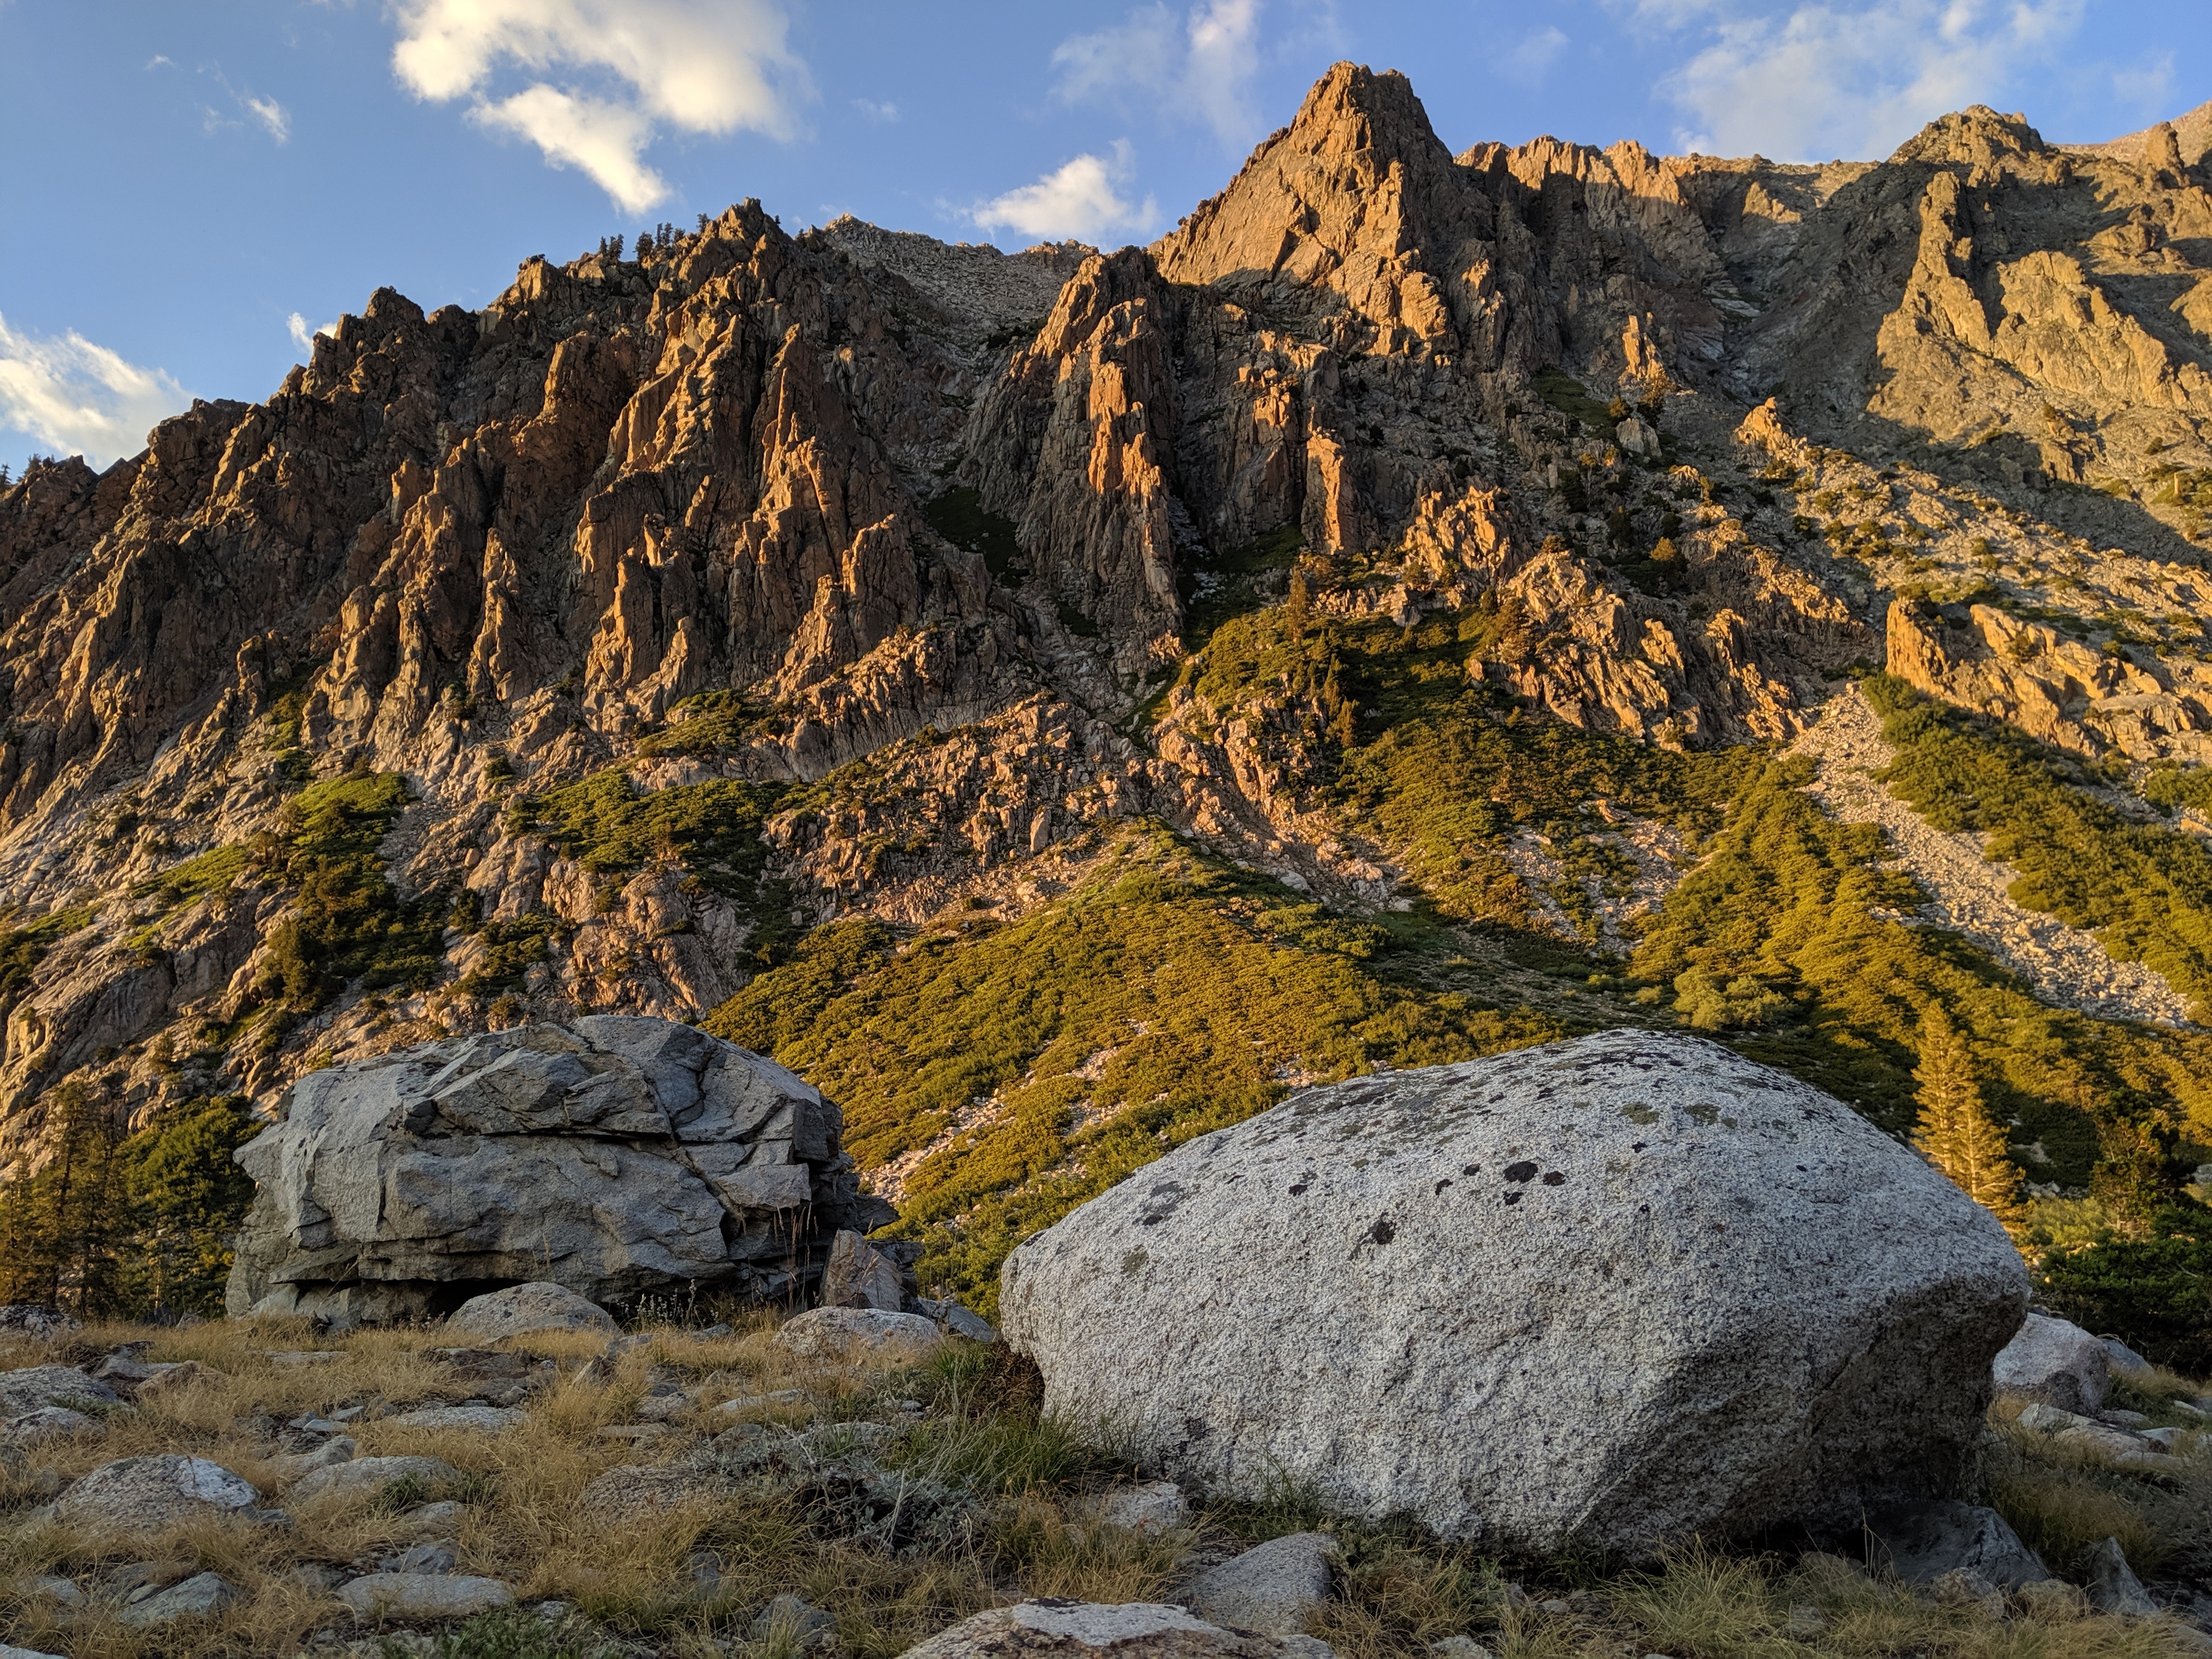
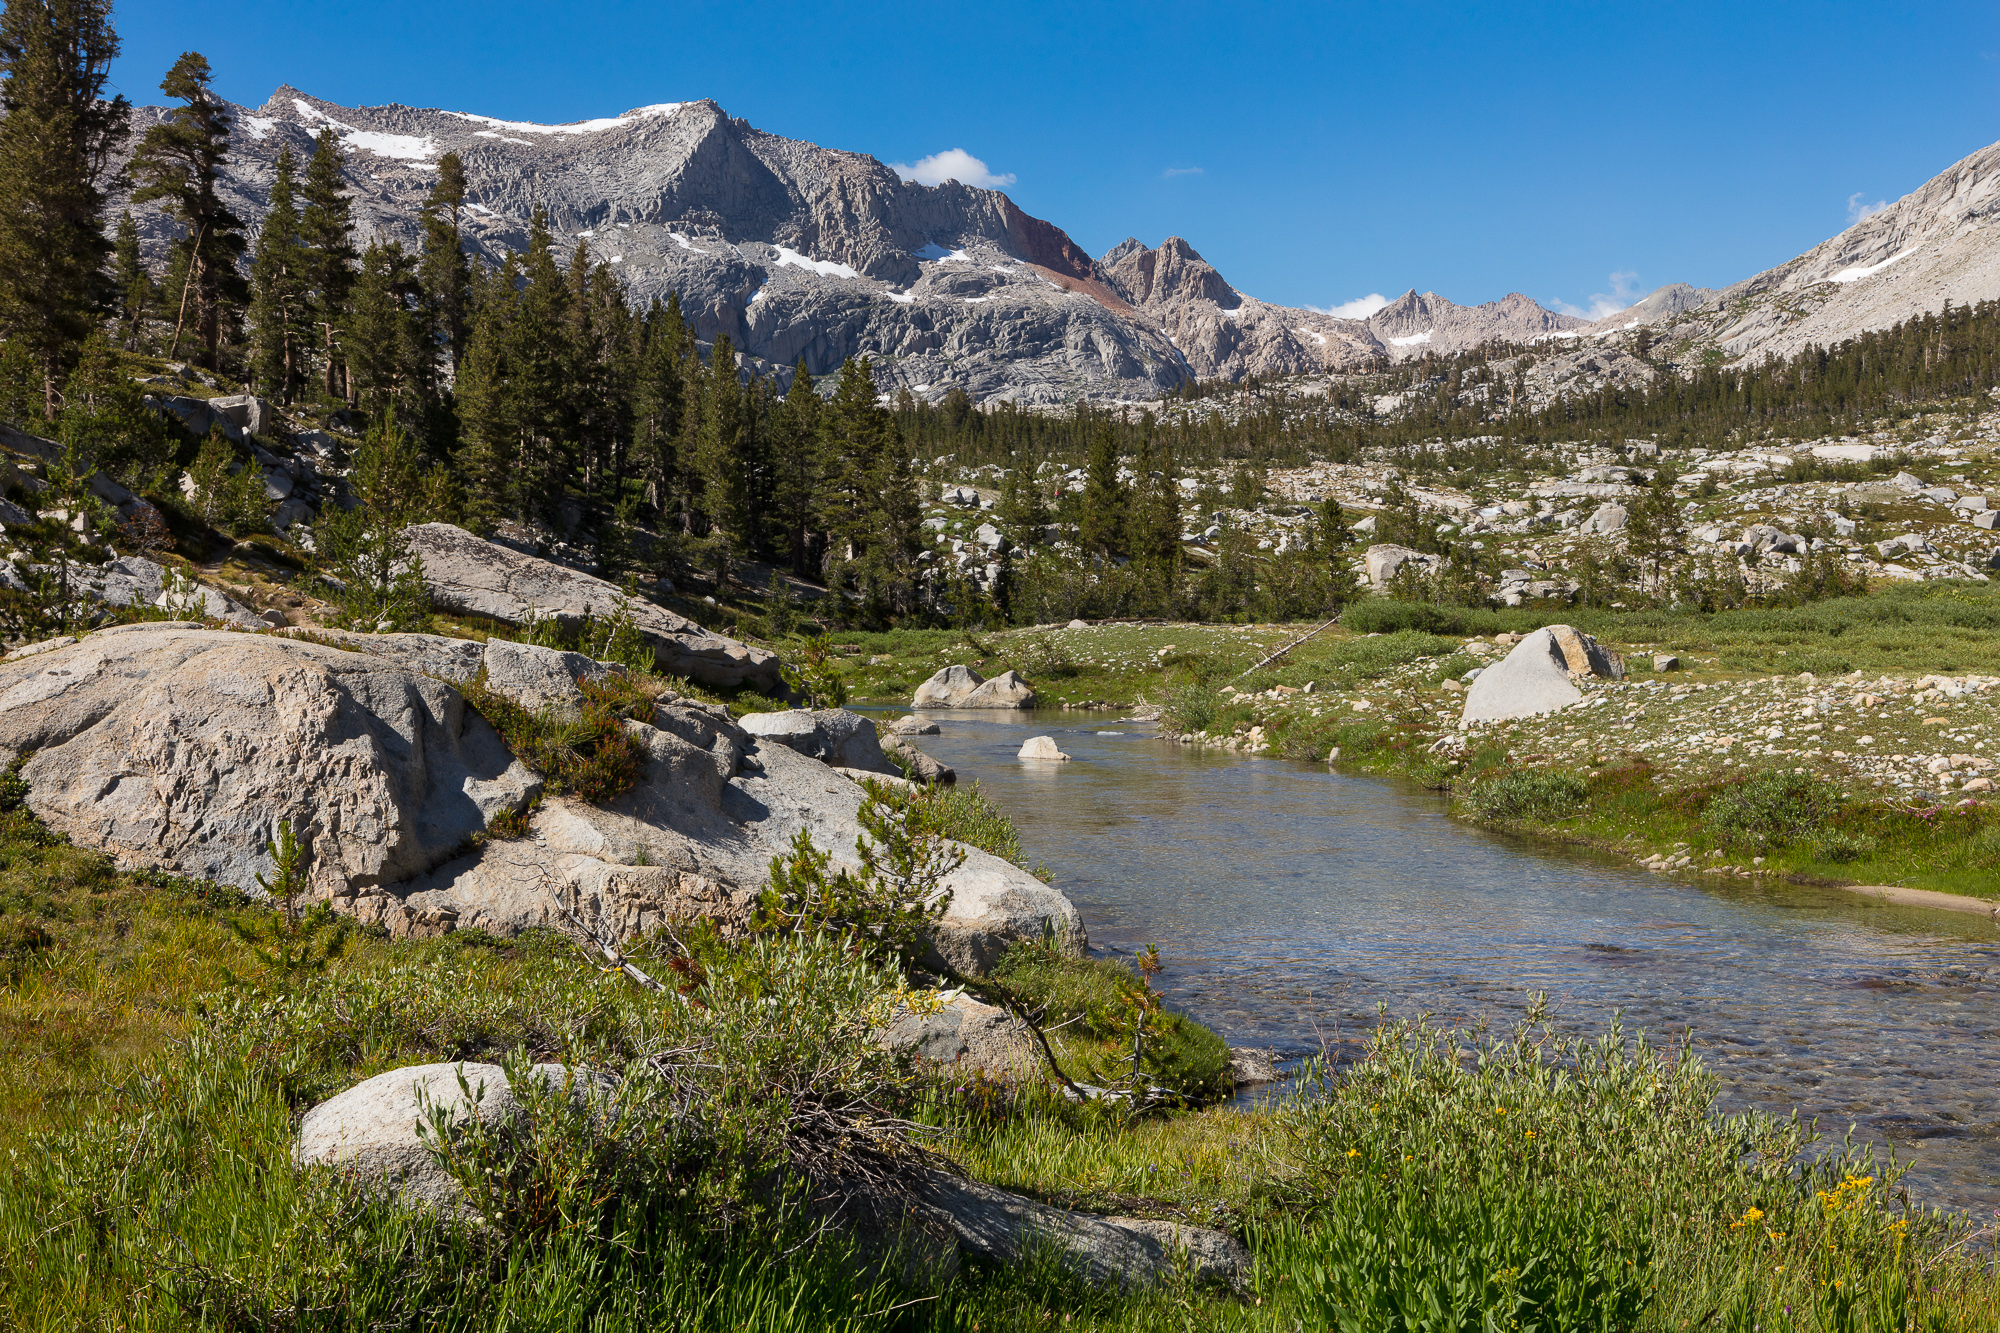
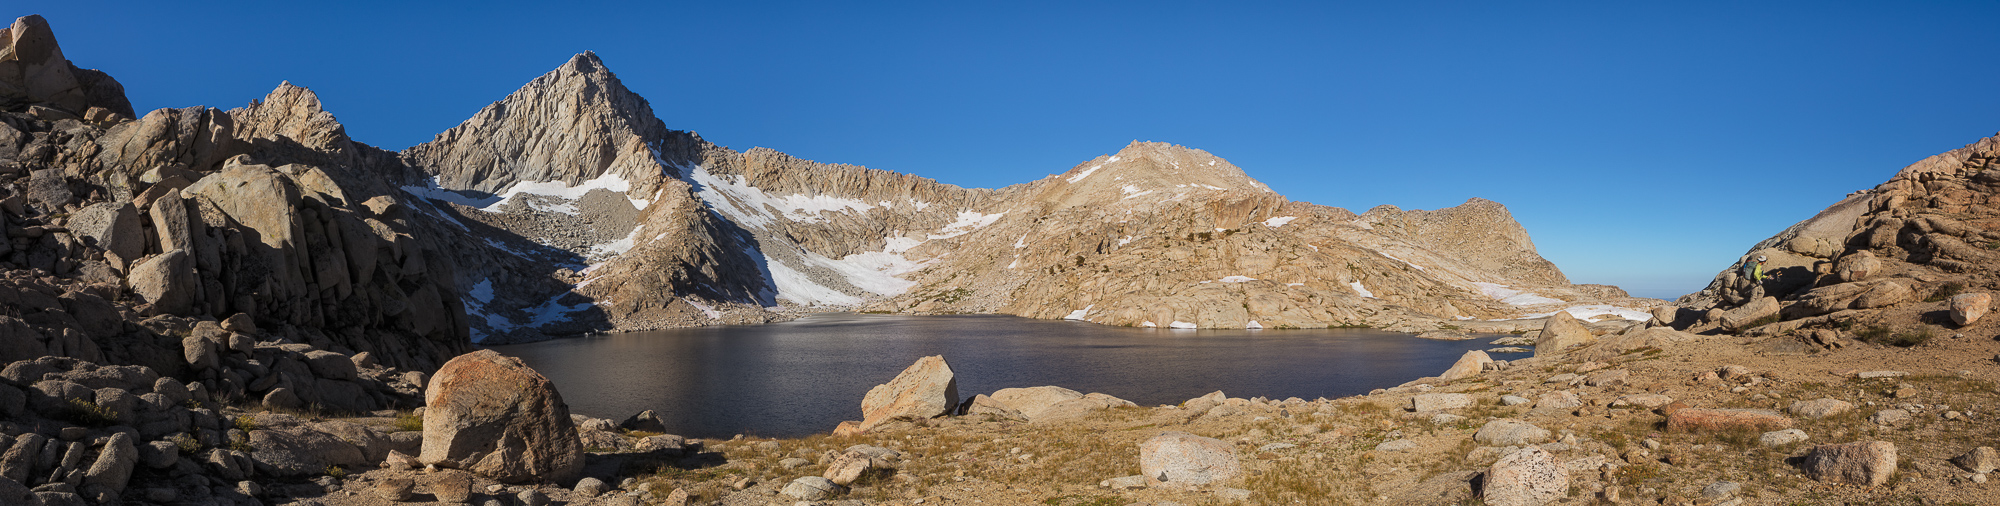
The next day we left our camp set up and day-hiked into a nearby basin dotted with lakes. This was somewhat challenging terrain and entirely off-trail. I had left most of my gear back at camp, including my photo gear, so this was taken with my cell phone camera. This allowed me to be more agile off-trail, while still able to capture my journey.

A waterfall flows into the Big Arroyo along the High Sierra Trail, Sequoia National Park
A waterfall flows into a creek prime for campsite drinking water, Sequoia National Park

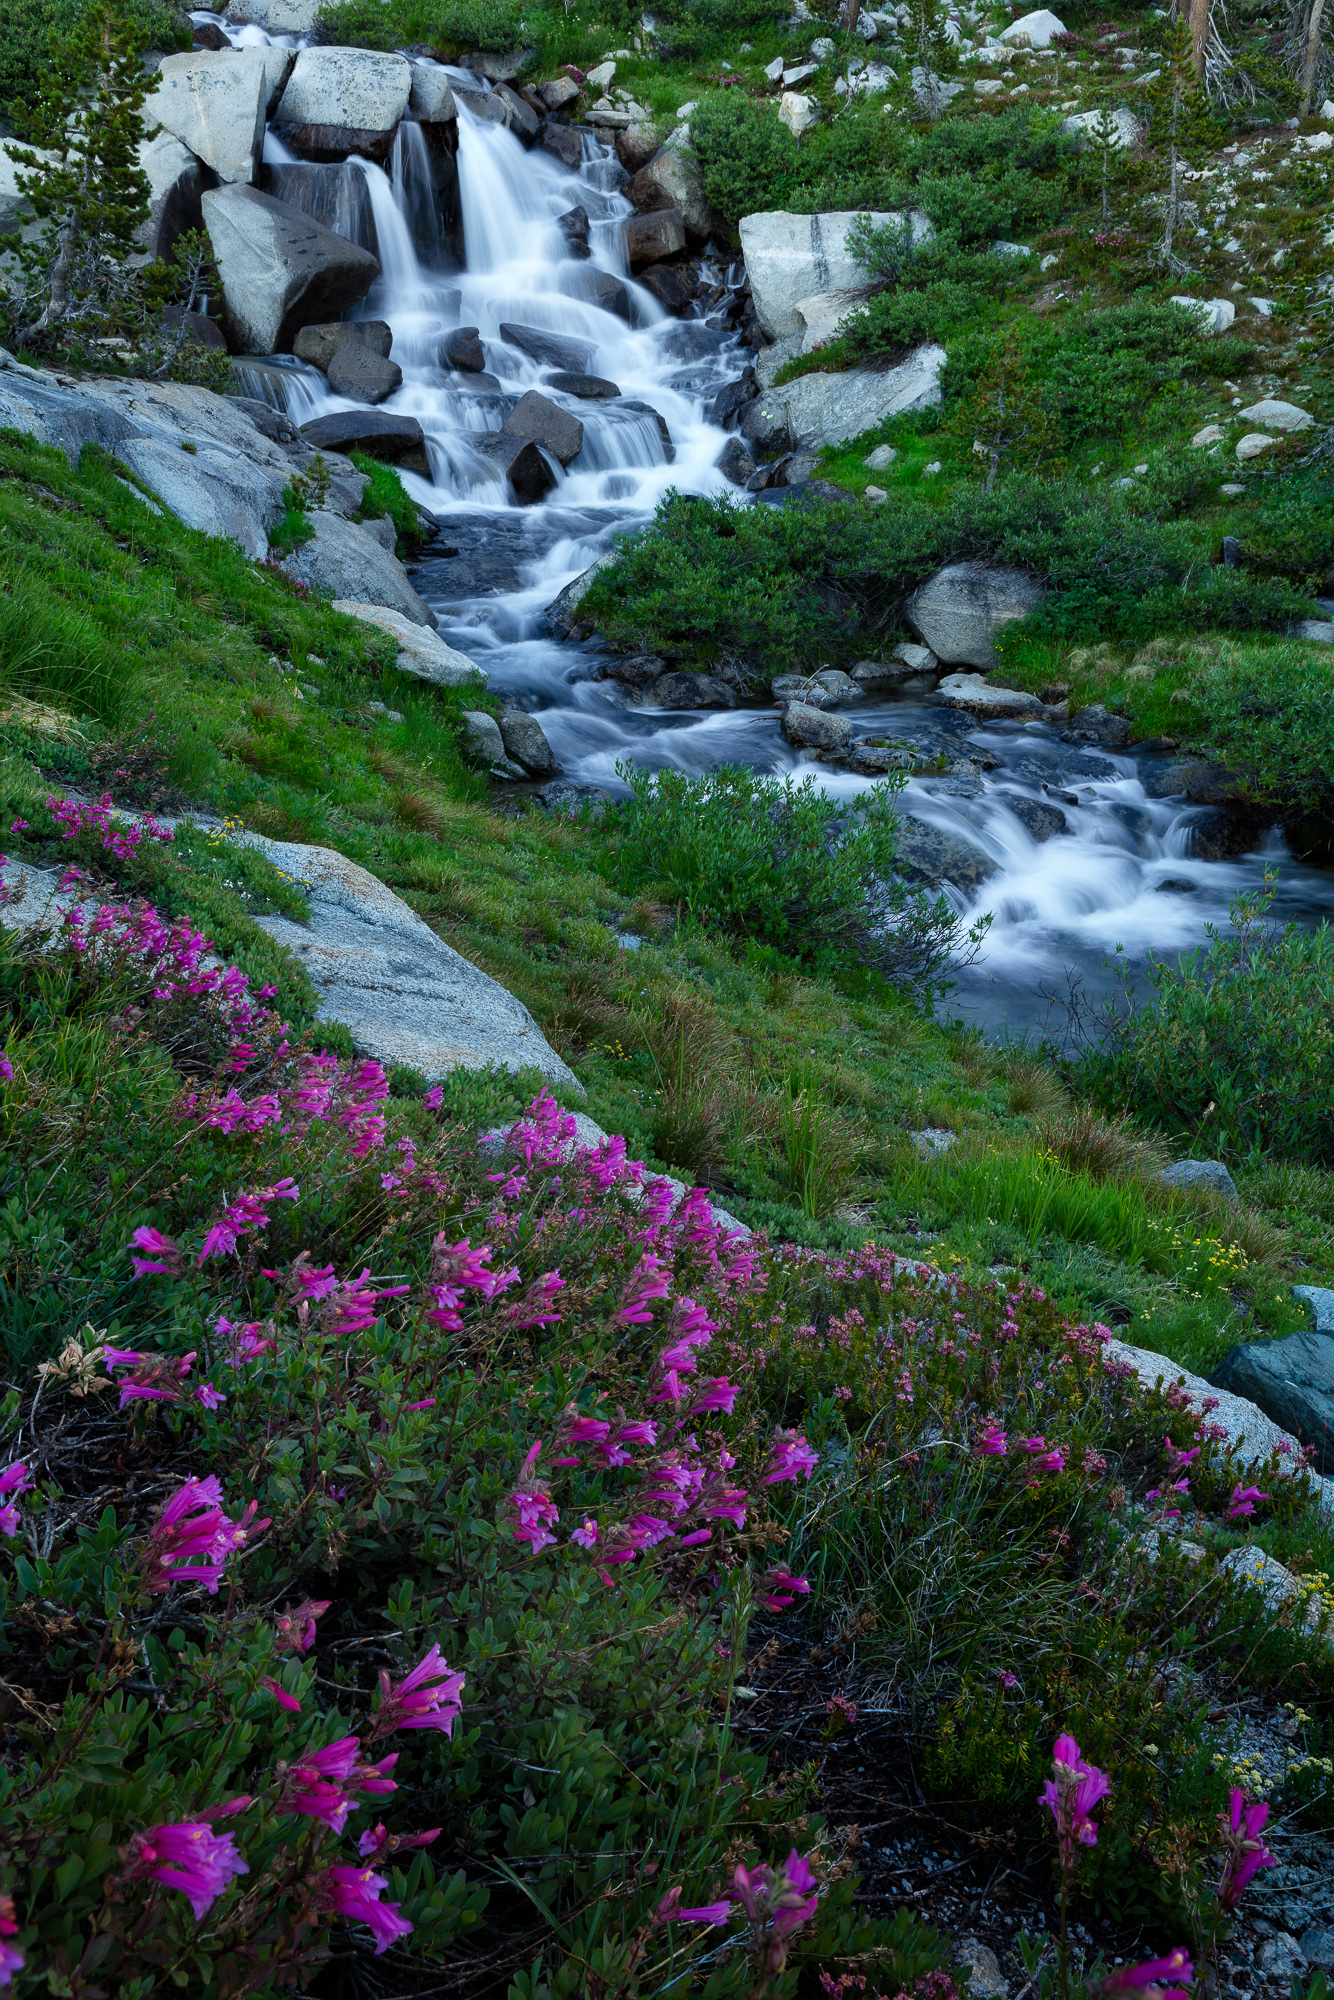
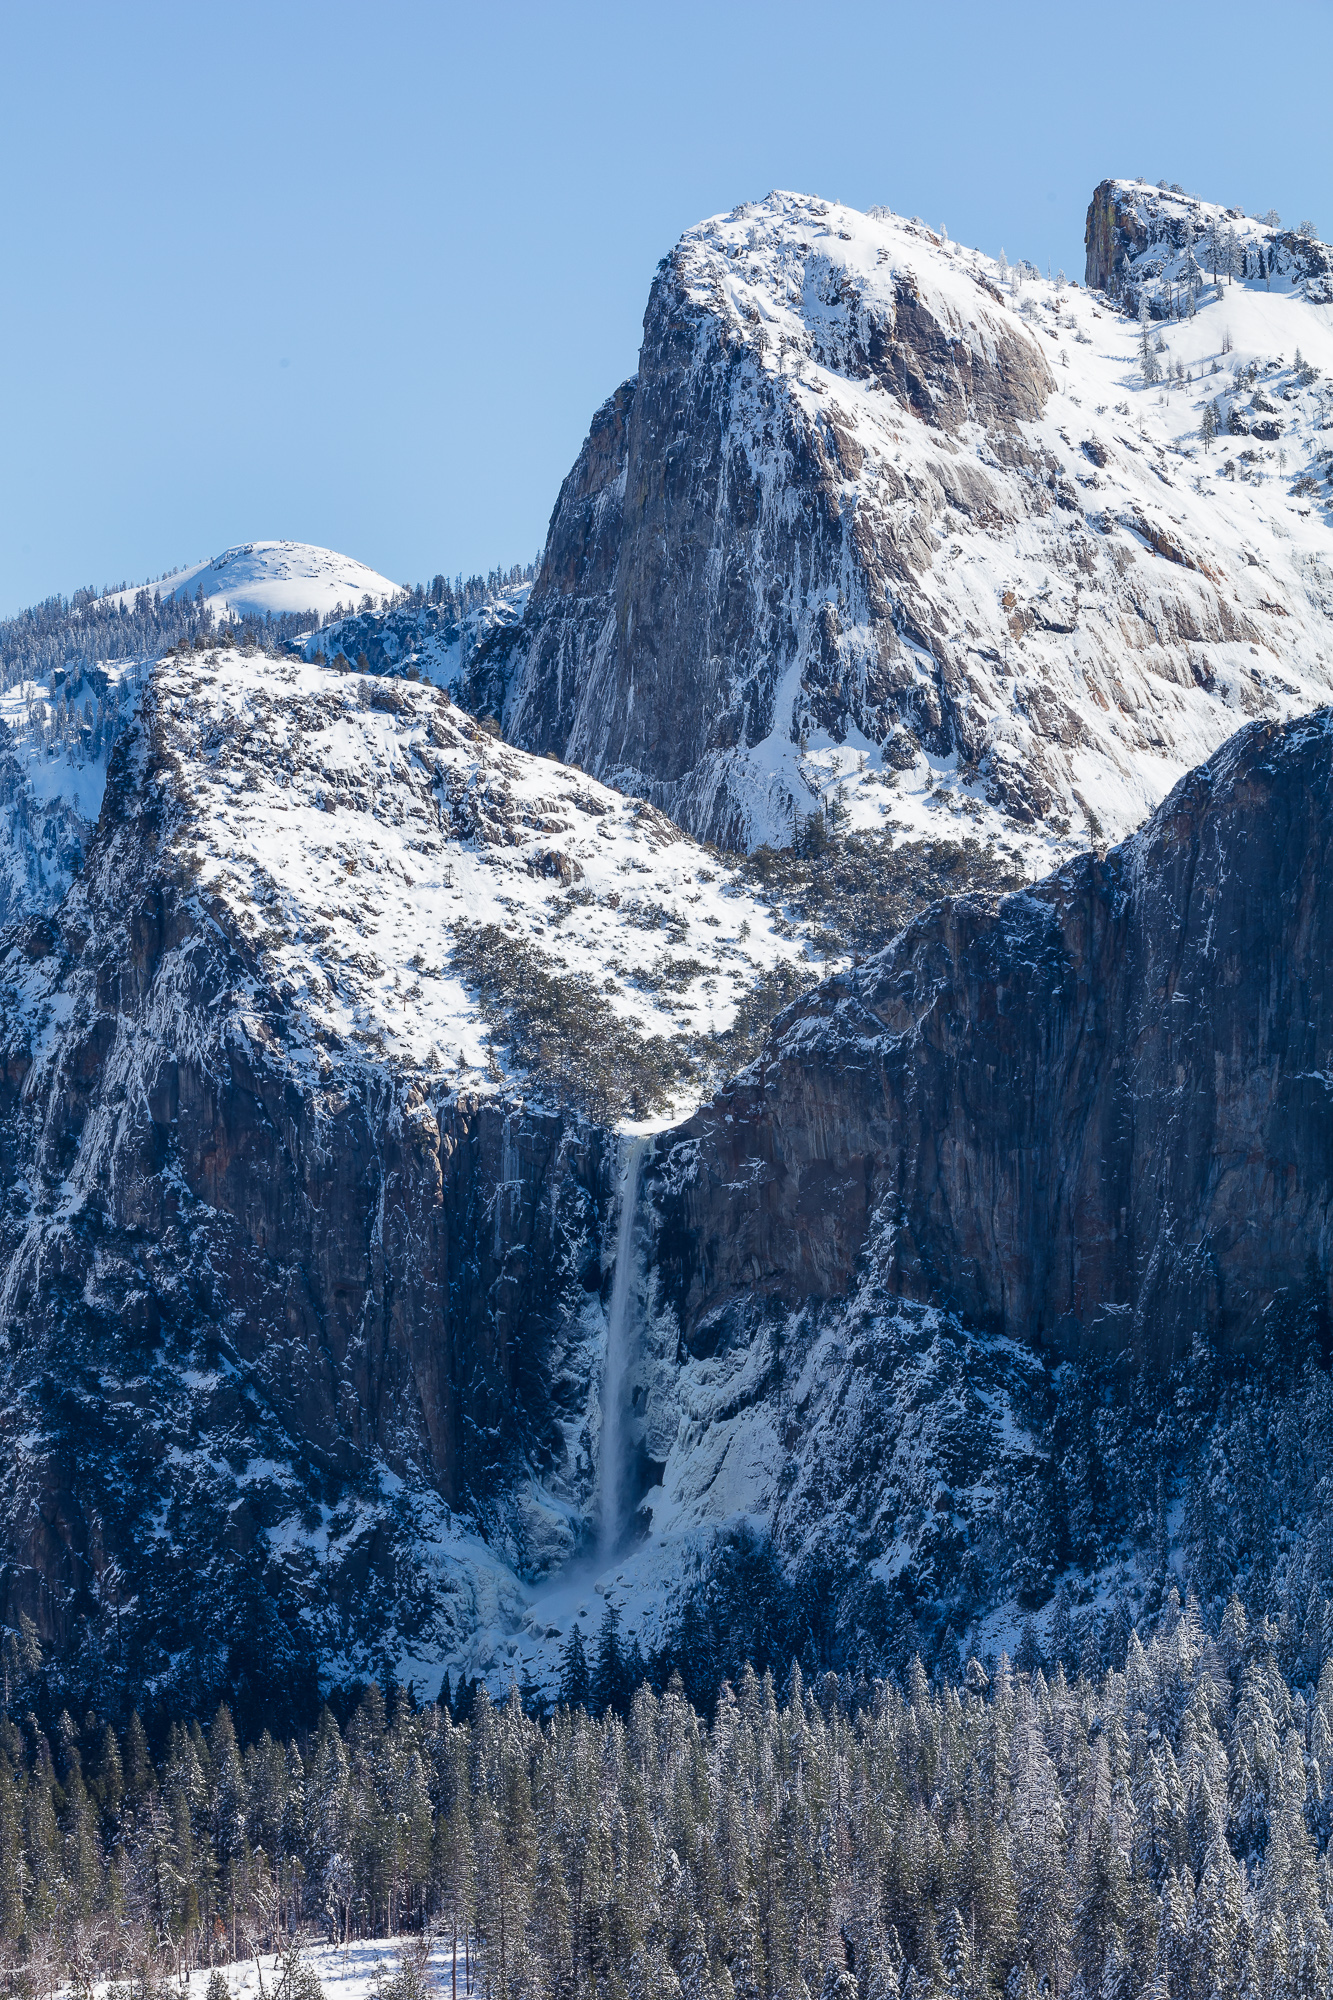
A second evening at our camp site gave us more time to explore the area, including this small waterfall just below our site. Once again, my camera gear did the proper job. Mounting the camera on a small travel tripod allowed me to not only focus stack but also to slow down the shutter speed to capture the motion of the water. This shot was far beyond the capabilities of the phone camera.

The big arroyo bubbles past the high sierra trail, Sequoia National Park
The Big Arroyo bubbles past the high sierra trail, Sequoia National Park

The next morning it was time to leave our mountain paradise and begin the journey home. Retracing our steps back down the canyon, we hiked past the serpentine route that the Big Arroyo cut through the valley floor.

We spent the night in another valley, in the shadow of the Sawtooth Range, our destination for the next morning. I was a bit nervous for the following day, because we had a pretty brutal climb up to Columbine Lake, at which point the trail ended. We were planning to continue off-trail over the 12,000 ft pass next to Sawtooth Peak.

Columbine Lake sits below Sawtooth Peak, overlooking Sequoia National Park

Our final morning dawned a clear blue sky. With an early start we made Columbine Lake by 10 AM, and rested a bit before venturing over the pass. Although very steep, there was a relatively clear use trail with a series of ducks to guide the way. The only sketchy part of the climb was the need to traverse a large snow bank right before the pass. Class 4+ scrambling got us around it, though my heart was beating out of my chest as there were hundreds of feet of near-vertical scree below us. A slip here would not have turned out well.

Finally we hit the pass and it was a quick 8 miles of decent to get back to the car. As we drove back to the SF Bay Area, we realized that everything we could think of had gone according to plan. We reached our planned destinations, covered the entire Nine Lakes Basin, experienced the ultimate solitude and had a beautiful campsite for two nights.

My final verdict is that while my phone sports an amazing little camera, it couldn’t quite replace my heavier gear. I proved to myself the worthiness of carrying a heavy DSLR and tripod, especially if I expected to make portfolio-worthy wilderness photographs. The camera phone indeed was a great asset during the day while on the trail, making me reconsider how I carry my gear in the future. I might stow my DSLR and tripod away and plan to only use them from around camp during the golden hours. My phone is easy to access from a pocket while hiking, and photos with midday lighting are not as likely to become a quality print. Time will tell, but I look forward to more experimentation with the capabilities of this handy device.

Camera gear I used on this trip includes:

Become a Better Photographer by Exposing to the Right

Sun creeps down the mountains west of the Cotton Ball Basin, Death Valley National Park

Read old photography books and you’ll find instruction on over or under exposing your camera in order to “fool” your camera into capturing the scene on film as it was in real life. Cameras are designed to render every scene at an average of middle gray, which may not be suitable for all scenes. For example, snow or beach scenes often need to be over exposed by a couple of stops or else the camera will expose the snow or sand darker than it appears in real life, giving a muddy appearance to a naturally bright scene. The same is true for naturally dark scenes. For example, if a black cat fills most of your frame, you should underexpose or else the camera will try to expose the cat at middle gray, blowing out your highlights.

However, this is not necessarily true with digital photography. As you are learning the craft of digital photography, once you graduate from shooting jpeg images to RAW images, you should learn how to “expose to the right”.
In a nutshell, this means overexposing the shot as much as possible without blowing out (or clipping) your highlights. This term is named after the fact that when overexposing, the tones captured by the camera move to the right part of the histogram that represents the possible tonal range the camera’s sensor can capture.

The principal behind this technique is simple – digital sensors capture far more digital information on the right side of the histogram (the brightest part of the image), than the left side of the histogram (the darkest part of the image). In other words, images with lots of bright, detailed areas take up more disk space (and contain more digital information) than images with dark features.

Let’s assume for example your camera’s digital sensor can capture 8 stops of light across 4096 tonal levels (in reality, dynamic range varies from sensor to sensor). The more tonal levels a sensor can capture, the smoother the transition between light and dark in the resulting photo. The f-stop measurement is logarithmic in nature, meaning a stop will capture twice as much light as one stop darker. That means using the example distribution above of 4096 tonal levels across 8 stops of light, the brightest stop will capture 2048 tonal levels while the darkest will capture only 32. There is much more digital information needed to capture the many tonal levels of the brightest stop than the few tonal levels of the darkest stop.

You’ve likely seen the results of this lack of digital information when trying to brighten an image in post processing. As you increase the exposure slider in Lightroom, for example, you’ll see lots of digital noise appear in the dark spots of the image. If, on the other hand, you need to make an image darker in post processing, no digital noise is added because you already had all that extra digital information in the brighter image. Therefore, the goal of exposing to the right is to capture the maximum amount of digital information as possible in the field, so that you have more options with that image in post processing.

Here are some examples:

In the image of the Grand Tetons above, I set my camera’s exposure compensation to +1 1/3 stops, even though it looked terrible on the back of my camera. By trusting the core principals of this technique and relying on my experience, I knew that once I post processed the RAW file in Lightroom, I could really make the image sing. Here is the result:

A fog bank moves in front of the Grand Tetons as the rising sun illuminates the sheer peaks, Grand Teton National Park

I corrected the photo in post processing by setting the black point to the left most side of the histogram. This evened out the tones across the entire histogram, adding a lot more contrast back into the photo. Secondly, I dropped the exposure slider down by about 1 stop. This corrected for the overexposure I made in the field. The real benefits can be seen when blowing this image up to inspect it for printing. The shadows are smooth and detailed – more so than if I shot at the correct exposure in the field.

The second example is from Death Valley National Park. Here again I set the exposure compensation on the camera to 1 2/3 stops lighter than the sensor would normally expose the scene. Similar to the brightness of the fog in the Tetons example, all of the white salt in this image required an overexposure so as not to get a middle gray result.

In the field, I kept raising my exposure compensation until I saw the white “blinkies” (overexposure warning) on the resulting image, indicating some parts of the scene were blown out. This meant that these parts of the image no longer contained any detail, and would render a pure white. There is no recovery from blown out white, no matter how much post processing you do, so I lowered the exposure compensation by 1/3 of a stop until the blinkies were no longer showing.

Sun creeps down the mountains west of the Cotton Ball Basin, Death Valley National Park

The processing steps were the same as the first image – set the black point to add contrast, and lower the exposure slider until the image looked correct on a calibrated monitor.

How to expose to the right

  1. Always shoot RAW! If you aren’t shooting RAW, you are already throwing away digital information, and letting robots process your images.
  2. Turn on the histogram for your camera. Make sure that every image viewed on the rear LCD shows a histogram, which you can use to judge the overall lightness and darkness of the image.
  3. Turn on the overexposure warning. On Cannon cameras, this the “blinkie” display. Any overexposed portions of your image will flash white, letting you quickly know that you need to lower the exposure compensation.
  4. Set the camera to evaluative metering. This means the camera’s light meter will use the entire scene to evaluate the exposure. I shoot 100% of my images in this mode, and I’ve learned my camera’s metering characteristics well enough to set the exposure compensation correctly for different light and dark scenes.
  5. Shoot a couple of test shots, making sure you overexpose the maximum amount without the overexposure warning appearing in the resulting image.
  6. In post processing, correct the exposure by setting the black point. In Lightroom, this means lowering the “Blacks” slider until there are values to the left most side of the histogram. This stretches the image values across the entire histogram, increasing contrast.
  7. Finally, lower the overall Exposure slider if the image is still too bright.
  8. Print and enjoy! Congratulations, you’ve just used your camera’s sensor to its maximum, gathering the highest possible amount of digital information from the scene.

My final example is also from Death Valley National Park, this time evening light on the Mesquite Dune field. When I overexposed this scene, I lost almost all contrast in the resulting image. However, I captured a ton of clean detail in the shadows of the dunes. This detail is especially important in this image, because the shadow patterns is the main foreground element, and having any digital noise here would ruin the image.

The Mesquite Dunes stretch across the valley just north of Stovepipe Wells, Death Valley National Park

In the final image I was able to add back all the contrast that was in the real scene, and ensure I kept all my shadows smooth and noise free. Practicing this technique a few times will make it a natural part of your workflow. If you have any questions about this process, drop me a comment below, or shoot me a message through my website.

Gear I used to create the photos in this post:

The Death of Previsualization?

A photographer stands in shallow water filming a fleeting sunset

Last week’s post about Yosemite’s natural firefall got me thinking about the late, great adventure and landscape photographer Galen Rowell. A topic that he wrote about often was the importance of pre-visualization in photography. That is to say, as a photographer, it is important to “pre-visualize the way the image will look on film before you take the photograph, instead of merely taking a snapshot with the naïve expectation that the outcome will be like you see.”

As I was learning the craft of photography, I always took this teaching to heart. But is the idea of pre-visualation as important today as it once was? Rowell was emphasizing the importance of understanding how each specific film type captures light and is processed into the resulting photograph.  Very few of us still shoot with film, so does the same concept hold true in the digital age?

As anyone who has learned photography with a digital camera can attest, being able to see the results of your work instantly in the field greatly accelerates the learning process. In other words, if you get the settings wrong when capturing an image, in most cases you can review the image, correct for any mistakes, and shoot again. The necessity of understanding how the camera sensor will capture the subject is diminished.  Of course, this may not hold true with certain types of action or event photography, as you might miss that critical moment.  But even with wildlife, I often take a few sample shots and review them to make sure my settings are in the ballpark of correctness.

The need for this type of pre-visualization falls apart even more when moving from DSLR to mirrorless photography. Mirrorless cameras have an electronic viewfinder, allowing the photographer to see a “live” view of exactly what the camera’s sensor sees. Here the photographer knows exactly what the image will look like before ever pressing the shutter.

So maybe Rowell’s original reasons for the need to practice pre-visualization have faded over the years. However, not all digital photographic results are directly correlated to what the photographer sees on the back of the camera. If the photographer is truly thinking digitally, they may be overexposing in order to capture more digital information in their final photo (exposing to the right). Or they may be thinking about capturing certain elements of the frame to use later in digital blending. Using techniques such as exposure blending, panorama stitching, or ISO blending all require some degree of pre-visualization of the final intended outcome.

Although the need to understand how the camera settings ultimately interact with the specific film you are using may no longer be valid for most photographers, the need to understand what you are trying to create and how to control the camera in order to achieve that vision may be more important than ever. The tools may have changed (film vs final digital output), but the concept is the same. The better you understand what you’re working with, the more predictive you can be about your desired outcome, and therefore, the better you’ll be able to prepare for that desired result in the field.

Gear I used to create the photos in this post:

Yosemite’s Natural Fire Fall

For only a few days a year, the setting sun lights up the seasonal horsetail falls, cascading down the sheer face of El Capitan in Yosemite National Park.

A couple of weekends ago, I had the opportunity to witness one of nature’s most spectacular light phenomenons. For only a few days of only some years, a seasonal waterfall in Yosemite National Park glows like lava as it catches the last rays of waning sunlight. I had long wanted to witness this event in person, but timing or weather had thus far made it impossible. Luckily, my good friend Steve was on the ball, and invited me along. He had already taken care of all the logistics (thank you Steve!) and all I had to do was pack for snow and show up.

Snow covers the floor of Yosemite Valley after a winter storm.

After a morning drive to Yosemite from the San Francisco Bay Area, we soon found ourselves in one of the most beautiful valleys on Earth. A recent storm had dropped several feet of snow on the ground and frosted the landscape, accentuating Yosemite Valley in all it wintry glory.

Snow covers the floor of Yosemite Valley after a winter storm.

As I often do with grand vistas, I not only captured the standard landscape shots, but also used my telephoto lens to find scenes within the scene. Switching to my 70-200mm allowed me to isolate Bridalveil Falls cascading down icy cliffs.

Bridalveil Falls forms an icy sheen on the rocks below, Yosemite National Park, CA.

We stopped off at the Bridalveil Falls trail and scrambled up the slippery path to the base of the falls. Here it became a frigid dance of setting up a shot on the tripod, wiping the icy spray that had accumulated on the lens, and quickly firing a shot. Many times the same shot had to be repeated due to poor wiping skills. Being able to immediately review each shot on the back of the camera was essential for success. With deep respect, I thought of the many photography legends who likely stood in this very spot using much more challenging gear.

Yosemite Falls is reflected in the calm water below, Yosemite National Park, CA.

Half Dome towers above Yosemite Valley in winter.

Throughout midday, we were able to capture some of the valley’s most famous icons, dusted in powdery snow.

Finally it was time to prepare for the main event. Many parking lots in Yosemite Valley were closed due to the several feet of snow on the ground. We parked at the closest lot and then snowshoed about a mile to the principal location at which the fire falls phenomenon could be viewed. We set up cameras and tripods at around 2pm, and waited until sunset, which we wouldn’t see for another three and a half hours (yes, landscape photography requires patience!).

For only a few days a year, the setting sun lights up the seasonal horsetail falls, cascading down the sheer face of El Capitan in Yosemite National Park.

Finally, just after 5pm, Horsetail Falls came to life. Starting with an intense yellow, the falls turned to orange lava over the course of ten minutes.

The story of the original Yosemite “fire falls” goes back to the early years of the National Park Service, at a time when it was struggling to define the meaning of “attraction” for park visitors.  One popular sentiment of the day was that the parks had to entertain visitors, much in the way a circus would entertain audiences through spectacle.   As much of the nation was still rural, the idea of simply having access to wilderness was not as precious as today.

For example, when black bears began to raid the poorly maintained Yosemite Valley dump where all food scraps would end up, the first thought was not the safety of the wild bears. Instead of building proper barricades to prevent the bears from habituating to human food, the park service built bleachers around the dump so that visitors could watch the action.  Another such misstep was the nightly building of a large bonfire at the top of Glacier Point.  As the fire burned down, the embers were shoveled off the cliff, creating a “fire fall” to wow the crowd below in Curry Village. Thankfully this practice was eliminated in the early 1960s. Little did people realize that nature was already providing a much more spectacular display of its own.

For only a few days a year, the setting sun lights up the seasonal horsetail falls, cascading down the sheer face of El Capitan in Yosemite National Park.

In 1973, photographer Galen Rowel was coming back from a climb in the valley when he looked up and saw a stunning light display against the shadowed backdrop of El Capitan.  Amazed at what he saw, he rushed to photograph it, only to see the light disappear before his eyes.  Although he didn’t know if he’d ever see something like that again, the next night he was prepared.  Sure enough, around the same time of day, Horsetail Falls (a seasonal waterfall that only flows with the proper amount of snow melt) lit up like a beacon.  He quickly composed an image that would become famous, and introduced the world to this amazing natural “fire fall”, which is now photographed by hundreds of photographers annually.

For only a few days a year, the setting sun lights up the seasonal horsetail falls, cascading down the sheer face of El Capitan in Yosemite National Park.

What Galen Rowel was seeing was the setting sun striking only Horsetail Falls, isolating it against the dark cliffs of El Capitan.  There is only about 10 minutes per day where this contrast can be seen, turning the water a reddish orange just before the sun dips over the horizon.  In addition, this perfect sun angle that is required to light the falls but not the cliff only happens twice a year for a few days at a time. And only in late February is there a chance that Horsetail Falls is actually flowing.  This explains why this natural “fire fall” was such a rare occurrence before anybody knew to look for it.

I was overjoyed to finally witness and photograph this phenomenon for myself.

Gear I used to create the photos in this post:

Copyright 2017 Hank Christensen