Palo Alto Baylands

While I usually don’t make location specific posts about birding, I did want to call out Palo Alto Baylands as one of the San Francisco Bay Area’s great birding spots. Located in Palo Alto right along the bay, it provides the birder with a variety of species, from water birds to song birds to raptors – there is always something interesting to see here. It even holds one of the best viewing areas for the elusive (and endangered) clapper rail. Here are a few photos of what I found there on a recent morning.

A song sparrow perches on wild fennel in the morning sun

Song sparrows are one of three most common sparrow (along with white and golden-crowned) species seen at Baylands. The ubiquity of the house sparrow in the suburbs gives way to the song sparrow this close to the water. With common birds such as this, I try to create photos that go beyond just showing the bird, but also show some behavior or interesting background. In this photo, I liked the way the sparrow is tilting downward (he was eating from the wild fennel) – it creates more of an action pose.

A white-tail kite perches on a large branch

Baylands has the occasional visit from a bird of prey. Kites are seen anywhere from the water up into the foothills, hunting large, open spaces. Other birds of prey I’ve seen include fly-overs by osprey, red-tailed and red-shouldered hawks, and norther harriers.

A female yellow warbler pauses briefly on wild fennel in the morning sun

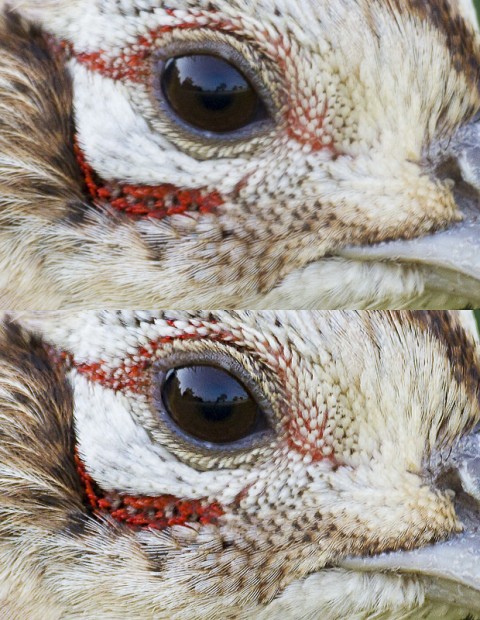
The smaller passerines get me excited because they are much harder to photograph than water birds or sparrows. The are small, fast, and rarely stay in one place for more than a few seconds. The most common warbler here is the yellow-rumped, but orange-crowned and yellow warblers are not uncommon. There are many many others, from chestnut-backed chickadees to bushtits – all of them equally hard to photograph. I loved the tonality of this image – the yellow on yellow really works here, blending the bird into her background.

A domestic goose swims through still water reflecting fall color foliage

Palo Alto Baylands also has a man-made pond that attracts a wide variety of migrating ducks throughout the year. There are also quite a few year-round residents, including this domestic goose. Most of the resident ducks here are cross breeds of domestic ducks and mallards. But this pond is also a great opportunity to see migrants up close, including ruddy ducks, greater and lesser scaup, northern shovelers, american wigeons, and a variety of teals.

An american avocet stands in shallow water, catching the first rays of morning sun

Finally there are the water birds. Habitat here includes plenty of tidal wetlands, so these species abound. All the usual suspects can be seen here, and there are good viewing angles in morning and evening. In this photo, the earliest morning light is lighting the feathers of this american avocet. In spring, there is a popular nesting area for avocets and black-necked stilts. Photographers line up to capture cute photos of hatchlings venturing for the first time out into the mud flats.

For birders there is always lots to see at Palo Alto Baylands. If you live near or are visiting the San Francisco Bay Area, be sure to put this on your list of bird spots to visit.

2014 Round-up – Top 40 Photos Of The Year

After a bit of thought, I have compiled my top 40 picks from the last 12 months. I selected from a variety of outings and types of photography, ranging from landscape, to wildlife, to pet photography. Unfortunately, 2014 was not the year I caught up on my backlog of photos waiting to be processed, so this list was not selected from all of my 2014 photographs (you’ll have to wait till next year’s round-up for those!)

This year included a fantastic fall color photo trip to the San Juan mountains in Colorado, as well as visits to the Sierra Nevada and of course many bird photographs, including some previously unpublished.

Please enjoy the gallery below. For best viewing (especially if viewing on a mobile device), please click on the following photo:

Gem lies on the floor, fast asleep

Or, just enjoy the gallery here on the page. To view larger photos in the embedded gallery below, click here to enter full screen mode.


If you are interested in compilations from previous years, please see the 2010, 2011, 2012, and 2013 lists.

Black And White Challenge

Two weeks ago I was challenged by friend and photographer Jerry Dodrill to post 5 black and white photographs on social media over 5 consecutive days. As I am not known for shooting much black and white, I dug back into my archives to see what I had. From that selection, I chose five photos from a variety of subject matter (landscape, wildlife, and architecture) that spoke to me more as fine art than editorial photos. Here is my selection collected together, along with a short synopsis of each.

Day One

Dawn breaks over Banner Peak and Thousand Island Lake, Ansel Adams Wilderness

I shot this last year on my attempt at the John Muir Trail. Thousand Island Lake is a beautiful location in the heart of the Ansel Adams Wilderness. This was a dark, moody, stormy morning, and during a brief pause in the torrential downpour, I braved the elements and scrambled out of my tent to capture Banner Peak with the lake below. In order to convey my feelings at the time I shot it, it seemed like a perfect candidate for a B&W conversion.

Day Two

Death Valley's Mesquite Dunes are a study of form and lines
Death Valley’s Mesquite Dunes are a study of form and lines

This shot is of the Mesquite Dunes outside of Stovepipe Wells in Death Valley National Park. I shot this fairly wide (21mm) as I was standing on the foreground dune. Those who have photographed a lot of sand know that you can’t just back up to reshoot – you’ll end up with a photo full of footprints! Black and white allowed me to add contrast into the sand ripples along the crest of the dune.

Day Three

Four american white pelicans line up, all of them fishing at the same time. There was a nice symmetry to this image, which was calling very strongly to be rendered as a black and white fine art photograph.

With this photo, I’m switching focus to birds (hey, birds can make great B&W too!) I was shooting a group of American White Pelicans and was waiting for that perfect, synergistic moment. Finally they all ducked down for fish at the same time (the white pelicans tend to be much lazier when eating as compared to the California Browns who are constantly dive bombing their food). I caught the moment and new it would make a nice pano crop – a conversion to a high-key black and white was icing on the cake.

Day Four

Church and cemetery, Great Smoky Mountains National Park

This image is a little different from my usual fare. Quite a few years ago, a friend and I were hiking through the woods of Great Smokey Mountain National Park. It was a still, crisp November day, and we were utterly alone with the trees. Throughout the day, we had been getting a very creepy vibe. Unlike the wilderness of the west, these forests are littered with remnants of past civilizations – small mountain villages linked to other settlements only via walking paths. It almost felt like the ghosts of the past were watching our progress through their woods. Suddenly our trail opened up into a clearing with an old church, complete with cemetery and 100+ year old headstones. When I took this photograph, I knew I wanted to try to convey that feeling that we’d been getting all day. A black and white, high contrast conversion was in order.

Day Five

Soft light across the dunes adds a milky texture to the wind carved lines, Death Valley National Park

My final shot is another B&W dune photo from Death Valley. This time I kept the contrast and the clarity low, to emphasize the soft buttery texture of twilight. What first attracted me to this spot was the three tall dunes in the background. I think they reminded me of pyramids off in the distance. I set about looking for a foreground. When I found layer upon layer of sand “waves” stacked up in front of the dunes, I knew I had my shot. I fell in love with the way the light moved across the sand like it was a living thing. In order to remove all other distractions from the photo, I subtracted all color and let the interplay between the shadows and highlights define the photograph.

Adobe Photoshop Anti-shake Put To The Test

I first heard about Adobe’s astonishing anti-shake feature In October 2011 when they demoed it at their user conference. The tool works on photos that were focused correctly but had a slow enough shutter speed to introduce camera shake (usually from hand-holding the camera), resulting in a blurry photo. To put it simply, the tool will analyze these photos, attempt to derive the directional path that the camera was moving along at the time the photo was taken, and correct that blur path. If it worked, this would be the holy grail of photo correction, finally disproving photography teacher’s mantra – “You can’t fix a blurry photo.”

At the time it was touted as a feature “in development,” which in software speak means it is something we’re tinkering with, but might actually never be released. Therefore, I was very surprised when it was announced as a headline feature of Photoshop CC. Now that this was out, I was excited to put it to the test with some real world examples from my catalog. Would this be a handy tool in the digital photographer’s toolbox, or just useless demo ware – a good idea with poor execution?

To start with, I needed to find a couple of test photos. I did a metadata search in Lightroom through my entire archive for photos taken with my Canon 800mm lens at a shutter speed of less than 1/200 of a second. Even when mounted on a tripod with the image stabilizer turned on, such a slow shutter speed usually introduces camera shake. This results in blur, even when the subject is correctly focused. Most photos taken at this speed with that lens are mistakes, usually due to a rapid change in light or background. And almost all of them become throwaways, never seeing the light of day on my web site.

I quickly found two candidate photos, one of a female ring-necked pheasant at 1/180 seconds which was almost sharp, and a much blurrier shot of a swimming common gallinule at 1/100 seconds.

I first worked on the pheasant and brought it into Photoshop. I duplicated the background to create a working layer and opened the anti-shake filter. The first thing the tool does is to pick a portion of the photo and analyze the edges to make a judgement about the motion of the camera at the time of capture. It automatically selected a portion of the face, probably because it has the sharpest edges in the photo. I slightly adjusted the detection square so that it just included the most important parts of the bird’s face. This is the area I wanted maximum sharpness. Other than that, I left all settings default. I had no experience with custom settings here, and in those cases, it is usually best to leave things alone to see how the tool performs.

There is a large preview in the tool, but I found it didn’t really help me determine if the shake was corrected or not. I hit OK to see the following results:

In this photo, the blur introduced by camera shake has been corrected using Photoshop's new anti-shake tool.
In this photo, the blur introduced by camera shake has been corrected using Photoshop’s new anti-shake tool.

Compare the corrected photo above with the original below.

This image is the shot straight out of the camera, suffering from slight camera shake.

As I said, the original was almost sharp but not quite. But I was blown away with how sharp the corrected photo was! This definitely turned a throwaway into a keeper. (Thanks Adobe!) Here is a closer crop comparison to help see the improvement in sharpness.

The top image is the shot out of camera, suffering from slight camera shake. The bottom photo has been corrected using Photoshop's new anti-shake tool.
The top image is the shot out of camera, suffering from slight camera shake. The bottom photo has been corrected using Photoshop’s new anti-shake tool.

Very satisfied with the results of the ring-necked pheasant, it was time to really put the anti-shake tool to the test. I opened the common gallinule photo and followed the same steps above. This photo is much blurrier than the ring-necked pheasant, but I was fairly sure the subject was in focus, just blurry due to camera shake. This time I again chose a target rectangle around the bird’s head, as this was the area of critical focus (especially the eye). The results are below:

In this photo, the blur introduced by camera shake has been corrected using Photoshop's new anti-shake tool.
In this photo, the blur introduced by camera shake has been corrected using Photoshop’s new anti-shake tool.

The photo above is corrected, and the photo below is the original.

This image is the shot straight out of the camera, suffering from slight camera shake.

In this case, the sharpness improved quite a bit, but the results were not as stellar as the first photo. The resulting photo almost looked a little too crunchy, with small halo artifacts here and there. That said, this photo now became usable at smaller sizes. It will find a new life in web use and for smaller prints. Here is a crop to do a detailed comparison.

The top image is the shot out of camera, suffering from slight camera shake. The bottom photo has been corrected using Photoshop's new anti-shake tool.
The top image is the shot out of camera, suffering from slight camera shake. The bottom photo has been corrected using Photoshop’s new anti-shake tool.

So what do these two real world tests tell us about the tool? First and foremost, this is not a panacea for blurry photos. This is no reason to go sell your expensive tripod on eBay. However, it can rescue some photos that are right on the verge of sharpness, but suffer from some amount of camera shake. And for those photos, it really does a fantastic job.

I’ll definitely spend some time scouring some of my older photos that I rejected because of camera shake. I’m very impressed with how well Adobe was able to pull this off – it is definitely a worthwhile and very usable feature.

Copyright 2017 Hank Christensen