In August my friend Steve and I attempted a quick four day loop through parts of Inyo National Forest. Our plan was to ascend Piute Pass, head down the other side to Evolution Valley, and loop back up Darwin Canyon through Lamarck Col to complete the loop at North Lake. Sounded pretty simple, and going through some beautiful country. What we hadn’t planned on when creating the trip was how much snow was still in the mountains from the heavy winter. Even though it was August, snow still covered much of our trail.
As our trip date approached, we saw that not only would we have lots of snow to contend with, but also some very wet weather. Monsoonal moisture was pushing up from the east side of the Sierra, looking to drench our trip. After some deliberation, we decided to push forward, hoping for at least one clear evening or morning in Evolution Valley. I’d certainly put up with four days of rain for one beautiful landscape shot to add to my portfolio.
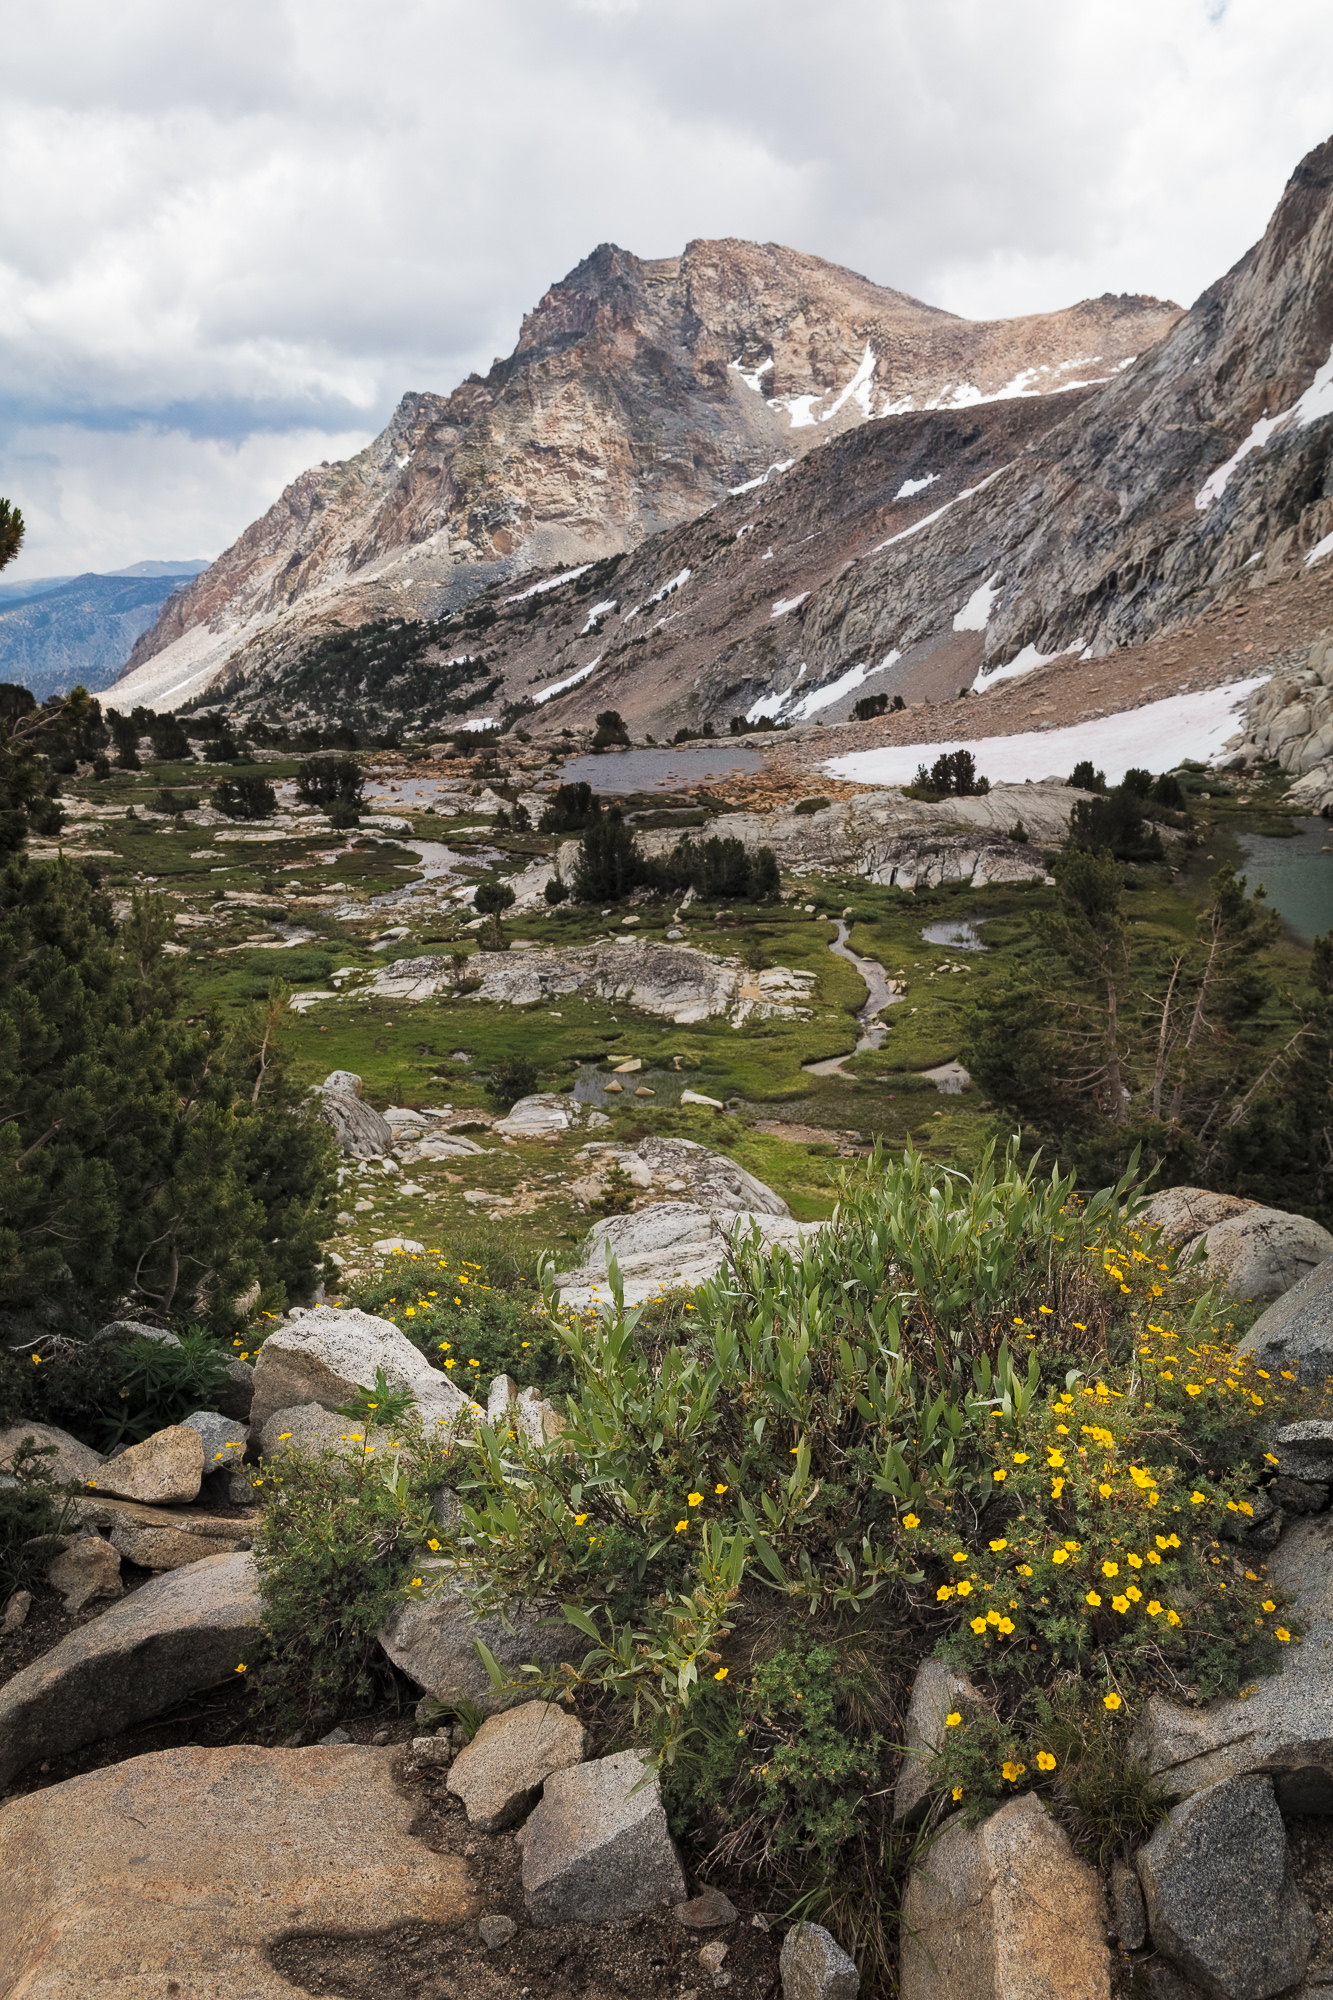
Snowmelt feeds waterfalls on the climb up to Piute Pass, Inyo National Forest, CA.
The climb up to Piute Pass was uneventful, passing a series of lakes on the way to the day’s high point. Glaciers clung to the northern slopes of the mountains, feeding small waterfalls. We did encounter several groups of happy campers who had spent the previous night at some of these lakes. I spoke briefly to a man named John and his son Clay who looked like they braved the nighttime rains in good spirits.
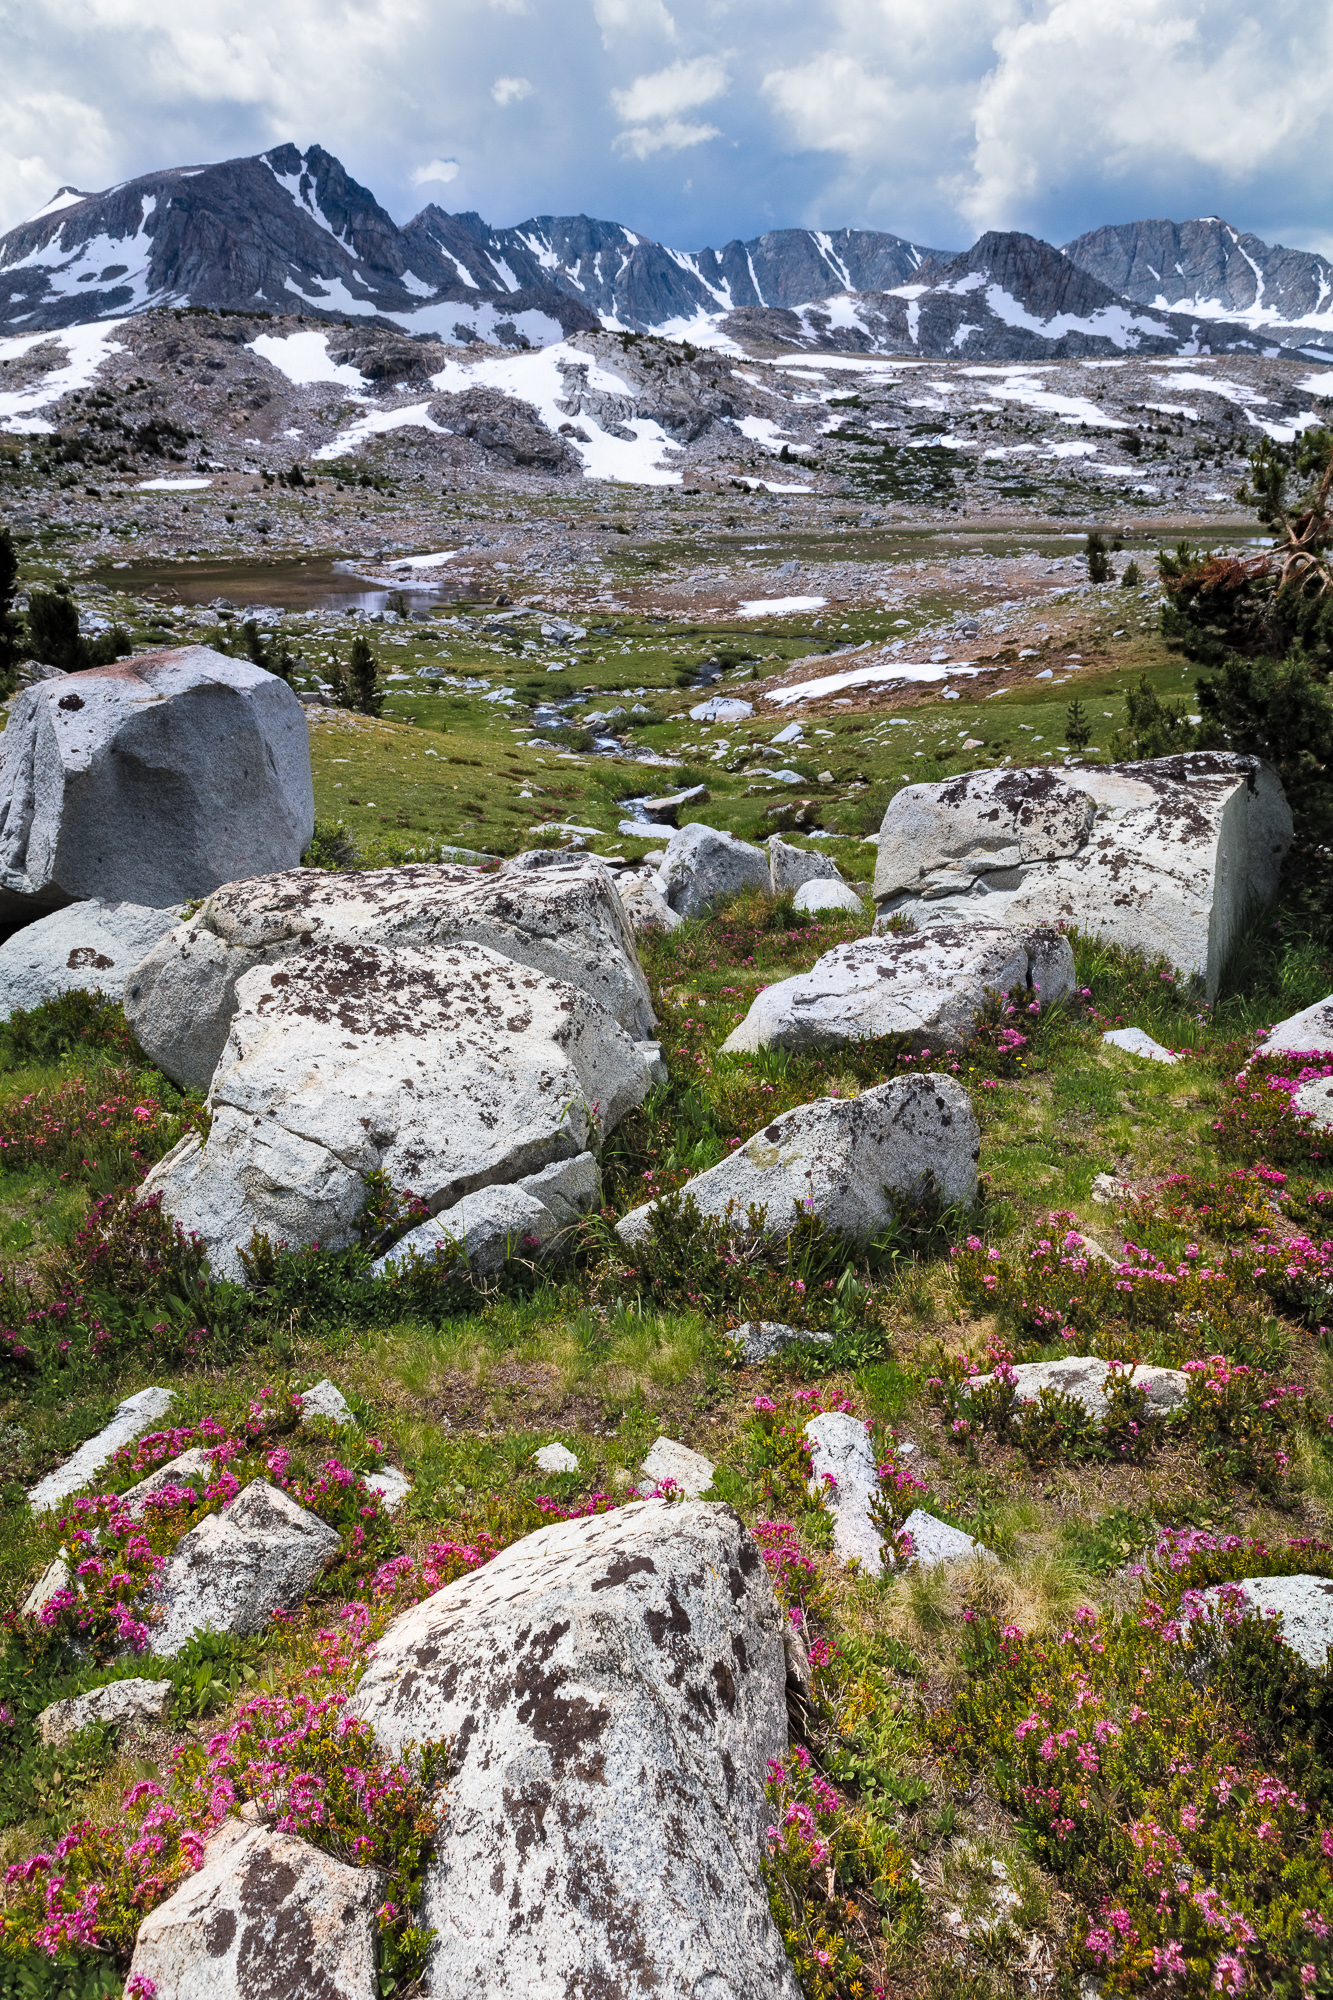
As we got closer to the top, I started seeing small fields of wildflowers. It was the right time of year for this elevation, but given how much snow was still in the mountains, I hadn’t been thinking of wildflowers at all.
Wildflowers adorn the meadows below Piute Pass, Inyo National Forest, CA
As soon as we were over the pass, we were treated to panoramic views of the mountains to the south. We had a short respite of flat ground, before the trail steepened and we descended into forest. As the rain started to fall, I donned my lightweight rain jacket and began to wonder if I was really prepared for potentially four days of rain. Soon we came across our first water crossing. The typical rock hop had swollen to a deep, fast flow, requiring the removal of my boots and a careful crossing. While the water was only up to my mid thigh, I began to worry about the crossings to come, knowing that some were much deeper.
Some days on the trail, the terrain wins the day. This was certainly one of those days. By the time we got to our campsite area, I was absolutely beat, and soaking wet from the five hours of downpour. Steve and I slogged around the area looking for a fire ring. Every spot that looked like it could work was under water. Between the rainfall and melting snow, there was so much water in the area that large pools formed in just about every flat space available. After about 45 minutes of searching, we finally found a place. I set up on a very wet slab of granite, hoping most of the water would run around my tent rather than under it. We heroically got a smoldering fire going, and tucked in for an early night.
The next morning, we woke to clear skies. However, everything I owned seemed to be soaked. Even my down sleeping back was wet on the outside, worrying me about warmth for the next cold night if it soaked through. We sat for a few minutes debating whether to push on, or just abandon and head back to the car. I was tired, wet, and worried about the difficult water crossings ahead. What finally swayed me was the discovery that my right boot was completely separating from the sole. This did not bode well for three more days of rough travel, much of it cross country. Time to head back to the car.
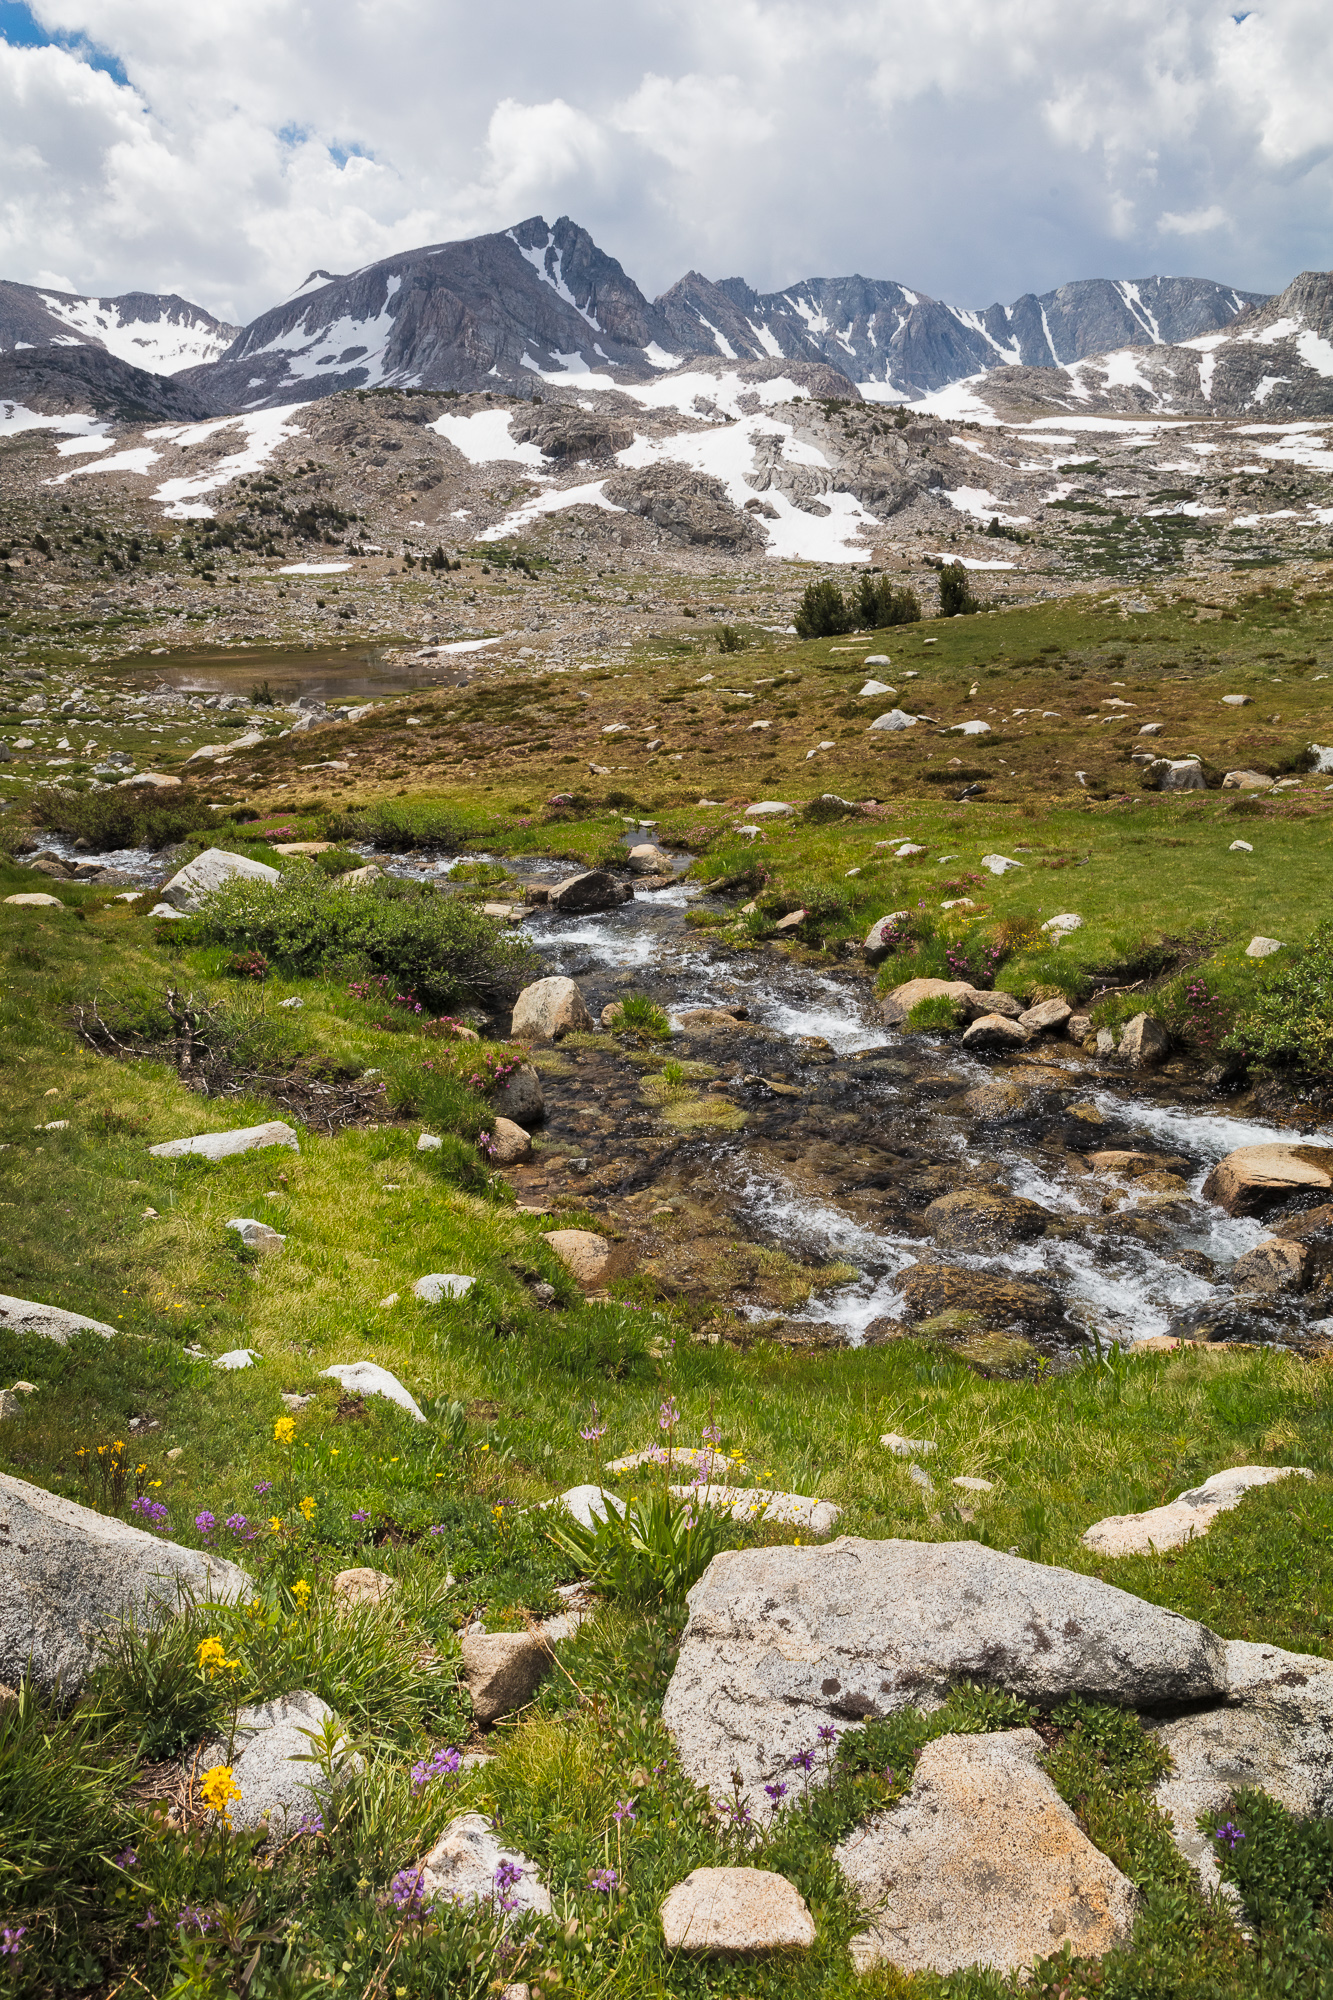
Wildflowers adorn the meadows below Piute Pass, Inyo National Forest, CA
Thus, with heavy hearts we repeated the terrain of day one. I tied some twine around my boot to hold it together and we climbed back up to Piute Pass from the west. Given that we had extra time to get back to the car, we stopped and took in a few beautiful wildflower displays on the western side of the pass.
Wildflowers adorn the meadows below Piute Pass, Inyo National Forest, CA
While we didn’t get to see the glory of Evolution Valley, it was beautiful country nonetheless. Even though it is always difficult when you don’t reach your goals, we still enjoyed a night out in the wilderness, 22 miles of challenging hiking, and some high elevation August wildflowers. Failed trip? Maybe. But it is hard to bemoan getting some solitude out in the natural world. It does much to replenish my soul, even when the going is tough.
Hang around a group of landscape photographers long enough, and you’ll undoubtedly hear them talking about location scouting. As the old saying goes, understanding your subject better will improve your photographs of the subject. This is true for all kinds of photography (wildlife, architectural, portrait), and landscapes are no exception. Location scouting is the process of getting to know a particular landscape better, and is an important aspect of improving your landscape photography.
Before we talk about the nuts and bolts of how to conduct a proper location scout, let’s talk about various types of scouting and how each might bring a new perspective on an imperfect landscape.
Seasonal scouting
Location scouting can be done long before the final photo is taken, sometimes even years. Anytime I visit an area for landscape photography, I not only try to create the best photograph I can at the time, but I also imagine what the scene might look like during different times of the year. Would that alpine meadow make the perfect foreground if only it were covered in wild flowers? Would those high mountain slopes pop if the aspen groves were in peak fall colors? Or if the tree line was blanketed with fresh snow?
Sometimes certain areas don’t look very good when I first visit, but in a different season, it would shine. In those cases, I make a mental note to come back in the season I think will show the area at its best, and do research to find out optimal timing for those seasonal elements. But while I’m there, I can spend the time finding some of the shots that I will eventually take, even if it ends up being years later.
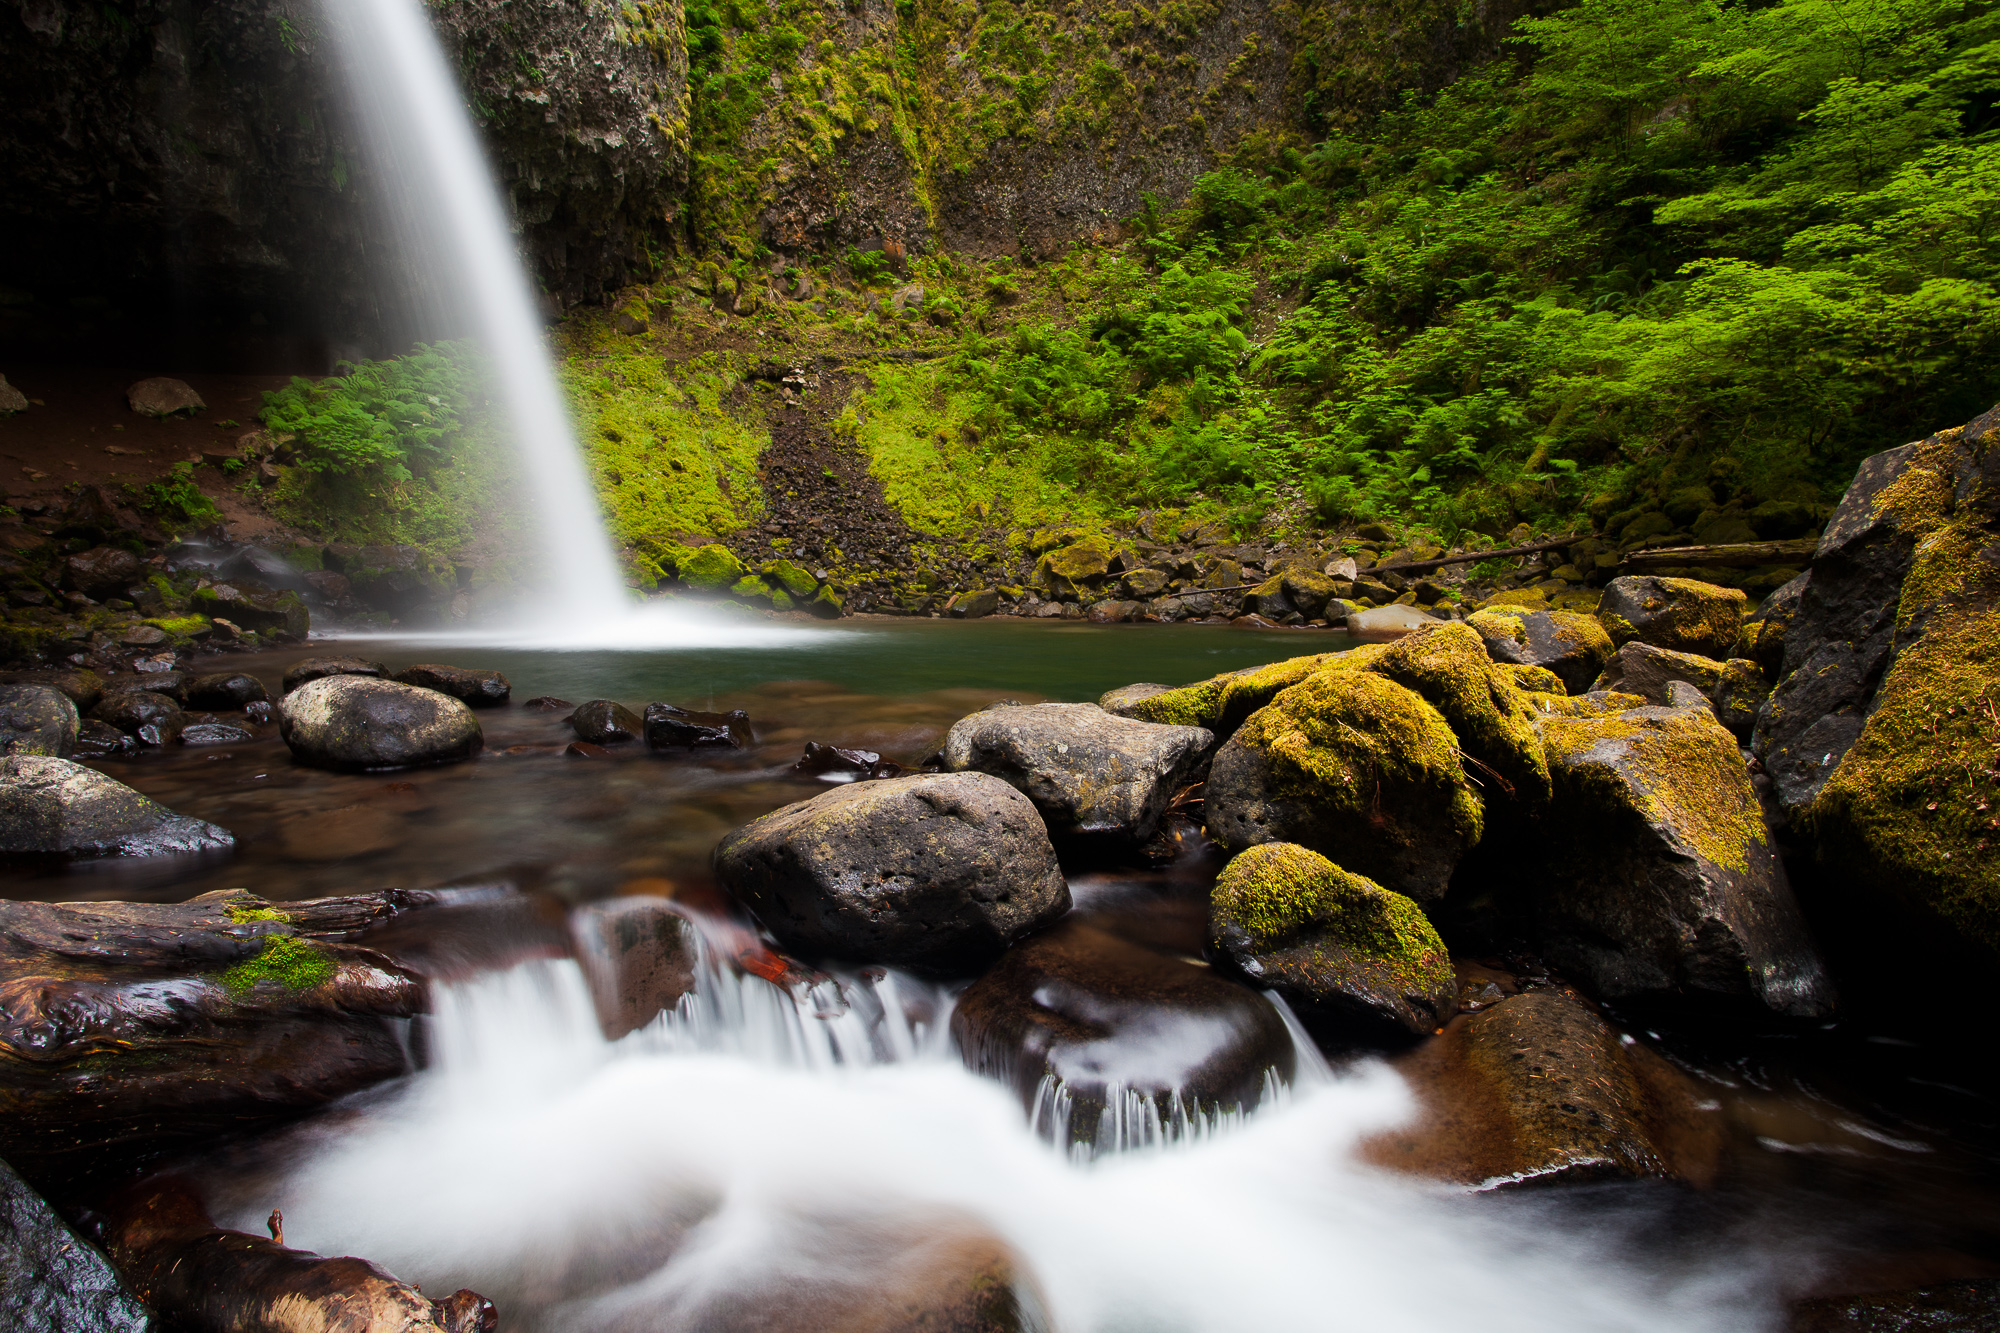
Ponytail Falls shoots outward from a cleft in a rock cliff, and cascades over large stones below, Columbia River Gorge, Oregon
In this example, I first visited Ponytail Falls in Oregon’s Columbia Gorge in late fall. The trees were bare and the moss on the river’s rocks was brown. It was still a pretty scene, but I knew that by visiting the same area in the spring, I would green up the scene, and catch the falls at peak water flow. I returned in spring a couple years later to capture the photo above. Having already scouted the area and set up my shot made the return trip easy, as I had already formulated my target compositions in my mind.
Scouting for a different time of day
Scouting an area for a future season is an extreme example of the practice. More often, we’re scouting in anticipation of different light on the scene. Examples include visiting an area in the evening in anticipation of sunrise light, visiting midday while waiting for a beautiful sunset, or even waiting for a passing squall to reveal the full glory of its post-storm light show.
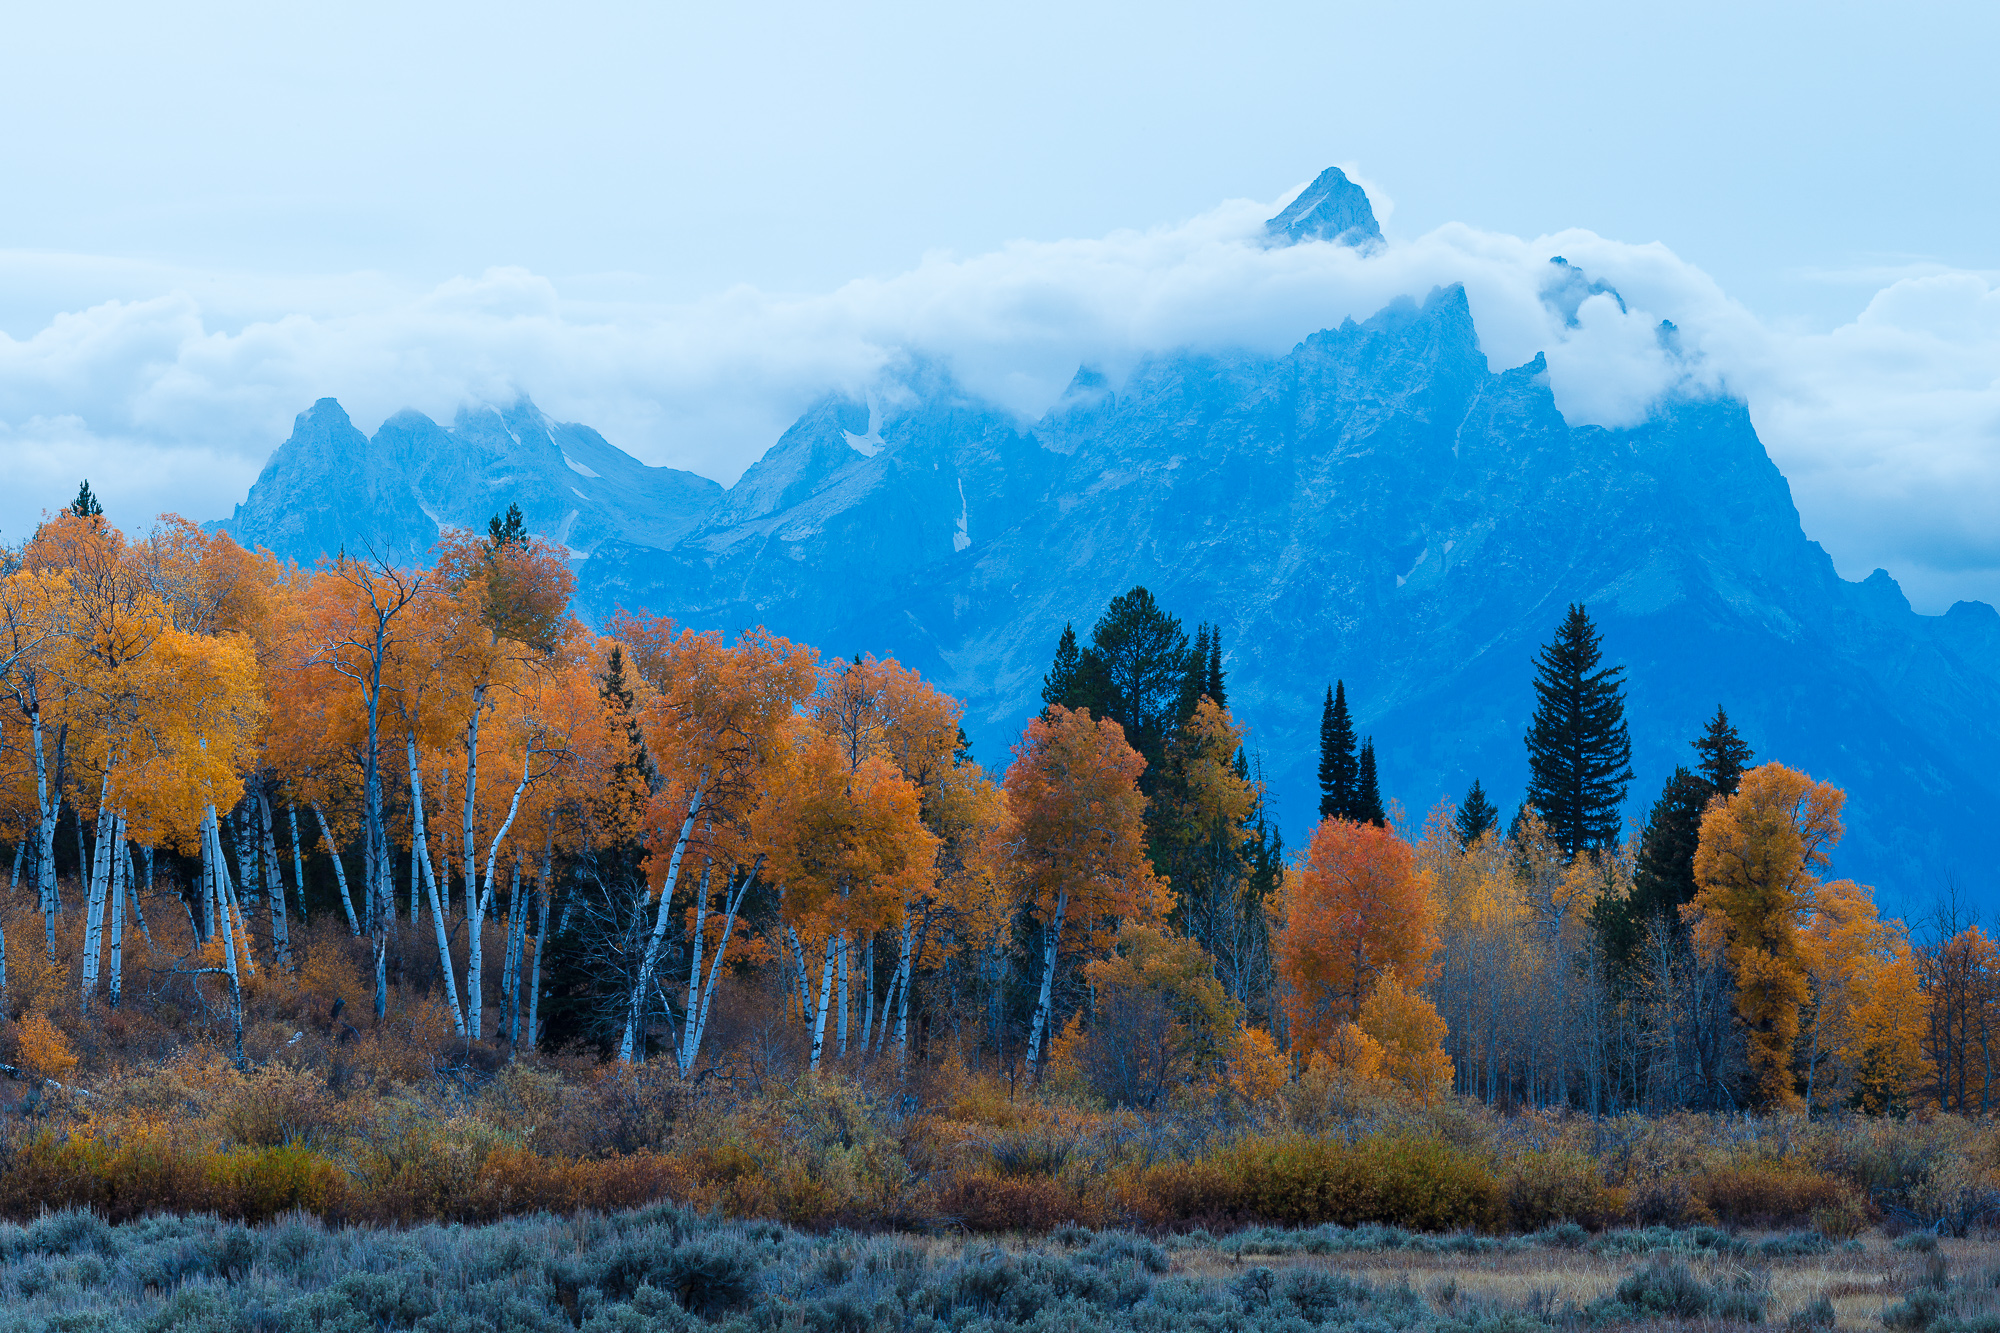
The tetons rise behind a stand of fall aspen, Grand Teton National Park
The photo above was taken on a trip to Grand Teton National Park with some friends. We scouted out a beautiful aspen grove in full fall foliage with the Tetons rising behind. However, the sunset we were hoping for failed to materialize with heavy cloud cover all the way to the western horizon. One of my friends suggested that although we had been targeting this location for a sunset, it might actually look spectacular at sunrise, as both the Tetons and the aspen grove would be front lit, slightly from the left. This would give definition to both the mountain and trees, and hopefully the sunrise would reveal some of that nice fall color throughout the grove. With another visit in mind, I spent some time composing the shot above, in anticipation of sunrise light.
The sun just lights the top of the Tetons as it rises behind a grove of aspen in their fall colors, Grand Teton National Park
A couple of days later, I was rewarded by the preparation. We arrived just before dawn, and because of my earlier visit, I knew exactly what my composition would look like. I quickly reset the shot based on GPS coordinates I took the previous visit. Using the exact spot I had set up in previously, as well as my reference shot from two days earlier, I took all the guesswork and stress of finding a shot that morning. Now it was just a matter of waiting for that beautiful light to brush through the aspen grove and make those yellows and oranges glow.
The on-site scout
The last type of scouting (and often the most frantic) that I do is what I call the “on-site”. This stems from me showing up unprepared, but still needing to quickly assess the area and find those great compositions that convey the essence of the area to the viewer. This is much easier done when showing up for a sunset shoot, because you typically have a few hours of daylight in which to scout and set up your shot for the magic hour. On-sight scouting for a sunrise shoot is much more difficult, because even if you show up early, you have to wait until pre-dawn light before you can see the scene well enough. It is very hard to create compositions in the pitch black of night!
Sunlight moves down the mountains to the west of Salt Creek, now a dried salt flat, Death Valley National Park
The photo above was the result of one of those rare pre-sunrise on-sight scouts. This shot was taken on my first trip to Death Valley National Park in the salt pan near Salt Creek. As I walked out onto the dried salt bed, I was surrounded by a thick salt crust. While this could make for an interesting foreground, it felt a little too overbearing to balance out the distant mountains. However, I had never been here before, and I didn’t quite know where to go. As I saw the sunlight start creeping down the mountain face, a composition suddenly came to me. I wanted to contrast the bright red of the sunlit mountains with the blues of the still-shaded salt. However, this thick crust of salt wasn’t working for me – I needed a much more delicate salt ridge pattern that gave more emphasis to the structure of the salt in between the ridges.
I quickly scanned the ground to the north and south, looking for a ground pattern that would help fulfill that vision. In the distance to the south I saw something that might work, but I had only a few minutes to get there and set up before the light would flood the salt pan itself, ruining the color contrast effect. I heaved my tripod (camera still attached) over one of my shoulders and ran as fast as I could across the pan. As I got close, I could see that this foreground would work out perfectly. Down went my tripod, already set up to the right height with the right, wide angle lens attached. Less than a minute later, the sun was just touching the lower slopes of the mountains, creating the beautiful color separation I was hoping for.
Scouting techniques
Now that we’ve gone over the various types of location scouting, how does one actually go about doing this? You’ve arrived to a spot with several hours to spare, but now what? For landscapes, there are three major elements I’m thinking about combining to create my composition – background, mid-ground and foreground. The goal of scouting is to essentially find each of these elements that you want to add together to create a potential composition. If the lighting is great while you’re there, wonderful. You may luck out and get your ideal photo of that location. But more often than not, it helps to think about other times or seasons in which to capture the scene.
1. Find your background:
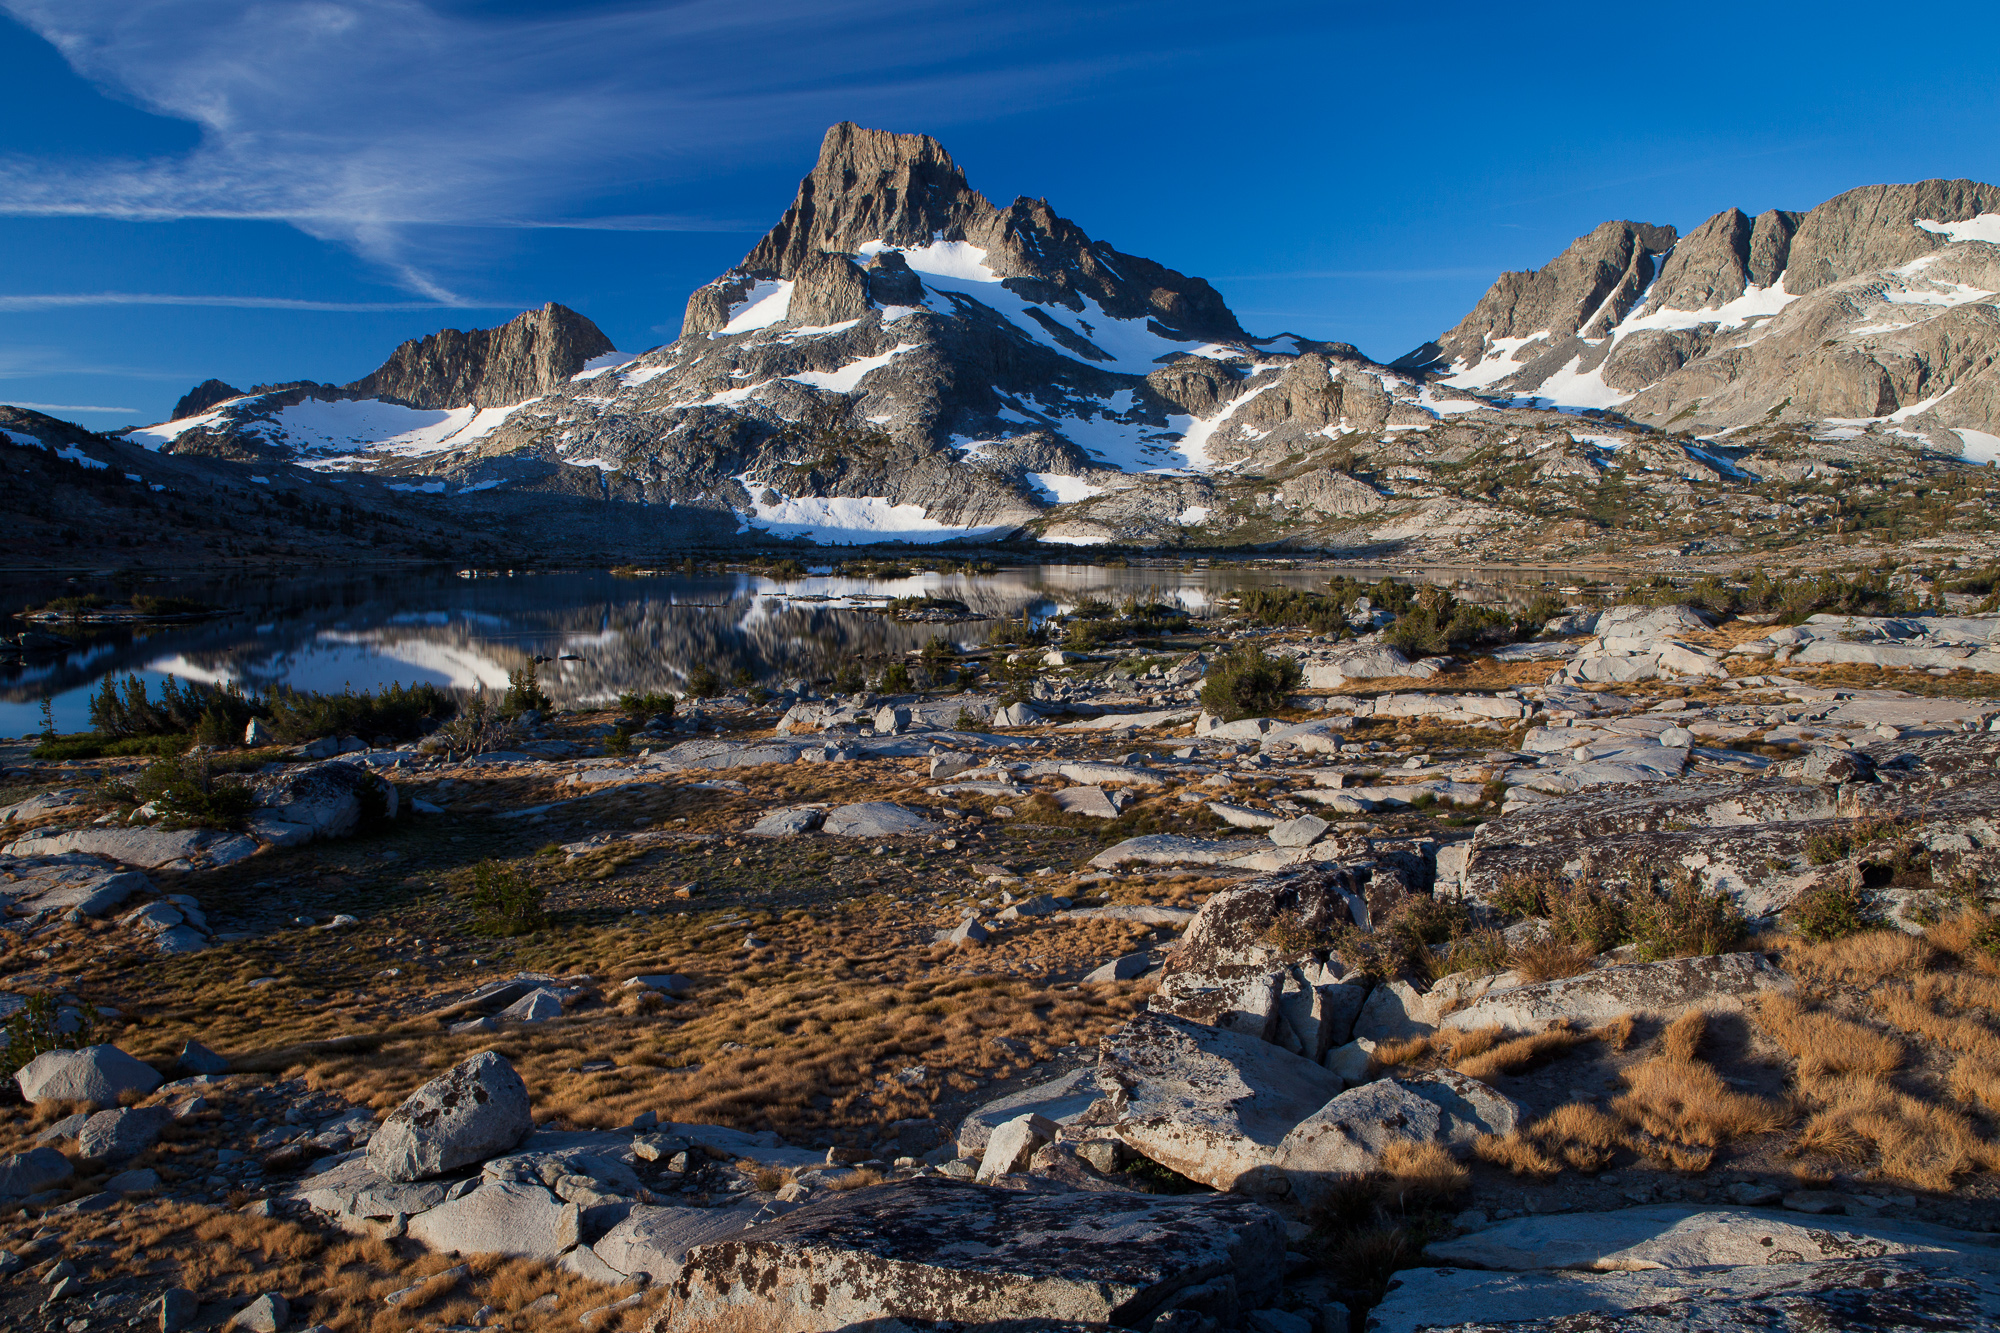
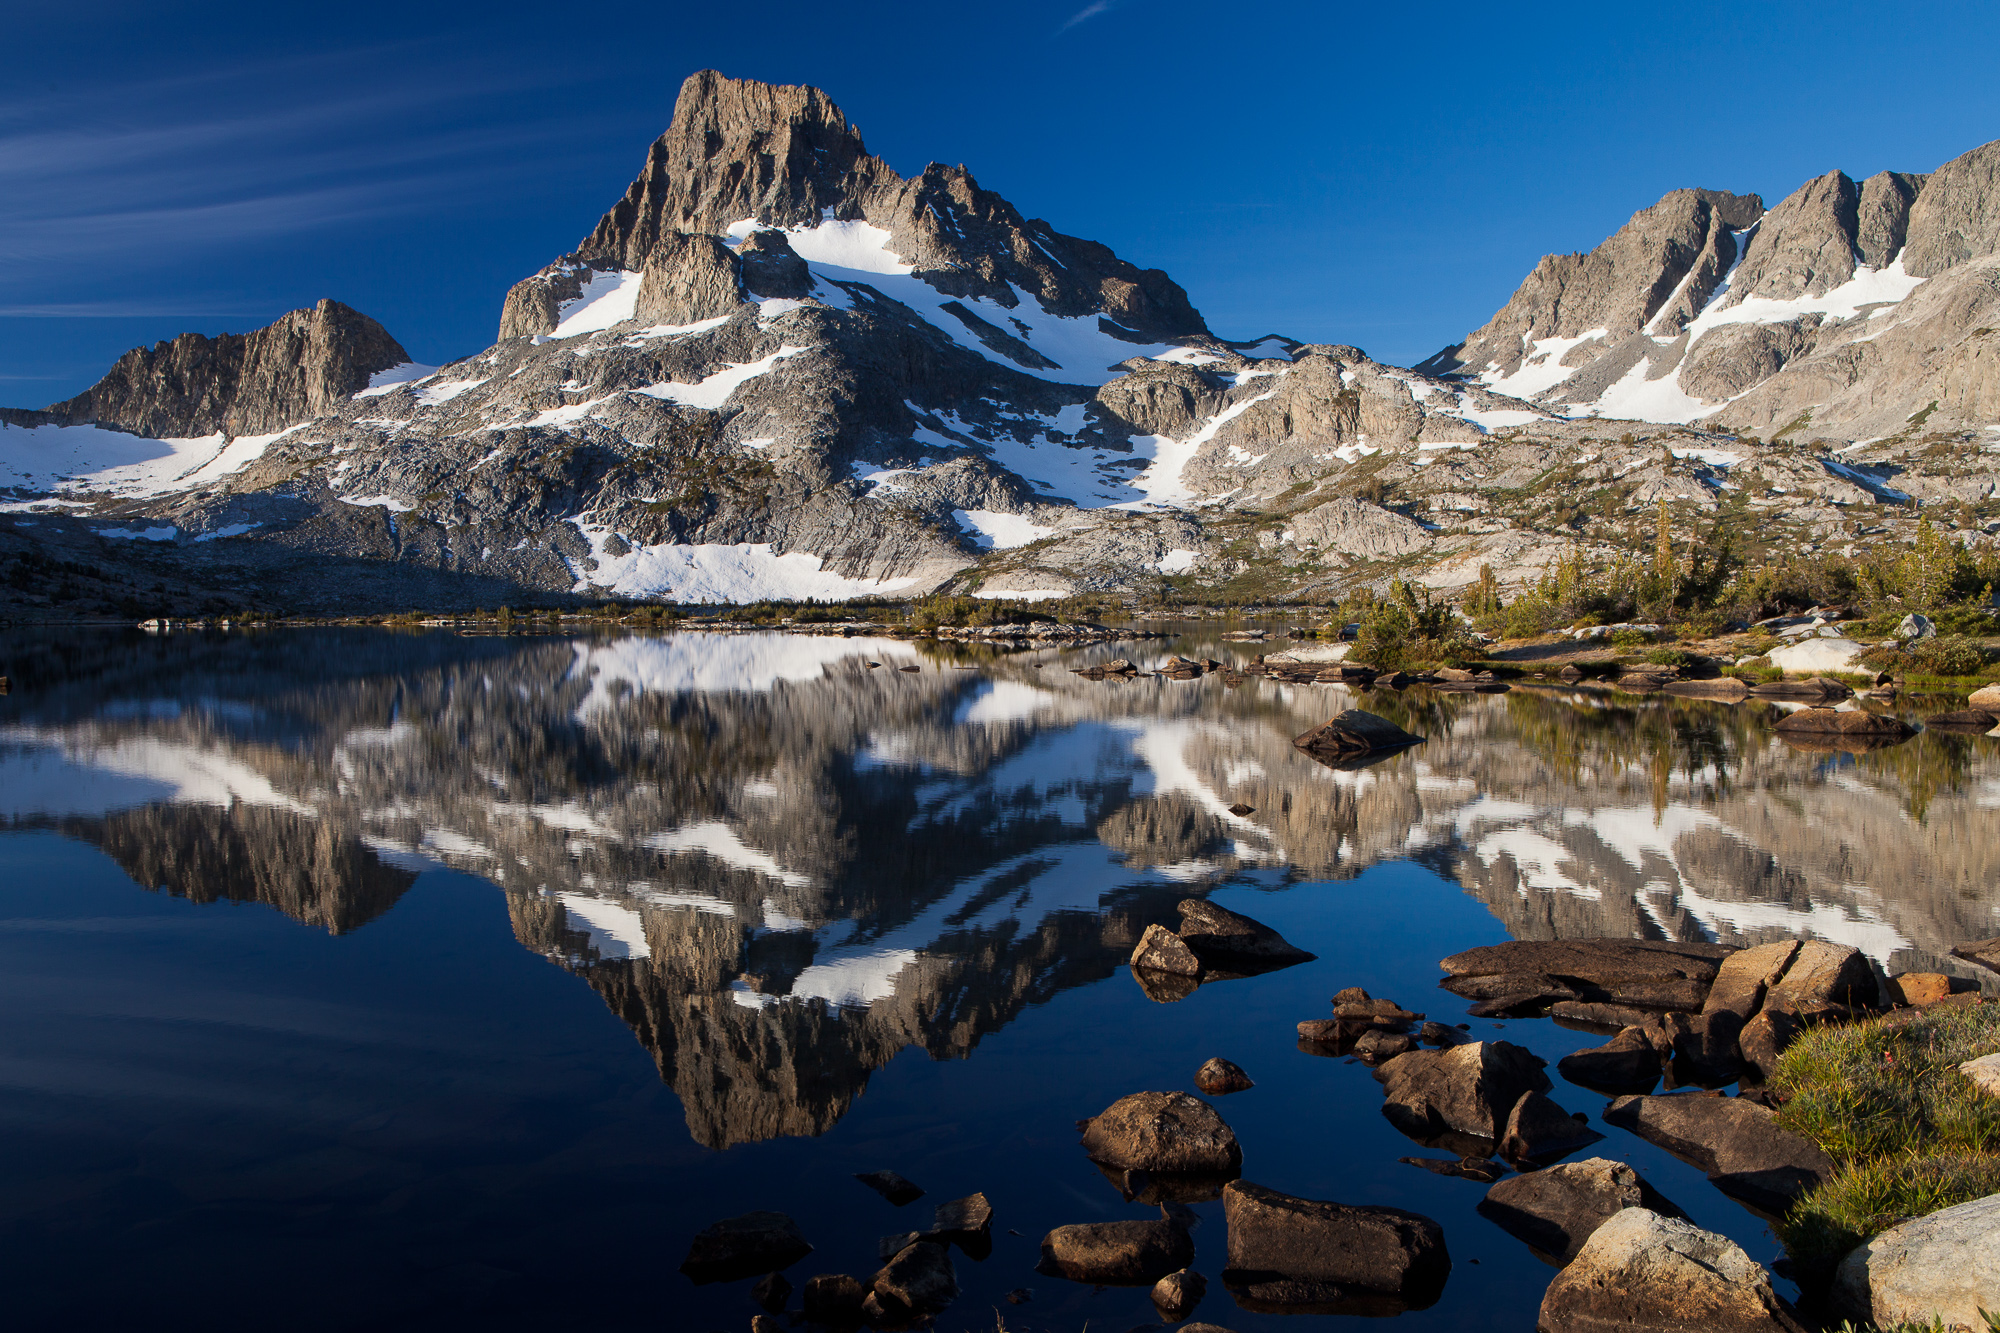
The sun rises over Thousand Island Lake and Banner Peak, Ansel Adams Wilderness
Backgrounds are easy. These are the huge dominant aspects of a landscape that typically draws you to the area in the first place. In my typical compositions, this is usually a mountain, ocean, or waterfall. In the photo above, I was backpacking at Thousand Island Lake in the Ansel Adams Wilderness of the Sierra Nevada. Banner Peak is a dominant feature of that area and hard to ignore. I knew well before my trip that I wanted to capture this massif at sunrise. One element down.
2. Find your middle ground:
The sun rises over Thousand Island Lake and Banner Peak, Ansel Adams Wilderness
A middle ground typically ties your foreground and background together. Every landscape doesn’t need a middle ground, but I’m always assessing the area around me to find some element that will compliment, or draw the viewers’ eyes toward the background. In this case, Thousand Island Lake itself was a no-brainer. It was a calm morning and Banner Peak cast a strong reflection, doubling the impact of the mountain. Now just to find a proper foreground to lead the viewers eye into the frame, and balance the strength of the mountain.
3. Construct your composition with proper foreground elements:
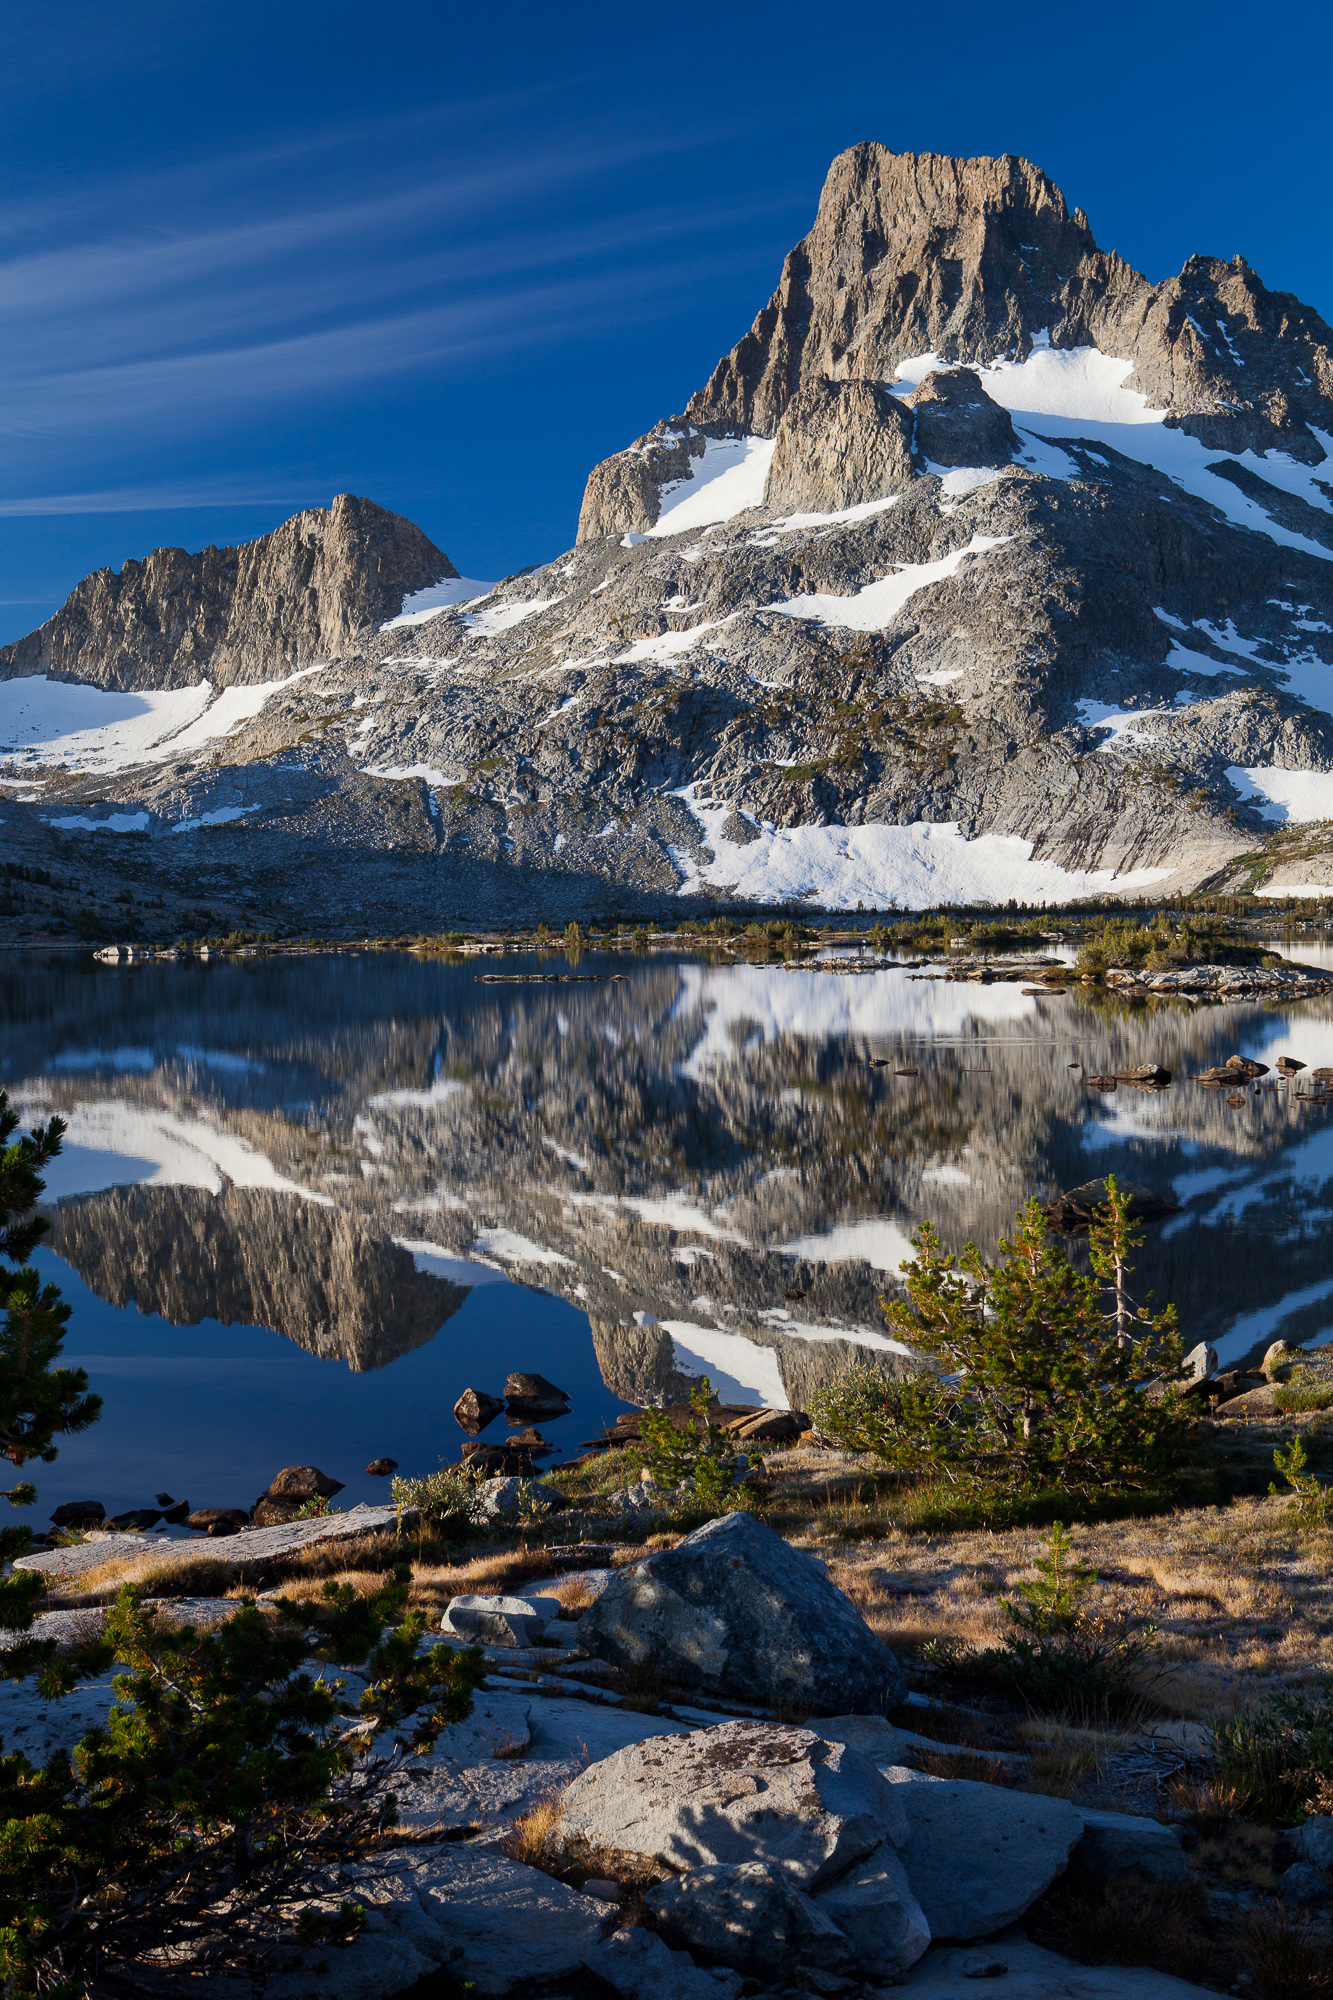
Banner Peak is reflected in Thousand Island Lake at dawn, Ansel Adams Wilderness
The perfect foreground usually takes some searching to find. If you see a photographer wandering around looking at their feet, this is likely what they are doing. If the angle of the lens is very wide, these foreground elements can sometimes be very small. You can often find several good options for foregrounds using the same middle and background elements. If so, shoot them all! In this case, walking along the shoreline of the lake led me to a line of rocks breaking the reflection of the deep blue sky. Perfect elements to draw the viewers eye toward the reflection and up to the peak itself. With my shot in the bag, I headed back to camp for my morning coffee.
A final word – virtual scouting
Today’s information age brings us many advantages in learning about far away places. Although I think nothing beats learning about a location like visiting it yourself, I often utilize digital exploration techniques before I go somewhere to photograph it. This helps me get my bearings and start to think about what kinds of photographs I’m going to attempt. While I won’t go into detail here, tools such as the Photographers Ephemeris, Google Maps 3D and Google Maps photo overlay help in seeing what others have captured in the area, as well as planning your own trip.
Sun lights the tip of Mt. Davis at dawn, Ansel Adams Wilderness
I often shoot remote mountain locations while backpacking. Every time I pull into a new campsite, I drop my pack and start scouting the surrounding area, thinking about sunset that night, and also sunrise the next morning. As I had never been to Davis Lakes in the Sierra Nevada before, I spent a good deal of time researching the area using the tools above. Based on the time of year and angle of the sunrise, I knew that sunrise light on the peak of Mt. Davis reflected in the lake would look fantastic. When I arrived at my predetermined campsite, I set about finding a composition that would lead the viewer’s eye right up to that beacon of light in the frame. In order to do this, I had to pre-visualize what it might look like the following morning. The next morning, I emerged from my tent and set up in the exact spot I had scouted the previous evening. Now I just had to wait for the light until it was perfect.
Next time you think of a new area you’d like to photograph, spend time beforehand learning about that location. Give yourself plenty of time to explore the area on foot, setting up several potential shots that might work well in the right lighting conditions. Above all, if mother nature does not cooperate with your photo endeavor, don’t despair! Just chalk it up to a valuable scouting trip!
Last weekend I took a quick two night backpacking trip with some friends, in hopes of hitting the high country of the Sierra Nevada in peak wildflower season. I set my sights on Gem Lake in Emigrant Wilderness – just about the right elevation for flowers this time of year. Having been there before, I knew that even if the place wasn’t in bloom, we’d have a great time and see some amazing scenery.
I like Emigrant Wilderness because there are no trail quotas and it is very easy to get a wilderness permit with short planning. We set out from the Bay Area early Friday morning, stopping at the Mi Wuk Ranger Station on the way up Highway 108. Even though we were taking our time, we still hit the trail by 10AM, plenty of time to reach our 10 mile destination of Gem Lake.
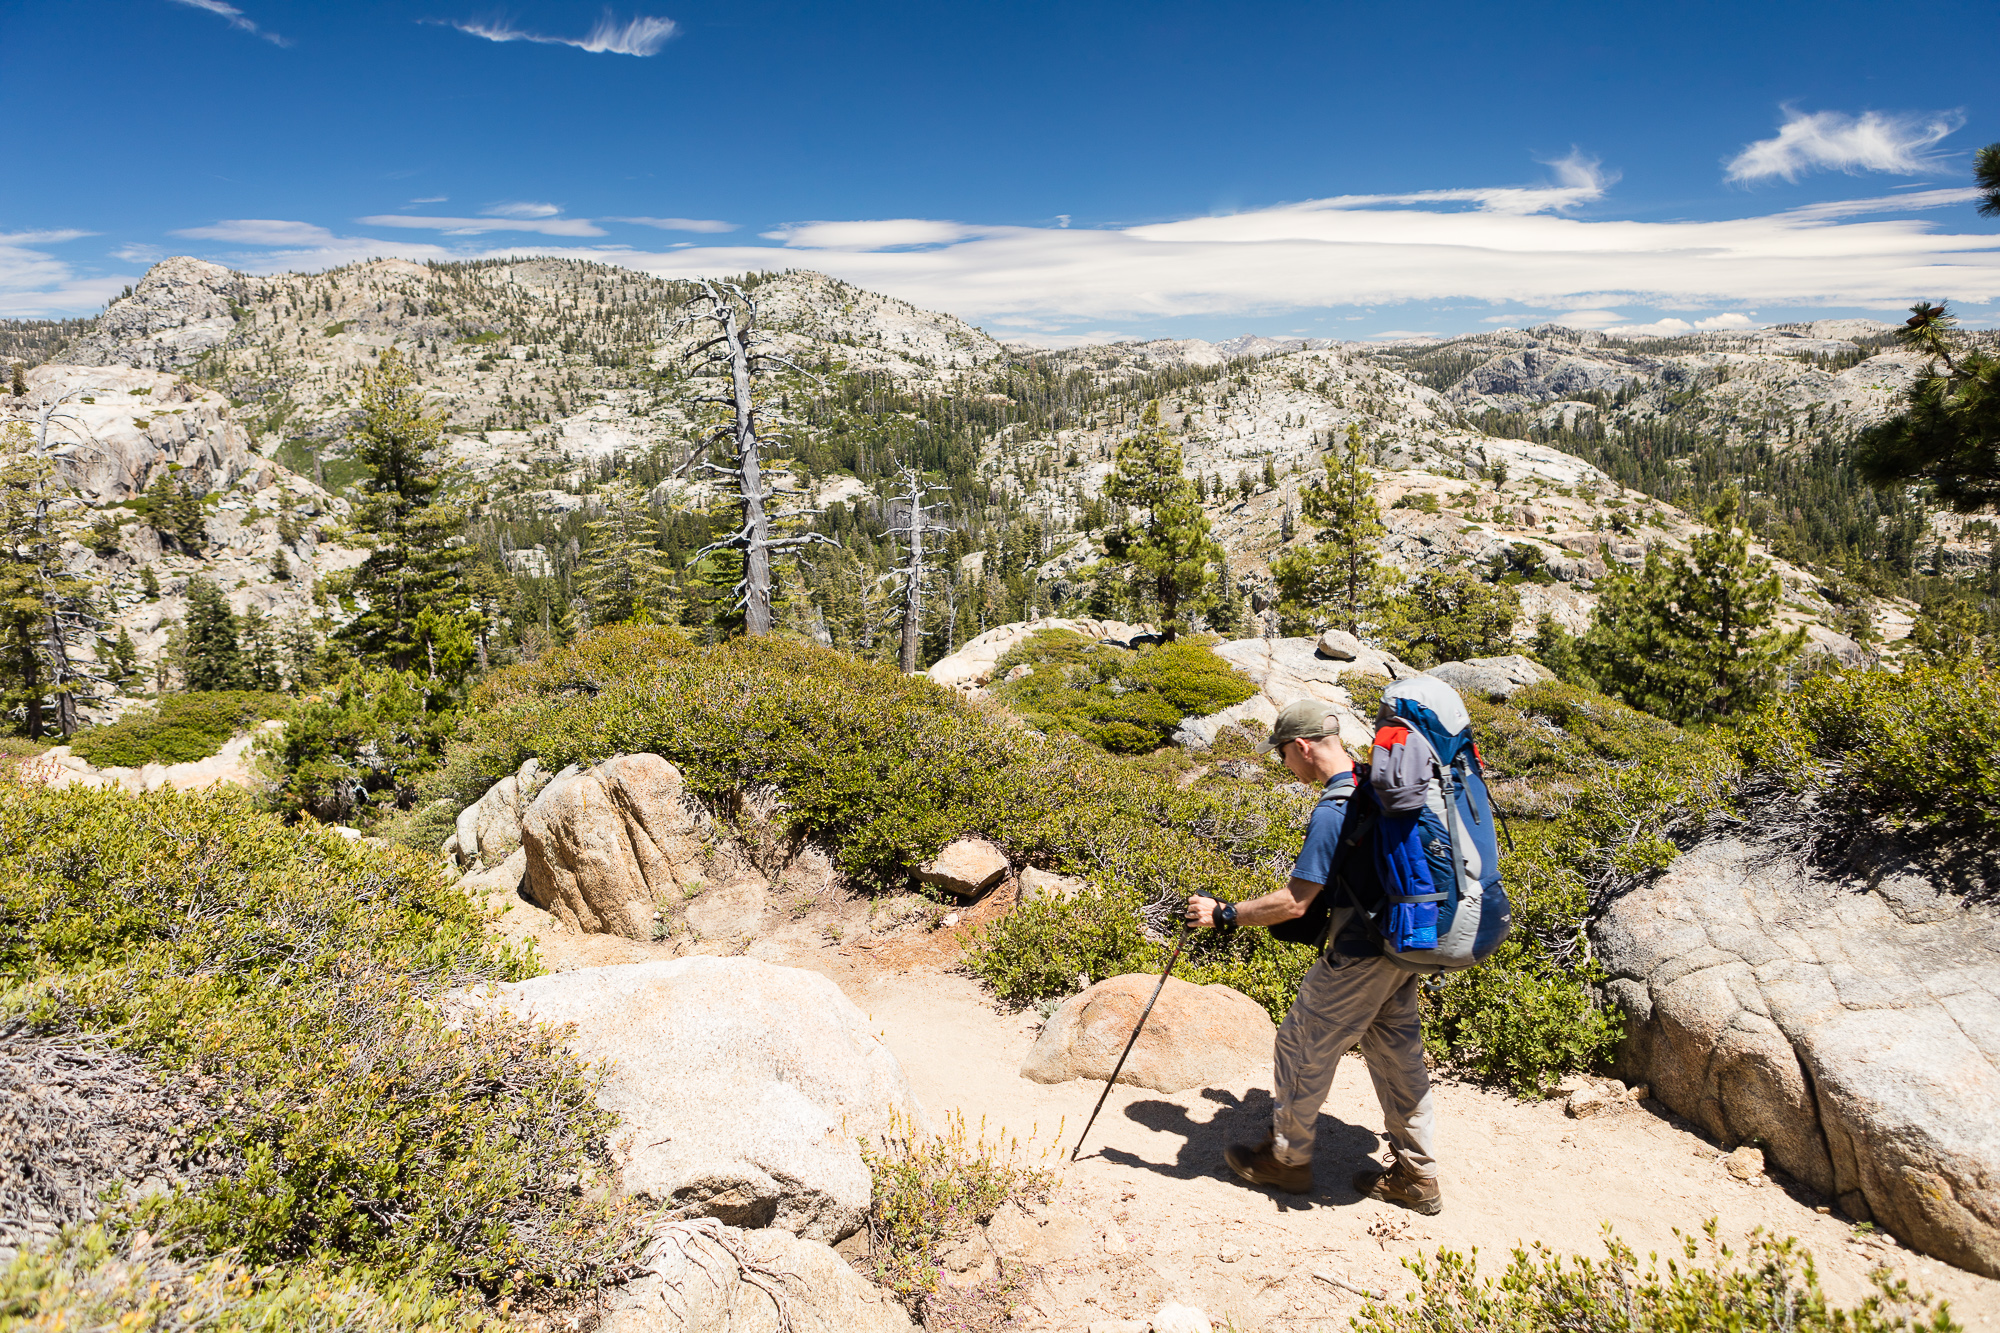
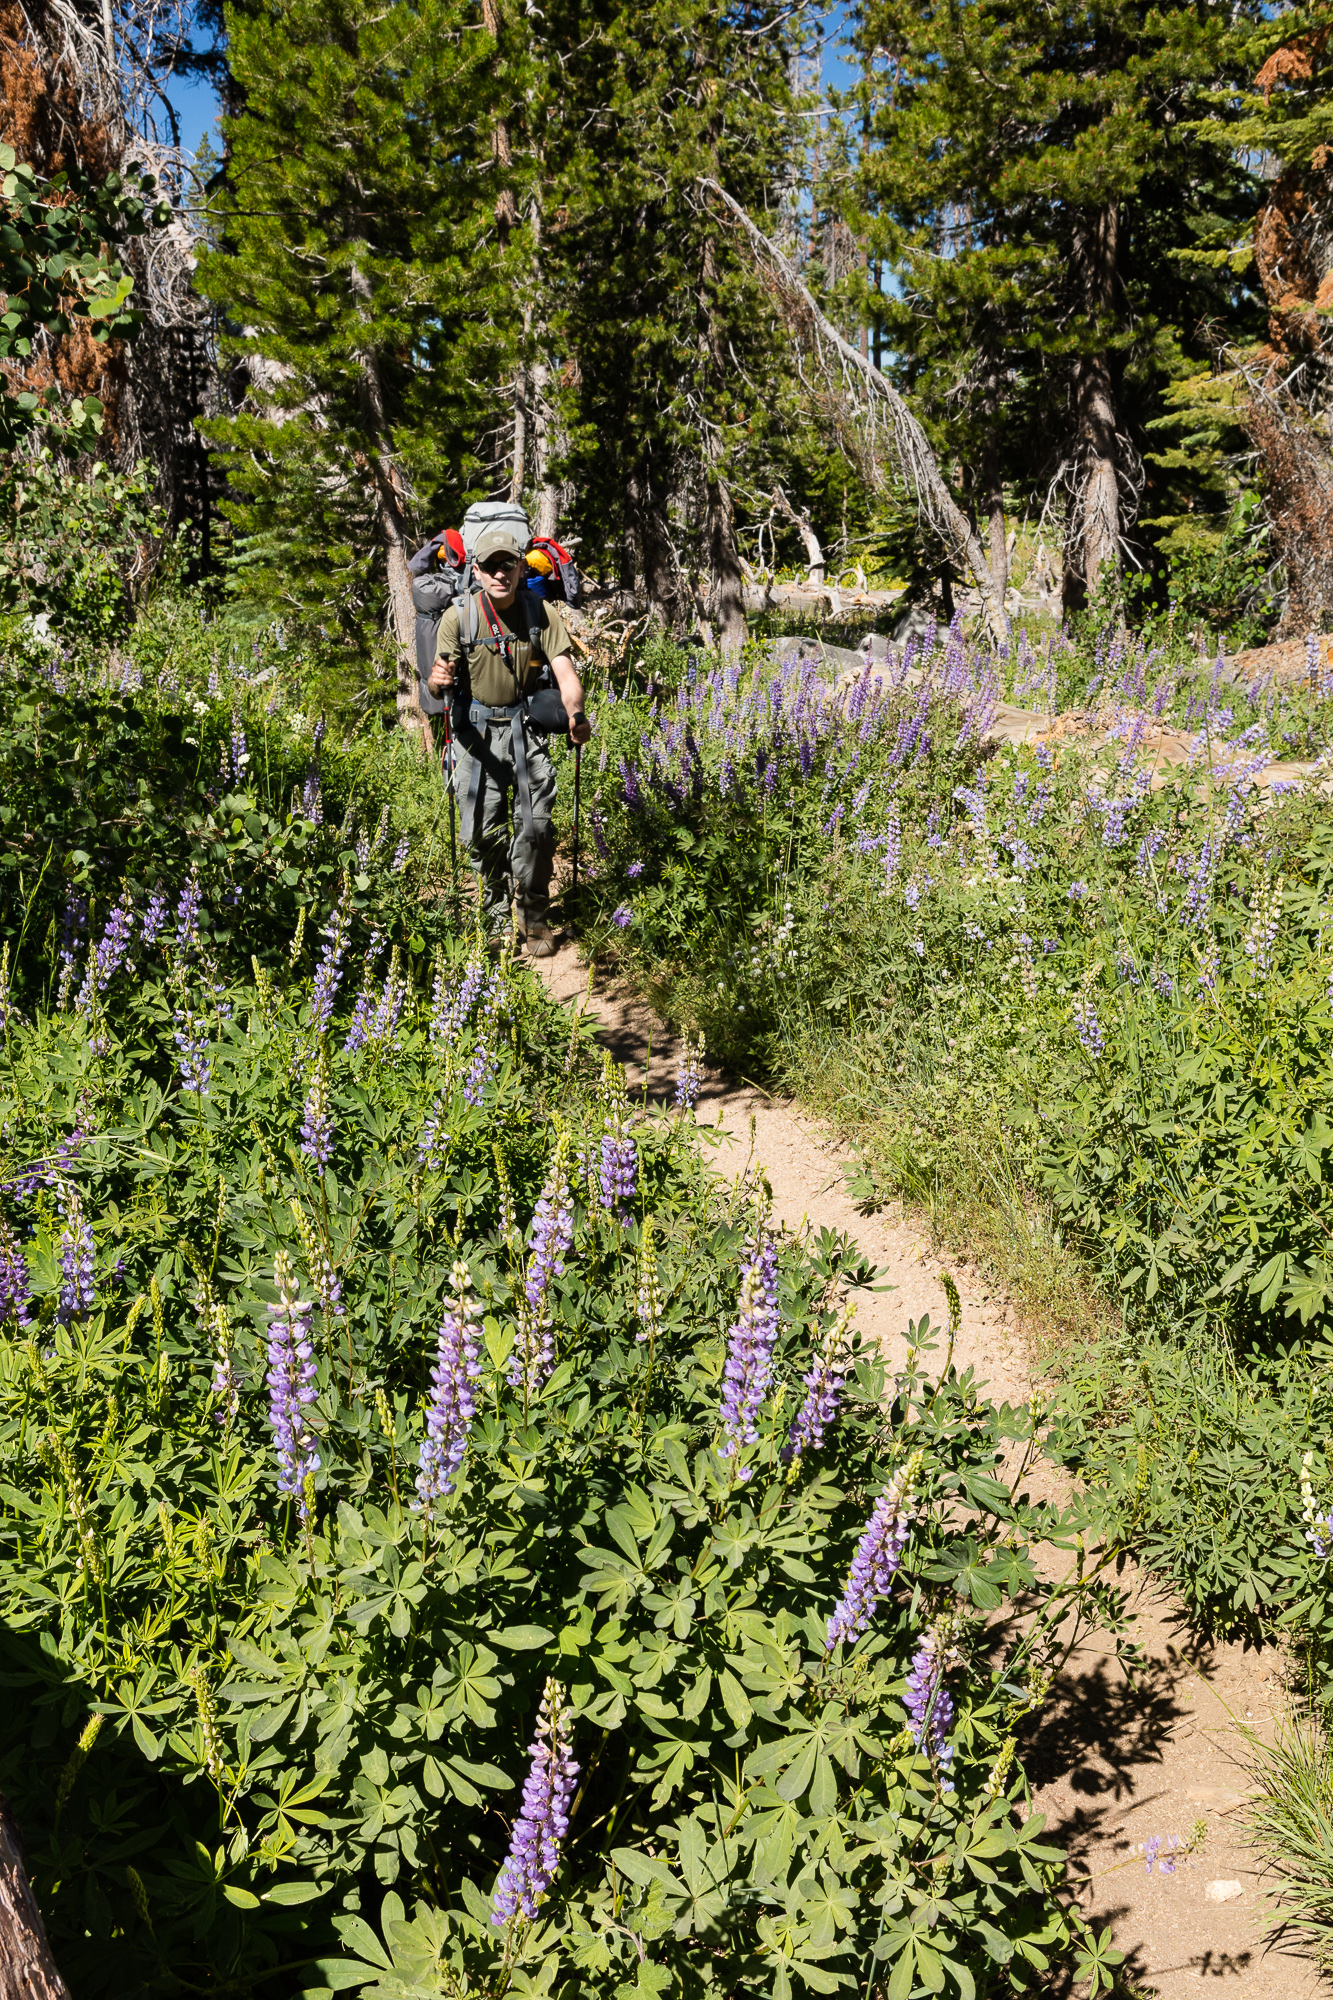
A backpacker hikes along the trail from Crabtree Camp trailhead to Gem Lake, Emigrant Wilderness, CA.
The trail meanders between thick forest and open granite-filled vistas. Most of Emigrant Wilderness is easily accessible cross country due to many gently-sloping wide open granite bowls and domes. This time we stuck to the trail, and made easy progress. Every so often we were rewarded with a scenic vista. If you are not already a lover of granite, after a few hikes in this part of the Sierra you soon will be!
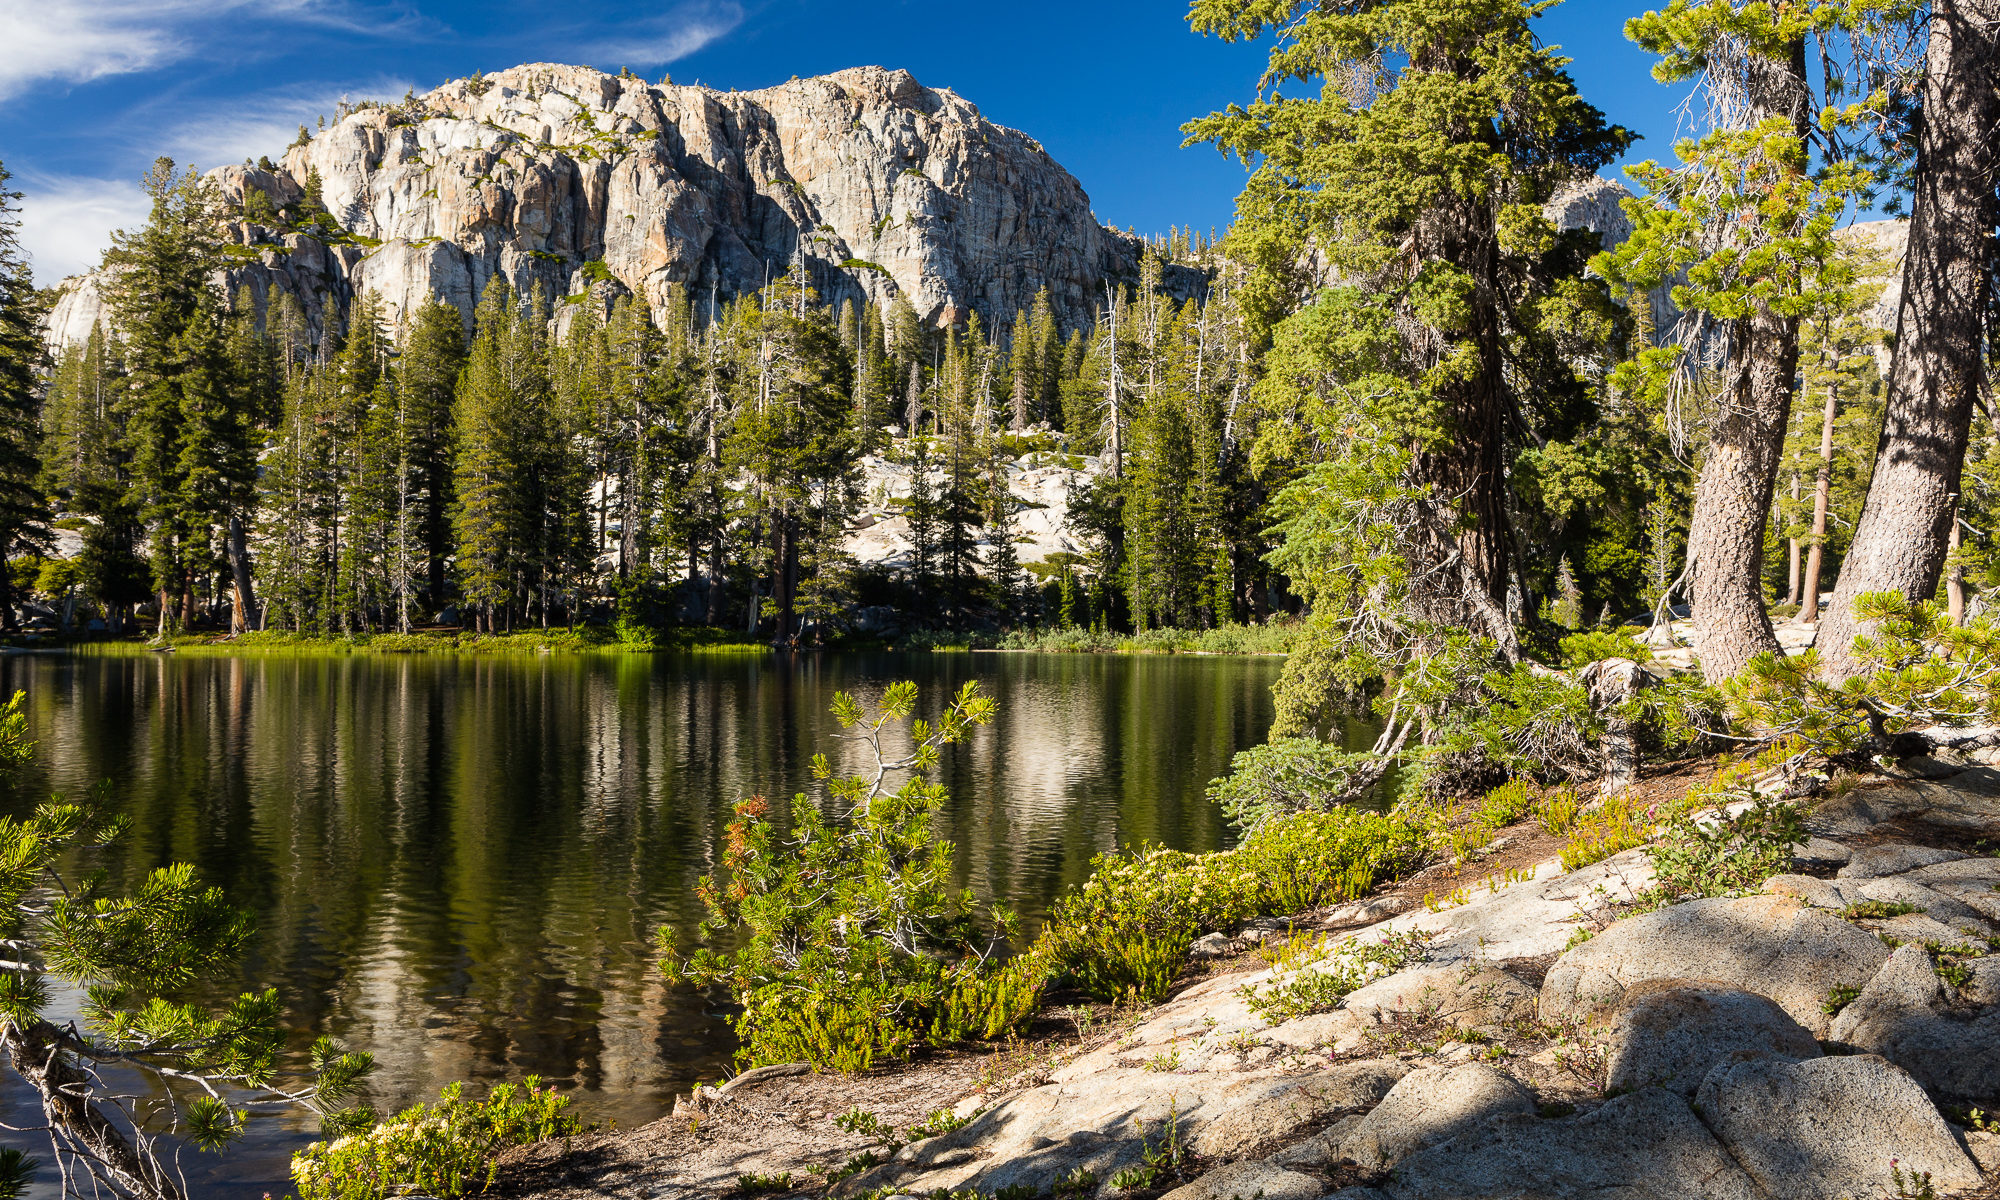
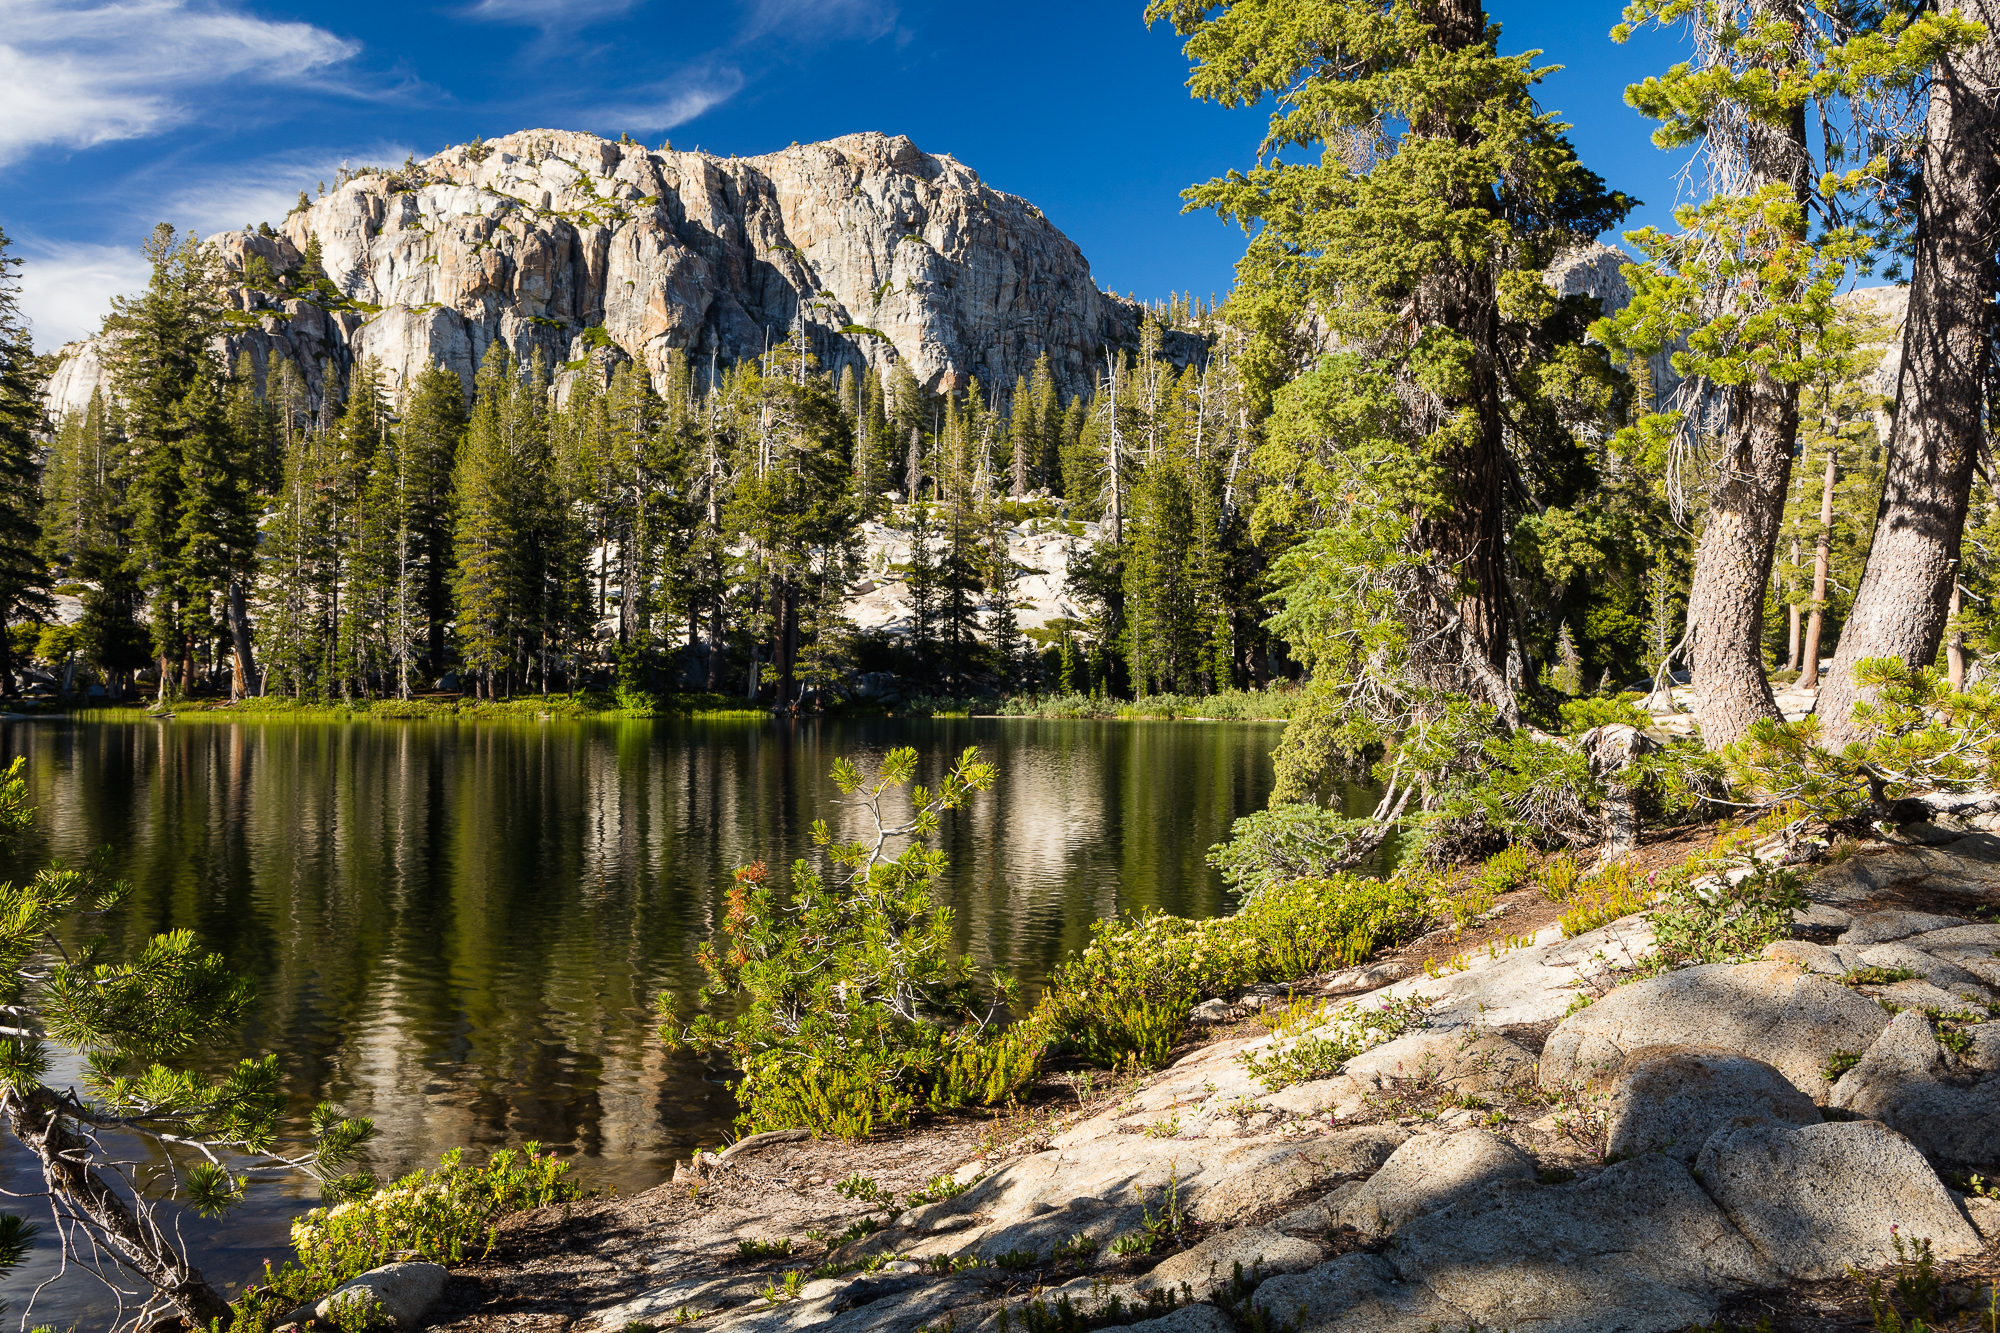
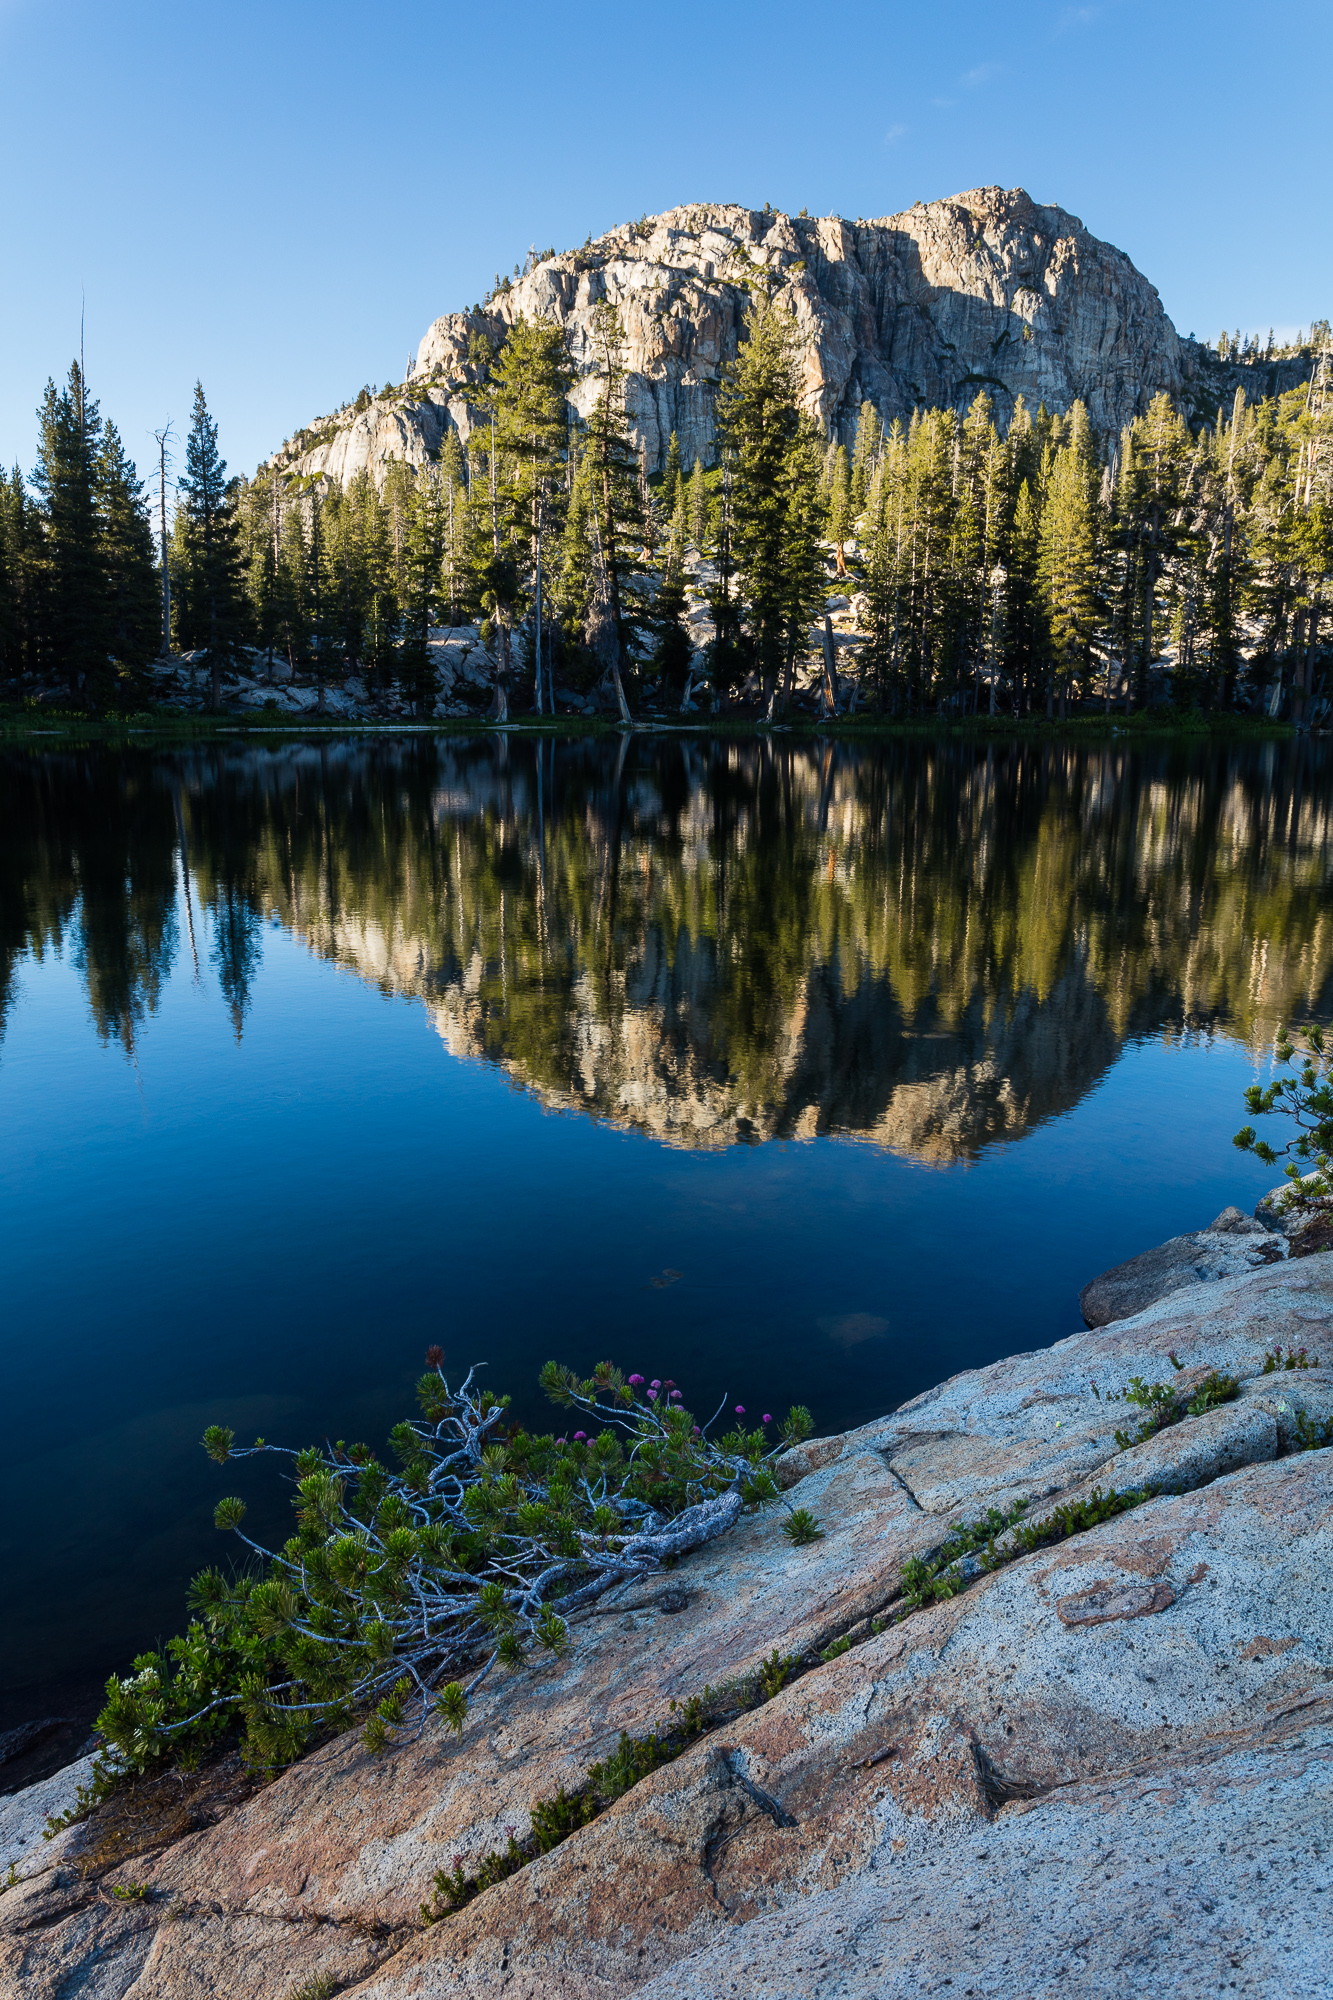
Cliffs to the north of Gem Lake reflect in the still water at sunset, Emigrant Wilderness, CA.
The elevation changes were just enough to tire our bodies by the time we reached Gem Lake. This lake certainly lives up to its name. However, it is very popular and can get quite crowded on the weekend. As it was Friday night, we were able to relax lakeside in relative peace. As the sun set, the wind settled and we got some nice reflections on the water.
Cliffs to the north of Gem Lake reflect in the still water at sunset, Emigrant Wilderness, CA.
The next day we went further up trail and explored Jewelry Lake and Deer Lake. Deer Lake is much larger and Gem or Jewelry, and it was hot enough to warrant a midday dip in its cool waters. This is a great area to take your time and not hurry along the trail. One more night, and it was time to head back.
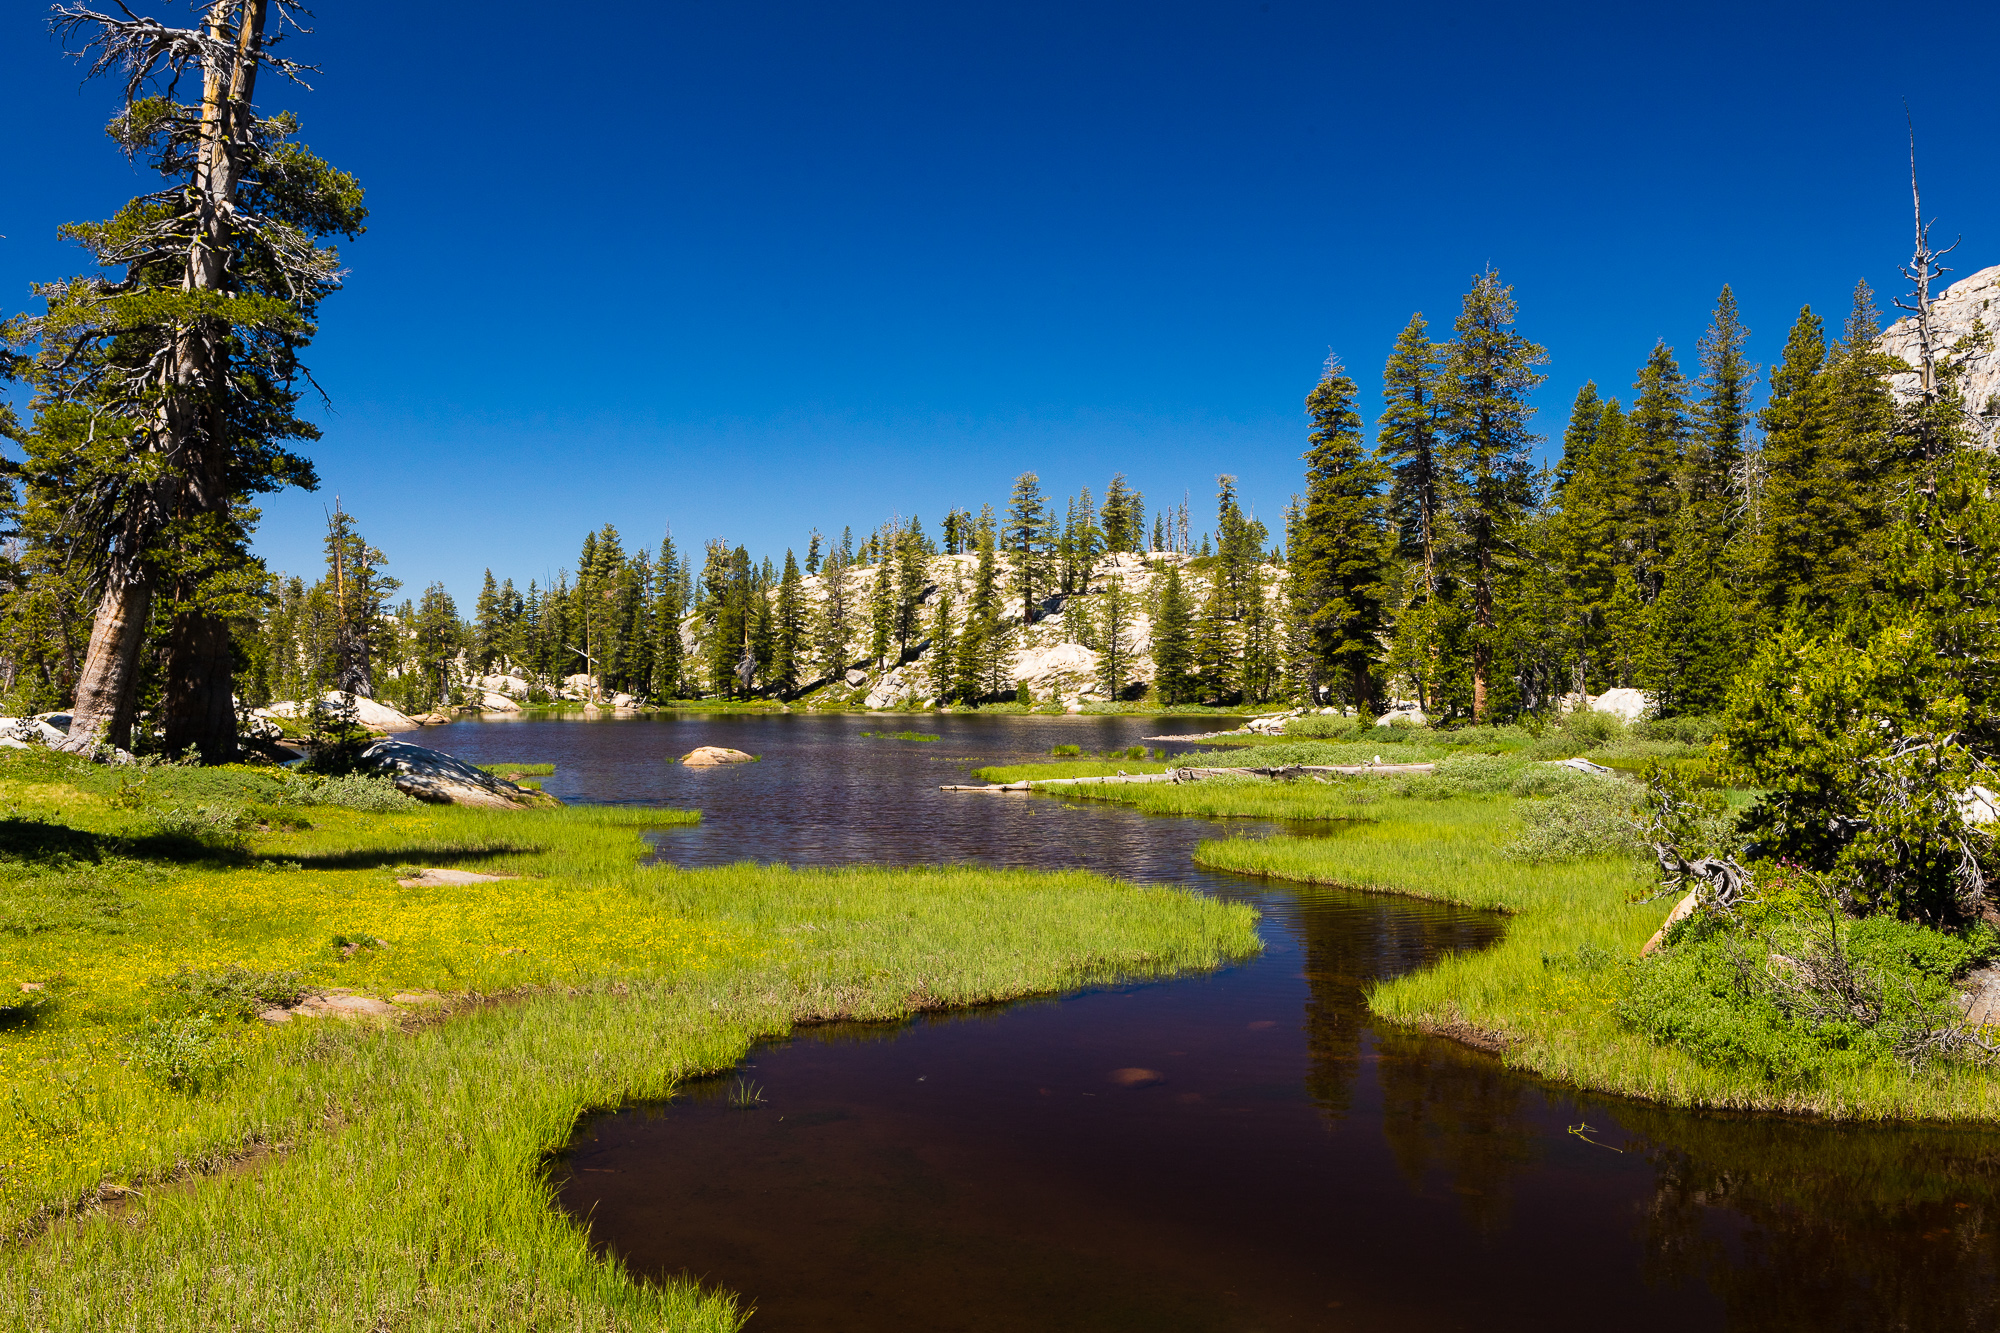
A winding stream flows into Jewelry Lake, Emigrant Wilderness, CA.
Luckily there were plenty of wildflowers along the trail to keep us entertained. We had perfect weather for our 26 mile journey and everyone enjoyed the change in scenery.
A backpacker hikes along the trail from Crabtree Camp trailhead to Gem Lake, Emigrant Wilderness, CA.
With its easy access and lack of quotas, this is the perfect place for an impromptu night or two in the wilderness.
Gear I used to create the photos in this post:
[amazon_link asins=’B00IAYFDIC,B00T3ERT5S,B0076BNK30,B0079RQZBU,B00OD71FKU’ template=’ProductCarousel’ store=’hankchristens-20′ marketplace=’US’ link_id=’617616e6-918b-11e7-b259-8df1aecbb1d9′]
Backpacker Magazine used one of my images of Banner Peak and Thousand Island Lake for an infographic about the John Muir Trail, January 2015 Issue.
Backpacker Magazine used one of my images of Thousand Island Lake in the Ansel Adams Wilderness to create an infographic of the John Muir Trail. The image appears in the January 2015 issue.
There are a couple of nice aspects to this particular publishing. First, the image takes up almost an entire page (in the world of magazine publishing, size does matter!) Second, it was great to have something positive come out of the JMT trip that never really got going.
This image was taken on the last morning before my friend Steve and I had to bail out of the trail. With a 19 day hike planned, we only lasted 3 days on the trail before we were forced to evacuate because of torrential rains.
Dawn breaks over Banner Peak and Thousand Island Lake, Ansel Adams Wilderness
Here is the image without all the text. It was probably chosen because of its subdued nature – if it had been a vibrant sunrise, it likely would not have been used for such a purpose.